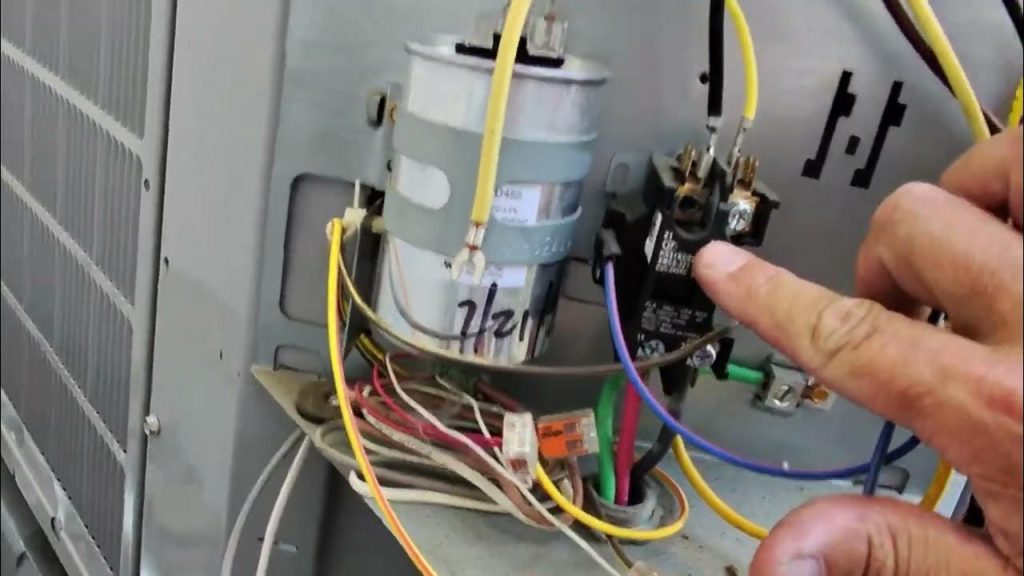
If your air conditioner isn’t cooling properly, the problem might be a faulty capacitor. Replacing it yourself can save you time and money, but only if you know the right steps.
In this guide, you’ll learn exactly how to install an air conditioner capacitor safely and easily—even if you’re not a tech expert. By the end, you’ll feel confident tackling this repair and getting your AC back to peak performance. Keep reading to discover the simple process that can make a big difference in your home comfort.

Credit: www.angi.com
Tools And Materials Needed
Installing an air conditioner capacitor requires some basic tools and materials. Having the right items ready will make the job easier and safer.
This guide covers the essential tools and materials you need before starting the installation.
Basic Tools
You need some common tools to remove the old capacitor and install the new one. These tools help you work safely and efficiently.
- Screwdriver set (flathead and Phillips)
- Needle-nose pliers
- Wire cutters/strippers
- Multimeter for testing electrical parts
- Insulated gloves for safety
- Socket wrench set
Materials Needed
Besides tools, you also need materials that are specific to your air conditioner model and the capacitor type.
| Material | Description |
| Replacement Capacitor | Matches the microfarad (µF) rating and voltage of the old capacitor |
| Electrical Tape | Insulates wire connections after installation |
| Wire Connectors | Secure wires to the capacitor terminals |
| Cleaning Cloth | Removes dust and dirt from the unit |
Safety Equipment
Safety gear protects you from electric shocks and injuries during installation.
- Safety glasses to protect your eyes
- Rubber-soled shoes to prevent electric shock
- Voltage tester to ensure power is off
- Face mask if working in dusty environments
Safety Precautions
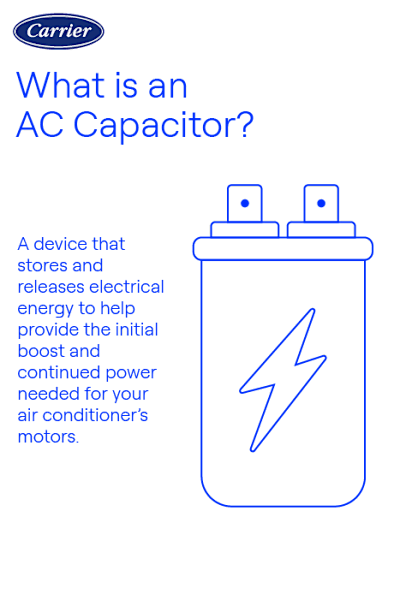
Installing an air conditioner capacitor can be risky without safety measures. The capacitor stores electrical energy, which can cause shocks.
Following safety steps keeps you safe and protects the AC unit from damage.
Turn Off Power Supply
Always switch off the power to the air conditioner before starting work. This stops electric current flow to the capacitor.
Use the main circuit breaker or disconnect switch to cut power. Confirm power is off with a voltage tester.
- Switch off the AC breaker in your fuse box
- Use a tester to check no electricity is present
- Never rely on just the AC remote power off
Discharge The Capacitor
Capacitors hold charge even when the power is off. Discharge it safely before touching terminals.
Use an insulated screwdriver or a resistor to discharge the capacitor. This prevents electric shock.
- Wear insulated gloves before handling
- Place screwdriver across capacitor terminals carefully
- Hold for a few seconds to release charge
- Double-check charge with a multimeter
Use Proper Tools And Equipment
Use insulated tools to avoid electric shocks. Avoid metal tools without insulation.
Wear safety glasses to protect your eyes from sparks or debris. Work in a dry area to reduce shock risk.
- Insulated screwdrivers and pliers
- Safety goggles or glasses
- Rubber-soled shoes
- Dry gloves and clothing
Follow Manufacturer Instructions
Read the air conditioner manual before installing the capacitor. Follow all safety warnings and steps.
Using the right capacitor type and rating avoids damage and hazards. Incorrect parts can fail or cause fires.
- Check capacitor voltage and microfarad ratings
- Match part numbers from the manual
- Do not mix old and new capacitors
- Keep the work area clean and organized
Avoid Working Alone
Have someone nearby in case of an emergency. They can help or call for assistance if needed.
Working with a partner increases safety and confidence during the installation process.
- Inform someone before starting work
- Keep a phone nearby for emergencies
- Ensure clear communication with your helper
Locating The Capacitor
Finding the capacitor is the first step to installing a new one in your air conditioner. The capacitor helps start the compressor and fan motor.
This guide will explain where to look and how to identify the capacitor safely.
Check The Outdoor Unit
The capacitor is usually inside the outdoor condenser unit. You need to open the access panel to see it.
Turn off the power before opening the panel to avoid electric shock.
Look For A Metal Or Plastic Box
The capacitor looks like a small round or oval box. It can be metal or plastic with wires coming out.
- Usually mounted near the compressor
- Has several terminals for wires
- Labeled with voltage and microfarads (µF) values
Use The Unit’s Wiring Diagram
Inside the access panel, find the wiring diagram sticker. It shows the capacitor’s exact location and wire connections.
Removing The Old Capacitor
Removing the old capacitor from your air conditioner is an important part of the repair process. You must follow safety steps to avoid injury.
This guide helps you remove the capacitor safely and correctly before installing a new one.
Disconnecting Power Supply
Always turn off the power to the air conditioner before you start. This step is very important to keep you safe.
- Find the main power switch or circuit breaker for the unit.
- Switch off the power supply completely.
- Use a voltage tester to confirm no electricity flows to the unit.
Taking Photos For Reference
Take clear photos of the capacitor and wire connections before removal. These photos will help you reconnect the wires correctly later.
- Capture the front and side views of the capacitor.
- Zoom in on the wire terminals and labels.
- Note the wire colors and their positions.
Detaching Wires And Mounting
Remove the wires from the capacitor carefully. Also, detach the capacitor from its mounting bracket or clip.
| Action | Details |
|---|---|
| Discharge Capacitor | Use a screwdriver with an insulated handle to short the terminals. |
| Remove Wires | Gently pull the wire connectors off the capacitor terminals. |
| Remove Mounting | Unscrew or unclip the capacitor from the unit frame. |
Choosing The Right Replacement Capacitor
Replacing an air conditioner capacitor needs careful attention. Picking the correct capacitor helps your AC run smoothly.
This guide explains how to select the right replacement capacitor for your air conditioner.
Check The Capacitor Type
There are two main types of capacitors: start and run. Identify which type your AC uses before buying.
Match The Microfarad Rating
The microfarad (µF) rating must match exactly. Using a different rating can damage the compressor or motor.
Check The Voltage Rating
Capacitors have voltage ratings like 370V or 440V. Always choose a capacitor with the same or higher voltage rating.
Look For Physical Size And Shape
The replacement capacitor should fit the mounting space. Check dimensions and terminal types before buying.
Use A Comparison Table For Key Features
| Feature | What to Check | Why It Matters |
| Capacitor Type | Start or Run | Ensures proper function of motor |
| Microfarad Rating | Exact µF value | Prevents motor damage |
| Voltage Rating | Same or higher voltage | Safe operation under power load |
| Physical Size | Fits mounting space | Easy installation |
| Terminal Type | Same connector type | Ensures secure wiring |

Credit: www.reddit.com
Installing The New Capacitor
Installing a new air conditioner capacitor is a key step in fixing your unit. This guide helps you mount the capacitor and reconnect the wires safely.
Make sure to turn off the power before starting. Follow each step carefully to avoid damage or injury.
Mounting The Capacitor
Place the new capacitor in the mounting bracket where the old one was. Ensure it fits snugly and the terminals face outward for easy wire connection.
- Align the capacitor with the mounting bracket.
- Secure it using the screws or clips provided.
- Check that the capacitor does not move or rattle.
- Keep the terminals clean and free of debris.
Reconnecting The Wires
Reconnect the wires to the capacitor terminals. Match each wire to the correct terminal based on the labels or your notes.
| Wire Color | Terminal Label | Purpose |
|---|---|---|
| Black | C | Common |
| Blue | HERM | Compressor |
| Brown | FAN | Fan Motor |
Use needle-nose pliers to firmly attach the wire connectors. Double-check all connections are tight and secure before restoring power.
Testing The Air Conditioner
Testing the air conditioner capacitor is important for proper AC function.
This process helps find faulty parts before installation.
Safety First
Always turn off power to the AC unit before testing the capacitor.
Use a voltage tester to confirm no electricity is flowing.
Discharge The Capacitor
Discharge stored energy by touching the capacitor terminals with a screwdriver.
- Wear insulated gloves.
- Use a screwdriver with an insulated handle.
- Short the terminals carefully.
Check The Capacitor With A Multimeter
Set your multimeter to the capacitance setting to measure the capacitor.
Remove the capacitor from the AC unit for accurate testing.
| Capacitor Rating | Multimeter Reading | Result |
| 35 µF | 33-37 µF | Good |
| 35 µF | Below 30 µF | Replace |
| 35 µF | No reading | Faulty |
Look For Physical Damage
Inspect the capacitor case for bulges, cracks, or leaks.
Physical damage means the capacitor must be replaced immediately.
Troubleshooting Common Issues
Installing an air conditioner capacitor can fix many problems. Sometimes, the unit still has issues after installation. Troubleshooting helps find the cause and solve it.
Check common issues to ensure the capacitor works well. This guide helps you spot and fix problems during or after installation.
Capacitor Not Holding A Charge
If the capacitor does not hold a charge, the AC may not start or run properly. This issue can happen if the capacitor is faulty or damaged.
Use a multimeter to test the capacitor’s microfarads (µF). If it reads lower or shows no charge, the capacitor needs replacement.
Incorrect Capacitor Size
Using the wrong capacitor size affects the air conditioner’s performance. A capacitor with the wrong rating can cause the motor to fail or run inefficiently.
Check the label on the old capacitor or the AC unit for the correct microfarad rating. Always match this when installing a new capacitor.
Loose Or Damaged Connections
Loose or damaged wires can stop the capacitor from working. The AC might not start or could make strange noises.
Inspect all wire connections to the capacitor. Tighten any loose wires and replace damaged ones before testing the unit again.
Capacitor Bulging Or Leaking
A bulging or leaking capacitor is a sign of failure. It can cause the air conditioner to stop working or run poorly.
Replace the capacitor immediately if you see any swelling or fluid leaks on its body. Do not try to fix a damaged capacitor.
Unit Still Not Starting After Replacement
If the AC does not start after installing a new capacitor, other parts may be the problem. The motor or compressor might be faulty.
Test the motor and compressor with a multimeter. If they are bad, call a professional for repair or replacement.
Credit: www.carrier.com
Frequently Asked Questions
What Tools Are Needed To Install A Capacitor?
To install an air conditioner capacitor, you’ll need a screwdriver, a multimeter, and insulated pliers. A voltage tester is also recommended for safety. These tools ensure a smooth and safe installation process, allowing you to efficiently replace the faulty capacitor without any hassle.
How Do I Safely Discharge A Capacitor?
To safely discharge a capacitor, use a resistor or a discharge tool. Connect it to the capacitor’s terminals. This helps to avoid electrical shocks. Always ensure the air conditioner is unplugged before starting. Safety is paramount when working with electrical components.
Why Is My Air Conditioner Not Cooling Properly?
A faulty capacitor might cause your air conditioner to not cool efficiently. It affects the compressor and fan motors. Replacing the capacitor can restore cooling performance. Regular maintenance and timely replacement ensure optimal functioning of the unit, providing a comfortable environment.
How Can I Identify A Bad Capacitor?
A bad capacitor often shows signs like bulging, leaking, or burning smell. Use a multimeter to test it for continuity. If it fails the test, it’s time for a replacement. Regular inspection helps in early detection, preventing further damage to the air conditioner.
Conclusion
Installing an air conditioner capacitor can save time and money. Follow the steps carefully for safe and effective work. Always turn off power before starting any repair. Use the right tools and parts for the job. Check connections to avoid future problems.
Regular maintenance helps your AC run smoothly. Stay patient and take your time during the process. This simple task can improve your AC’s performance and lifespan. With practice, you will feel more confident handling basic repairs. Keep safety first and enjoy a cooler home.