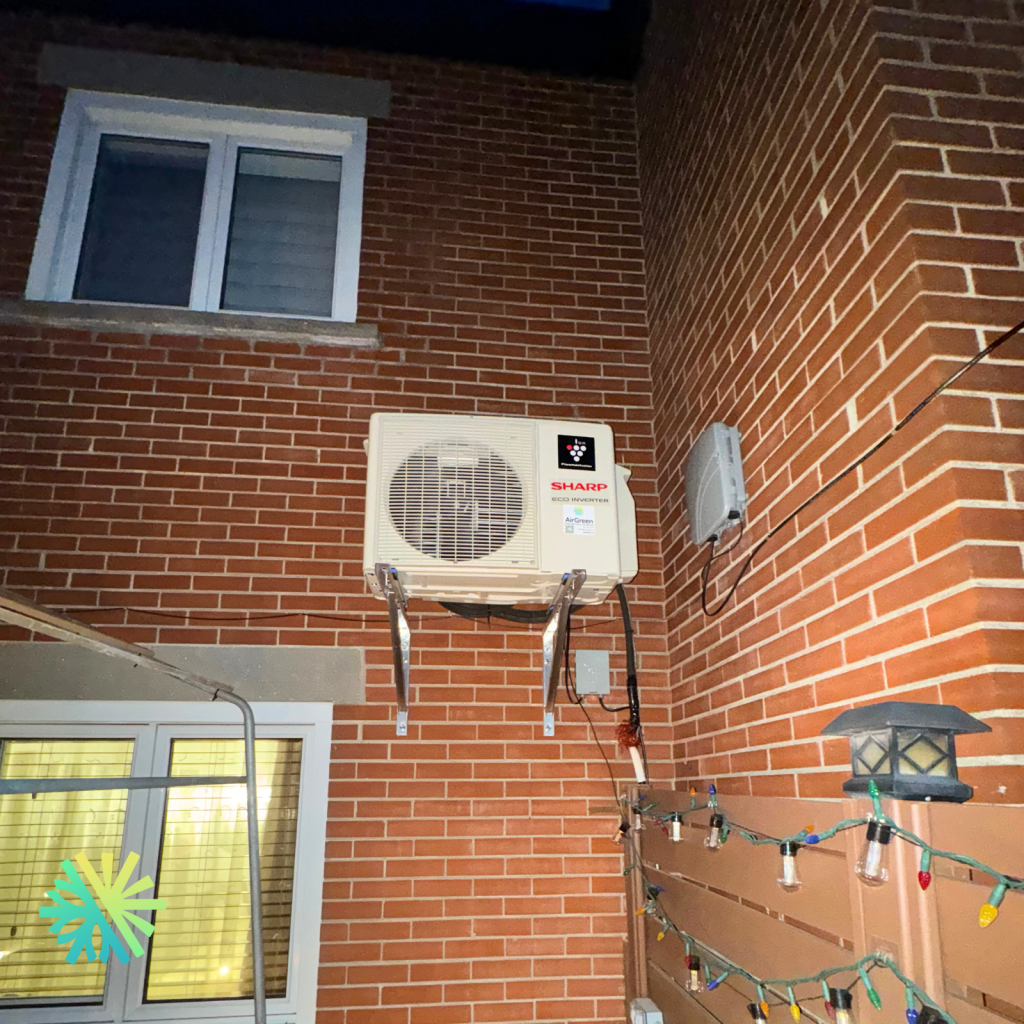
Are you tired of sweating through hot days and want a cool, comfortable space? Installing an air conditioner right into your wall can be the perfect solution.
But if you’ve never done it before, the idea might feel overwhelming. Don’t worry—this guide will walk you through every step in a simple, clear way. By the end, you’ll know exactly how to install your wall air conditioner safely and efficiently, saving you time and money.
Ready to bring cool air into your home? Let’s get started!
Choosing The Right Air Conditioner
Installing an air conditioner in your wall keeps your room cool and comfortable. Picking the right unit is very important. It affects how well your space stays cool and how much energy you use.
This guide helps you choose the best air conditioner for your wall. Learn about types, size, and energy ratings to find the perfect fit.
Types Of Wall Air Conditioners
Wall air conditioners come in different styles. Each type fits different rooms and needs.
- Through-the-Wall Units:Installed directly into the wall. Good for small to medium rooms.
- Mini-Split Systems:Consist of an indoor and outdoor unit. They cool quietly and save energy.
- Window-Style Units:Fit into a wall sleeve. Easy to install and remove.
Sizing Your Unit
Choosing the right size is key for good cooling. Too small will not cool well. Too big wastes energy.
Measure the room size in square feet. Use this to find the cooling power needed, shown in BTUs.
- Up to 150 sq ft: 5,000 BTU
- 150 to 250 sq ft: 6,000–8,000 BTU
- 250 to 350 sq ft: 8,000–10,000 BTU
- 350 to 450 sq ft: 10,000–12,000 BTU
Energy Efficiency Ratings
Energy ratings show how much power the unit uses. Look for units with high ratings to save on bills.
The SEER and EER numbers tell how efficient the air conditioner is. Higher numbers mean better efficiency.
- SEER:Seasonal Energy Efficiency Ratio. Measures cooling over a season.
- EER:Energy Efficiency Ratio. Measures cooling at a specific temperature.

Credit: airgreen.ca
Gathering Tools And Materials
Installing an air conditioner in a wall needs the right tools and materials. Getting everything ready saves time and effort.
Before starting, gather all items to ensure a smooth installation process. This guide helps you prepare well.
Essential Tools List
Use these basic tools to install your wall air conditioner. They help you measure, cut, and secure the unit safely.
- Measuring tape
- Level tool
- Power drill with drill bits
- Jigsaw or handsaw
- Screwdrivers (flathead and Phillips)
- Stud finder
- Caulking gun
- Utility knife
- Wrench set
Safety Equipment
Protect yourself during installation with proper safety gear. This equipment reduces injury risks.
- Safety goggles to protect your eyes
- Work gloves for hand protection
- Dust mask to avoid inhaling debris
- Hearing protection if using loud tools
- Long sleeves and pants to protect skin
Additional Supplies
These extra supplies help finish the installation and keep the air conditioner secure and sealed.
- Foam insulation strips
- Weatherproof caulk or sealant
- Mounting brackets or support frame
- Electrical tape and wire connectors
- Drip pan or drainage hose
Selecting The Installation Location
Choosing the right place on your wall is important for installing an air conditioner. The location affects how well the unit cools the room and how easy it is to install.
Think about space, power supply, and any barriers before placing the air conditioner. These factors help you pick the best spot on the wall.
Measuring The Wall Space
Measure the wall where you want to install the air conditioner. Make sure the space is wide and tall enough for the unit and its bracket.
Check the height from the floor to the installation spot. The air conditioner should be high enough to cool the room well but easy to reach for maintenance.
- Use a tape measure to find the width and height of the wall space
- Leave extra space around the unit for airflow
- Confirm the wall can hold the weight of the air conditioner
Considering Electrical Outlets
Check where electrical outlets are near the installation spot. The air conditioner needs power to work properly and safely.
Pick a location close to an outlet to avoid long extension cords. This reduces fire risks and keeps the area neat.
- Locate the nearest electrical outlet on the wall
- Make sure the outlet can handle the air conditioner’s power needs
- Consider installing a dedicated circuit if needed
Avoiding Obstacles
Look for obstacles like windows, doors, or furniture near the wall. These can block airflow or make installation difficult.
Avoid placing the air conditioner where curtains or shelves might block air. Also, do not install near heat sources or direct sunlight.
- Keep the area clear of large objects
- Do not place near vents or heating units
- Ensure the outdoor part of the unit has clear space for airflow
Preparing The Wall
Installing an air conditioner in the wall needs careful preparation. You must plan the wall area to avoid damage and ensure the unit fits well.
This guide helps you prepare the wall by marking, cutting, and reinforcing the space for the air conditioner.
Marking The Cutout Area
Start by measuring the air conditioner’s size. Mark the exact spot on the wall where you want to install the unit.
- Use a pencil and a level to draw a rectangle matching the AC dimensions.
- Check twice to make sure the lines are straight and sized correctly.
- Mark the studs and wiring inside the wall to avoid cutting them.
Cutting The Wall Opening
Cut the wall carefully along the marked lines. Use the right tools for clean cuts and safety.
- Wear safety goggles and gloves before cutting.
- Use a drywall saw or a jigsaw to cut along the pencil lines.
- Remove the cut piece gently to avoid breaking the wall.
- Clear away any dust and loose pieces from the opening.
Reinforcing The Wall Frame
Reinforce the wall opening to hold the air conditioner firmly. This prevents damage and keeps the unit stable.
| Material | Purpose | Notes |
|---|---|---|
| Wooden studs | Support the frame edges | Use 2×4 lumber for strong support |
| Metal brackets | Secure the studs | Attach with screws for stability |
| Foam insulation | Seal gaps around unit | Prevents air leaks and moisture |
Installing The Air Conditioner
Installing an air conditioner in a wall requires careful steps. Proper installation helps the unit work well and last longer.
Follow the instructions below to position, secure, and seal your wall air conditioner.
Positioning The Unit
Choose a spot that can support the air conditioner’s weight. The location should allow good airflow and easy access for maintenance.
Make sure the unit fits the wall opening and that the window or vent is not blocked.
- Pick a sturdy wall section
- Check for power supply nearby
- Avoid direct sunlight to save energy
- Leave space around the unit for air flow
Securing The Mounting Bracket
Install the mounting bracket first to hold the air conditioner securely in place. Use a level to keep it straight.
Attach the bracket with strong screws into wall studs or anchors made for your wall type.
- Find studs with a stud finder
- Mark screw holes on the wall
- Drill pilot holes to prevent cracking
- Secure bracket tightly with screws
Sealing And Insulating
Seal all gaps around the air conditioner to stop air leaks and water from entering. Use weatherproof sealant or foam.
Insulate the sides and bottom of the unit to improve energy efficiency and keep noise low.
- Apply caulk around the edges
- Fill gaps with expanding foam
- Use weatherstripping for extra sealing
- Check seals regularly for damage
Connecting Electrical Components
Connecting electrical parts is key when installing a wall air conditioner. Proper wiring keeps your AC safe and working well.
Follow clear steps to connect wires, check power, and test the setup before use.
Wiring Basics
Use the correct wire type and size for your air conditioner. Usually, copper wires with insulation are best.
- Turn off the main power before starting.
- Identify the live, neutral, and ground wires.
- Connect wires with matching colors: black or red for live, white for neutral, green or bare for ground.
- Use wire nuts or connectors to join wires securely.
- Wrap connections with electrical tape for safety.
Ensuring Power Supply
Check that your power source matches the AC unit’s voltage and amperage needs. Use a dedicated circuit if possible.
| Power Feature | Requirement |
| Voltage | Usually 110-120V or 220-240V |
| Amperage | Check AC manual for amps |
| Circuit | Dedicated breaker recommended |
| Outlet Type | Proper grounding and fit |
Testing Electrical Connections
After wiring, test all connections to avoid hazards and ensure the AC works well.
- Turn the power back on at the breaker.
- Use a voltage tester to check each wire connection.
- Look for sparks or loose wires and fix if needed.
- Switch on the air conditioner and check if it runs smoothly.
- Listen for unusual sounds or smells that signal problems.
Final Adjustments And Testing
After installing the air conditioner in the wall, it is important to make final adjustments. These ensure the unit works properly and lasts longer. Testing the system helps find any problems early.
This section covers leveling the unit, running initial tests, and troubleshooting common issues. Follow these steps carefully for a smooth finish.
Leveling The Unit
Leveling the air conditioner is key to proper drainage and operation. Use a spirit level to check the unit’s angle.
- Place the level on top of the unit.
- Adjust the unit so it tilts slightly backward inside the wall.
- Tighten mounting screws to hold the position.
- Check again to confirm the unit is stable and level.
Running Initial Tests
Initial tests show if the air conditioner cools and runs as expected. Turn on the unit and observe its functions.
- Switch on the power and set the temperature low.
- Listen for unusual noises or vibrations.
- Check if cold air flows from the front vents.
- Inspect the drain pipe to ensure water flows out correctly.
- Make sure the remote control or panel responds well.
Troubleshooting Common Issues
If the unit shows problems, use this table to find quick fixes. These solutions cover most installation issues.
| Problem | Possible Cause | Solution |
| Unit won’t turn on | Power supply off or loose | Check plug and circuit breaker |
| No cold air | Thermostat set too high | Lower temperature setting |
| Water leaks inside | Blocked drain pipe | Clear drain pipe |
| Vibrations or noise | Unit not level | Re-level the unit |
| Remote not working | Dead batteries | Replace batteries |

Credit: www.youtube.com
Maintenance Tips For Longevity
Installing an air conditioner in your wall is just the first step. Proper care keeps it running well for years. Regular maintenance helps avoid costly repairs and keeps the air fresh.
Follow these simple tips to keep your air conditioner working efficiently and lasting longer.
Regular Cleaning
Cleaning your air conditioner regularly prevents dust and dirt buildup. Dust can block airflow and reduce cooling power. Use a soft brush or cloth to wipe the outer surface every month.
- Turn off and unplug the unit before cleaning.
- Clean the vents and grills with a vacuum or brush.
- Wipe the exterior with a damp cloth.
- Remove any debris from the installation area.
Filter Replacement
Filters trap dust and allergens. A dirty filter lowers air quality and makes the unit work harder. Change or clean filters every three months or more often if needed.
| Filter Type | Replacement Frequency |
| Reusable Mesh Filter | Clean every 1 month |
| Disposable Fiber Filter | Replace every 3 months |
| HEPA Filter | Replace every 6 months |
Seasonal Shutdown Procedures
Preparing your air conditioner for the off-season prevents damage and keeps it ready for next use. Follow these steps before you shut down the unit for winter or long breaks.
- Turn off power at the circuit breaker.
- Remove and clean filters thoroughly.
- Cover the unit with a breathable cover to keep out dust.
- Check for any signs of wear or damage.
- Store the remote control in a safe place.

Credit: m.youtube.com
Frequently Asked Questions
How Do I Choose The Right Wall Air Conditioner Size?
Select an air conditioner based on room size, insulation, and climate. Check BTU ratings to match your room’s cooling needs. Proper sizing ensures efficient cooling and energy savings.
What Tools Are Needed To Install A Wall Air Conditioner?
You’ll need a drill, screwdriver, level, measuring tape, saw, and mounting brackets. Safety gear like gloves and goggles is also essential for safe installation.
Can I Install A Wall Air Conditioner Myself?
Yes, with basic DIY skills and tools, you can install it. Follow the manufacturer’s instructions carefully and ensure proper sealing to avoid air leaks.
How Do I Prepare The Wall For Air Conditioner Installation?
Measure and mark the installation spot accurately. Cut a hole matching the unit’s dimensions, ensuring structural support and proper sealing to prevent drafts and water damage.
Conclusion
Installing a wall air conditioner can cool your room fast and save space. Follow each step carefully for the best results. Use the right tools and check the instructions often. Take your time to avoid mistakes and ensure safety. A well-installed unit will work quietly and last longer.
Enjoy cool air during hot days without much hassle. Simple preparation leads to better comfort in your home.