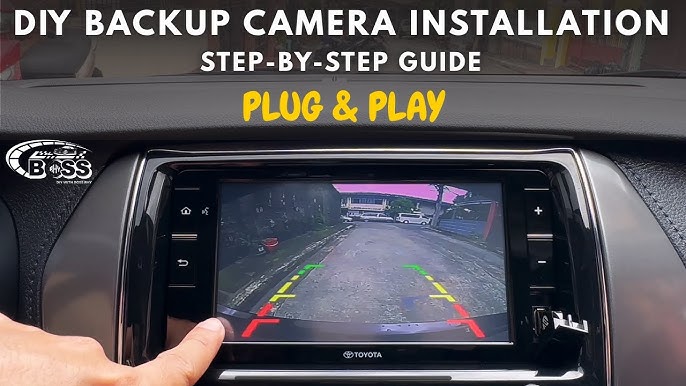
Have you ever struggled to see what’s behind your car while reversing? Installing a backup camera can change that instantly.
It gives you a clear view of obstacles, making parking safer and easier. In this guide, you’ll learn exactly how to install a backup camera in your car, step by step. No confusing jargon, just simple instructions you can follow right now.
Keep reading, and you’ll soon enjoy the confidence and peace of mind that comes with a backup camera.
Tools And Materials Needed
Installing a backup camera in your car helps improve safety. You need the right tools and materials for a smooth installation.
Getting prepared before starting saves time and avoids mistakes. Here are some key points to consider.
Choosing The Right Backup Camera
Select a backup camera that fits your car and needs. Consider camera size, image quality, and viewing angle.
Some cameras come with night vision or waterproof features. Think about where you will install the camera and the weather conditions.
- Choose a camera with clear video resolution
- Pick a wide-angle lens for better view
- Check for waterproof and dustproof ratings
- Make sure it fits your car model
- Select a camera with night vision if you drive at night
Essential Tools For Installation
Having the right tools makes installing your backup camera easier. Some tools are common, but important for the job.
Prepare these tools before you start to avoid delays and frustration during installation.
- Screwdrivers (Phillips and flat-head)
- Power drill with drill bits
- Wire strippers and cutters
- Electrical tape or heat shrink tubing
- Multimeter or test light for checking voltage
- Zip ties to secure wires
- Panel removal tool to open car panels safely
- Backup camera kit with cables and mounting hardware
- Optional: soldering kit for secure wire connections

Credit: www.youtube.com
Preparing Your Vehicle
Installing a backup camera needs careful preparation. You must get your car ready before starting the work.
This guide covers finding the best spot for the camera and how to reach your car’s wiring safely.
Locating The Ideal Mounting Spot
Choose a place on your car’s rear that offers a wide view. The spot should be stable and easy to connect with wires.
- Check near the license plate for good visibility
- Pick a spot free from dirt and water pooling
- Avoid areas with moving parts like the trunk lid edge
- Ensure the camera lens will not be blocked by the car’s frame
Accessing The Car’s Wiring
You need to find the wires that power the camera and send its video signal. These wires are usually near the rear lights or inside the trunk.
| Wire Type | Location | Purpose |
| Reverse Light Wire | Near rear light cluster | Power camera when car reverses |
| Ground Wire | Chassis or metal frame | Complete electrical circuit |
| Video Signal Wire | Runs from camera to display unit | Transmit video feed |
Installing The Camera
Installing a backup camera in your car improves safety while reversing. This guide covers the key steps for a secure installation.
Focus on mounting the camera firmly and running the wires neatly. Proper installation ensures the camera works well and lasts long.
Mounting The Camera Securely
Choose a flat spot near your license plate or rear bumper to mount the camera. Clean the area to remove dust and grease before attaching the camera.
- Use the supplied screws or strong double-sided tape for mounting.
- Make sure the camera lens faces straight back for a clear view.
- Check that the camera does not block the license plate or lights.
- Test the camera angle before tightening all screws fully.
Running The Wires
Hide the wires inside the car body to protect them from damage and keep the car neat. Avoid sharp edges and moving parts that can cut the wires.
| Wire Section | Tips for Running |
| From Camera to Trunk | Use trim panels to hide wires; avoid pinch points |
| From Trunk to Cabin | Pass wires through existing grommets or holes |
| From Cabin to Dashboard | Secure wires with clips; keep away from pedals |
| Power Connection | Connect to reverse light power for automatic activation |

Credit: www.youtube.com
Connecting To Power And Display
Installing a backup camera requires connecting it to your car’s power source and display. This guide helps you link the camera to the right wires and monitor.
Follow simple steps to connect the camera safely. Proper wiring ensures the camera works when you reverse your car.
Wiring To The Reverse Light
The backup camera needs power only when the car is in reverse. Connect its power wire to the reverse light wire. This way, the camera turns on automatically when you shift to reverse gear.
- Locate the reverse light wire in your car’s tail light assembly.
- Use a wire stripper to expose a small section of the reverse light wire.
- Connect the camera’s red power wire to the exposed reverse light wire.
- Secure the connection with electrical tape or a wire connector.
- Connect the camera’s black wire to a good ground point on the car chassis.
Connecting To The Monitor Or Head Unit
The backup camera sends video to a display screen inside the car. This can be a separate monitor or your car’s head unit. Connect the video cable from the camera to the video input on the monitor.
| Connection Type | Description |
| RCA Cable | Most common cable for video signal |
| Wireless Transmitter | Sends video without cables, needs power |
| Head Unit Video Input | Use this if your car stereo supports backup camera input |
Make sure the monitor or head unit is powered on. Test the camera by shifting into reverse and checking the display for the camera’s image.
Testing And Adjusting
After installing your backup camera, it is important to test it carefully. This ensures the camera works properly. Adjustments may be needed for the best view.
Use the following steps to check the camera and adjust its angle. This will help you get clear and useful images while reversing.
Checking Camera Functionality
Turn on your car and put it in reverse gear. The backup camera display should activate automatically. Look for a clear, stable image on the screen.
- Check if the image is sharp and not blurry.
- Make sure the camera feed does not flicker or cut off.
- Test the camera in low light to see if it works well at night.
- Look for any dirt or obstructions on the camera lens.
- Verify that the parking guidelines appear if your system supports them.
Adjusting The Camera Angle
Adjust the camera angle to cover the widest area behind your car. The camera should show the ground near your rear bumper and the road behind.
| Adjustment | What to Check | Tips |
| Vertical Tilt | See the rear bumper and ground | Angle down slightly to include the bumper |
| Horizontal Angle | Cover the full width behind the car | Center the camera to avoid blind spots |
| Rotation | Make sure image is level | Use grid lines if available to align |
Troubleshooting Tips
Installing a backup camera in your car can improve safety. Sometimes issues come up during or after installation. These tips help solve common problems quickly.
Knowing how to fix signal and power troubles will keep your camera working well. Follow simple steps to check connections and settings.
Common Installation Issues
One common issue is loose connections. Check all plugs and wires to ensure they fit tightly. A loose cable can stop the camera from working.
- Verify that the camera is mounted correctly and not blocked.
- Check the display screen to confirm it is set to the camera input.
- Inspect the wiring harness for any damage or cuts.
- Ensure the camera lens is clean and free from dirt or moisture.
Fixing Signal Or Power Problems
Power issues often cause the camera to turn off or not display. The signal may cut out if the wiring is poor or the voltage is low.
| Problem | Possible Cause | Solution |
| No power to camera | Blown fuse or loose power wire | Check fuse box and tighten power connection |
| Flickering image | Weak ground connection | Secure a good ground wire to metal frame |
| No image or static | Damaged video cable | Replace or repair video cable |
| Image cuts out when reversing | Voltage drops during gear shift | Use a voltage stabilizer or direct power source |
Credit: dashcamtalk.com
Frequently Asked Questions
What Tools Are Needed To Install A Backup Camera?
You need a screwdriver, wire stripper, electrical tape, drill, and a multimeter. These tools help secure the camera, connect wires, and test the system effectively.
How Do I Power The Backup Camera In My Car?
Power the camera by tapping into the reverse light circuit. This ensures the camera activates only when reversing your vehicle.
Can I Install A Backup Camera Myself Easily?
Yes, with basic tools and instructions, DIY installation is possible. Follow the steps carefully for a proper, secure setup.
How Do I Connect The Backup Camera To The Display?
Connect the camera’s video cable to the monitor’s input port. Use RCA connectors or wireless transmitters based on your system type.
Conclusion
Installing a backup camera in your car improves safety and ease. The process is simple if you follow the right steps carefully. Use the right tools and take your time for best results. Check connections and test the camera before driving.
This small upgrade helps you see blind spots clearly. Enjoy parking and reversing with more confidence now. Keep your car safer with this useful addition.