
Are you ready to keep your home cool and comfortable all year round? Installing a bracket for your air conditioner is the first step to making that happen.
But if you’ve never done it before, the process might seem tricky or overwhelming. Don’t worry—you’re in the right place. This guide will walk you through simple, clear steps to install your air conditioner bracket safely and securely. By the end, you’ll have the confidence to handle the job yourself and enjoy a perfectly mounted unit without any hassle.
Keep reading to learn exactly how to get it done right!
Choosing The Right Bracket
Installing a bracket for your air conditioner is important for safety and performance. The right bracket holds the unit firmly and prevents damage.
Choosing the best bracket depends on the type, material, size, and weight of your air conditioner. This guide will help you pick the right one.
Types Of Air Conditioner Brackets
There are several types of brackets for air conditioners. Each type fits different installation needs and wall structures.
- L-shaped brackets: Common and easy to install, support window units well.
- Adjustable brackets: Allow changes in angle and position for better airflow.
- Fixed brackets: Provide strong support and do not move after installation.
- Wall-mounted brackets: Designed for split and wall air conditioners.
Materials And Durability
Material matters for bracket strength and lifespan. Choose materials that resist weather and rust.
- Steel brackets: Very strong and durable but may need rust protection.
- Aluminum brackets: Lightweight and rust-resistant but less strong than steel.
- Plastic brackets: Not common for heavy AC units, used for small or indoor units.
Look for brackets with a protective coating for outdoor use. This increases durability and safety.
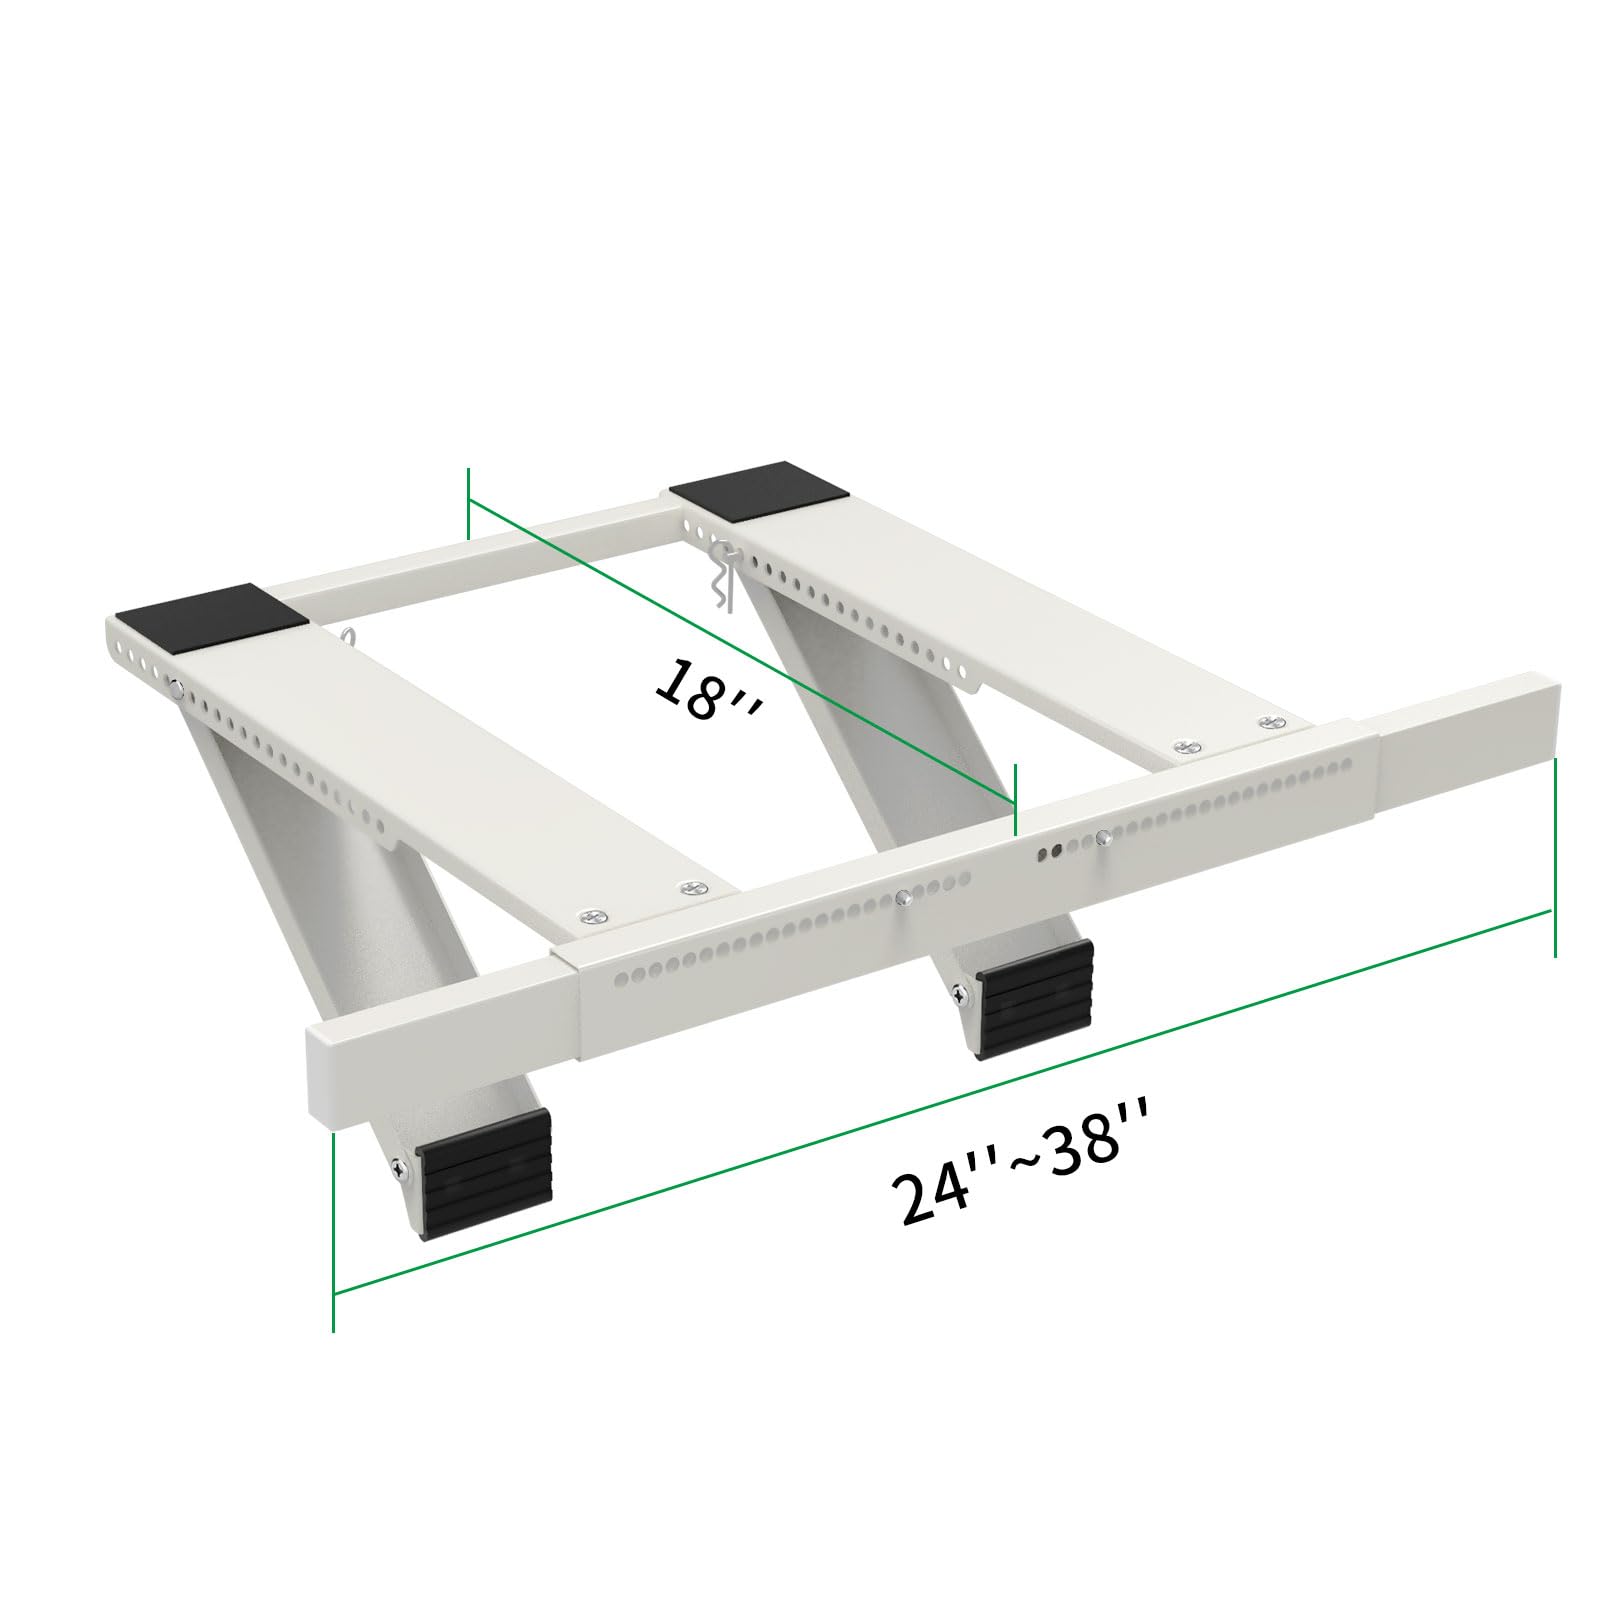
Size And Weight Considerations
Brackets must fit the size and weight of your air conditioner. A wrong size can cause accidents or damage.
Check the weight capacity before buying. The bracket should support more than your AC’s weight for safety.
- Measure the AC unit’s width and depth.
- Choose a bracket wide enough to hold the base securely.
- Check maximum weight limit on the bracket packaging.
- Use extra support brackets for heavier units.
Credit: www.amazon.com
Gathering Necessary Tools
Installing a bracket for an air conditioner needs the right tools. Getting these tools ready will make the job easier.
Without the proper tools, you may face delays or unsafe work conditions. Let’s look at what you need before you start.
Essential Tools List
You need some basic tools to install the air conditioner bracket. These tools help you measure, drill, and fix the bracket securely.
- Drill with different drill bits
- Measuring tape
- Spirit level
- Screwdriver set
- Wrench or socket set
- Pencil or marker
- Hammer
Safety Equipment
Safety gear protects you from accidents during installation. Always wear the right equipment before starting work.
Protective gear keeps you safe from dust, debris, and sharp tools. It also helps prevent injuries from falls or slips.
- Safety goggles to protect your eyes
- Work gloves to protect your hands
- Dust mask to avoid breathing dust
- Non-slip shoes for stable footing
- Hard hat if working on high spots
Preparing The Workspace
Clear the area where you will work. A clean space helps you move freely and reduces accidents.
Make sure there is enough light. Good lighting helps you see measurements and marks clearly.
- Remove furniture and obstacles near the wall
- Lay down a cloth or sheet to catch debris
- Ensure a stable ladder or platform if needed
- Check for electrical wires or pipes behind the wall
- Keep tools and safety gear within reach
Selecting The Installation Location
Choosing the right place to install an air conditioner bracket is important. It helps the unit work well and stay safe.
Consider the wall strength, height, and any objects around the spot before installing.
Wall Strength And Support
The wall must be strong enough to hold the weight of the air conditioner. Use a solid wall like concrete or brick.
A weak wall, such as drywall, may need extra support like studs or anchors.
- Check for cracks or damage on the wall
- Use a level to ensure the bracket fits straight
- Drill into studs or solid parts of the wall
Optimal Height And Position
Install the bracket at a height that allows easy access for cleaning and maintenance.
Place the air conditioner where it can cool the room evenly without blocking windows or doors.
- Keep the unit at least 7 feet above the floor
- Allow space above and below the unit for airflow
- Keep it away from direct sunlight
Avoiding Obstructions
Do not install the bracket where furniture, curtains, or other objects block the air flow.
Make sure the outdoor part of the unit has enough space for air to move freely.
- Keep a clear space of at least 2 feet around the unit
- Avoid places near heat sources or vents
- Check that no wires or pipes block the bracket area

Credit: shopsavvy.com
Marking And Drilling Holes
Installing a bracket for an air conditioner needs careful marking and drilling. Correct marks ensure the bracket fits securely. Drilling holes carefully prevents damage to walls.
This guide covers measuring and aligning, using a level, and drilling techniques. Follow these steps to prepare for a safe and stable installation.
Measuring And Aligning
Measure the bracket size and wall space before marking holes. Align the bracket on the wall to match the air conditioner’s dimensions. Use a pencil to mark the exact spots for drilling.
- Measure the width and height of the bracket.
- Check the wall space for any obstacles.
- Hold the bracket firmly against the wall.
- Mark the holes clearly with a pencil.
Using A Level
Use a level tool to make sure the bracket is straight. A crooked bracket can cause the air conditioner to tilt or fall. Adjust the bracket until the bubble is in the center.
| Tool | Purpose | Tip |
|---|---|---|
| Spirit Level | Check horizontal alignment | Place on top edge of bracket |
| Laser Level | Project straight line on wall | Use for longer wall surfaces |
Drilling Techniques
Select the right drill bit size for wall anchors. Drill slowly at first to avoid cracking the wall. Clean dust from the holes before inserting anchors or screws.
- Choose drill bit matching anchor size.
- Mark the drill points again before drilling.
- Drill holes straight and steady.
- Remove dust with a brush or blower.
- Insert wall anchors carefully.
Mounting The Bracket
Mounting the bracket is an important step to install your air conditioner. The bracket holds the unit safely on the wall.
Follow the instructions carefully to make sure the bracket is strong and steady.
Attaching The Bracket Securely
Place the bracket on the wall where you want to install the air conditioner. Use a level to keep it straight.
Mark the holes on the wall through the bracket’s mounting points. This helps you drill in the right places.
Using Anchors And Screws
Use wall anchors if you mount the bracket on drywall or hollow walls. Anchors hold screws tightly in place.
Choose screws that fit the bracket holes and anchors. Use a drill to insert screws firmly into the anchors.
- Use a drill bit to make holes for anchors
- Push anchors into holes until flush with wall
- Insert screws through bracket holes into anchors
- Tighten screws securely but do not over-tighten
Checking Stability
After attaching, check the bracket’s stability by gently shaking it. It should not move or wobble.
If the bracket feels loose, tighten the screws or add stronger anchors. Stability is crucial for safety.
Installing The Air Conditioner
Installing an air conditioner requires careful handling and precision. Proper installation ensures the unit works efficiently and lasts longer.
This guide covers lifting the unit, securing it to the bracket, and making sure it drains correctly.
Lifting And Positioning
Lift the air conditioner carefully to avoid damage. Use two or more people if the unit is heavy or bulky. Hold the unit steady to prevent it from tipping.
Position the unit over the bracket slowly. Align it so the mounting holes match the bracket holes exactly. This step helps secure the unit firmly.
Securing The Unit To The Bracket
Attach the air conditioner to the bracket using screws or bolts. Tighten all fasteners evenly to keep the unit stable. Check that the unit does not wobble.
- Place the unit on the bracket with aligned holes.
- Insert screws or bolts into the holes.
- Tighten each screw or bolt securely.
- Double-check all fasteners for tightness.
- Ensure the unit is stable and level.
Ensuring Proper Drainage
Drainage is important to avoid water buildup inside the unit. The air conditioner should tilt slightly outside to let water flow out.
| Drainage Tip | Details |
| Tilt Angle | About 2 to 3 degrees downward |
| Drain Pipe | Check it is not blocked or kinked |
| Water Flow | Ensure water flows freely out of the unit |
Final Checks And Maintenance Tips
Installing a bracket for your air conditioner is only the first step. You need to do final checks to make sure it is safe and works well. Regular maintenance helps your air conditioner last longer.
Follow these tips to keep the bracket and air conditioner secure and running smoothly.
Testing The Installation
After installing the bracket, check if the air conditioner is steady. Make sure it does not move or shake. Test the unit by turning it on to see if it runs quietly and cools well.
- Check if the bracket holds the weight firmly
- Look for any gaps between the wall and bracket
- Listen for unusual noises when the unit runs
- Make sure the air conditioner cools the room properly
Regular Inspection
Inspect the bracket and air conditioner often. Look for rust, loose screws, or cracks. Early checks prevent bigger problems later.
- Check screws and bolts every few months
- Clean dirt and dust from the bracket and unit
- Look for signs of wear or damage on the bracket
- Make sure the unit is still level and secure
Troubleshooting Common Issues
If you notice problems, check the bracket first. Loose brackets can cause noise or vibration. Tighten screws or replace damaged parts as needed.
- Noise or shaking means the bracket may be loose
- Rust can weaken the bracket; clean and repaint if needed
- If the unit leaks water, check the bracket angle for proper drainage
- Replace any bent or broken parts immediately

Credit: www.amazon.com
Frequently Asked Questions
How Do I Choose The Right Bracket For My Ac?
Select a bracket that supports your AC’s weight and size. Check the manufacturer’s specifications. Use durable materials like steel for safety and stability.
What Tools Are Needed To Install An Ac Bracket?
You will need a drill, level, measuring tape, wrench, and screws. These tools help ensure a secure and accurate installation.
How High Should I Install The Ac Bracket?
Install the bracket at least 7 feet above the ground. This height optimizes air circulation and keeps the unit safe from damage.
Can I Install An Ac Bracket On A Brick Wall?
Yes, use masonry anchors and a hammer drill for brick walls. This ensures the bracket is firmly secured and supports the AC unit.
Conclusion
Installing a bracket for your air conditioner can save time and money. Follow each step carefully to ensure a safe setup. Use the right tools and check the wall’s strength before drilling. Secure the bracket firmly to avoid accidents. A well-installed bracket keeps your air conditioner stable and working well.
Take your time and do it right for the best results. Now, enjoy cool air in your home with confidence. Simple steps, strong support.