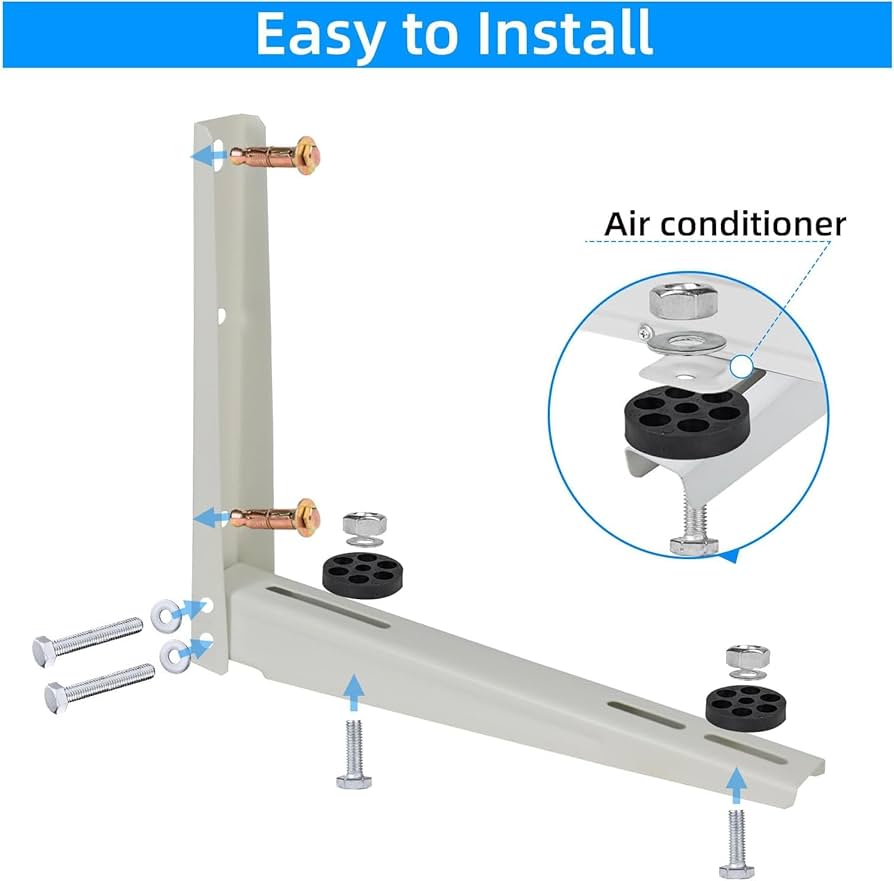
Are you ready to install a bracket for your air conditioner but don’t know where to start? You’re in the right place.
Installing the right bracket is key to keeping your air conditioner secure and running smoothly. In this guide, you’ll discover simple, step-by-step instructions that make the process easy—even if you’ve never done it before. By the end, you’ll have the confidence to mount your air conditioner safely and correctly.
Keep reading, and let’s get your space cool and comfortable!
Choose The Right Bracket
Selecting the right bracketis key for a safe air conditioner setup. Brackets differ by design and use.
- L-shaped brackets:Common for window units, easy to install.
- Wall-mounted brackets:Hold split systems, provide strong support.
- Heavy-duty brackets:Made for large or heavy units.
| Bracket Type | Weight Capacity | Material |
|---|---|---|
| L-shaped | Up to 50 lbs | Steel, Aluminum |
| Wall-mounted | 50 – 150 lbs | Steel, Iron |
| Heavy-duty | Over 150 lbs | Reinforced Steel |
Choose a bracket made of strong materialto hold weight safely. Steel is often best. Check the weight capacityto match your AC unit. Using the wrong bracket risks damage and accidents.

Credit: shopsavvy.com
Gather Required Tools
Gathering the right toolsis essential for installing an air conditioner bracket. The basic tools listincludes:
- Drillwith appropriate bits
- Screwdriver
- Measuring tape
- Levelto ensure straight installation
- Wrenchor spanner
- Stud finderfor wall support
- Pencilfor marking spots
Using the correct safety gearprotects you during installation. Important items include:
- Safety gogglesto protect eyes
- Glovesfor hand protection
- Dust maskif drilling creates dust
- Closed-toe shoesto protect feet
Select Installation Location
Choose a spot with optimal height, usually 7-8 feet from the ground. This height helps cool air spread well. Place the bracket where the air conditioner will not block doors or windows. Avoid walls with strong sunlight to keep the unit efficient.
Look for a place free of obstacles. Keep clear space around the unit so air flows easily. Avoid spots near heat sources like ovens or heaters. This ensures the air conditioner works well.
Make sure the area has proper ventilation. Good airflow prevents overheating and helps the unit last longer. Avoid tight corners and closed rooms. A well-ventilated spot keeps your air conditioner running smoothly.
Mark Mounting Points
Use a level toolto ensure the bracket is straight. Mark the points where the bracket will attach to the wall. This helps avoid uneven installation.
Measure the distance between the marks carefully. Use a tape measure and double-check your numbers. Accurate measuring keeps the air conditioner stable and secure.
Look for studs or solid surfacesbehind the wall. Brackets need strong support to hold the unit’s weight. Use a stud finder or tap the wall to find these spots.
Drill Holes And Secure Bracket
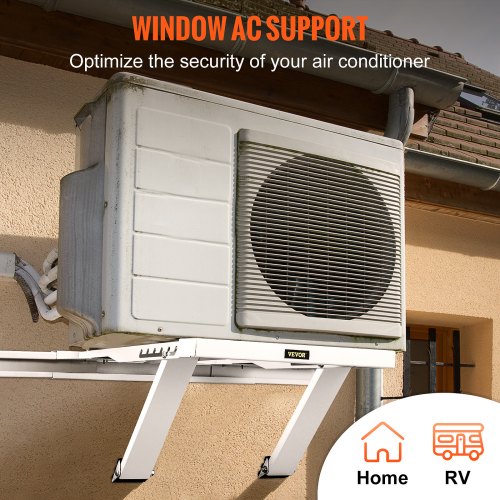
Choose the right drill bit for the wall type. Use a masonry bit for concrete or brick. For wood, a standard drill bit works well. The drill bit size should match the anchor size.
Insert anchors into the drilled holes to hold screws firmly. Push them in gently until they are flush with the wall.
Attach the bracket by lining it up with the anchors. Use screws that fit the anchors and tighten securely. Make sure the bracket does not wobble.
Credit: www.vevor.com
Mount The Air Conditioner
Lift the air conditioner carefully with help. Position it on the bracket firmly. Make sure it fits well.
Secure the unit using the screws provided. Tighten all screws to keep it safe. Avoid loose fixing.
Check the stability by gently shaking the unit. It should not move or wobble. Stability ensures safety and good work.
Test Installation
Check the bracket for any vibrationsby gently shaking it. Vibrations can cause noise and damage over time. Tighten screws if you feel any movement.
Make sure the drainage systemis clear and slopes downward. This helps water flow away and prevents leaks or damage. A blocked drain can cause water to pool around the unit.
Turn on the air conditioner to verify its operation. Listen for strange sounds and watch for proper airflow. Confirm the unit cools the air effectively and that all parts work well.

Credit: www.amazon.com
Frequently Asked Questions
How Do I Choose The Right Bracket Size?
Selecting the correct bracket size ensures stability. Measure your air conditioner’s mounting points and choose a bracket that matches. Check the weight capacity to ensure it can support your unit. Proper sizing prevents damage and improves efficiency.
What Tools Are Needed For Bracket Installation?
You will need a drill, screws, and a level for installation. A measuring tape ensures accurate placement. Having a screwdriver and a wrench can help tighten the bracket securely. Proper tools ensure a sturdy installation.
Can I Install The Bracket Myself?
Yes, you can install it yourself with basic tools. Ensure you follow the manufacturer’s instructions for safe installation. If unsure, consult a professional to avoid mistakes. Proper installation ensures your air conditioner operates efficiently and safely.
How High Should I Install The Bracket?
Install the bracket at a comfortable height for maintenance. Typically, 2-3 feet above the ground is ideal. Ensure it is accessible for cleaning and servicing. Proper height placement ensures optimal cooling and ease of use.
Conclusion
Installing a bracket for your air conditioner is simple with clear steps. Measure carefully and use the right tools for safety. Secure the bracket firmly to hold the unit well. Check that everything is level before tightening screws. This helps your air conditioner work better and last longer.
Taking your time ensures a safe and strong setup. Now, you can enjoy cool air comfortably in your home.