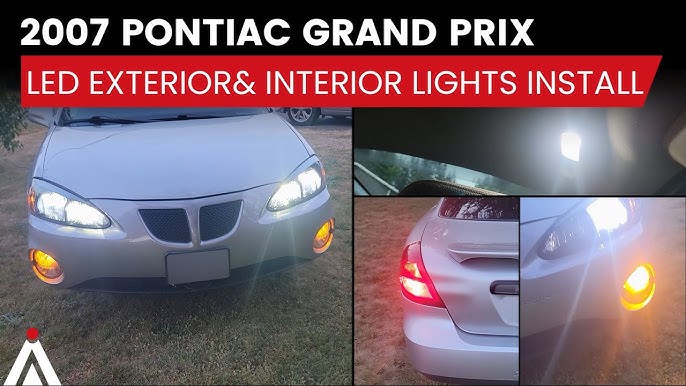
Are you ready to give your car a fresh, modern look that turns heads everywhere you go? Installing exterior LED lights on your car is one of the easiest and most effective ways to upgrade its appearance and improve visibility at night.
But maybe you’re wondering where to start or worried it might be too complicated. Don’t worry—you’re about to discover simple, step-by-step instructions that anyone can follow. By the end of this article, you’ll know exactly how to install exterior LED lights on your car, making it safer and more stylish in no time.
Keep reading, and let’s get your ride shining brighter than ever!
Choosing The Right Led Lights
Installing exterior LED lights on your car can improve visibility and style. Picking the right lights is important for safety and performance.
This guide helps you understand different types of LED lights, brightness and color options, and compatibility with your car model.
Types Of Exterior Led Lights
There are many types of exterior LED lights for cars. Each serves a different purpose and fits different locations on your vehicle.
- Headlights:Main lights for night driving and road visibility.
- Fog Lights:Low mounted lights to cut through fog and rain.
- Daytime Running Lights (DRLs):Lights that stay on during the day for extra visibility.
- Turn Signal Lights:Indicate turning direction to other drivers.
- Accent Lights:Decorative lights to enhance the car’s look.
Brightness And Color Options
Brightness affects how well you can see and how visible your car is to others. Color can change the style and sometimes the function of your lights.
| Brightness (Lumens) | Use | Notes |
| 800 – 1200 | Fog lights and accent lights | Good for close range and style |
| 1500 – 3000 | Headlights and DRLs | Bright enough for most road conditions |
| Above 3000 | High beam headlights | Used only in very dark areas |
| White | Most exterior lights | Clear and bright for road visibility |
| Amber/Yellow | Turn signals and fog lights | Easy to see and recognized by others |
| Blue or Colored | Accent lights | Not for road use, mostly decorative |
Compatibility With Your Car Model
Your car model affects the size and type of LED lights you can install. Check your car’s manual or ask an expert for the right fit.
Here are key points to check for compatibility:
- Shape and size of the light housing
- Electrical system voltage (usually 12V)
- Connector type and wiring setup
- Legal restrictions for light colors and brightness

Credit: www.ebay.com
Tools And Materials Needed
Installing exterior LED lights on your car needs the right tools and materials. Using the proper items makes the job easier and safer.
This guide covers the essential tools, safety gear, and extra accessories you will need to complete the installation.
Essential Tools
You need basic tools to fit and connect LED lights on your car. These tools help you remove old parts and secure new lights firmly.
- Screwdrivers (flathead and Phillips)
- Wire strippers and cutters
- Electric drill with bits
- Socket wrench set
- Multimeter to check electrical connections
- Heat gun or lighter for heat shrink tubing
- Electrical tape
Safety Gear
Protect yourself while working on your car’s electrical system. Safety gear lowers the risk of injuries or accidents.
- Insulated gloves to avoid electric shocks
- Safety glasses to protect your eyes
- Long sleeve shirt to cover your arms
- Mask or respirator if soldering wires
Additional Accessories
Extra accessories help make the LED light installation neat and reliable. They keep wires safe and connections strong.
- Heat shrink tubing to protect wire joints
- Zip ties to organize and secure wires
- Wire connectors or crimp terminals
- Mounting brackets or clips for LED lights
- Silicone sealant to keep water out
Preparing Your Car
Installing exterior LED lights on your car needs careful preparation. This ensures the lights fit well and work correctly.
Start by getting your car ready. Clean the surface, find power sources, and plan where to place the lights.
Cleaning The Surface
Clean the areas where you will install the LED lights. Dirt and grease can stop the lights from sticking well.
- Wash the car surface with soap and water.
- Use a cloth to dry the area completely.
- Remove any wax or polish with rubbing alcohol.
- Let the surface dry before installing the lights.
Locating Power Sources
Find a good power source to connect your LED lights. The battery or fuse box are common choices.
| Power Source | Pros | Cons |
| Car Battery | Strong power supply | May need extra wiring |
| Fuse Box | Protected circuit | Requires fuse tap |
| 12V Accessory Outlet | Easy access | Limited power |
Planning Light Placement
Decide where to place your LED lights on the car’s exterior. Think about visibility and safety.
- Check car parts that do not block the light.
- Place lights where they look balanced and neat.
- Avoid areas that get very hot or wet.
- Plan wiring routes to keep cables hidden and safe.
Wiring The Led Lights
Installing exterior LED lights on your car needs careful wiring. Proper wiring keeps the lights safe and working well.
Good wiring prevents problems like shorts or blown fuses. It also helps your lights last longer.
Connecting To Power
Connect the LED lights to a power source in your car. The battery is a common choice for power.
Use the positive wire from the LED light to the positive terminal on the battery. Connect the negative wire to a good ground point on the car.
- Disconnect the battery before wiring
- Use wire of the correct thickness
- Make solid connections with terminals or solder
- Check polarity to avoid damage
Using Fuses And Relays
Fuses protect your wiring from too much current. They stop fires and damage if a short happens.
Relays allow the lights to draw power safely. They use a small switch to control a larger current.
- Install a fuse near the battery on the positive wire
- Choose a fuse with the right amperage for your LED lights
- Use a relay to control the lights from a switch
- Connect the relay coil to the switch and ground
Securing Wiring
Secure wiring to prevent it from moving or getting damaged. Loose wires can cause shorts or break.
Use clips, zip ties, or wire looms to hold wires in place. Keep wires away from hot or sharp parts.
- Route wires along existing harnesses or frame
- Avoid bending wires sharply
- Check wiring after installation for tightness
- Cover connections with heat shrink or electrical tape
Mounting The Led Lights
Mounting LED lights on your car requires careful planning. Proper mounting keeps the lights secure and effective. This guide covers key steps to mount exterior LED lights.
Follow these tips to choose the right mounting method, install brackets or adhesives, and adjust the light angles for best results.
Choosing Mounting Methods
Selecting the right mounting method depends on your car and LED light type. Some lights use brackets, while others use adhesive pads. Choose a method that fits your car’s surface and use.
- Use brackets for strong, durable mounting on metal parts.
- Adhesive pads work well on smooth, flat surfaces.
- Magnetic mounts are good for temporary placement.
- Check the mounting method’s weather resistance.
- Consider ease of removal if you plan to move the lights.
Installing Brackets Or Adhesives
Install brackets or adhesives carefully to keep lights secure. Clean the mounting area well before attaching. For brackets, use the right screws or bolts. For adhesives, press firmly and let them set.
| Mounting Type | Tools Needed | Key Tips |
|---|---|---|
| Brackets | Drill, screws, screwdriver | Use rust-proof screws; pre-drill holes if needed |
| Adhesive Pads | Cleaning cloth, adhesive pad | Clean surface; apply pressure for 30 seconds |
| Magnetic Mounts | Magnets (included with light) | Place on clean metal; avoid rough surfaces |
Adjusting Light Angles
Adjusting the light angle helps improve road visibility and reduces glare. Loosen the mounting slightly, tilt the lights, then tighten the mount again. Test the angle at night for best results.
- Point lights slightly downward to avoid blinding others.
- Adjust side lights to cover wide areas.
- Tighten screws or fasteners after adjustment.
- Check angles after driving on rough roads.
Testing And Troubleshooting
After installing exterior LED lights on your car, testing is important. It helps find any problems early.
Troubleshooting guides you to fix common issues quickly. This saves time and effort.
Checking Connections
Start by checking all wire connections. Loose or dirty connections stop lights from working well.
- Inspect connectors for corrosion or dirt
- Make sure plugs fit tightly
- Check for broken wires or damaged insulation
- Test battery terminals for good contact
Identifying Common Issues
Look for simple signs that show common LED light problems. This helps you know what to fix.
| Problem | Cause | Solution |
| Lights do not turn on | Dead battery or blown fuse | Replace battery or fuse |
| Lights flicker | Loose wires or bad connection | Tighten or reconnect wires |
| Lights dim | Weak power supply | Check battery charge and alternator |
| Lights turn on but no glow | Wrong polarity | Reverse wire connections |
Fixing Wiring Problems
Fix wiring problems with simple tools. Use wire strippers and electrical tape for repairs.
- Disconnect power before working on wires
- Cut damaged wire sections cleanly
- Strip wire ends about half an inch
- Use wire connectors or solder joints
- Wrap connections with electrical tape
- Test lights again before final assembly
Maintaining Exterior Led Lights
Exterior LED lights on cars need care to work well and last long. Regular maintenance keeps them bright and safe.
Simple checks and cleaning can prevent problems and save money on repairs.
Regular Cleaning Tips
Keep the LED lights clean to maintain brightness. Dirt and grime reduce light output and can cause damage.
- Use a soft cloth with mild soap and water to wipe the lights.
- Avoid abrasive cleaners that may scratch the surface.
- Dry the lights completely after cleaning to prevent water spots.
- Clean the lights at least once a month or after driving in harsh conditions.
Inspecting For Damage
Check the LED lights often for cracks, moisture, or loose connections. Early detection helps avoid bigger issues.
| Type of Damage | Signs to Look For | Action Needed |
| Cracks | Visible breaks or chips on the lens | Replace the light cover or unit |
| Moisture | Fog inside the light or water drops | Dry and seal the light, check seals |
| Loose Wiring | Lights flicker or do not turn on | Secure connections or replace wiring |
Replacing Faulty Components
Replace parts that no longer work properly to keep the lights safe and efficient.
- Turn off the car and disconnect the battery before starting.
- Remove the damaged LED light or component carefully.
- Install the new part following the car manual instructions.
- Reconnect the battery and test the new light.
- If unsure, ask a professional to help with replacement.

Credit: www.ebay.com
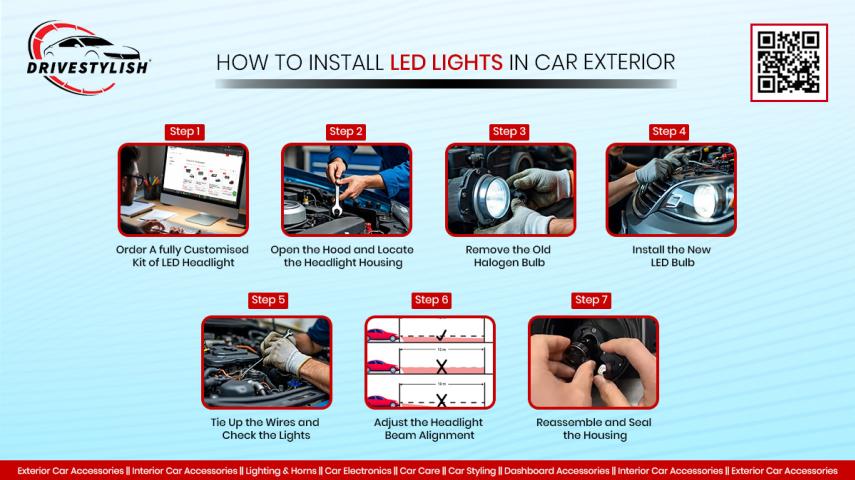
Credit: www.promoteproject.com
Frequently Asked Questions
How Do I Choose The Right Exterior Led Lights For My Car?
Select LED lights based on your car model and lighting needs. Consider brightness, color temperature, and durability. Choose waterproof and energy-efficient options for better performance. Check compatibility with your car’s electrical system to avoid installation issues.
What Tools Are Needed To Install Exterior Led Lights?
You will need screwdrivers, wire strippers, electrical tape, and connectors. A multimeter helps check electrical connections. Having a drill may be necessary for mounting lights. Always use insulated tools to ensure safety during installation.
Can I Install Exterior Led Lights Myself Safely?
Yes, with proper instructions and safety precautions, DIY installation is possible. Disconnect the car battery before starting. Follow the wiring diagram carefully. If unsure, consult a professional to avoid damage or injury.
How Do I Wire Exterior Led Lights To My Car?
Connect the LED light’s positive wire to the car’s positive terminal. Attach the negative wire to a suitable ground point. Use connectors and electrical tape for secure connections. Test the lights before finalizing the installation.
Conclusion
Installing exterior LED lights on your car is simple and rewarding. Follow each step carefully and take your time. Use the right tools to avoid mistakes. Check the connections to ensure safety and proper function. Bright LED lights improve your car’s look and visibility.
Enjoy driving with better lighting and style. Keep your lights clean and well-maintained for long life. Remember, a little effort makes a big difference. Now, you are ready to light up your car with confidence.