
Is your air conditioner struggling to start or making strange noises when it kicks on? You’re not alone, and there’s a simple fix that can save you time and money: installing a hard start kit.
This small device gives your AC a powerful boost at startup, making it run smoother and last longer. If you want to learn how to install a hard start kit on your air conditioner quickly and safely, you’ve come to the right place.
Keep reading, and you’ll discover easy steps to improve your AC’s performance without calling a technician.
Credit: www.amazon.com
Benefits Of Hard Start Kits
Hard start kitshelp the air conditioner’s compressor start faster and easier. This reduces the strain on the motor and saves energy. The compressor uses less power during startup, which leads to better energy efficiency. This can lower your electricity bills.
Using a hard start kit also means the compressor faces less wear and tear. This helps the air conditioner last longer and need fewer repairs. It keeps the system running smoothly and reduces the chance of breakdowns.
- Improved Compressor Startup:Easier and faster compressor start.
- Energy Efficiency Boost:Uses less power at startup.
- Reduced Wear and Tear:Extends the life of the compressor.
Tools And Materials Needed
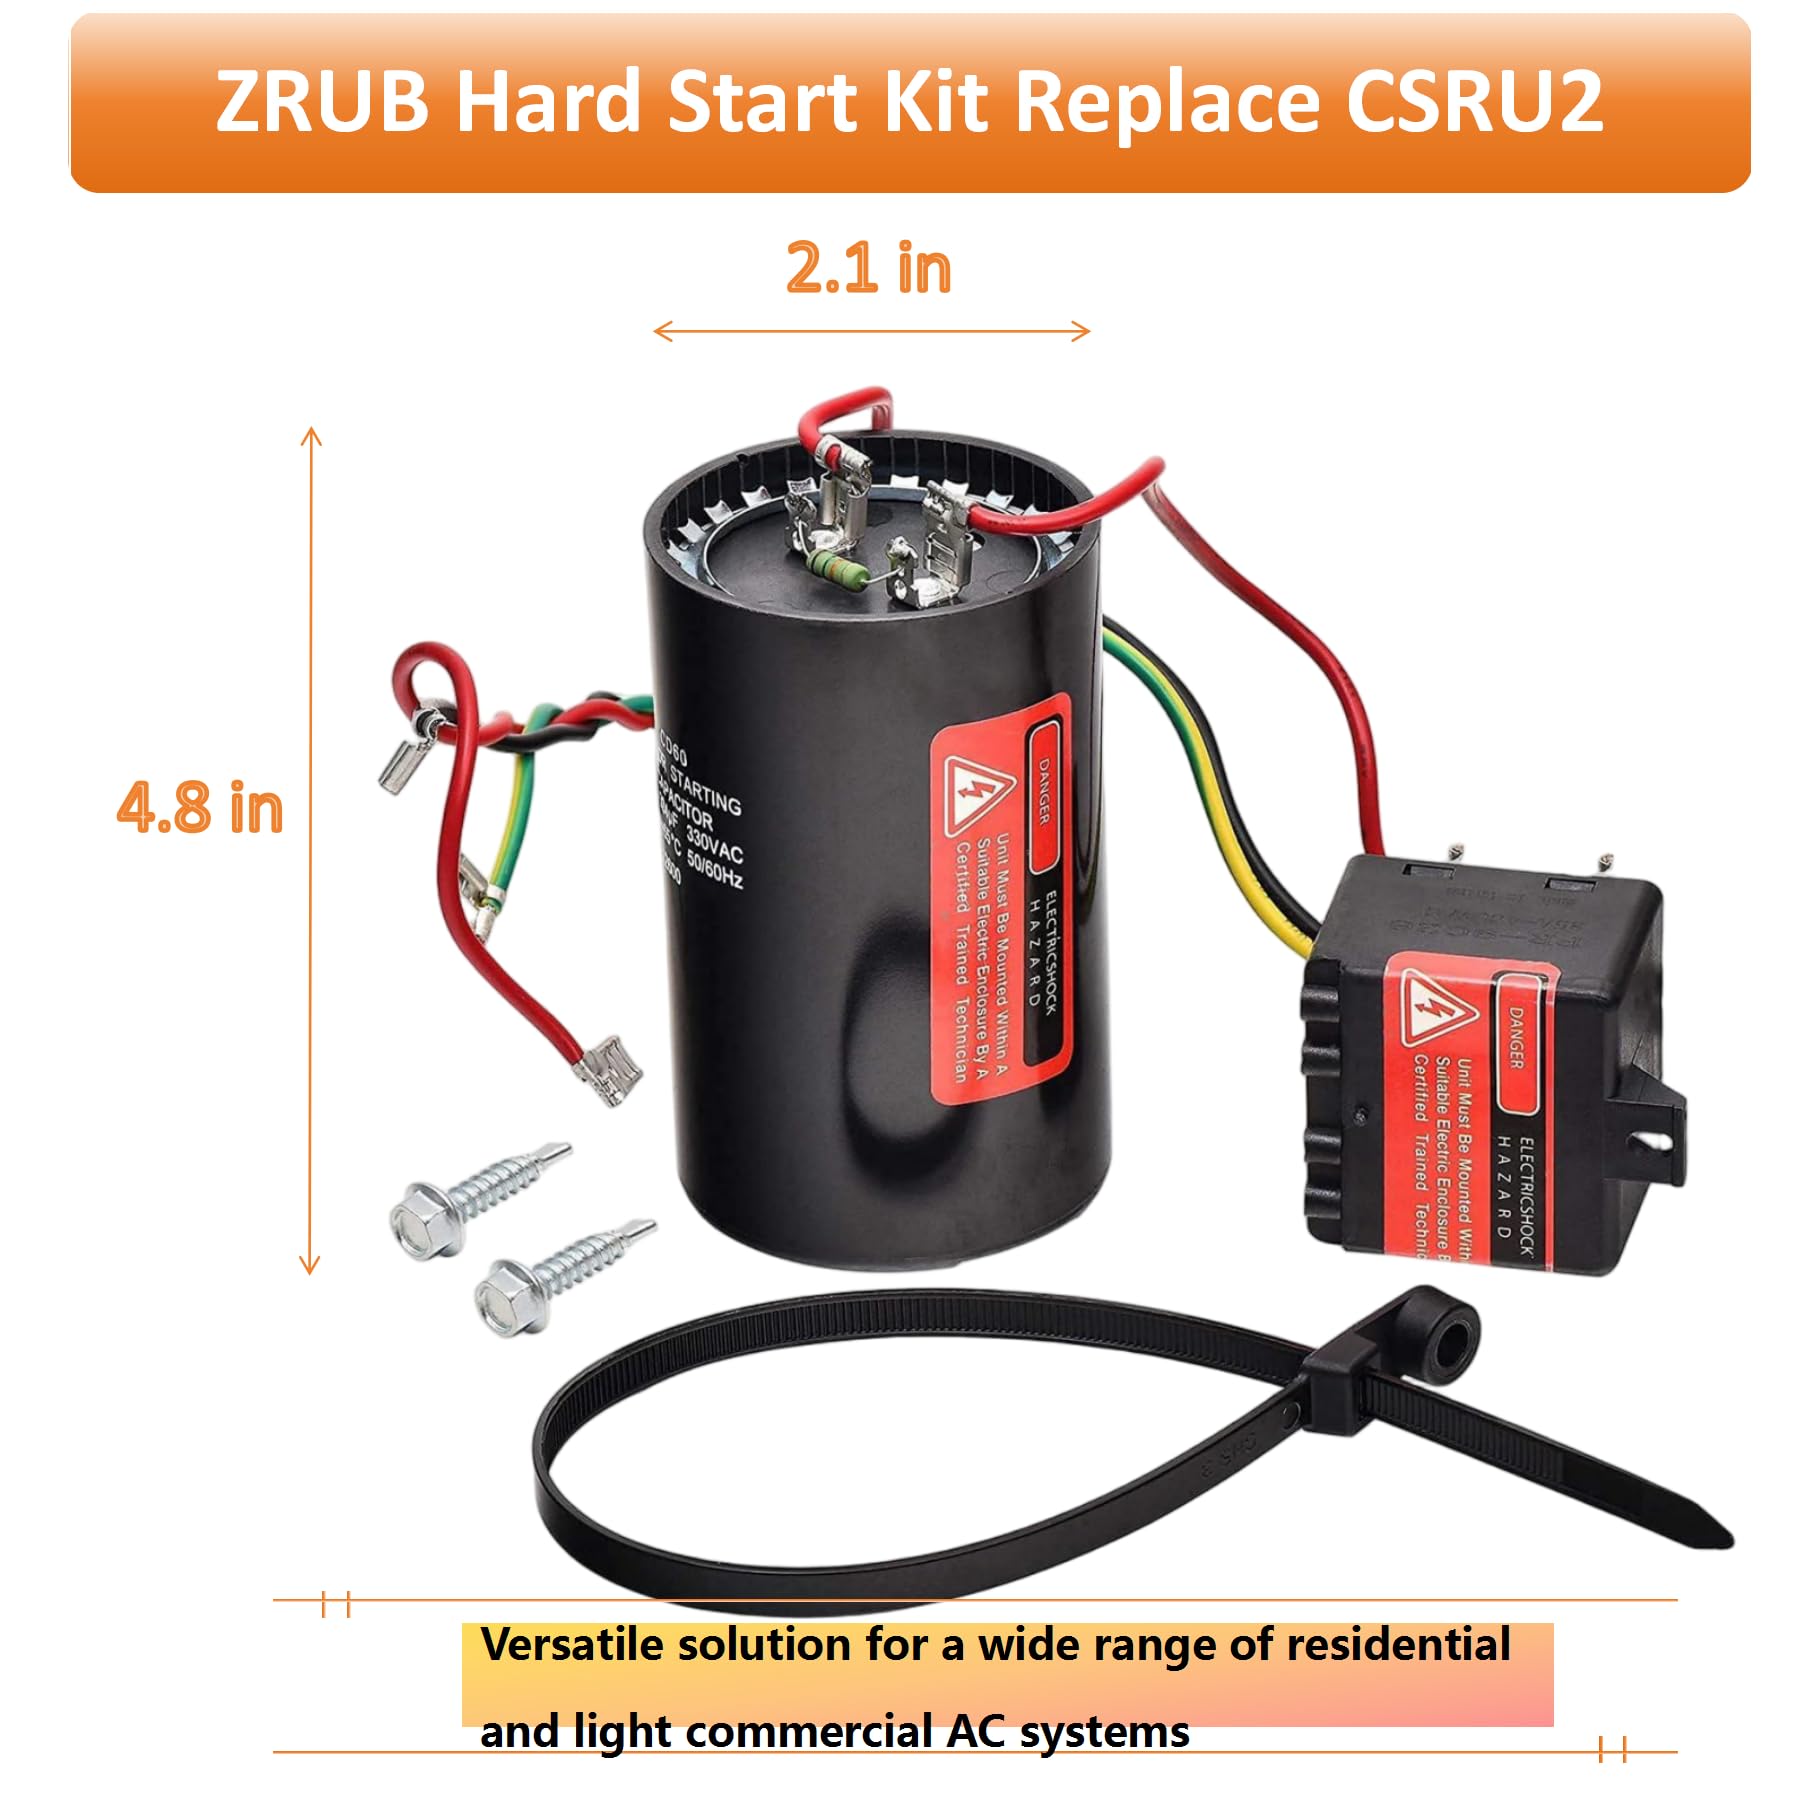
The Hard Start Kit Componentsusually include a start capacitor, a relay, and wiring connectors. These parts help the air conditioner start more easily and reduce stress on the compressor.
Basic Tools Requiredare simple. You will need a screwdriver, wire stripper, and a multimeter to check electrical connections. Also, have electrical tape and pliers ready for secure and safe connections.
Safety Gearis very important. Use insulated gloves to avoid electric shock. Safety goggles protect your eyes from sparks or debris. Always turn off the power before starting any work on the air conditioner.
Preparing The Air Conditioner
Before starting, turn off the powerto the air conditioner. This prevents any electric shock. Check that the unit is completely disconnected from electricity. Use a voltage tester to be sure.
Next, remove the access panel to reach the compressor. This is usually at the back of the unit. Be gentle to avoid damage.
Look for the wiring connectionsnear the compressor. Identify the start capacitor, run capacitor, and common wire. These wires are important for connecting the hard start kit.

Credit: www.reddit.com
Installing The Hard Start Kit
Locate the capacitor in your air conditioner. It usually looks like a small metal cylinder. Identify the terminals labeled “C” (common), “HERM” (hermetically sealed compressor),and “FAN”. Connect the hard start kit’s wires to these terminals. Make sure each wire matches the right terminal to avoid damage.
Secure the hard start kit near the capacitor using zip ties or mounting brackets. Keep it away from any moving parts or electrical wires. This prevents any loose connections or damage during operation.
Check all connections twice. Tighten any loose screws or clips. Confirm wires are connected firmly and correctly. This step ensures the kit works properly and safely.
Testing After Installation
First, turn on the powerto the air conditioner unit. Listen carefully for the compressor startup sound, a low humming or buzzing noise. This sound shows the hard start kit is working properly.
Watch the unit for a few minutes. Make sure the compressor runs smoothly without unusual noises. Check if the air conditioner cools the room as expected. Any strange sounds or failure to start means the kit might need adjustments.
- Power on the unit carefully
- Listen for compressor humming
- Watch for smooth compressor running
- Confirm cooling performance
Troubleshooting Common Issues
No startup improvementoften means the hard start kit is not correctly installed. Check the capacitor wiringand ensure all connections are tight. A loose wire can stop the kit from working.
Electrical problemslike blown fuses or tripped breakers can cause issues. Test the circuit breaker and replace any blown fuses. Also, check for any signs of damaged wiringor burnt connectors.
| Kit Compatibility | What to Check |
|---|---|
| Unit Model | Match the kit with your air conditioner’s model and specs. |
| Voltage | Ensure the kit supports your unit’s voltage (110V, 220V, etc.). |
| Compressor Type | Confirm if the kit suits the compressor (single-phase or three-phase). |
Credit: vernonairconditioning.com
Frequently Asked Questions
What Is A Hard Start Kit For Air Conditioners?
A hard start kit helps your AC compressor start more easily. It reduces startup time and prevents motor damage. This improves efficiency and extends the compressor’s life.
Why Should I Install A Hard Start Kit?
Installing a hard start kit lowers energy use and reduces wear on your AC. It prevents frequent compressor failures and saves repair costs. It also enhances system reliability during power fluctuations.
How Do I Install A Hard Start Kit Safely?
Turn off the AC power before installation. Locate the compressor terminals and connect the kit’s wires as instructed. Secure connections and ensure proper grounding. Always follow manufacturer guidelines or hire a professional.
Can I Install A Hard Start Kit Myself?
Yes, if you have basic electrical skills and tools. Follow the kit instructions carefully to avoid damage or injury. If unsure, it’s safer to hire an HVAC technician to install the kit correctly.
Conclusion
Installing a hard start kit can help your air conditioner start smoothly. It reduces stress on the compressor and saves energy. Follow the steps carefully for safe and proper installation. Check all connections and tighten them well. Test the unit to ensure it runs without issues.
Regular maintenance keeps your AC working longer. This small upgrade can make a big difference in performance. Take your time and work safely for best results.