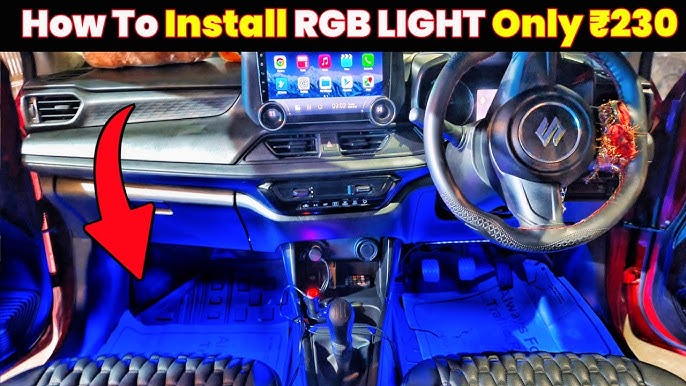
Want to give your car a fresh, modern look that turns heads everywhere you go? Installing LED lights is one of the easiest and most affordable ways to do just that.
But maybe you’re worried it’s complicated or that you’ll make a mistake. Don’t stress—this guide will walk you through every step, so you can confidently light up your ride like a pro. By the end, you’ll not only know how to install LED lights but also how to do it safely and effectively.
Ready to transform your car and stand out on the road? Let’s get started!
Choosing The Right Led Lights
Installing LED lights in your car can improve visibility and style. It is important to select the right type for your vehicle. This guide helps you choose the best LED lights.
Consider your car’s needs and local laws before buying LED lights. This will ensure a safe and proper installation.
Types Of Led Lights For Cars
There are different LED lights for cars. Each type has its own use and brightness level. Choose the one that fits your purpose.
- Headlights: Provide bright light for night driving.
- Fog Lights: Help in foggy or rainy weather.
- Interior Lights: Light up the inside of the car.
- Strip Lights: Used for decoration or accent lighting.
- Brake Lights: Signal when you slow down or stop.
Checking Compatibility With Your Vehicle
Not all LED lights fit every car model. Check your vehicle’s manual for bulb size and power limits. This helps avoid electrical problems.
| Vehicle Part | Common Bulb Size | Power Limit (Watts) |
| Headlights | H11, 9005 | 35W |
| Fog Lights | H8, H11 | 25W |
| Interior Lights | T10, 194 | 5W |
| Brake Lights | 1157, 7443 | 21W |
Legal Considerations And Regulations
Some LED lights may not be legal in your area. Check local laws about color and brightness. Illegal lights can cause fines or accidents.
- Use white or yellow lights for front driving lights.
- Red lights must be used for rear brake and tail lights.
- Avoid blue or flashing lights that mimic emergency vehicles.
- Check if your lights need certification or approval.

Credit: www.youtube.com
Gathering Tools And Materials
Before installing LED lights on your car, you need to gather all necessary tools and materials. Having everything ready makes the installation easier and faster.
This guide will help you collect the essential tools and extra supplies needed for a smooth setup.
Essential Tools Needed
You need some basic tools to install LED lights correctly. These tools help you work safely and achieve good results.
- Screwdrivers (flathead and Phillips)
- Wire cutters and strippers
- Electrical tape
- Multimeter to check voltage
- Drill with bits for mounting
- Heat gun or lighter for heat shrink tubing
- Socket wrench set
Additional Supplies For Installation
Besides tools, you will need some extra supplies. These parts help secure the lights and ensure proper electrical connections.
| Supply | Purpose |
| LED light strips or pods | Main lighting components |
| Wire connectors | Connect wires safely |
| Zip ties | Hold wires in place |
| Fuse holder and fuse | Protect the circuit |
| Switch or remote control | Turn lights on and off |
| Power source cable | Connect to car battery or fuse box |
Preparing Your Vehicle
Installing LED lights on your car needs careful preparation. This helps the lights work well and last long.
Start by getting your vehicle ready. Cleaning and safety checks make the job easier.
Cleaning The Installation Area
Clean the area where you will attach the LED lights. Dirt and dust can stop the lights from sticking properly.
Use a soft cloth and mild cleaner. Wipe the surface until it is dry and shiny.
- Remove dirt, grease, and old adhesive
- Use rubbing alcohol for best cleaning
- Dry the area completely before installing
Disconnecting The Battery For Safety
Always disconnect the car battery before starting the LED light installation. This prevents electrical shocks and short circuits.
Use a wrench to loosen the battery terminals. Remove the negative terminal first, then the positive.
- Wear gloves to protect your hands
- Keep tools away from battery terminals
- Reconnect battery only after installation finishes
Removing Existing Lights
Removing old lights is the first step to installing LED lights on your car. You need to carefully take out the current lights.
This process helps prepare your car for new, brighter LED lights to fit correctly.
Accessing The Light Housing
Start by opening the hood or trunk, depending on the light location. Find the back of the light housing.
Remove any covers or panels blocking the light housing. Use a screwdriver if needed to remove screws.
- Open the hood or trunk carefully
- Locate the light housing behind the light lens
- Remove covers or panels with a screwdriver
- Keep screws and parts safe for reassembly
Removing Old Bulbs Or Fixtures
Once you access the housing, gently twist or pull the bulb socket to remove it. Be careful not to break the bulb.
If the entire fixture needs removal, check for screws or clips holding it in place. Remove them slowly to avoid damage.
- Gently twist or pull the bulb socket out
- Avoid touching the bulb glass with bare hands
- Unscrew or unclip the fixture if needed
- Keep all parts for reference or reuse
Installing The Led Lights
Installing LED lights on your car can improve its look and visibility. This guide will help you with the wiring, securing, and testing of the lights.
Follow each section carefully to make sure the lights work properly and stay in place while driving.
Connecting Wiring Harness
First, locate the wiring harness that comes with your LED lights. This harness connects the lights to your car’s electrical system.
- Disconnect the car battery to avoid shocks.
- Match the wiring harness connectors to the LED lights.
- Use wire strippers to expose wire ends if needed.
- Connect the wires according to the color codes: red for power, black for ground.
- Secure connections with electrical tape or connectors.
- Reconnect the car battery once all wires are connected.
Securing The Led Lights In Place
After wiring, fix the LED lights securely to your car. Loose lights can fall off or cause damage.
| Method | Tools Needed | Notes |
|---|---|---|
| Double-sided tape | Cleaning cloth | Good for smooth surfaces, easy removal |
| Screws and brackets | Drill, screwdriver | Strong hold, requires drilling |
| Zip ties | Scissors | Quick and adjustable, best for wire bundles |
Choose the method that fits your car and lights best. Always clean the surface before attaching the lights.
Testing The Lights
Once installed, test the LED lights to ensure they work well. This step avoids future problems on the road.
- Turn on your car and switch on the LED lights.
- Check if all lights turn on and shine brightly.
- Look for flickering or dim lights as signs of loose wiring.
- Test different modes if your lights have options like flashing or colors.
- If lights do not work, recheck wiring connections and fuses.

Credit: www.youtube.com
Final Adjustments And Troubleshooting
After installing LED lights on your car, you need to make final adjustments. This ensures the lights work well and look good. Troubleshooting helps fix common problems quickly.
Pay close attention to the light angles and how the lights sit on your car. If anything looks off, small changes can make a big difference.
Adjusting Light Angle And Position
Set the LED lights so they point in the right direction. Proper angle and position improve visibility and keep other drivers safe.
- Loosen mounting screws slightly to move the lights.
- Adjust the angle by tilting the lights up or down.
- Check how the lights look from different distances.
- Tighten screws after you find the best position.
- Test the lights at night to ensure proper brightness and angle.
Common Issues And Fixes
Some issues might occur after installation. Knowing how to fix them saves time and effort.
| Issue | Cause | Fix |
|---|---|---|
| Lights not turning on | Loose wiring or blown fuse | Check connections and replace fuse |
| Lights flickering | Poor ground connection | Secure ground wire firmly |
| Lights too bright or dim | Wrong angle or voltage issue | Adjust angle or check voltage supply |
| Lights water damaged | Poor seal or exposure to rain | Seal properly and avoid water contact |
Maintaining Your Led Lights
Proper care helps your LED car lights last longer. Clean and check them often to keep them bright.
Regular maintenance also prevents damage and keeps your car safe on the road.
Cleaning And Care Tips
Keep LED lights clean to avoid dimming. Dirt and grime reduce their shine and effectiveness.
- Use a soft cloth to wipe the lights gently.
- Apply mild soap and water for tough dirt.
- Avoid harsh chemicals that can damage the lens.
- Check for moisture inside the light housing.
- Dry the lights completely after cleaning.
When To Replace Led Lights
LED lights last long but will need replacement if they fail or dim significantly.
| Sign | What It Means |
| Light flickers | Possible loose wiring or faulty LED |
| Light is dimmer | LED nearing end of life |
| Light does not turn on | LED or circuit failure |

Credit: www.youtube.com
Frequently Asked Questions
What Tools Are Needed To Install Led Lights In A Car?
You need LED strips, a power source, connectors, wire cutters, electrical tape, and a screwdriver. Proper tools ensure secure installation and prevent damage.
Can I Install Led Lights Without Professional Help?
Yes, with basic knowledge and proper tools, you can install LED lights yourself. Follow instructions carefully and test connections before finalizing.
Where Is The Best Place To Install Led Lights In A Car?
Common spots include under the dashboard, seats, or along the footwell. Choose locations that enhance visibility and do not distract the driver.
How Do I Connect Led Lights To The Car’s Power Supply?
Connect LED wires to the car battery or fuse box using proper connectors. Use a fuse to protect the circuit from overload.
Conclusion
Installing LED lights on your car is simple and rewarding. Follow each step carefully for the best results. Use the right tools and take safety precautions. Double-check your connections to avoid problems later. Bright, efficient lighting can improve your car’s look and visibility.
Enjoy your new lights and drive safely. Keep learning and upgrading your car with confidence.