
Are you thinking about installing a microwave oven over your range but aren’t sure where to start? You’re in the right place.
Installing an over-the-range microwave can save space, add convenience, and give your kitchen a sleek, modern look. But the process can seem tricky if you’ve never done it before. Don’t worry—this guide will walk you through every step clearly and simply, so you can tackle the job confidently.
By the end, you’ll have your microwave up and running, making cooking easier and your kitchen more efficient. Let’s get started!
Choose The Right Microwave
Installing a microwave oven over your range can be a game changer in your kitchen, freeing up counter space and streamlining your cooking area. But, it’s crucial to choose the right microwave for your specific needs and space. Let’s dive into the key considerations to make the best choice.
Measure Your Space
Before you even think about which microwave to buy, grab your measuring tape. Measure the width, depth, and height of the space where the microwave will go. This ensures the microwave will fit perfectly and not obstruct any cabinet doors or other appliances.
Remember, even a small miscalculation can lead to a lot of hassle. Double-check your measurements and jot them down for reference when shopping.
Check Venting Options
Microwave ovens over the range come with different venting options, such as external venting and recirculating venting. External venting is often preferred as it expels air outside, but it requires a duct system. Recirculating venting uses filters to clean the air, which is easier to install but may not be as effective.
Consider what your kitchen setup can accommodate. If you’re unsure, consult with a professional to avoid costly mistakes. Ask yourself, do you need strong venting for heavy cooking?
Consider Power Requirements
Microwaves vary in power, usually measured in watts. Higher wattage means faster cooking times, but it also requires more electrical power. Check your kitchen’s electrical system to ensure it can handle the microwave’s power requirements.
Avoid overloading your circuit. If you’re not sure about your electrical system’s capacity, a quick call to an electrician could save you from future headaches.
Choosing the right microwave can make a world of difference in your kitchen experience. By taking these factors into account, you’ll ensure a seamless installation and efficient performance. So, are you ready to make the smart choice for your kitchen?

Credit: www.youtube.com
Gather Necessary Tools
Gathering the right tools is the first step to install a microwave oven over the range safely and efficiently. Having everything ready helps avoid interruptions and keeps the work smooth. Prepare your workspace and check each tool before you start. This saves time and reduces stress during installation.
List Essential Tools
- Drill with screwdriver bits
- Stud finder
- Measuring tape
- Level
- Socket wrench
- Phillips and flathead screwdrivers
- Adjustable wrench
- Utility knife
- Wire stripper
- Step ladder
Safety Gear To Use
- Safety glasses to protect your eyes
- Work gloves to protect your hands
- Dust mask for breathing safety
- Closed-toe shoes to protect feet
- Hearing protection if using loud tools
Prepare The Installation Area
Preparing the installation area is a key step before mounting your microwave oven over the range. This step ensures safety and proper fit. Clear and ready space makes the installation smooth and efficient.
Remove Existing Range Hood
Start by turning off the power to the range hood. Use a screwdriver to remove screws holding the hood. Carefully detach the hood from the wall or cabinet. Disconnect any vent ducts and electrical wiring. Set the old hood aside safely.
Inspect Wall And Cabinets
Check the wall for any damage or weak spots. Look for holes or cracks that need repair. Measure the space to confirm it fits the microwave size. Examine cabinets for sturdy support and proper clearance. Repair or reinforce areas if needed to hold the microwave securely.
Ensure Electrical Supply
Locate the electrical outlet near the installation area. Verify it is grounded and meets microwave power needs. Check the circuit breaker to avoid overload. If no outlet exists, plan to install one with a licensed electrician. Proper power supply prevents hazards and ensures microwave works well.
Mark Mounting Points
Marking the mounting points accurately is crucial for a secure and level installation of your microwave oven over the range. If you miss the correct spots, the microwave might not sit properly or could even fall, causing damage or injury. Taking the time to mark the right points saves you from redoing the work and ensures a sturdy setup.
Locate Studs
Start by finding the wall studs behind your backsplash. These wooden supports will hold the microwave’s weight better than drywall alone. Use a stud finder to scan the area where your microwave will hang.
If you don’t have a stud finder, gently tap the wall and listen for a solid sound or look for electrical outlets attached to studs as a clue. Mark each stud location with a pencil, so you know exactly where to drill later.
Measure And Mark Drill Holes
Next, measure the mounting bracket on your microwave carefully. Use a tape measure to find the exact distance between the mounting holes on the bracket. This step is critical because even a small misalignment can make the microwave hang crooked.
Transfer these measurements onto the wall, aligning them with the studs you marked earlier. Use a level to ensure your marks are perfectly horizontal. This helps the microwave sit straight and look professional once installed.
Double-check your marks before drilling. Imagine how frustrating it would be to drill a hole in the wrong spot and have to patch the wall. Taking a few extra minutes here makes a big difference.
Install Mounting Bracket
Installing the mounting bracket is key to securing your over-the-range microwave. This step ensures the microwave stays firmly attached to the wall. A well-installed bracket supports the weight and keeps the microwave stable during use. Take your time to align and secure the bracket correctly for safety and functionality.
Align Bracket With Marks
Start by matching the bracket holes with the marks on the wall. These marks show exactly where the bracket should go. Use a level to keep the bracket straight. Check that it sits flush against the wall surface. Proper alignment prevents future problems with mounting the microwave.
Secure Bracket To Wall
Use screws and anchors to fasten the bracket to the wall. Choose screws strong enough to hold the microwave’s weight. Drill pilot holes at the marked spots for easier screw insertion. Tighten screws firmly but avoid over-tightening. Confirm the bracket is steady and does not wobble before moving on.
Connect Electrical Wiring
Connecting the electrical wiring for your over-the-range microwave is a crucial task that ensures safety and proper function. This step requires careful attention to detail and adherence to safety protocols. Let’s walk through the essential actions you need to take to make reliable and secure electrical connections.
Turn Off Power
Before you touch any wires, make sure to turn off the power at the circuit breaker. This simple action can prevent serious electrical shocks or injury. You might think the microwave is off, but the circuit can still carry live current, so double-check with a voltage tester to be sure.
Have you ever experienced a small shock while working on home projects? Avoid that by always confirming the power is completely off. It’s a small step that protects you and keeps your installation smooth and stress-free.
Make Proper Connections
Once the power is off, connect the wires by matching the colors: black to black (hot), white to white (neutral), and green or bare copper to ground. Using wire nuts, twist the wires together tightly to ensure a solid connection that won’t loosen over time.
Don’t rush this part. Loose connections can cause the microwave to malfunction or even create a fire hazard. If you’re unsure about the wire type or connections, consider consulting the microwave’s manual or an electrician.
- Use electrical tape around wire nuts for extra security.
- Double-check connections before pushing wires back into the junction box.
- Keep wires organized to avoid pinching when mounting the microwave.
Have you ever had a device stop working after installation? Chances are, the wiring wasn’t done correctly. Taking your time here saves you from that frustration.
Mount The Microwave
Mounting the microwave over the range is a key step in installation. It requires care and steady hands. Proper placement ensures safety and functionality. Follow the guide below to position and secure your microwave correctly.
Lift Microwave Into Position
Enlist help to lift the microwave safely. Hold the microwave firmly on both sides. Align it with the mounting bracket on the wall. Make sure the microwave sits level and flush with the cabinet above. Avoid tilting to prevent damage or injury. Keep it steady while preparing to secure.
Secure Microwave To Cabinet
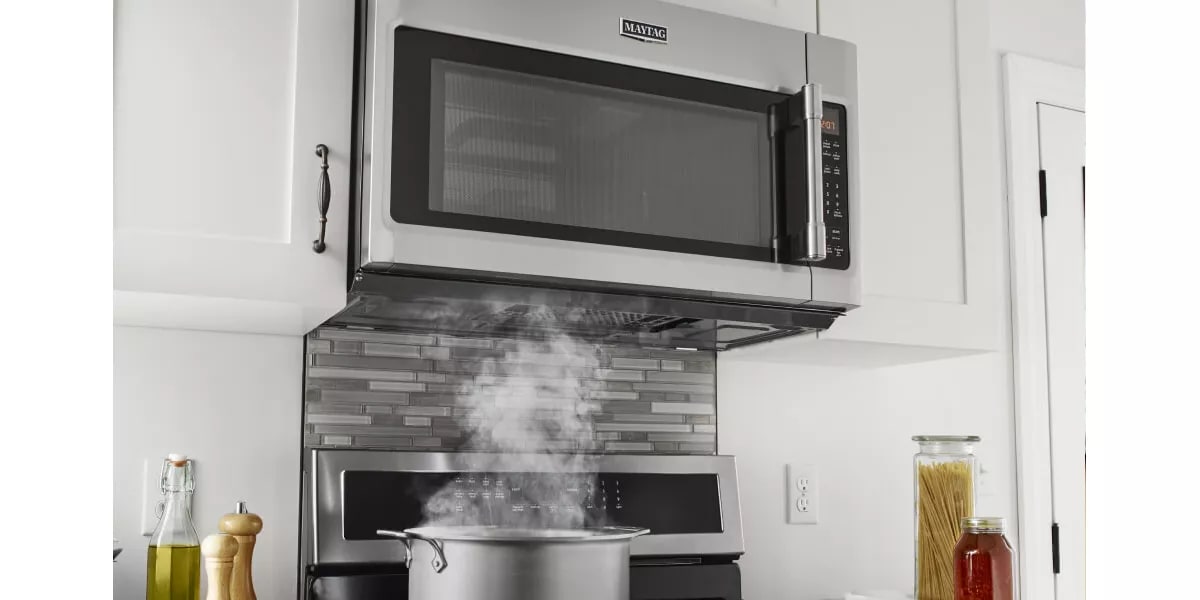
Locate the mounting screws inside the cabinet. Use a drill or screwdriver to fasten the microwave to the cabinet. Tighten screws evenly to avoid gaps or looseness. Check that the microwave does not move or wobble. Confirm all screws are tight but do not overtighten. This step keeps the microwave stable during use.
Credit: www.maytag.com
Test The Microwave
Testing your microwave oven after installation is crucial to ensure it works safely and effectively. This step helps you catch any issues before you start using it daily. Let’s focus on two key areas: powering it on and checking its functions, and inspecting the ventilation.
Power On And Check Functions
First, plug in your microwave and turn it on. Does the display light up clearly? If not, you might have a power connection problem that needs fixing.
Next, test the basic functions. Try heating a cup of water for one minute. Is the timer working accurately? Does the microwave heat evenly?
Don’t forget to test the exhaust fan and light. These are essential for over-the-range models to clear smoke and provide visibility while cooking. Are they operating smoothly without unusual noises?
Inspect Ventilation
The ventilation system keeps your kitchen air fresh and your microwave running safely. Check if the vent fan is pulling air properly by holding a small piece of tissue near the vent while the fan runs. Does it stick to the vent, indicating strong airflow?
Look for any blockages in the vent path. Obstructions can cause overheating and reduce efficiency. Also, listen for any rattling sounds that might mean loose parts or poor installation.
Have you noticed any steam or odors lingering longer than expected after cooking? That might signal a ventilation problem to address before it worsens.
Troubleshooting Tips
Installing a microwave oven over the range can sometimes lead to small problems. These issues may slow down the process or affect the microwave’s performance. Knowing how to fix common problems helps save time and stress. This section shares useful troubleshooting tips to guide you through typical challenges.
Common Installation Issues
- The microwave does not fit properly in the space.
- Mounting screws don’t align with wall studs.
- The microwave feels loose or unstable after mounting.
- Electrical outlet is missing or too far from the microwave.
- The vent does not connect correctly to the outside or recirculate properly.
- Power does not turn on after installation.
- Buttons or controls are unresponsive.
Check each problem carefully. Tighten screws or adjust the mounting bracket if needed. Use a stud finder to locate proper support points. Ensure the power cable is plugged in and the circuit breaker is on. Verify the vent system matches your microwave’s requirements.
When To Call A Professional
- Electrical wiring is complex or unsafe.
- Wall structure requires reinforcement.
- Vent installation needs special tools or cutting.
- The microwave is very heavy and hard to lift safely.
- Multiple issues occur at once and you feel unsure.
Hiring an expert can prevent damage and ensure safety. A professional installer has experience with wiring, wall support, and venting. This helps avoid future problems and keeps your kitchen safe. Don’t hesitate to get help if installation feels beyond your skills.

Credit: danmarcappliance.com
Frequently Asked Questions
How Do I Safely Install An Over-the-range Microwave?
First, turn off power and follow the manufacturer’s instructions. Use a stud finder to secure the mounting bracket to wall studs. Ensure proper ventilation and electrical connections. Double-check alignment before tightening screws for a secure fit.
What Tools Are Needed For Microwave Over-range Installation?
Common tools include a drill, screwdriver, level, measuring tape, stud finder, and wrench. You may also need wire strippers and a voltage tester for electrical work. Having these tools ensures a smooth and safe installation process.
Can I Install An Over-the-range Microwave Myself?
Yes, if you have basic DIY skills and follow the instructions. Proper safety precautions and electrical knowledge are important. Otherwise, consider hiring a professional to avoid damage or injury.
How High Should I Mount An Over-the-range Microwave?
Mount the microwave 13 to 16 inches above the cooktop surface. This height ensures proper ventilation and safe clearance. Check the microwave’s manual for specific height recommendations.
Conclusion
Installing a microwave oven over the range is simple with clear steps. Measure carefully and follow the instructions closely. Secure the unit properly for safety and performance. Check the electrical connections before turning it on. Enjoy the extra space and convenience it brings to your kitchen.
Taking your time helps avoid mistakes and keeps everything safe. Now, you can cook and heat food more easily every day.