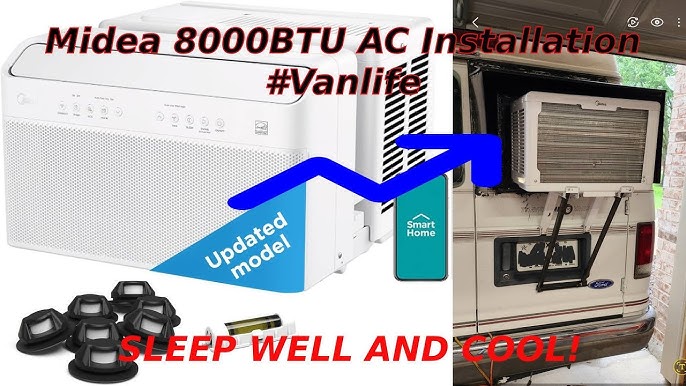
Are you ready to enjoy cool, refreshing air right in your home? Installing your Midea air conditioner might seem tricky, but with the right steps, you can do it yourself quickly and safely.
Imagine beating the heat without waiting for a technician or paying extra fees. In this guide, you’ll discover simple, clear instructions that make installation easy—even if you’re not a pro. Keep reading, and you’ll have your Midea air conditioner up and running in no time, turning your space into a comfortable oasis.
Preparing For Installation
Installing a Midea air conditioner needs good preparation. This helps the unit work well and last longer.
Before you start, check the place, tools, and electrical setup. This guide will help you get ready.
Choosing The Right Location
Pick a spot with good air flow and little direct sunlight. Avoid places near heat sources.
The indoor unit should be high on the wall and away from obstructions. The outdoor unit needs space to release heat.
- Indoor unit: 7 feet from the floor
- Keep 6 inches free around the indoor unit
- Outdoor unit: place on flat, stable ground
- Keep 12 inches free around the outdoor unit
Gathering Necessary Tools
Have all tools ready before you begin. This saves time and makes the job easier.
- Screwdrivers (Phillips and flathead)
- Drill with bits
- Measuring tape
- Pipe cutter
- Wrench set
- Level tool
- Vacuum pump (for refrigerant lines)
- Electrical tester
Checking Electrical Requirements
Make sure your home’s electrical system matches the air conditioner’s needs. This keeps it safe and works well.
Check the voltage and amperage ratings on the unit label. Use a dedicated circuit and proper wiring.
- Voltage: usually 220-240V for split ACs
- Use a circuit breaker matching the AC’s power rating
- Wire gauge must support the current load
- Ground the unit properly to avoid shocks
Unpacking And Inspecting The Unit
Before installing your Midea air conditioner, carefully unpack the unit. This step helps you avoid damage and find all parts.
Inspecting the air conditioner ensures it is safe and ready for installation. Take your time to check everything.
Checking For Damages
Look over the outside of the unit for dents, cracks, or scratches. These can affect how well the air conditioner works.
Check the packaging for signs of rough handling. If you find damage, report it to the seller before installing.
- Inspect the front, back, and sides of the unit
- Look inside the vents for any blockages or breaks
- Check the power cord for cuts or frays
- Make sure the remote control is not damaged
Identifying Components
After unpacking, find all parts that come with the air conditioner. Knowing each piece helps during installation.
The package usually includes the indoor unit, outdoor unit, remote control, and installation accessories. Check each part carefully.
- Indoor unit with front panel and air filter
- Outdoor unit with compressor and fan
- Remote control with batteries
- Installation kit (mounting brackets, screws, and pipes)
- User manual and warranty card
Installing The Indoor Unit
Installing the indoor unit of your Midea air conditioner needs care. Follow the steps to mount the unit safely and correctly.
This guide covers mounting the bracket, connecting the drain pipe, and securing the indoor unit.
Mounting The Bracket
Start by choosing a strong wall free of obstacles. Use a level to make sure the bracket is straight.
- Mark the drill holes using the bracket as a template.
- Drill holes at the marked points.
- Insert wall plugs for extra support.
- Fix the bracket to the wall using screws.
- Check that the bracket is firmly attached and level.
Connecting The Drain Pipe
The drain pipe removes water from the indoor unit. Connect it carefully to avoid leaks.
| Step | Action | Tip |
|---|---|---|
| 1 | Attach the drain pipe to the unit’s outlet. | Push firmly to prevent water leaks. |
| 2 | Secure the pipe with a clamp. | Use a clamp to keep the pipe stable. |
| 3 | Check the pipe slope. | Ensure it slopes downward for water flow. |
| 4 | Run the pipe outside or to a drain. | Avoid sharp bends or kinks. |
Securing The Indoor Unit
After mounting the bracket and connecting the drain pipe, hang the indoor unit carefully.
- Lift the indoor unit and hook it onto the mounted bracket.
- Make sure it clicks or locks in place.
- Check that the unit is stable and does not wobble.
- Connect electrical wires as per the manual.
- Seal around the pipe entry with foam or putty to prevent air leaks.
Installing The Outdoor Unit
Installing the outdoor unit of your Midea air conditioner is important for the system’s performance. This part removes heat from your home, so it needs the right place and setup.
This guide helps you install the outdoor unit correctly. Follow the steps to keep it safe and working well.
Selecting A Suitable Spot
Choose a flat and stable place for the outdoor unit. It should be close to the indoor unit to avoid long pipe runs.
The spot must be easy to access for maintenance and repair. Avoid places with direct sunlight or heavy dust.
- Flat and level ground or wall bracket
- Near the indoor unit for short pipe length
- Protected from strong sunlight and rain
- Accessible for cleaning and service
- Away from noise-sensitive areas
Mounting The Unit
Use a solid base or wall brackets to mount the unit. It should not vibrate or move after installation.
Secure the unit tightly with bolts. Make sure the unit is level to avoid water buildup.
- Use a concrete pad or metal frame
- Install anti-vibration pads under the unit
- Tighten all bolts and screws firmly
- Check the unit is level with a spirit level
Ensuring Proper Ventilation
Good airflow is vital for the outdoor unit to work well. Keep the area around it clear of obstacles.
Leave enough space on all sides for air to flow freely. This helps the unit cool efficiently and last longer.
- At least 12 inches (30 cm) clearance on sides
- At least 24 inches (60 cm) space above the unit
- Keep plants, walls, and furniture away
- Do not block the fan or air vents
Connecting Refrigerant Lines
Connecting refrigerant lines is an important part of installing a Midea air conditioner. Proper connection ensures the system works efficiently and safely.
This guide covers handling refrigerant pipes, flare connection techniques, and leak testing procedures.
Handling Refrigerant Pipes
Handle refrigerant pipes carefully to avoid damage. Bent or kinked pipes can cause leaks and reduce cooling efficiency.
- Wear gloves to protect your hands and keep pipes clean.
- Use a pipe bender for smooth curves without kinks.
- Keep pipe ends covered until ready to connect.
- Inspect pipes for dents or cracks before installation.
Flare Connection Techniques
Flare connections create a tight seal between refrigerant pipes and the air conditioner. Correct flaring prevents leaks and ensures system reliability.
- Cut the pipe squarely using a pipe cutter.
- Slide the flare nut onto the pipe before flaring.
- Use a flaring tool to form a 45-degree flare at the pipe end.
- Check the flare for smoothness and uniformity.
- Align and tighten the flare nut by hand, then use a wrench to secure.
Leak Testing Procedures
Leak testing ensures no refrigerant escapes from the connections. It protects the system and environment.
| Method | Steps | Purpose |
|---|---|---|
| Soap Solution | Apply soap water to connections; watch for bubbles. | Detects small leaks visually. |
| Pressure Test | Pressurize system with nitrogen; check for pressure drop. | Confirms system integrity under pressure. |
| Electronic Leak Detector | Scan connections with detector; listen or watch for alerts. | Finds leaks quickly and precisely. |

Credit: www.reddit.com
Electrical Wiring Setup
Setting up electrical wiring is key for your Midea air conditioner. This guide covers the wiring steps clearly and safely.
Follow each part carefully to connect power and control wires. Safety checks are also important before turning on the unit.
Running Power Cables
Use the right gauge cable for the air conditioner’s power needs. Run the cables from the main electrical panel to the installation site.
- Turn off the main power before starting.
- Use conduit to protect cables inside walls.
- Keep cables away from water sources.
- Secure cables with clamps every 3 feet.
- Follow local electrical codes strictly.
Connecting Control Wires
Control wires link the indoor unit to the outdoor compressor. These wires send signals to operate the air conditioner.
| Wire Color | Function |
| Red | Power Supply |
| Blue | Thermostat Signal |
| Yellow | Compressor Control |
| Green | Ground Wire |
Match each wire to the correct terminal. Tighten screws to ensure a solid connection.
Safety Checks
Before powering the unit, check all wiring connections. Look for loose wires or damaged insulation.
- Verify the power cable is properly grounded.
- Ensure control wires are connected to the right terminals.
- Inspect cable clamps and conduit for secure fitting.
- Use a voltage tester to confirm no live wires are exposed.
- Turn on power and test the air conditioner functions.
Final Checks And Testing
After installing your Midea air conditioner, it is important to do final checks. These steps ensure your unit works well and lasts longer.
This guide covers vacuuming the system, powering on the unit, and checking its cooling performance.
Vacuuming The System
Vacuuming removes air and moisture from the system. This prevents damage and improves cooling.
Use a vacuum pump connected to the service port. Run it for at least 30 minutes to clear out air and moisture.
- Connect vacuum pump to the service valve
- Turn on the pump and let it run
- Check the pressure gauge for a deep vacuum
- Close valves to keep the vacuum
Powering On The Unit
Before powering on, confirm all electrical connections are tight and secure. Ensure the unit is grounded properly.
Switch on the air conditioner using the remote or control panel. Listen for any unusual noises during startup.
- Check circuit breaker and fuses
- Turn on the unit with remote or panel
- Watch for error lights or sounds
- Stop if any problems occur
Verifying Cooling Performance
Test the air conditioner by measuring the temperature difference between the air intake and output.
The unit should cool the air effectively within minutes. Check the airflow and listen for steady operation.
- Measure room air temperature near intake
- Measure air temperature at the outlet
- Look for at least 15°F (8°C) drop in temperature
- Ensure steady airflow without interruptions

Credit: www.reddit.com
Troubleshooting Common Issues
Installing a Midea air conditioner can sometimes lead to small problems. Troubleshooting helps fix these issues fast.
This guide covers common installation errors, electrical problems, and tips to keep your unit running well.
Addressing Installation Errors
Improper installation can cause your AC to work poorly or stop working. Check the unit’s placement and connections first.
- Ensure the unit is level to avoid water leaks.
- Check that the mounting bracket is securely fastened.
- Verify the refrigerant lines are properly connected and sealed.
- Make sure the drain pipe is clear and correctly angled.
- Confirm the outdoor unit has enough clearance for airflow.
Handling Electrical Problems
Electrical issues can prevent your AC from turning on or cause it to stop suddenly. Inspect wiring and power sources carefully.
| Problem | Cause | Solution |
| Unit does not start | Power outage or blown fuse | Check circuit breaker and replace fuse |
| Frequent shut-offs | Loose wiring or poor connection | Tighten connections and inspect wiring |
| Remote control not working | Dead batteries or interference | Replace batteries and clear obstructions |
| Unit trips breaker | Short circuit or overload | Call a technician for detailed inspection |
Maintaining Optimal Functionality
Regular care helps your Midea air conditioner run efficiently and last longer.
Follow these tips to keep your AC in good shape:
- Clean or replace filters every month during use.
- Keep outdoor unit free from debris and dust.
- Schedule annual professional maintenance checks.
- Use a surge protector to guard against power spikes.
- Monitor for unusual noises or smells and act quickly.

Credit: www.youtube.com
Frequently Asked Questions
How Do I Prepare For Midea Ac Installation?
First, choose a suitable location with proper ventilation. Clear the area for easy access. Ensure a power source is nearby. Read the user manual for specific requirements. Gather necessary tools before starting the installation process.
What Tools Are Needed To Install Midea Ac?
You will need a drill, screwdriver, level, tape measure, wrench, and vacuum pump. These tools help mount the unit, connect pipes, and ensure proper sealing. Having the right tools ensures a smooth and efficient installation process.
Can I Install Midea Ac Without Professional Help?
Yes, if you have basic DIY skills and follow the manual carefully. However, complex tasks like electrical wiring and refrigerant handling require experts. Improper installation can lead to poor performance or damage. Consider professional help for safety and warranty.
How Long Does Midea Ac Installation Take?
Typically, installation takes 2 to 4 hours depending on unit type and room conditions. Proper setup, testing, and adjustments are essential. Rushing the process may cause issues later. Allocate enough time for a thorough installation.
Conclusion
Installing a Midea air conditioner can be simple and effective. Follow each step carefully. Ensure all tools are ready before starting. Double-check connections for safety. After installation, test the unit. Make sure it’s working properly. Enjoy a cooler, more comfortable home.
Regular maintenance keeps it efficient. Clean filters and check for issues. Doing this saves money on repairs. Remember, a well-installed unit lasts longer. Keep your environment cool and pleasant. With these steps, you’ll be ready to enjoy your air conditioner.
Stay cool and comfortable all year round.