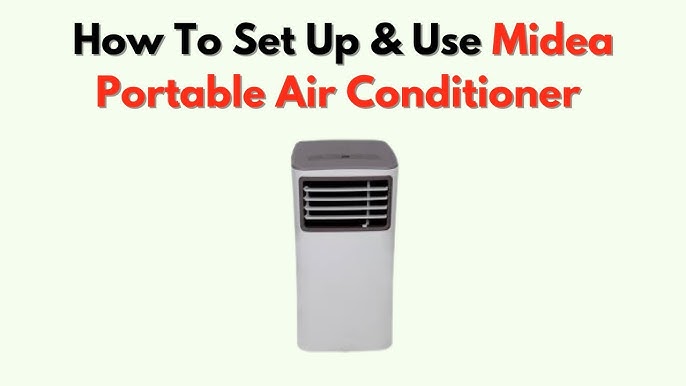
Are you ready to beat the heat with your new Midea Portable Air Conditioner? Imagine the comfort of a perfectly cooled room while the summer sun blazes outside.
Installing your Midea unit doesn’t have to be a daunting task. In fact, it’s simpler than you might think! By following a few straightforward steps, you can enjoy a refreshing environment in no time. This guide will walk you through each step, ensuring you avoid any common pitfalls.
Get ready to transform your space into a cool oasis and experience the satisfaction of a job well done. Dive in and discover how easy it is to set up your new cooling companion!
Preparing For Installation
Installing your Midea portable air conditioner starts with good preparation. Taking time to organize helps the process go smoothly.
Below are key steps to get ready before you begin the installation.
Check Package Contents
Open the box and verify all parts are included. This ensures you have everything needed to set up the air conditioner.
- Portable air conditioner unit
- Exhaust hose and window kit
- Remote control with batteries
- User manual and installation guide
- Drainage pipe (if included)
Choose The Installation Location
Select a spot near a window for venting hot air outside. The location should have a power outlet nearby.
| Consideration | Details |
| Window type | Sliding or vertical windows work best |
| Space | Leave 20 inches clearance around the unit |
| Floor | Place on a flat, stable surface |
| Power | Use a grounded outlet close to the unit |
Gather Required Tools
Collect tools before starting. Having them ready saves time and avoids interruptions.
- Screwdriver (Phillips and flathead)
- Measuring tape
- Utility knife or scissors
- Drill with bits (optional for some window kits)
- Level (optional for accurate positioning)
Setting Up The Exhaust Hose
Setting up the exhaust hose is key to making your Midea portable air conditioner work well. It helps remove hot air from the room.
Follow these simple steps to attach the hose and install the window kit for proper venting.
Attach Hose To Air Conditioner
Start by connecting one end of the exhaust hose to the back of the air conditioner. This part usually has a round outlet.
Turn the hose connector clockwise until it locks firmly in place. Make sure it is tight to avoid air leaks.
Install Window Kit
Next, prepare the window kit to fit your window size. Most kits have adjustable panels that slide to match your window.
Place the window kit securely in the window frame, closing the window onto it. This blocks outside air from entering.
- Measure your window opening
- Adjust the window kit panels to fit
- Insert the kit into the window frame
- Close the window to hold the kit in place
Connect Hose To Window Kit
Attach the free end of the exhaust hose to the round opening on the window kit. This lets hot air escape outside.
Turn the hose connector clockwise until it clicks. Check that the hose is secure and not bent or twisted.
Positioning The Unit
Proper positioning of your Midea portable air conditioner helps it work well. It also keeps your room cool and comfortable.
Place the unit where it can vent air outside and get fresh air from the room.
Place Unit Near Window
Put the air conditioner close to a window. This allows the hot air to vent outside easily.
Keep the unit on a flat surface near the window. Avoid placing it in corners or behind furniture.
Ensure Proper Ventilation
Make sure the room has good airflow. The unit needs fresh air to cool the space well.
Do not block the air intake or exhaust vents. Keep curtains and furniture away from the unit.
- Clear space around the unit at least 20 inches
- Keep vents free of dust and dirt
- Open doors or windows if the room feels stuffy
Secure Window Kit
Use the window kit that comes with the air conditioner. It seals the window opening around the exhaust hose.
Install the kit tightly to stop hot air from coming back inside. This helps the unit cool better.
- Fit the kit in the window gap securely
- Check for gaps and seal them with tape if needed
- Adjust the kit length to match your window size

Credit: www.reddit.com
Powering On And Testing
After installing your Midea portable air conditioner, you need to power it on and test its functions. This ensures the unit works properly and cools your space effectively.
Follow these simple steps to plug in the unit, turn it on, and check for airflow and cooling performance.
Plug In The Unit
Find a nearby power outlet that matches the unit’s plug type. Make sure the outlet is grounded and not overloaded with other devices.
- Use the power cord that came with the air conditioner.
- Do not use extension cords or adapters.
- Plug the unit firmly into the outlet.
- Check that the power switch on the unit is off before plugging in.
Turn On Air Conditioner
Press the power button on the control panel or use the remote control to switch the air conditioner on. Wait a few moments for the unit to start running.
| Control Panel Button | Remote Control Button |
| Power | Power |
| Mode (Cooling) | Mode (Cooling) |
| Fan Speed | Fan Speed |
Check For Airflow And Cooling
Once the unit is on, verify the airflow and cooling function. Feel the air coming out of the front vents and check the temperature.
- Place your hand near the air outlet to sense airflow.
- Adjust fan speed settings to see changes in airflow.
- Wait 5 to 10 minutes for the air to cool down.
- If the air is not cool, check the settings or vent installation.
Maintenance Tips
Keeping your Midea portable air conditioner in good shape helps it work well. Regular care stops problems before they start.
Follow these tips to clean and store your unit properly. This keeps the air fresh and the machine running longer.
Clean Air Filter Regularly
Cleaning the air filter stops dust from blocking airflow. This helps the unit cool better and saves energy.
- Turn off and unplug the unit before cleaning.
- Remove the air filter from the back or side panel.
- Use a vacuum or wash the filter with warm water and mild soap.
- Let the filter dry completely before putting it back.
- Clean the filter every two weeks during heavy use.
Drain Water Tank
The water tank collects moisture from the air. Empty it to prevent leaks and mold growth.
| Action | Details |
| Locate Drain Plug | Find the plug on the back or side of the unit. |
| Place a Container | Put a bucket or tray under the drain to catch water. |
| Open Plug | Turn or pull out the plug carefully. |
| Drain Water | Let all water flow out, then close the plug tightly. |
| Frequency | Drain tank weekly or when full. |
Store Unit Properly
Store your air conditioner in a dry place during cold months. This protects it from damage.
- Turn off and unplug the unit.
- Drain any water from the tank and hose.
- Clean the air filter and dry it completely.
- Wrap the power cord neatly.
- Cover the unit with a cloth or plastic to keep dust out.
- Store in a cool, dry area away from direct sunlight.

Credit: www.youtube.com

Credit: www.youtube.com
Frequently Asked Questions
How Do I Install A Midea Portable Air Conditioner?
To install, unpack the unit and attach the window kit. Connect the exhaust hose to the unit and window kit. Secure the window kit in your window frame. Plug in the air conditioner and set the controls to start cooling.
What Tools Are Needed For Installation?
You typically need a screwdriver and measuring tape. Some kits include mounting brackets and screws. Check the package contents before starting. Having a level can help ensure proper window kit alignment.
Can I Install It Without A Window?
No, a window or sliding door is required. The exhaust hose must vent hot air outside. Without proper ventilation, the unit won’t cool effectively. Consider a venting kit compatible with your window type.
How Do I Seal The Window For The Exhaust Hose?
Use the included foam seal or weather stripping. This prevents hot air from entering your room. Make sure the seal is tight around the window kit. Proper sealing improves cooling efficiency and energy savings.
Conclusion
Installing your Midea portable air conditioner is simple with clear steps. Connect the exhaust hose to the window kit and the unit. Secure the window kit tightly to avoid air leaks. Plug in the unit and turn it on to check cooling.
Clean filters regularly for better performance. Follow these tips to enjoy cool air all summer. Keep your space comfortable with proper setup and care. Enjoy the easy installation and cool relief from your Midea unit.