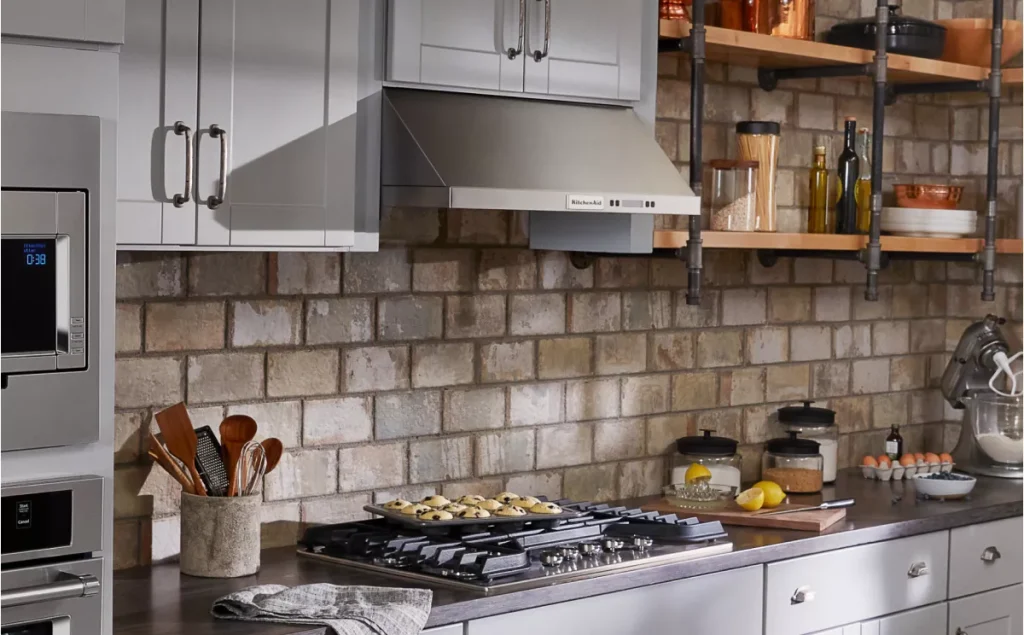
Are you tired of cooking smells lingering in your kitchen? Installing an under cabinet range hood can be the perfect solution to keep your space fresh and clean.
But if you’re worried it’s too complicated or expensive, don’t be. This guide will walk you through every simple step to install your range hood quickly and confidently. By the end, you’ll have a powerful ventilation system working for you—making your kitchen more comfortable and your cooking experience better.
Ready to get started? Let’s dive in!

Credit: www.amazon.ca
Tools And Materials Needed
Basic tools like a drill, screwdriver, and measuring tape are essential. Materials include the range hood, mounting brackets, screws, and ductwork for proper installation.
Installing an under cabinet range hood can seem daunting, but having the right tools and materials can make the process straightforward and enjoyable. You might be surprised how a little preparation can turn a potentially overwhelming task into a satisfying DIY project. So, what exactly do you need to get started?Tools Needed
- Drill and Drill Bits:A power drill is essential for making holes in the cabinet to mount the hood. Make sure you have a variety of drill bits to suit different screw sizes.
- Screwdriver:A Phillips or flathead screwdriver will be handy for securing the range hood in place.
- Measuring Tape:Accurate measurements are key to a successful installation. A measuring tape helps ensure your range hood fits perfectly.
- Level:To ensure your range hood is straight and aligned, a level is crucial.
- Pencil:Use a pencil to mark where you need to drill or cut. It’s always better to mark first before making any permanent changes.
Materials Needed
- Range Hood:Choose a hood that matches your kitchen’s style and size. This is the centerpiece of your installation.
- Mounting Screws:These will secure the range hood to the cabinet. Make sure they’re the right size for your cabinet material.
- Electrical Wire:If your range hood requires hardwiring, you’ll need the appropriate electrical wire.
- Duct Tape:If your hood is ducted, duct tape can help secure and seal the venting.
- Wire Connectors:Essential for safely connecting electrical wires.
Choosing The Right Range Hood
Choosing the right range hood is important for kitchen comfort and safety. It removes smoke, odors, and grease while cooking. The perfect hood fits your kitchen size and style. It also matches your cooking habits and ventilation needs. Consider several factors before buying to make a smart choice.
Measuring Your Space
Measure the width of your cooking area. The range hood should be at least as wide as your stove. Check the height from the cooktop to the bottom of cabinets. This distance affects hood performance and safety. Also, note the depth of your cabinets. It helps to find a hood that fits well without sticking out too much.
Types Of Range Hoods
- Under Cabinet:Fits under kitchen cabinets. Saves space and looks neat.
- Wall-Mounted:Attaches to the wall above the stove. Offers strong ventilation.
- Island:Hangs from the ceiling over an island cooktop. Stylish and effective.
- Downdraft:Pulls air down through vents near the cooktop. Good for kitchens without overhead space.
Ventilation Options
Decide on ducted or ductless ventilation. Ducted hoods vent air outside the home. They remove heat and odors effectively. Ductless hoods use filters to clean the air. They recirculate air back into the kitchen. This option suits places without easy duct installation. Choose filters that are easy to clean and replace.
Preparing The Installation Area
Preparing the installation area is a crucial part of fitting your under cabinet range hood correctly. Taking the time to set up the space properly can save you from headaches during the actual installation. It also ensures your range hood works safely and efficiently from day one.
Turning Off Power
Before you start any work, make sure to turn off the power to the area where you will be installing the range hood. This step is essential to avoid electric shock or damage to the wiring.
You can switch off the circuit breaker that controls the kitchen power or unplug any nearby appliances if possible. Double-check by testing the power with a voltage tester to confirm everything is safe.
Clearing The Cabinet Space
Clear out the cabinet and countertop area under where the range hood will go. Remove all items to give yourself plenty of room to work comfortably.
Check the cabinet for any obstructions like pipes, wires, or vents. If you find any, plan how you will work around them or move them if necessary.
Marking Mounting Points
Use a pencil and a measuring tape to mark where you will mount the range hood. Accurate marking makes the installation smoother and ensures the hood sits level and securely.
Measure the height recommended in your range hood’s manual and mark the spots for screws or brackets carefully. Double-check your marks before drilling to avoid mistakes that can be hard to fix.
Installing The Mounting Bracket
Installing the mounting bracket is a key part of fitting your under cabinet range hood. This step holds the hood securely and ensures it functions well. Proper placement and strong attachment are essential. The bracket must line up with the wall studs for solid support.
Focus on finding the right spots on the wall and attaching the bracket tightly. This process helps avoid damage and keeps the hood stable during use.
Finding Studs
Use a stud finder to locate the wooden studs behind the wall. Move the tool slowly across the area where the bracket will go. Mark the edges of each stud with a pencil. You want to find at least two studs within the bracket’s width.
Studs are usually spaced 16 or 24 inches apart. If you cannot find studs, consider using heavy-duty wall anchors. But studs provide the best hold for your range hood.
Securing The Bracket
Hold the mounting bracket against the wall, aligning it with the stud marks. Use a level to make sure it is perfectly horizontal. Mark the screw holes on the wall with a pencil through the bracket holes.
Drill pilot holes into the marked spots to make screwing easier. Attach the bracket using strong wood screws that reach into the studs. Tighten the screws firmly but avoid over-tightening to prevent damage.
Double-check the bracket’s stability by giving it a gentle shake. It should feel solid and not move. This ensures your range hood will hang safely and work properly.
Wiring The Range Hood
Wiring your under cabinet range hood is a crucial part of the installation process. It connects your appliance to power, ensuring it operates safely and efficiently. Handling the wiring carefully can prevent electrical hazards and keep your kitchen running smoothly.
Connecting Electrical Wires
Start by turning off the power at the circuit breaker to avoid any shocks. Open the hood’s wiring compartment, usually located on the top or side. Identify the wires: typically, black or red is the live wire, white is neutral, and green or bare copper is ground.
Match each wire from the hood to the corresponding wire in your home’s electrical box. Use wire nuts to twist the connections securely. Don’t forget to wrap electrical tape around the wire nuts for extra safety and a solid hold.
If your wires don’t match colors, check the hood’s manual or use a voltage tester to confirm. Have you ever encountered a setup that didn’t follow the usual color codes? It’s always best to double-check before proceeding.
Ensuring Safety
Double-check that all connections are tight and no bare wire is exposed. Loose connections can cause sparks or shorts, which are dangerous. Ensure the grounding wire is properly attached to prevent electrical shocks.
After wiring, close the compartment cover securely to protect the connections. Restore power and test the hood’s fan and light functions. If something doesn’t work, turn off the power immediately and recheck your wiring.
Investing time in proper wiring saves you headaches later. Would you rather fix a wiring issue now or face a kitchen emergency at midnight? Taking the extra step ensures your range hood works safely for years.
Mounting The Range Hood
Mounting the range hood is a key step that transforms your kitchen setup. It requires careful handling and precise alignment to ensure the hood works efficiently and looks great. Let’s break down how to lift, align, and secure your under cabinet range hood properly.
Lifting And Aligning
Before lifting, double-check that the mounting bracket is firmly attached to the cabinet or wall. This bracket will support the entire weight of the hood, so it must be secure.
Ask a friend to help you lift the hood carefully. Holding it steady, align the hood’s mounting slots with the bracket hooks or screws.
Take your time to make sure the hood sits flush against the cabinet bottom. Misalignment can cause air leaks or vibration noise later on.
Securing To Bracket
Once aligned, it’s time to fasten the hood to the bracket. Use the screws provided with the range hood and tighten them firmly but avoid overtightening.
Check the hood’s stability by gently shaking it. If it feels loose, re-tighten the screws or adjust the bracket position.
Have you noticed any gaps between the hood and cabinet? Seal those with a thin bead of silicone caulk to prevent grease and steam from escaping.
Connecting The Vent
Connecting the vent is a crucial step in installing your under cabinet range hood. This part ensures that smoke, odors, and grease are efficiently carried out of your kitchen. Proper vent connection not only improves the hood’s performance but also keeps your kitchen cleaner and safer.
Attaching Ductwork
Start by selecting ductwork that fits your vent size and kitchen layout. Rigid metal ducts work best for smooth airflow, but flexible ducts can fit tight spaces. Make sure the duct runs straight and short to avoid airflow restrictions.
Attach the duct to the range hood’s vent outlet using screws or metal clamps. Secure the connection firmly to prevent any movement or leaks later on. If your duct has a slip joint, slide the pieces together tightly before fastening.
Have you checked if your duct path avoids obstacles like wall studs or electrical wires? Planning the route carefully can save you from unexpected repairs and improve vent efficiency.
Sealing Connections
Once the ductwork is attached, sealing the connections is essential to prevent air leaks. Use high-quality aluminum foil tape designed for ducts to wrap all joints tightly. Avoid using regular duct tape, as it may lose adhesion over time.
Apply the tape smoothly, covering every seam and overlap. This keeps the vent airtight and boosts your range hood’s suction power. You might also consider adding a bead of silicone caulk around the edges for extra sealing, especially where the duct meets the wall or vent cap.
Think about how even small leaks can reduce your hood’s performance and increase energy waste. Taking the time to seal connections properly pays off in cleaner air and lower utility bills.

Credit: prolinerangehoods.com
Testing The Range Hood
Testing your under cabinet range hood after installation is key to making sure it works efficiently and safely. This step confirms that both the power and the mechanical parts are functioning correctly before you start cooking with it. Taking a few extra minutes here can prevent bigger issues later on.
Powering On
First, connect your range hood to the power supply. If it has a switch, turn it on and watch for any signs of life. You should see indicator lights or hear a soft hum, depending on your model.
If nothing happens, double-check the circuit breaker or fuse box. Sometimes the problem is as simple as a tripped breaker. Also, ensure the hood’s power cord is securely plugged in or the hardwire connections are tight.
Checking Fan And Lights
Next, test the fan at all speed settings. Listen carefully for unusual noises like rattling or grinding, which can signal loose parts or motor issues. The airflow should feel strong and steady, not weak or inconsistent.
Turn on the hood lights and observe their brightness. Flickering or dim lights often mean faulty bulbs or wiring problems. Replace any bulbs that don’t meet the standard brightness or check wiring if the problem persists.
Have you noticed any strange smells or sounds during the test? These can indicate electrical problems or poor ventilation, which need fixing before regular use. Your range hood should operate quietly and effectively to keep your kitchen air fresh and clean.
Maintenance Tips
Proper maintenance keeps your under cabinet range hood working well. It also extends its life and improves air quality in your kitchen. Regular care is simple and takes little time. Focus on key tasks to avoid buildup and damage.
Cleaning Filters
Filters trap grease and dust from cooking fumes. Dirty filters reduce airflow and cause odors. Clean them every month or more often if you cook a lot. Most filters are easy to remove and wash.
- Use warm water and mild soap to soak filters.
- Scrub gently with a soft brush to remove grease.
- Rinse thoroughly and let filters dry before reinstalling.
- Replace charcoal filters every 3 to 6 months, if applicable.
Regular Inspections
Check your range hood regularly for any problems. Look for loose screws, worn parts, or strange noises. Inspect the fan blades and motor for dust and grease buildup. Clean these parts carefully to prevent damage.
- Test the lights and replace bulbs as needed.
- Ensure the hood is securely mounted under the cabinet.
- Listen for unusual sounds when the fan runs.
- Clean the exterior surface with a soft cloth and mild cleaner.

Credit: www.create-enjoy.com
Frequently Asked Questions
How Do I Install An Under Cabinet Range Hood Safely?
To install safely, first turn off the power supply. Use a stud finder to locate wall studs for secure mounting. Follow manufacturer instructions carefully and use proper tools. Ensure proper ventilation and electrical connections to avoid hazards.
What Tools Are Needed For Under Cabinet Range Hood Installation?
You will need a drill, screwdriver, measuring tape, level, stud finder, wire stripper, and mounting hardware. Having these tools ready makes the installation easier and ensures precise placement and secure attachment.
How High Should I Mount An Under Cabinet Range Hood?
Mount the range hood 20 to 24 inches above the cooktop surface. This height ensures optimal smoke and odor capture without obstructing cooking space.
Can I Install An Under Cabinet Range Hood Myself?
Yes, if you have basic DIY skills and tools, you can install it. Follow the manual carefully, ensure power is off, and check local codes. For complex wiring or ventilation, consider professional help.
Conclusion
Installing an under cabinet range hood can improve kitchen air quality. Follow the steps carefully to ensure safe and proper setup. Measure and mark before drilling holes. Secure the hood tightly to avoid any accidents. Connect the vent and electrical parts with care.
Test the hood to confirm it works well. Regular cleaning keeps it running smoothly. Enjoy cooking with less smoke and odors. Taking time for proper installation pays off. Your kitchen will feel fresher and more comfortable. Simple tasks, big benefits.