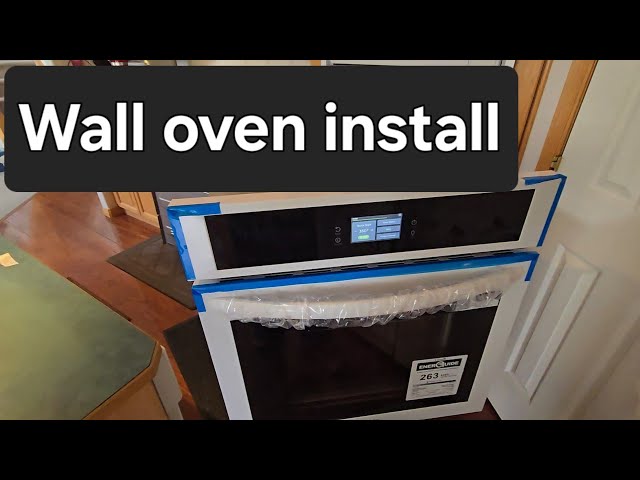
Are you ready to upgrade your kitchen with a sleek wall oven but unsure where to start? Installing a wall oven might seem tricky, but with the right steps, you can do it yourself and save money.
Imagine having a modern cooking space that fits perfectly into your kitchen, making meal prep faster and more enjoyable. In this guide, you’ll discover simple, clear instructions that make the installation process easy to follow. Keep reading, and by the end, you’ll feel confident taking on this project and transforming your kitchen with your own hands.
Credit: www.artisanwestappliance.com
Tools And Materials Needed
Installing a wall oven requires specific tools and materials. These help you complete the job safely and correctly.
Gather all tools and materials before starting the installation. This saves time and avoids interruptions.
Measuring Tape
A measuring tape helps you check the space for the oven. Accurate measurements avoid fitting problems.
Measure the height, width, and depth of the wall opening. Compare these with the oven’s dimensions.
Screwdrivers
You need screwdrivers to remove or attach screws during installation. Both flathead and Phillips types are useful.
Use the right screwdriver for each screw to avoid damage. Keep them handy as you work.
Drill And Drill Bits
A drill helps make holes for mounting the oven. Use drill bits that fit the screws and wall material.
- Choose bits for wood, drywall, or masonry as needed
- Drill pilot holes for easier screw insertion
- Use safety glasses when drilling
Level Tool
A level ensures the oven sits straight in the wall. A crooked oven can affect performance and looks.
Place the level on top and sides of the oven during installation. Adjust until the bubble centers.
Electrical Tester
Use an electrical tester to check power at the installation site. This ensures safety before wiring the oven.
Test the wires to confirm there is no current before connecting the oven. Always follow safety rules.
Mounting Brackets And Screws
Mounting brackets hold the oven securely in place. Use the screws that come with the oven or recommended types.
Check that brackets fit your wall type and oven size. Secure brackets tightly to avoid movement.
Wall Oven Unit
Choose the correct wall oven for your kitchen space. Read the manual before installation for special requirements.
Handle the oven carefully to avoid damage. Keep packaging until installation is complete.
Safety Gear
Wear safety gear like gloves and goggles to protect yourself during installation. This prevents injuries.
- Use gloves to protect your hands from sharp edges
- Wear goggles to guard your eyes from dust and debris
- Use a dust mask if needed
Choosing The Right Wall Oven
Installing a wall oven is a great way to save kitchen space and add style. Picking the right oven means measuring well and knowing your options.
This guide helps you choose a wall oven that fits your kitchen and needs.
Measuring Your Space
Measure the height, width, and depth of the wall space where you want the oven. Make sure to leave room for ventilation and proper installation.
- Use a tape measure for accuracy
- Check for electrical or gas connections nearby
- Account for any surrounding cabinets or appliances
- Note the height that is comfortable for you
Types Of Wall Ovens
Wall ovens come in different styles. Choose one that fits your cooking habits and kitchen design.
| Type | Description | Best For |
| Single Wall Oven | One cooking chamber | Small kitchens, basic cooking |
| Double Wall Oven | Two cooking chambers | Large families, frequent cooking |
| Convection Oven | Uses fans for even heat | Baking and roasting evenly |
| Combination Oven | Combines convection and microwave | Quick cooking and baking |
Energy Efficiency Considerations
Choose an energy-efficient oven to save electricity and lower bills. Look for ovens with good energy ratings.
- Check the Energy Star label
- Choose convection ovens to cook faster
- Use ovens with good insulation
- Consider the size that fits your cooking needs
Preparing The Installation Area
Installing a wall oven needs careful preparation. The area must be ready before you start.
This guide covers key steps to prepare the space for your new wall oven.
Removing The Old Oven
First, turn off the power to the oven at the breaker box. Safety is very important.
Next, disconnect the oven from the wall. Carefully remove screws holding it in place.
- Unplug the oven or disconnect wiring
- Remove trim or panels if needed
- Pull the oven out slowly to avoid damage
Checking Electrical And Ventilation Requirements
Check that your kitchen has the right power supply for the new oven. Wall ovens need specific voltage.
Ventilation is important to keep the oven working safely. Make sure vents are clear and properly placed.
- Confirm voltage and amperage match oven specs
- Inspect wiring for any damage or wear
- Ensure vents are not blocked or covered
- Plan for proper air flow around the oven
Ensuring Proper Wall Support
The wall must support the oven’s weight safely. Check the wall structure before installation.
Reinforce the wall if needed with extra studs or braces. This keeps the oven secure and stable.
- Measure the oven’s weight and size
- Inspect wall studs for strength and spacing
- Add support if the wall is weak or hollow
- Use a level to ensure even mounting surface
Wiring And Electrical Setup
Installing a wall oven requires careful attention to wiring and electrical setup. Proper connections ensure safe and efficient oven operation. Follow each step carefully to avoid electrical hazards.
This guide covers turning off power, connecting wires, and testing the electrical setup. Each part is important for a safe installation.
Turning Off Power Safely
Before working on any electrical wiring, always switch off the power at the circuit breaker. This prevents shocks and accidents during installation.
- Locate the correct circuit breaker for the wall oven.
- Turn off the breaker completely to cut power.
- Use a voltage tester to confirm no electricity is flowing.
- Keep the breaker off until all wiring is finished and tested.
Connecting Electrical Wires
Connect the wall oven wires to the home wiring carefully. Match wire colors and secure all connections tightly.
| Wire Color | Purpose | Connection Tip |
| Black | Hot (live) wire | Connect to oven’s black wire |
| Red | Second hot wire (for 240V ovens) | Connect to oven’s red wire |
| White | Neutral wire | Connect to oven’s white wire |
| Green or Bare Copper | Ground wire | Connect to oven’s green wire or grounding screw |
Use wire nuts to secure each connection. Wrap wires neatly to avoid strain. Check that no bare wire is exposed.
Testing Electrical Connections
After wiring, test the connections before fully installing the oven. This ensures safe and correct operation.
- Turn the power back on at the circuit breaker.
- Use a voltage tester to verify power at the oven’s wiring box.
- Turn the oven on and check that it heats properly.
- If the oven does not work, turn off power and recheck all connections.
- When tests pass, finish the oven installation as instructed by the manufacturer.
Mounting The Wall Oven
Installing a wall oven requires careful attention to detail. Follow these steps to ensure a secure fit.
Mounting a wall oven involves positioning, securing, and adjusting the appliance properly. Let’s go through each step.
Positioning The Oven
Find the ideal spot for your wall oven. Make sure it aligns with your kitchen layout.
Check that there is enough space for ventilation. This helps in maintaining the appliance’s efficiency.
- Measure the wall space accurately
- Ensure easy access to power outlets
- Keep the oven away from flammable materials
Securing The Oven To The Wall
Use brackets to attach the oven securely. This prevents any movement during use.
Check that the brackets are tight and stable. This ensures the oven stays in place.
- Locate studs in the wall for a stronger hold
- Use screws that are the correct size for your oven model
- Double-check all connections for safety
Adjusting For A Perfect Fit
After securing, adjust the oven to fit perfectly. Make sure the oven door opens without hitting anything.
Check that the oven is level. This is important for even cooking.
- Use a level tool to check alignment
- Adjust the feet if necessary
- Test the door for smooth operation

Credit: www.youtube.com
Final Checks And Testing
After installing your wall oven, it is important to perform final checks. This ensures your oven works safely and correctly.
Testing helps you find any problems before regular use. Follow these steps for a smooth start.
Powering On The Oven
First, connect the oven to the power supply. Make sure the circuit breaker is on and the oven is plugged in correctly.
Turn on the oven using the control panel. Check if the display lights up and the oven responds to commands.
Running Initial Tests
Run a short heating test to check if the oven heats evenly. Set it to a low temperature and watch for any unusual smells or sounds.
Test all functions like bake, broil, and timer. Confirm that the oven turns off when the timer ends.
- Set oven to 350°F (175°C) for 15 minutes
- Listen for any strange noises
- Check if the oven heats up and stays warm
- Try different cooking modes
- Use the timer and see if it stops heating
Troubleshooting Common Issues
If the oven does not turn on, check the power connection and circuit breaker. Make sure the fuse is not blown.
If the oven heats unevenly or not at all, check the heating elements for damage. Reset the oven by unplugging it for a few minutes.
- Oven won’t start: Check power and breaker
- Display is blank: Verify the power cord is plugged in
- Uneven heating: Inspect heating elements
- Oven smells strange: Run the oven empty for a few minutes
- Timer not working: Reset the oven’s control panel
Safety Tips And Maintenance
Installing a wall oven requires careful attention to safety and maintenance. Proper care ensures your oven works efficiently and lasts longer.
Follow these guidelines to keep your wall oven in top condition and avoid common hazards.
Regular Cleaning
Regular cleaning prevents buildup and keeps your oven functioning well. A clean oven also cooks food more evenly.
- Remove racks and clean them separately.
- Use a soft cloth to wipe the interior.
- Avoid harsh chemicals; use a mild detergent.
Avoiding Electrical Hazards
Electrical safety is crucial when installing or maintaining your wall oven. Always ensure the power is off before working on the oven.
When To Call A Professional
Sometimes, professional help is necessary. Know when to call an expert to prevent further damage or risk.
| Issue | Professional Needed |
| Strange noises | Yes |
| Temperature issues | Yes |
| Electrical smell | Yes |
Credit: www.whirlpool.com
Frequently Asked Questions
How Do I Prepare The Wall For Oven Installation?
First, measure the oven space accurately. Ensure proper electrical wiring and ventilation. Remove any obstacles or old appliances. Check wall studs for secure mounting. Follow manufacturer’s guidelines for safety and compatibility.
What Tools Are Needed To Install A Wall Oven?
You’ll need a drill, screwdriver, level, measuring tape, wire stripper, and wrench. Safety gear like gloves and goggles is also essential. Having all tools ready ensures a smooth and safe installation process.
Can I Install A Wall Oven Myself Safely?
Yes, if you have basic electrical and carpentry skills. Always turn off power before starting. Follow the oven’s installation instructions closely. If unsure, consult a professional to avoid hazards and damage.
How Do I Connect The Electrical Wiring For A Wall Oven?
Ensure the power supply matches oven specifications. Use a dedicated circuit breaker for safety. Connect wires following color codes and manufacturer instructions. Secure all connections tightly and test before use.
Conclusion
Installing a wall oven can seem tricky at first. Take your time and follow each step carefully. Make sure to measure the space before you start. Double-check all electrical connections for safety. Ask for help if you feel unsure. A well-installed oven adds style and convenience to your kitchen.
Enjoy cooking with your new wall oven soon!