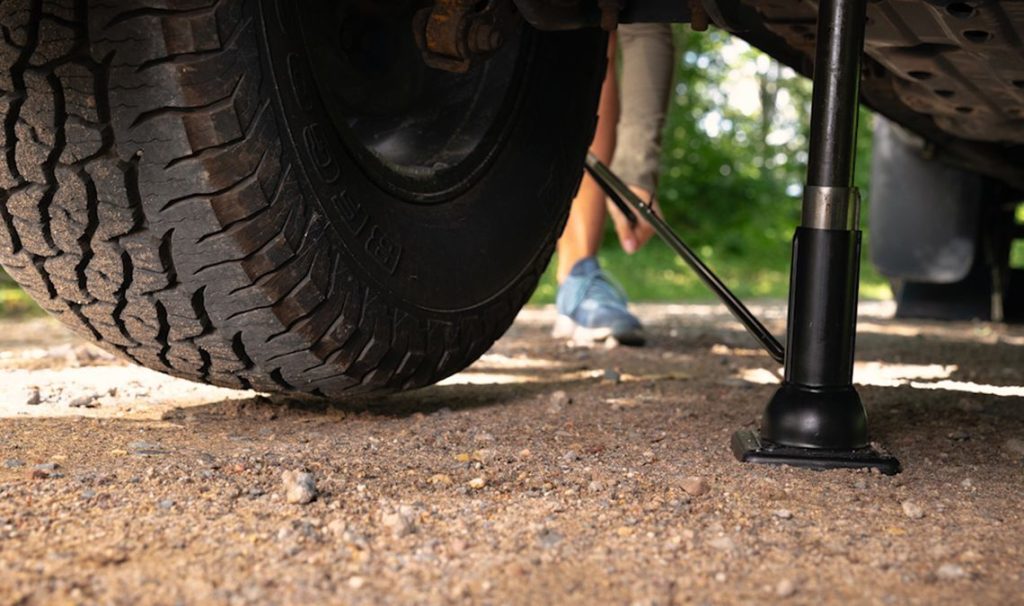
Changing a tire might seem tricky if you’ve never done it before. But knowing how to jack up your car safely can save you time, money, and stress when you need it most.
In this guide, you’ll learn simple, step-by-step instructions to lift your car the right way. By the end, you’ll feel confident handling a flat tire on your own. Ready to take control and keep your car moving? Let’s get started.

Credit: www.mrclutch.com
Essential Tools
Changing a tire needs the right tools to work safely and quickly. These tools help lift the car and remove the tire.
Knowing what each tool does makes the process easier. Here are the main tools you need.
Jack Types
A jack lifts the car so you can remove the tire. Different jacks work for different cars and situations.
Common types include scissor jacks, bottle jacks, and floor jacks. Each has pros and cons.
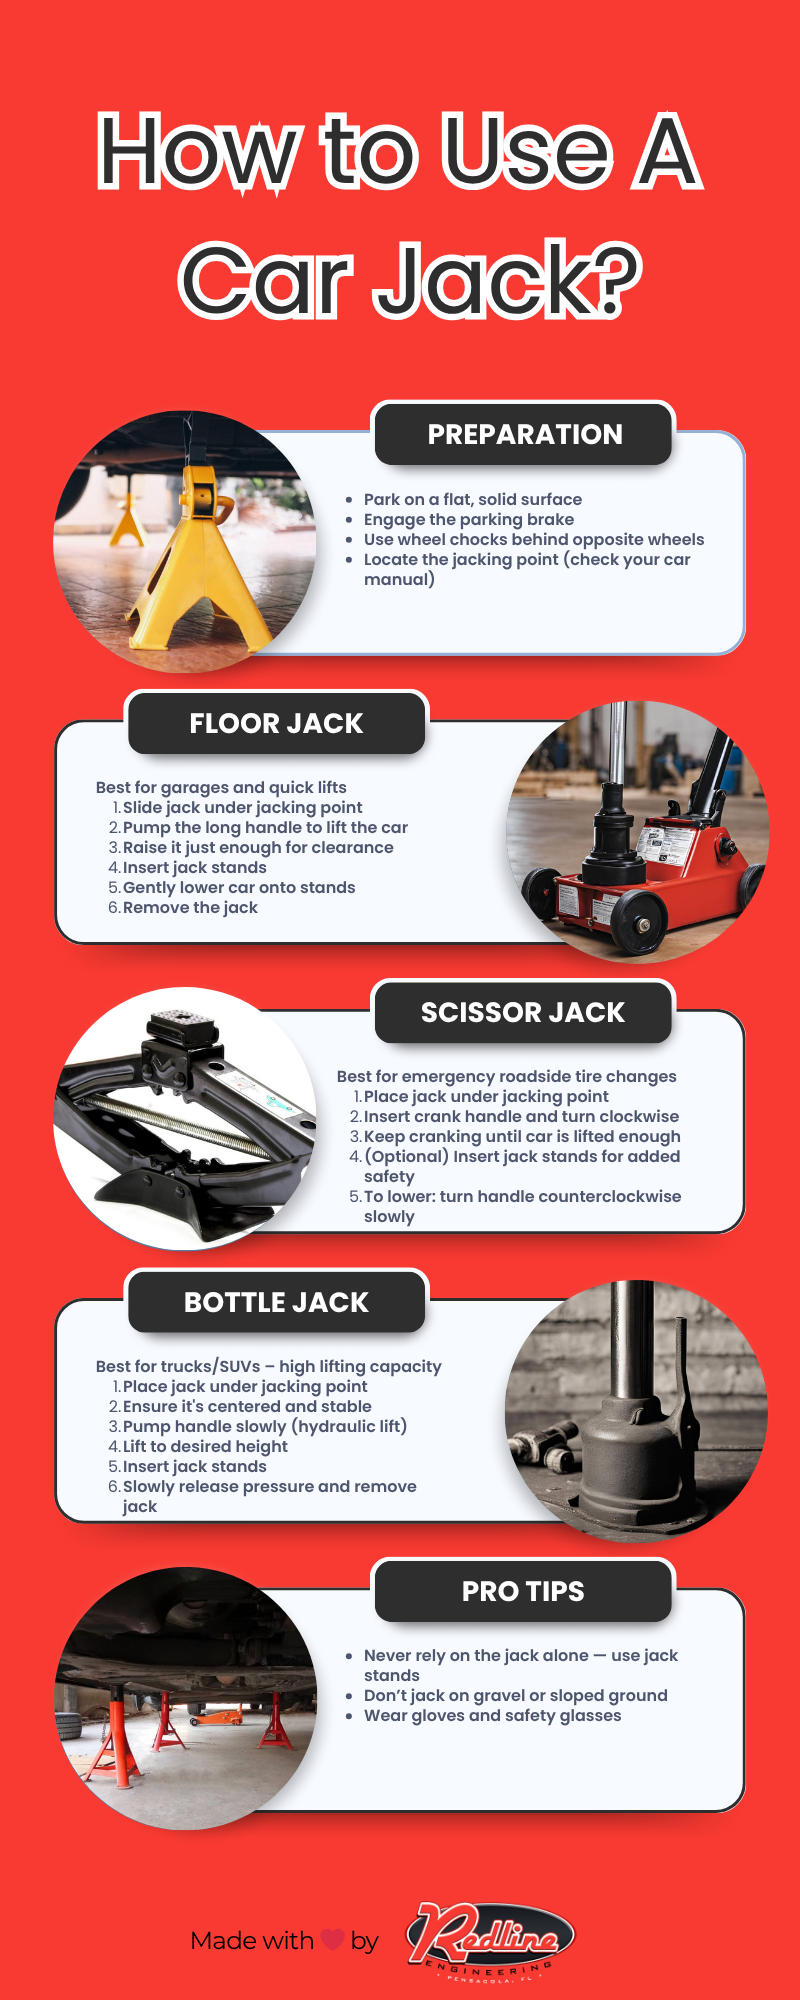
- Scissor Jack:Compact and easy to store, but slower to lift.
- Bottle Jack:Strong and fast, but less stable on soft ground.
- Floor Jack:Fast and stable, best for garages but bulky.
Lug Wrench
A lug wrench helps loosen and tighten the lug nuts on your wheel. It fits over the nuts to turn them.
Choose a lug wrench that fits your car’s lug nuts. Some have a cross shape for better grip and leverage.
- Use the right size socket to avoid stripping nuts.
- Apply steady force to loosen tight nuts.
- Keep the wrench in your car for emergencies.
Wheel Chocks
Wheel chocks stop your car from rolling while it is jacked up. They keep the car safe and stable.
Place chocks on the wheels that stay on the ground. Use sturdy blocks made of rubber or wood.
- Put chocks behind or in front of the tires.
- Use two chocks per wheel for extra safety.
- Check chocks before starting to jack up the car.
Spare Tire
A spare tire replaces the flat tire while you drive to a repair shop. It must be in good shape and ready to use.
Check your spare tire’s air pressure regularly. Know where it is stored in your car for quick access.
- Use a full-size spare if possible for better driving.
- Temporary spares save space but have speed limits.
- Replace or repair the flat tire as soon as possible.
Preparing The Car
Changing a tire requires careful preparation to keep you safe. Preparing your car properly makes the job easier and safer.
Before jacking up the car, follow these steps to secure it and prevent accidents.
Park On A Level Surface
Always park your car on a flat, level area. This stops the car from rolling when it is lifted.
A level surface helps the jack stay stable. Avoid slopes or hills if possible.
Apply Parking Brake
Set the parking brake before lifting the car. This keeps the wheels from moving.
Make sure the brake is fully engaged. Do not rely on the car being in gear alone.
Place Wheel Chocks
Put wheel chocks on the tires that stay on the ground. Chocks stop the car from rolling.
Place chocks on both sides of the tire for extra safety. Use sturdy blocks made for this purpose.
- Use rubber or wooden wheel chocks
- Place chocks behind and in front of the tire
- Ensure chocks fit snugly against the tire
Locating The Jack Point
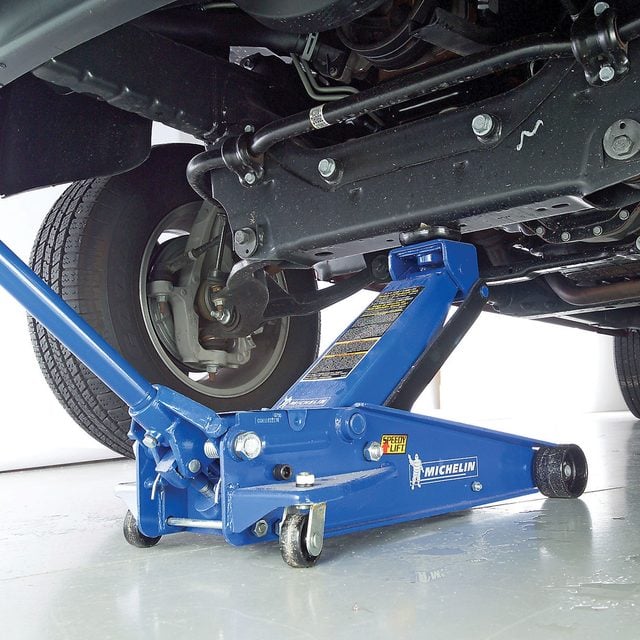
Knowing where to place the jack is very important for safety. The jack point is the spot under your car where the jack fits securely.
Placing the jack in the wrong spot can damage your car or cause the jack to slip. This guide helps you find the right place.
Check Owner’s Manual
Your car’s owner’s manual shows where the jack points are. It usually has pictures and instructions for your specific car model.
- Look for a section about tire changing or jacking up the car.
- Find diagrams that show the jack points on your vehicle’s frame.
- Follow any warnings or special notes to avoid damage.
- Check if the manual recommends specific jacks or tools.
Identify Reinforced Areas
Jack points are often on reinforced areas of the car’s frame. These spots can hold the car’s weight without bending.
| Location | Description | Signs to Look For |
|---|---|---|
| Side Rails | Strong metal beams under the car’s sides. | Flat spots or notches near the wheels. |
| Near Wheel Wells | Frame sections close to each wheel. | Raised or reinforced metal plates. |
| Under Door Sills | Metal parts under the doors. | Markings or indentations from the factory. |
Credit: www.familyhandyman.com
Loosening The Lug Nuts
Loosening the lug nuts is the first step before lifting your car. It makes removing the tire easier and safer.
Do this step carefully to avoid damaging the nuts or the wheel. Use the right tools and apply steady force.
Use The Lug Wrench Correctly
Choose a lug wrench that fits your car’s lug nuts perfectly. The wrench should have a strong grip to prevent slipping.
- Place the wrench on the lug nut firmly.
- Turn the wrench counterclockwise to loosen.
- Use your body weight to push down if the nuts are tight.
- A breaker bar can help if the wrench is too short.
- Do not remove the lug nuts completely yet.
Loosen Before Lifting
Always loosen the lug nuts before lifting the car with a jack. This prevents the wheel from spinning while you turn the wrench.
| Why Loosen Before Lifting? | Benefit |
|---|---|
| Car is stable on the ground | Less risk of slipping or falling |
| Wheel stays still | Easier to apply force on lug nuts |
| Safer jack use | Reduces chance of accidents |
Positioning And Using The Jack
Changing a tire requires lifting your car safely. Using a jack correctly helps avoid accidents. Position the jack in the right spot before lifting.
This guide covers how to place the jack, lift the car, and check stability for a safe tire change.
Place The Jack Securely
Find the correct jack point under your car. It is usually near the tire you want to change.
- Check the owner’s manual for jack points.
- Look for a flat, strong metal area near the wheel.
- Do not place the jack on plastic or soft parts.
- Clear the ground under the jack from debris and dirt.
- Set the jack on a firm and level surface.
Lift The Car Safely
Raise the car slowly by turning the jack handle. Stop when the tire is off the ground.
- Turn the handle clockwise to lift the car.
- Lift until the tire clears the ground by a few inches.
- Do not go higher than needed to avoid instability.
- Keep your hands and feet clear of the jack while lifting.
Check Stability
Make sure the car is stable before removing the tire. A small shake test helps confirm this.
| Check Point | What to Do |
|---|---|
| Jack Position | Ensure it stays firmly under the jack point |
| Car Movement | Gently shake the car to test stability |
| Surface | Confirm the ground is level and firm |
| Safety Blocks | Use wheel chocks on opposite tires for extra safety |
Removing The Flat Tire
Removing a flat tire safely is important before putting on a new one. This guide explains the key steps to take off the tire properly.
Make sure you have the right tools and have parked your car on a flat surface. Keep the parking brake on for safety.
Unscrew Lug Nuts
Start by loosening the lug nuts that hold the tire in place. Do this before raising the car with the jack. Loosen them by turning counterclockwise using a lug wrench.
- Place the lug wrench on a lug nut.
- Turn the wrench left to loosen the nut.
- Repeat for all lug nuts, but do not remove them yet.
Remove The Tire
After loosening the lug nuts and jacking up the car, you can now remove the flat tire. Pull the tire straight off the wheel studs carefully.
- Grip the tire firmly with both hands.
- Pull it towards you, away from the car.
- Place the tire flat on the ground to avoid rolling.
Inspect The Wheel
Check the wheel for any damage before putting on the spare tire. Look for cracks, bends, or dirt that may affect the new tire’s fit.
| Check Item | What to Look For |
|---|---|
| Wheel Rim | Cracks or bends |
| Wheel Studs | Clean and undamaged threads |
| Brake Components | No leaks or damage nearby |
Installing The Spare Tire
After jacking up your car, the next step is to install the spare tire. This process helps you replace the flat tire safely. Follow the steps carefully to avoid any mistakes.
Make sure you have the spare tire and the lug nuts ready. Installing the spare tire correctly keeps you safe on the road.
Align The Spare
Take the spare tire and lift it onto the wheel hub. Line up the holes on the tire with the wheel studs on your car. Make sure the tire sits flush against the hub.
Aligning the spare tire correctly prevents it from wobbling when you drive. Check that the tire fits snugly before moving on.
Hand Tighten Lug Nuts
Place the lug nuts onto the wheel studs by hand. Turn each lug nut clockwise to start threading them. Do not use the wrench yet.
Hand tightening the lug nuts keeps the tire in place. It also prevents cross-threading, which can damage the studs.
- Put on all lug nuts loosely by hand
- Ensure each nut fits smoothly on the stud
- Tighten them just enough to hold the tire
Lower The Car
Slowly lower the car until the spare tire touches the ground. Remove the jack carefully once the car is stable. The car should now rest on the spare tire.
Lowering the car fully allows you to tighten the lug nuts safely. Never try to tighten the nuts while the car is still raised.
Tightening Lug Nuts
Tightening lug nuts is important for safety after changing a tire. Proper tightening keeps the wheel secure and prevents accidents.
Use the right tools and follow the correct steps to tighten lug nuts evenly and firmly.
Use Proper Sequence
Tighten lug nuts in a star or crisscross pattern. This helps the wheel fit evenly on the hub.
Do not tighten nuts one after another in a circle. This can cause the wheel to sit unevenly.
- Start with one lug nut and tighten it halfway.
- Move to the lug nut opposite it and tighten halfway.
- Continue in a star pattern until all are halfway tight.
- Then fully tighten all lug nuts in the same star order.
Apply Correct Torque
Use a torque wrench to apply the exact force needed. Too much force can damage parts.
Check your car’s manual for the right torque value. This keeps the lug nuts tight but safe.
- Set the torque wrench to the recommended value.
- Tighten each lug nut in the proper sequence.
- Listen for the click or feel the stop on the wrench.
- Do not guess the tightness with a regular wrench.
Final Safety Checks
After changing a tire, it is important to follow safety steps. These checks help ensure your car is ready to drive safely.
Take time to remove all tools and supports, check tire pressure, and do a short test drive. These steps prevent accidents and damage.
Remove Tools And Chocks
Clear the area under and around your car. Take out the jack, lug wrench, and any wheel chocks you used. Make sure nothing blocks the wheels or the road.
- Lower the car completely before removing the jack.
- Put tools back in their storage spots.
- Remove wheel chocks from the wheels.
- Double-check the ground around the car is clear.
Check Tire Pressure
Use a tire pressure gauge to check the new tire’s pressure. Proper pressure keeps your car stable and extends tire life.
| Tire Position | Recommended Pressure (psi) | Actual Pressure (psi) |
| Front Left | 32 | ___ |
| Front Right | 32 | ___ |
| Rear Left | 30 | ___ |
| Rear Right | 30 | ___ |
Test Drive Carefully
Drive slowly and listen for strange noises. Check if the car pulls to one side or the steering feels off. These signs show if the tire is properly installed.
- Drive on a quiet street at low speed.
- Turn the steering wheel gently left and right.
- Listen for any unusual sounds.
- Stop and check the tire if something feels wrong.
Credit: www.redlinestands.com
Frequently Asked Questions
How Do I Safely Jack Up A Car To Change A Tire?
Use a flat, stable surface and engage the parking brake. Place wheel chocks opposite the tire being changed. Position the jack under the vehicle’s designated lifting point. Lift the car slowly until the tire clears the ground.
Where Is The Correct Jack Point On My Car?
Check your vehicle’s owner manual for exact jack points. Common locations include near the front and rear wheel wells. Avoid placing the jack under the car’s frame or suspension parts to prevent damage.
What Type Of Jack Is Best For Changing A Tire?
A scissor jack or hydraulic floor jack works well for tire changes. Scissor jacks are compact and come with most cars. Hydraulic jacks lift faster and require less effort but are bulkier.
Can I Jack Up My Car On An Uneven Surface?
No, always jack up your car on a flat, level surface. Uneven surfaces increase the risk of the car slipping or the jack tipping over. Use a sturdy platform if necessary to stabilize the jack.
Conclusion
Changing a tire is easier than many think. Use the right tools and follow steps carefully. Always place the jack securely under your car. Lift the car slowly to avoid accidents. Remember to tighten the lug nuts after replacing the tire.
Practice makes this task quicker and safer. Stay calm and focused during the process. Now, you can handle a flat tire with confidence. Keep safety as your top priority at all times.