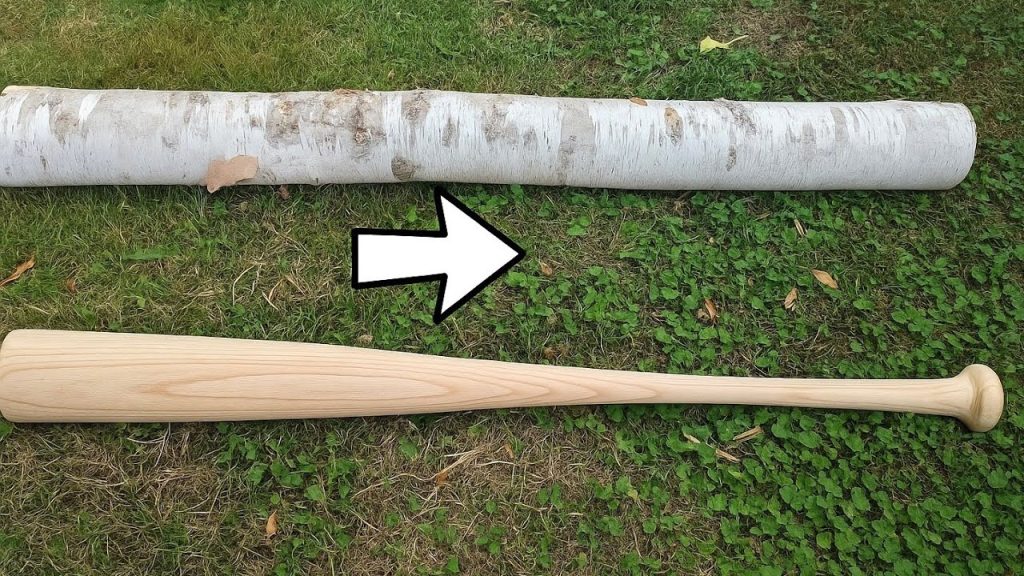
Have you ever wondered how a simple piece of wood turns into a powerful baseball bat? Making your own bat might seem tricky, but it’s easier than you think.
Imagine holding a bat you crafted yourself—built just the way you like it, with your personal touch. In this guide, you’ll discover step-by-step how to create a baseball bat that feels perfect in your hands. Ready to take control of your game and craft something truly unique?
Keep reading, and let’s get started!

Credit: www.youtube.com
Choosing The Right Wood
Making a baseball bat starts with picking the right wood. The wood affects the bat’s strength and performance.
Choosing good wood helps create a bat that is durable and balanced. It also impacts how the bat feels in your hands.
Types Of Wood For Bats
Different woods have unique qualities. Some woods are hard and heavy, while others are lighter and flexible.
- Maple:Very hard and dense. Maple bats are strong and have a smooth finish.
- Ash:Lightweight with good flexibility. Ash bats have a grainy look and absorb shock well.
- Birch:A mix of hard and flexible. Birch bats are durable and offer good control.
Selecting Quality Lumber
Look for wood that is straight and has tight grain lines. The grain should run parallel to the bat’s length.
Avoid wood with knots, cracks, or discoloration. These flaws can weaken the bat and cause it to break.
- Choose wood with a grain slope less than 1:8 for strength
- Pick lumber that is dry and well-seasoned to prevent warping
- Inspect the wood for any defects or damage before use
Gathering Tools And Materials
Making a baseball bat requires the right tools and materials. Collecting these items first helps you work safely and efficiently.
Choose quality wood and tools to create a strong and smooth bat. Safety gear protects you during the process.
Essential Tools List
You need specific tools to shape and finish the baseball bat. Each tool helps with a different part of the process.
- Wood lathe for shaping the bat
- Measuring tape or ruler for accuracy
- Wood saw to cut the wood to size
- Sandpaper or sanding machine for smoothing
- Wood glue for joining pieces if needed
- Clamps to hold wood while working
- Chisels for fine shaping and detail
- Protective finishing oil or varnish
Safety Gear Requirements
Safety gear keeps you safe from dust, sharp tools, and wood splinters. Always wear proper protection.
- Safety goggles to protect your eyes
- Dust mask to avoid inhaling wood dust
- Work gloves to protect your hands
- Ear protection if using loud power tools
- Long sleeves and pants to cover your skin
Preparing The Wood Blank
Making a baseball bat starts with selecting the right wood. This wood blank will be shaped into a sturdy bat.
Choosing a straight grain wood like maple or ash is essential. It ensures the bat will be strong and durable.
Cutting To Size
The wood blank must be cut to the right size. This step sets the foundation for the bat’s dimensions.
Most bats are between 32 and 36 inches long. Make sure to measure the wood carefully before cutting.
- Use a saw to cut the wood to the desired length
- Ensure the cut is straight and even
- Double-check measurements before proceeding
Shaping The Blank
Shaping the blank involves creating the bat’s round form. This step requires precision and attention to detail.
A lathe machine is often used to shape the bat. It spins the wood while tools are applied to carve the shape.
- Secure the wood in the lathe machine
- Use chisels to round the wood
- Check the diameter frequently
Turning The Bat On A Lathe
Turning a baseball bat on a lathe is a key step in making a smooth, round bat. The lathe spins the wood so you can shape it evenly.
This process needs care and focus to get the right size and shape for the bat.
Setting Up The Lathe
First, place the wooden blank securely between the lathe centers. Make sure it is tight to avoid wobbling.
Check that the lathe speed is set to a medium level. Too fast can be unsafe, too slow can cause rough cuts.
- Mount the wood firmly in the lathe
- Set speed to medium for control
- Wear safety glasses and gloves
Shaping The Handle And Barrel
Start shaping the handle by slowly cutting the wood with a sharp chisel. Make the handle thinner but strong.
Next, shape the barrel by making it round and smooth. The barrel should be thicker than the handle for hitting power.
- Use a chisel to shape the handle
- Keep the handle smooth and even
- Shape the barrel larger and round
- Check measurements often for accuracy
Sanding And Smoothing
Sanding and smoothing are key steps to make a baseball bat feel right. These steps remove rough spots and prepare the wood for finishing.
Proper sanding helps the bat look clean and improves its grip. You need to pick the right sandpaper grit and use the right technique.
Choosing Grit Levels
Start with coarse grit sandpaper to shape the bat. Then use finer grits to smooth the surface and remove scratches from the coarser grit.
- Use 60-80 grit for initial shaping and rough sanding
- Move to 120-150 grit for smoothing out rough areas
- Finish with 220-320 grit for a smooth surface ready for finishing
Achieving A Smooth Finish
To get a perfect smooth finish, sand in the direction of the wood grain. Use clean sandpaper and avoid pressing too hard.
| Tip | Explanation |
|---|---|
| Sand with the grain | Prevents scratches and uneven surfaces |
| Use light pressure | Helps keep the shape and avoid gouges |
| Clean dust often | Ensures smooth sanding and better finish |
| Check surface by touch | Feel for bumps or rough spots before finishing |

Credit: m.youtube.com
Branding And Customizing
Making a baseball bat is not just about the shape and weight. It is also about making it unique. Branding and customizing the bat adds personal style and identity.
Customizing can include adding logos, names, or colors. This makes the bat special and easy to recognize on the field.
Adding Logos Or Names
Adding a logo or name to a bat shows team pride or personal identity. You can do this by engraving or using decals.
- Choose a spot on the bat for the logo or name.
- Use a stencil for painting or an engraving tool for carving.
- Apply decals carefully to avoid bubbles or wrinkles.
- Seal the area with clear varnish to protect the design.
Applying Paint Or Stain
Paint or stain changes the bat’s color and finish. It also protects the wood from damage and weather.
| Type | Effect | Drying Time |
| Paint | Bright, opaque color | 2-4 hours |
| Stain | Natural wood tone enhancement | 1-3 hours |
| Clear Varnish | Glossy, protective coat | 4-6 hours |
Applying Protective Coatings
Applying protective coatings is a key step in making a baseball bat. It helps protect the wood from damage and wear. A good finish also makes the bat look smooth and shiny.
Using the right coating keeps the bat strong and lasts longer. This guide explains the types of finishes and how to apply them properly.
Types Of Finishes
There are several finishes to protect a baseball bat. Each finish has its benefits and looks different. Choose one based on your needs.
- Oil Finish:Penetrates wood and keeps it from drying out. It gives a natural look.
- Lacquer:Dries fast and creates a hard, shiny surface. It protects well from scratches.
- Polyurethane:A strong coating that resists water and damage. It gives a glossy finish.
- Shellac:Made from natural resin, it gives a warm color and good protection.
Proper Application Techniques
Applying coatings correctly helps the bat last longer. Clean the bat surface before applying any finish. Sand it smooth for better results.
Use these tips for a good application:
- Apply thin coats to avoid drips and bubbles.
- Use a brush or cloth depending on the finish type.
- Let each coat dry fully before adding the next one.
- Lightly sand between coats for a smooth surface.
- Work in a dust-free area to keep the finish clean.
Final Inspection And Testing
After crafting a baseball bat, the last step is to check its quality. This ensures the bat is safe and performs well.
The final inspection and testing process helps find any problems and confirms the bat meets standards.
Checking For Defects
Look closely at the bat to find cracks, dents, or uneven areas. These defects can cause the bat to break or not work properly.
- Inspect the handle for smoothness and strength
- Check the barrel for any cracks or dents
- Ensure the bat is balanced and symmetrical
- Look for loose parts or splinters on the surface
- Verify the finish is even and well-coated
Performance Testing
Test the bat to measure its weight, swing speed, and impact resistance. This shows if the bat works well for hitting.
| Test Type | Purpose | Result Needed |
| Weight Measurement | Check if the bat feels right | Within 30 ounces |
| Swing Speed Test | Measure ease of swinging | Consistent and smooth |
| Impact Resistance | Ensure bat withstands strong hits | No cracks or breaks |
| Balance Check | Confirm even weight distribution | Bat is not top or bottom heavy |

Credit: www.youtube.com
Frequently Asked Questions
What Materials Are Best For Making A Baseball Bat?
The best materials for baseball bats are ash, maple, and birch wood. These woods provide durability, flexibility, and good weight. Ash offers lightweight feel, maple adds hardness, and birch balances both. Choose quality wood for a strong, long-lasting bat.
How Long Does It Take To Make A Baseball Bat?
Making a baseball bat typically takes 2 to 4 hours. This includes selecting wood, shaping, sanding, and finishing. Drying and curing may add extra time. Skilled craftsmen can complete the process faster while maintaining quality.
Can I Make A Baseball Bat At Home?
Yes, you can make a baseball bat at home with basic woodworking tools. You need wood, a lathe or shaping tools, sandpaper, and finish. Follow safety steps and detailed instructions to create a usable bat.
What Tools Are Needed To Make A Baseball Bat?
Essential tools include a lathe for shaping, sandpaper for smoothing, saws for cutting, and finishing supplies. A measuring tape and wood sealant are also important. These tools help create a precise, smooth, and durable bat.
Conclusion
Making a baseball bat takes patience and care. Start with good wood and simple tools. Follow each step slowly to shape the bat right. Sand it smooth for a perfect finish. A well-made bat feels strong and balanced. You can enjoy playing with a bat you built yourself.
This project teaches skills and gives pride. Try making your own bat and see the fun. Crafting is rewarding and connects you to the game. Keep practicing and improving your work each time.