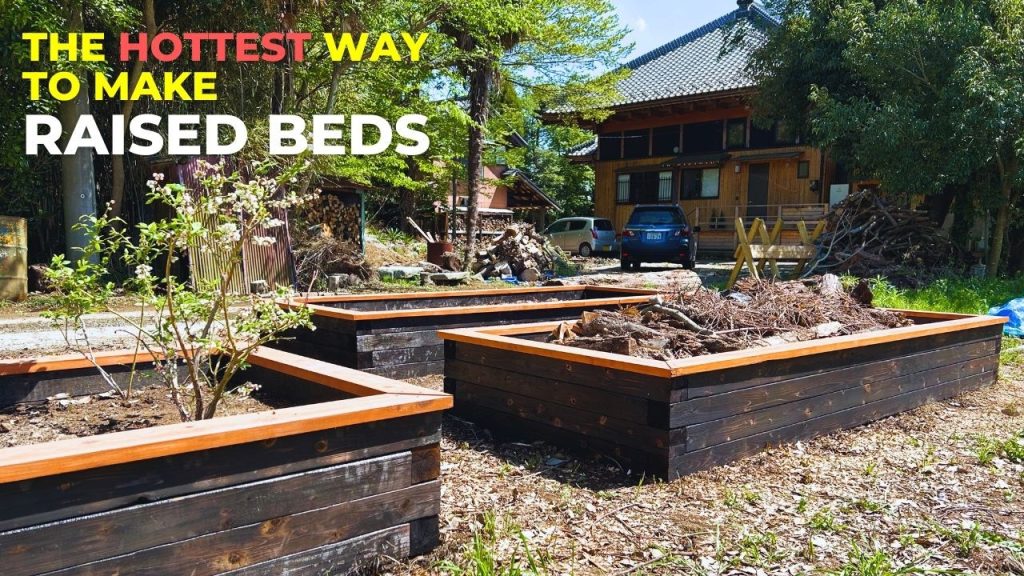
Are you ready to transform your garden with a beautiful and durable raised bed? Making a cedar raised garden bed is easier than you think, and it can give your plants the perfect home to grow strong and healthy.
Cedar wood is naturally resistant to rot and insects, so your garden bed will last for years without harmful chemicals. In this guide, you’ll learn simple steps to build your own cedar raised bed, even if you’ve never done a project like this before.
Keep reading to discover how you can create a garden space that looks great and helps your plants thrive.
Choosing Cedar For Garden Beds
Cedar wood is a popular choice for raised garden beds. It lasts long and resists rot. Many gardeners prefer cedar because it stays strong outside.
This guide covers why cedar is good for garden beds. It also shows how to find quality cedar wood for your project.
Benefits Of Cedar Wood
Cedar has many features that make it ideal for garden beds. It naturally fights bugs and decay. Cedar wood is light but tough, so it is easy to work with.
- Resists rot and insect damage
- Lasts many years outdoors
- Lightweight and easy to cut
- Has a nice natural smell
- Does not need chemical treatment
Sourcing Quality Cedar
Finding good cedar is key to building a strong garden bed. Look for wood that is straight and free of cracks. Fresh cedar has a clear, reddish color and smells strong.
| Where to Buy | What to Check |
| Lumber Yards | Grade and freshness of wood |
| Garden Centers | Type of cedar and size |
| Online Suppliers | Customer reviews and shipping |
| Local Sawmills | Freshness and price |

Credit: eartheasy.com
Planning Your Raised Bed
Building a cedar raised garden bed starts with good planning. This step helps you create a bed that fits your space and needs.
Think about where to place your garden bed and how big it should be. Planning well saves time and effort later.
Selecting The Size And Location
Choose a size that matches your available space and gardening goals. Raised beds are often 3 to 4 feet wide to reach the middle easily.
Pick a sunny spot for your bed. Most vegetables need at least six hours of sun each day to grow well.
- Width: 3 to 4 feet for easy reach
- Length: Depends on your space, often 6 to 12 feet
- Location: Sunny area with good drainage
- Avoid low spots where water can collect
Designing The Bed Layout
Plan how to arrange your raised bed. You can build one large bed or several smaller ones.
Think about paths between beds for easy access. Paths should be wide enough to walk through comfortably.
- Decide on bed shape: rectangular or square
- Leave 2 to 3 feet wide paths between beds
- Consider placing beds in rows or a grid
- Plan space for companion planting or crop rotation
Gathering Tools And Materials
Building a cedar raised garden bed is a rewarding project. You need the right tools and materials to get started. In this guide, we will cover what you need to gather first.
Let’s start by taking a look at the essential tools and materials you will need for this project.
Essential Tools List
Having the right tools makes building your garden bed easier. Here is a list of essential tools.
- Measuring tape
- Hand saw or power saw
- Drill with drill bits
- Screwdriver
- Hammer
Materials Checklist
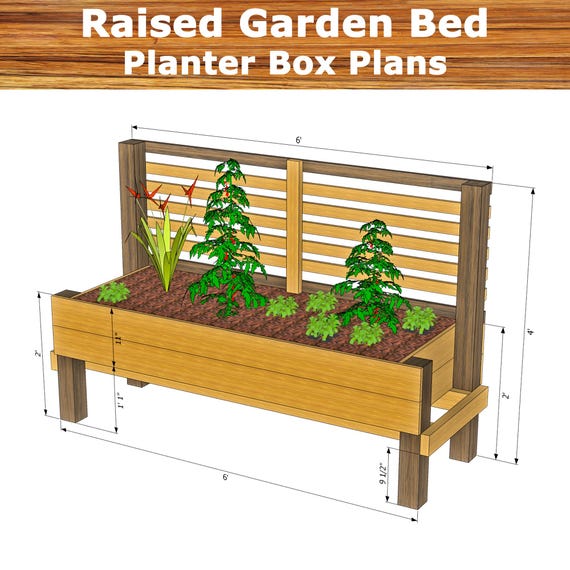
Cedar is a great choice for garden beds because it resists rot. Below is the materials checklist for your project.
| Material | Quantity |
| Cedar boards (2×6 inches) | 4 boards of desired length |
| Wood screws | 1 box |
| Landscape fabric | Enough to cover the base |
| Soil | Enough to fill the bed |
Credit: www.etsy.com
Cutting And Preparing Cedar Boards
Building a cedar raised garden bed starts with cutting and preparing the wood. Cedar boards are strong and resist rot, making them perfect for outdoor use.
Careful measuring and safe cutting are important to get the right pieces for your garden bed. This guide will help you cut cedar boards accurately and safely.
Measuring And Marking
Use a tape measure to check the length of each cedar board before cutting. Mark the wood clearly with a pencil to show where to cut.
Double-check your measurements to avoid mistakes. Mark both ends of the board for a straight cut line.
- Measure twice, cut once
- Use a carpenter’s square to draw straight lines
- Mark the cutting line on both sides of the board
Safe Cutting Techniques
Wear safety glasses and gloves before starting to cut the cedar boards. Use a saw that fits the size and thickness of the wood.
Cut slowly and follow the marked lines. Keep your hands away from the blade and secure the board firmly on a stable surface.
- Use a circular saw or handsaw for straight cuts
- Clamp the board to prevent movement
- Cut with steady, even pressure
- Clear the workspace of obstacles
Assembling The Raised Bed Frame
Building a cedar raised garden bed starts with making a strong frame. This frame holds the soil and plants securely. Careful assembly will keep your garden bed stable and long-lasting.
Focus on joining corners tightly and adding extra support. These steps help the frame stand firm against weather and soil pressure.
Joining Corners Securely
Use wood screws or galvanized nails to join the cedar boards at each corner. Drill pilot holes first to avoid splitting the wood. Make sure corners are square by checking with a carpenter’s square.
- Align two boards at a right angle.
- Drill pilot holes on both boards.
- Attach boards using 3-inch wood screws or nails.
- Repeat for all four corners.
- Check each corner with a square tool.
Reinforcing The Structure
Add support braces inside the frame to keep it strong. Braces stop the sides from bowing out under soil weight. Place them evenly along the longer sides.
| Support Type | Position | Material |
| Corner Braces | Inside each corner | Cedar blocks or metal brackets |
| Side Braces | Midpoint of long sides | Cedar strips, 2×2 inches |
| Bottom Supports | Underneath the frame | Pressure-treated lumber (optional) |

Credit: diyhuntress.com
Installing The Bed In Your Garden
Installing a cedar raised garden bed is an easy way to improve your garden space. The right setup helps your plants grow well.
This guide shows how to prepare the ground and position the frame for the best results.
Leveling The Ground
Start by clearing the area where you want to place the bed. Remove grass, rocks, and debris.
Use a shovel or rake to make the soil as flat as possible. A level surface stops water from pooling.
- Remove plants and roots from the spot
- Use a rake to smooth the soil
- Check for evenness with a carpenter’s level
- Add or remove soil to fix bumps or dips
Positioning The Frame
Place the cedar frame on the leveled ground. Make sure it fits the space you planned for your garden.
Check that the frame sits firmly and does not wobble. Adjust the soil under the frame if needed.
- Set the frame down gently on the prepared spot
- Press the frame edges into the soil slightly
- Use a level to confirm the frame is even
- Fix any tilts by adding soil under low corners
Filling The Bed With Soil
Filling a cedar raised garden bed with the right soil is key to healthy plants. Good soil helps roots grow and keeps water flowing.
Take your time to prepare the soil. This step will make your garden stronger and easier to maintain.
Choosing The Right Soil Mix
Pick a soil mix that drains well but holds moisture. Use soil rich in nutrients for strong plant growth.
A good mix has three parts: topsoil, compost, and a light material like perlite or sand. This mix feeds plants and keeps roots healthy.
- Topsoil provides structure and minerals
- Compost adds nutrients and improves texture
- Perlite or sand helps with drainage and air flow
Layering For Drainage
Layering the soil helps water drain and stops roots from sitting in water. Start with a base layer that drains well.
Use coarse materials at the bottom. Then add your soil mix on top for plants to grow strong.
- First layer: small rocks or gravel (2-3 inches)
- Second layer: coarse sand or wood chips (2 inches)
- Top layer: your prepared soil mix (fill the rest)
Maintaining Your Cedar Raised Bed
Keeping your cedar raised bed in good shape helps it last longer. Proper care protects the wood and supports healthy plant growth.
This guide covers key ways to protect your cedar bed from weather and how to care for it each season.
Protecting Wood From Weather
Cedar wood is naturally resistant to rot but still needs protection. Weather can cause cracking, warping, and fading over time.
- Apply a non-toxic wood sealant every year to block moisture.
- Use a tarp or cover during heavy rain or snow to keep the bed dry.
- Place the bed in a spot with good drainage to avoid standing water.
- Check for loose screws or nails and tighten them to keep the structure stable.
Seasonal Care Tips
Each season brings unique challenges. Adjust your care routine to keep the bed strong and ready for planting.
| Season | Care Tasks |
| Spring | Clean debris, add fresh soil, check wood for damage |
| Summer | Water plants regularly, check for cracks, reapply sealant if needed |
| Fall | Remove dead plants, cover bed if heavy rain or frost expected |
| Winter | Keep bed covered, remove snow buildup, inspect wood for mold |
Frequently Asked Questions
What Materials Do I Need For A Cedar Raised Garden Bed?
You need cedar boards, screws, a drill, measuring tape, and soil. Cedar is durable and naturally rot-resistant, perfect for garden beds.
How Long Does A Cedar Raised Garden Bed Last?
A cedar raised bed typically lasts 15 to 20 years. Its natural oils protect it from rot and insects without chemical treatments.
How Deep Should A Cedar Raised Garden Bed Be?
The ideal depth is 12 to 18 inches. This depth provides enough room for most vegetables’ root growth and soil drainage.
Can I Build A Cedar Raised Bed On Any Surface?
Yes, you can place it on soil, grass, or concrete. Ensure proper drainage and level the surface before installation.
Conclusion
Building a cedar raised garden bed is simple and rewarding. You get sturdy, long-lasting wood that resists rot. This type of bed helps your plants grow better by improving soil and drainage. Plus, it keeps your garden neat and easy to manage.
With just a few tools and steps, you can create a beautiful space for flowers or vegetables. Start small, and enjoy watching your garden thrive. A cedar raised bed makes gardening easier and more fun for everyone. Give it a try and see the difference yourself.