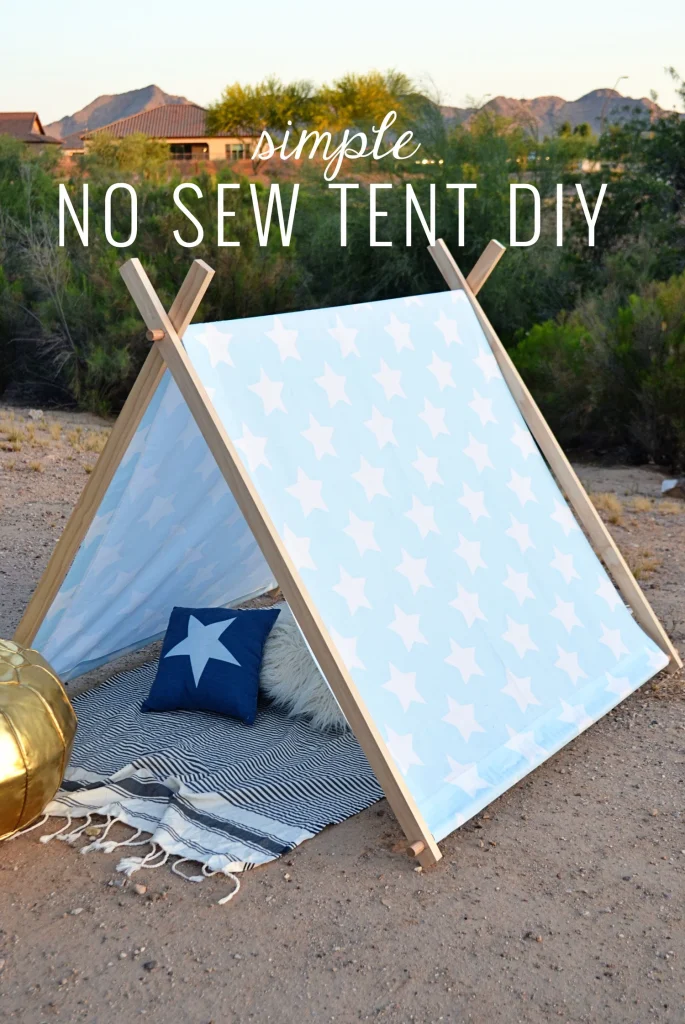
Are you looking for a fun and creative project that your child will love? Making a child’s tent is easier than you think, and it brings hours of joy and imagination right into your home or backyard.
Imagine your little one having a special hideaway all their own—a cozy space to read, play, or simply dream. In this guide, you’ll discover simple steps and handy tips to build a safe and charming tent using everyday materials. Keep reading, and you’ll have a perfect play spot ready in no time!
Materials Needed
Making a child’s tent is a fun and creative project. You need the right materials to build a safe and cozy space. This guide helps you gather everything necessary before starting.
The materials fall into three main groups: fabric, frame parts, and extra supplies. Each group has options to fit your style and skill level.
Fabric Options
Choose a fabric that is soft, durable, and easy to clean. Cotton and canvas are popular choices because they breathe well and feel comfortable. Avoid heavy or stiff fabrics that can be hard to handle.
- Cotton fabric for light and airy tents
- Canvas for sturdier and longer-lasting tents
- Polyester blends for water resistance
- Old bedsheets or curtains as budget-friendly options
Frame Choices
The frame holds the tent up and shapes it. Pick materials that are lightweight and safe for children. You can use wooden dowels, PVC pipes, or even sturdy branches from outside.
| Frame Material | Advantages | Notes |
| Wooden dowels | Natural look, easy to cut | Sand edges to avoid splinters |
| PVC pipes | Lightweight, flexible | Use connectors to join pieces |
| Sturdy branches | Free, eco-friendly | Check for bugs and sharp spots |
Additional Supplies
You need some extra supplies to put the tent together and keep it secure. These items help you attach fabric to the frame and add comfort inside the tent.
- Strong scissors to cut fabric and tape
- Thread and needle for sewing or repair
- Rope or string to tie fabric to frame
- Clamps or clips to hold fabric in place
- Soft blankets or cushions for the tent floor
- Measuring tape to get correct sizes
Choosing The Right Spot
Finding the best place for a child’s tent is important. The spot should be safe and fun.
Think about where your child will play most and what space fits the tent size.
Indoor Locations
Indoors, choose a flat area with enough room around the tent. Avoid crowded or noisy spots.
Look for places with soft flooring like carpets or rugs. This adds comfort and safety.
- Living room corners
- Playroom or kids’ bedroom
- Near windows for natural light
- Away from heaters or sharp objects
Outdoor Spaces
Outside, pick a flat and dry spot for the tent. Grass or soft ground works best.
Choose a place with some shade. It keeps the tent cool and protects from sunburn.
- Backyard corners with grass
- Shady spots under trees
- Away from garden tools or pools
- Far from busy paths or roads
Building The Frame
Creating a child’s tent is a fun and easy project. You can use different materials to build the frame. Choose what you have available at home.
Let’s explore three different methods to construct the frame. Each method offers a unique approach for building a sturdy tent.
Using Pvc Pipes
PVC pipes are lightweight and easy to handle. They provide a strong frame for your child’s tent.
- Gather PVC pipes and connectors.
- Cut pipes to the required lengths.
- Assemble the pipes using connectors.
- Ensure the frame is stable and secure.
Wooden Dowels Method
Wooden dowels offer a natural look. They are sturdy and can support a canvas or fabric tent.
Materials Needed:
- Wooden dowels
- Rope or string
- Drill
Instructions:
- Drill holes at the ends of the dowels.
- Connect dowels with rope through the holes.
- Tie knots to secure the structure.
Alternative Frame Ideas
If you want to try something different, consider these ideas. Use items you have at home to build a creative tent frame.
| Material | Pros | Cons |
| Bamboo sticks | Eco-friendly, strong | May need cutting tools |
| Metal rods | Durable, long-lasting | Heavier than other options |
| Old broom handles | Cost-effective, reusable | May not be uniform in size |

Credit: www.creativegreenliving.com
Constructing The Tent Cover
Making a cover for a child’s tent is fun and simple. It keeps the tent cozy and adds charm. You will need some fabric and basic tools to start.
This guide shows how to cut the fabric, attach it, and add windows and doors. Follow each part carefully to build a safe and cute tent cover.
Cutting The Fabric
Choose a fabric that is light but strong. Cotton or canvas works well. Measure the tent frame before you cut to get the right size.
- Measure the height, width, and length of the tent frame.
- Mark the fabric with chalk or a fabric pen.
- Cut the fabric with sharp scissors along the marks.
- Leave extra fabric for seams and hems.
Attaching The Cover
Attach the fabric to the frame with care. Use strong thread and a needle or a sewing machine. Secure corners first for better shape.
| Task | Tip |
| Sew edges | Use double stitches for strength |
| Attach corners | Fold fabric neatly before sewing |
| Check fit | Try cover on frame before finishing |
Adding Windows And Doors
Windows and doors make the tent more fun and useful. Cut out shapes and add mesh or clear plastic. Use Velcro or ties to open and close.
Here are simple steps to add windows and doors:
- Draw window and door shapes on fabric.
- Cut out the shapes carefully.
- Attach mesh or plastic inside the cut shapes.
- Sew Velcro strips or attach ties along edges.
- Test openings to make sure they work well.
Decorating The Tent
Decorating your child’s tent makes it a special place for play and rest. You can add colors, lights, and personal touches to make it unique.
Use simple decorations that are safe and easy to change as your child grows. This guide shows ways to make the tent cozy and fun.
Painting And Patterns
Painting the tent lets you add bright colors or fun patterns. Use fabric paint or markers that do not harm the cloth.
- Choose simple shapes like stars, circles, or stripes
- Use stencils to keep the design neat
- Let your child pick their favorite colors
- Paint on only one side to keep the tent light
Adding Lights
Lights add a magical feel inside the tent. Use soft, safe lights to create a warm glow without heat.
| Type of Light | Safety | Effect |
| Battery-powered string lights | Safe, no wires | Twinkling and fun |
| LED fairy lights | Cool to touch | Soft and cozy |
| Glow sticks | Non-electric | Colorful and bright |
Personalizing With Accessories
Accessories make the tent feel like your child’s own space. Pick items that add comfort and personality.
- Soft pillows and small blankets for comfort
- Hanging pockets or small baskets for toys
- Decorative flags or bunting on the tent edges
- Stuffed animals or dolls inside the tent
- Name tags or signs with your child’s name
Safety Tips
Making a child’s tent can be fun and creative. Safety should always be the main focus. This guide shares important tips to keep your child safe while playing.
Follow these safety tips on building a stable tent, using safe materials, and supervising your child properly.
Stable Structure
Ensure the tent is steady and will not fall easily. Use strong poles or sticks and secure them well. Avoid sharp edges or loose parts that might hurt the child.
- Use thick and sturdy poles for support
- Check all knots and fastenings twice
- Place the tent on flat ground without rocks
- Avoid heavy objects on top of the tent
- Test the tent’s stability before use
Non-toxic Materials
Choose materials that are safe for children. Avoid anything that could cause allergies or poisoning. Look for natural fabrics and water-based paints.
| Material | Safety Feature | Why It Matters |
| Cotton Fabric | Breathable & Soft | Reduces skin irritation |
| Wooden Poles | Natural & Smooth | Less risk of splinters |
| Water-based Paint | Non-toxic | Safe if touched or licked |
| Natural Rope | Strong & Chemical-Free | Prevents harmful contact |
Supervision Guidelines
Always watch your child while they use the tent. Check the tent often for any wear or damage. Teach children to play safely inside and around the tent.
- Keep an eye on the child at all times
- Do not leave the tent unattended
- Check for loose parts or tears before each play
- Make sure the tent is dry and clean
- Explain safe play rules to your child
Maintenance And Storage
Keeping your child’s tent clean and stored properly helps it last longer. Regular care prevents damage and keeps the tent safe to use.
Read the following tips on cleaning, folding, and fixing small problems to keep the tent in good shape.
Cleaning The Tent
Clean the tent after every use. Dirt and stains can weaken the fabric if left too long. Use a soft brush to remove loose dirt.
- Wipe the tent with a damp cloth and mild soap.
- Do not use bleach or harsh chemicals.
- Rinse with clean water to remove soap.
- Air dry the tent fully before storing.
Folding And Storing
Fold the tent carefully to avoid creases that damage fabric. Store it in a dry place away from sunlight and moisture.
| Folding Tips | Storage Tips |
| Lay the tent flat and smooth out wrinkles | Keep in a breathable bag or container |
| Fold along original creases | Store in a cool, dry place |
| Avoid tight folds that stress the fabric | Do not place heavy items on top |
Repairing Damages
Fix tears and broken parts quickly to avoid bigger problems. Small repairs keep the tent safe and useful.
- Use fabric patches or repair tape for small tears.
- Sew loose seams with strong thread.
- Replace broken poles or connectors carefully.
- Check zippers and fix or replace if stuck.

Credit: www.creativegreenliving.com

Credit: www.creativegreenliving.com
Frequently Asked Questions
What Materials Are Needed To Make A Child’s Tent?
You need fabric, wooden poles or PVC pipes, string, and basic sewing tools. Choose lightweight, durable materials for safety and comfort. Soft fabric like cotton or canvas works best. Ensure the poles are sturdy but easy to assemble.
How Long Does It Take To Build A Child’s Tent?
Building a child’s tent usually takes 1 to 3 hours. Time varies based on design complexity and skill level. Simple tents are quicker to assemble, while detailed ones need more time. Preparation and cutting fabric also affect total time.
Is Sewing Necessary For Making A Child’s Tent?
Sewing is helpful but not always necessary. You can use fabric glue or Velcro for no-sew options. Sewing provides durability and a cleaner finish. Choose the method based on your skills and the tent’s intended use.
How Can I Make The Tent Safe For Children?
Ensure all materials are non-toxic and smooth to avoid injuries. Secure poles firmly and avoid sharp edges. Use breathable fabric to prevent overheating. Supervise playtime and check the tent regularly for wear or damage.
Conclusion
Making a child’s tent can be fun and simple. It brings joy and sparks imagination. Use easy materials found at home. Let your child help build and decorate it. This creates special memories and strengthens bonds. A homemade tent offers a cozy space for play and rest.
Try different shapes and colors to keep things exciting. Enjoy watching your child’s creativity grow inside their new tent. It’s a small project with big smiles. Give it a try today!