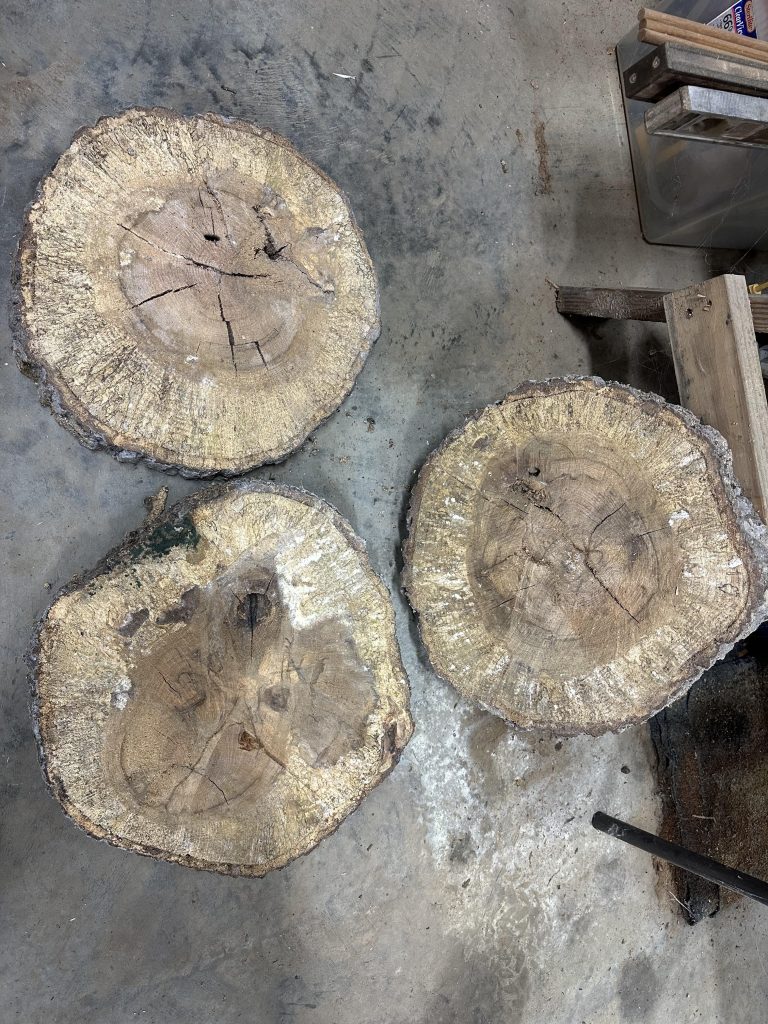
Have you ever thought about turning a simple log into a beautiful, functional cutting board? Making your own cutting board from a log is easier than you might think, and it’s a rewarding way to add a personal touch to your kitchen.
Imagine slicing your favorite ingredients on a board you crafted yourself—strong, unique, and full of character. In this guide, you’ll discover clear, step-by-step instructions that anyone can follow, even if you’re new to woodworking. Ready to create something practical and impressive?
Let’s dive in and make your very own cutting board from a log.
Choosing The Right Log
Making a cutting board starts with picking a good log. The right wood affects how the board looks and works.
You need to know which wood is safe and strong. Also, the log’s size and condition matter a lot.
Types Of Wood Suitable For Cutting Boards
Some woods are better for cutting boards. They are hard, safe, and do not hurt knives.
Soft woods can get damaged fast. Avoid woods that have strong smells or toxins.
- Maple – hard and light-colored wood
- Walnut – dark and durable wood
- Cherry – reddish wood with smooth grain
- Beech – dense and pale wood
- Birch – light and fine-grained wood
Selecting A Log Size And Shape
Choose a log size that fits your cutting board plan. Logs that are too big or small can cause problems.
Look for a log with a shape that is easy to work with. Round or slightly oval logs are best for boards.
- Length: 12 to 18 inches works well
- Diameter: 8 to 12 inches is ideal
- Even shape helps in cutting and shaping
Checking For Defects And Dryness
Check the log for cracks, knots, or holes. Defects can weaken the board and cause problems later.
The wood must be dry. Wet wood can crack or warp after you make the board.
- Look for cracks or splits on the surface
- Avoid logs with many knots or holes
- Test dryness by weighing the log or tapping it
- Dry wood sounds hollow and feels lighter

Credit: www.reddit.com
Gathering Tools And Materials
Making a cutting board from a log needs the right tools and materials. Collecting everything before starting makes the project easier.
You will use tools to shape the wood and supplies to finish the board. Safety gear protects you while working.
Essential Tools For The Project
Tools help cut, shape, and smooth the log into a cutting board. Each tool has a special job in the process.
- Hand saw or chainsaw to cut the log into slices
- Orbital sander or sandpaper for smoothing surfaces
- Chisels for shaping edges
- Clamps to hold the wood steady
- Measuring tape and pencil for marking cuts
Safety Equipment
Safety gear protects your eyes, hands, and lungs from dust and sharp tools. Always wear safety equipment when working.
- Safety goggles to protect your eyes
- Work gloves to protect your hands
- Dust mask to avoid breathing sawdust
- Ear protection if using loud power tools
Additional Supplies Needed
Besides tools and safety gear, some supplies help finish the cutting board. These improve the look and durability.
- Food-safe wood finish or mineral oil
- Clean rags for applying finish
- Wood glue for joining pieces (optional)
- Sandpaper with different grits for finer smoothing
Preparing The Log
Making a cutting board from a log starts with good preparation. The wood must be clean and dry before you begin shaping it.
This section covers how to remove bark, cut the log, and dry the wood properly for a sturdy cutting board.
Removing Bark And Outer Layers
Remove the bark to expose the fresh wood underneath. This helps prevent pests and mold growth.
- Use a drawknife or chisel to strip the bark off.
- Scrape away any rough outer layers or dirt.
- Check for soft spots or rot and cut these away.
- Smooth the surface with coarse sandpaper.
Cutting The Log To Size
Cut your log into manageable pieces that fit your cutting board design. Use sharp tools for clean cuts.
| Tool | Purpose | Tip |
| Hand saw | Cut log into sections | Make slow, steady strokes |
| Chainsaw | Cut large logs quickly | Wear safety gear |
| Band saw | Trim edges for smooth shape | Use for precise cuts |
Drying And Curing The Wood
Drying the wood prevents cracking and warping later. Cure it slowly to keep it strong.
- Store the wood in a dry, shaded area.
- Stack the pieces with spacers between them for airflow.
- Turn the wood every few days to dry evenly.
- Wait several weeks until the wood feels light and dry.
Shaping The Cutting Board
Shaping a cutting board from a log is an important step. It gives your board its form and function.
This stage involves smoothing, rounding, and adding features like juice grooves. These details make the board useful and safe.
Sanding Techniques For Smooth Surfaces
Sanding removes rough spots and splinters from the wood. Start with coarse sandpaper and move to finer grits.
Use long, even strokes and sand along the grain. This keeps the surface smooth and prevents scratches.
- Begin with 80-grit sandpaper to shape the surface
- Use 120-grit for smoothing
- Finish with 220-grit for a fine, polished feel
Rounding Edges And Corners
Rounding edges makes the board safe and comfortable to hold. Sharp edges can cause injury or damage knives.
Use a router or sandpaper to round corners gently. Keep the curve smooth and even all around the board.
- Use a router with a round-over bit for clean edges
- Hand sand edges for a softer, natural finish
- Check all corners to avoid sharp points
Creating Juice Grooves Or Handles
Juice grooves catch liquids and help keep countertops clean. Handles make the board easy to carry and move.
Cut juice grooves with a router set to a shallow depth. For handles, carve or drill openings that fit your hand comfortably.
- Set router depth about 1/8 inch for juice grooves
- Carve grooves around the cutting surface edge
- Drill or carve handle holes about 1 inch wide
- Sand inside handles smooth to avoid splinters
Finishing Touches
After shaping your cutting board from a log, the finishing touches protect it. These steps keep the board safe and long-lasting. Proper finishing also improves the board’s look and feel.
Careful selection of finishes and regular maintenance help your cutting board stay useful for years. Let’s explore how to finish your board the right way.
Choosing Food-safe Finishes
Not all finishes are safe for food contact. Choose finishes that protect the wood without harmful chemicals. Common food-safe finishes include oils and natural waxes.
- Mineral oil: odorless and tasteless, easy to apply
- Beeswax: adds a protective layer and shine
- Walnut oil: natural but watch for nut allergies
- Coconut oil: solid at room temperature and safe
- Tung oil: natural drying oil, use pure form only
Applying Oil Or Sealant
Apply oil or sealant to keep the wood hydrated and safe. Use a clean cloth to rub the finish into the board’s surface. Let it soak in before wiping off excess.
- Clean and dry the cutting board thoroughly
- Pour a small amount of oil or sealant on the surface
- Rub oil evenly using circular motions
- Let the board absorb the oil for 20-30 minutes
- Wipe off any extra oil with a clean cloth
- Repeat every few weeks or when the board looks dry
Maintaining Your Cutting Board
Regular care prevents cracks and warping. Clean the board properly and reapply finish as needed. Avoid soaking the board in water or using harsh soaps.
| Maintenance Task | Frequency | Tips |
| Clean with warm water and mild soap | After every use | Dry immediately to prevent warping |
| Apply food-safe oil | Every 3-4 weeks | Use enough to keep wood shiny and smooth |
| Remove stains with lemon and salt | As needed | Rub gently, then rinse and dry |
| Sand rough spots | When surface feels rough | Use fine-grit sandpaper before oiling |

Credit: 100things2do.ca
Tips And Troubleshooting
Making a cutting board from a log takes care and attention. You want a strong board that lasts long and looks good.
This guide shares tips to prevent problems and fix small damages. Follow these steps for a reliable cutting board.
Preventing Cracks And Warping
Wood can crack or warp if it dries unevenly or too fast. Keep your cutting board safe by controlling the drying process.
- Dry the log slowly in a cool, shaded place.
- Seal the ends of the log with wax or paint to reduce moisture loss.
- Store the board flat to avoid bending.
- Use stable wood types like maple or walnut for better results.
Repairing Minor Damages
Small cracks and dents can happen. Fix them early to keep your board safe and smooth.
Fill cracks with food-safe wood glue or wood filler. Sand the area smooth after it dries. For dents, use a damp cloth and iron to raise the wood fibers.
Extending Board Longevity
Proper care keeps your cutting board working well for years. Use oil and avoid bad habits.
| Care Tip | Reason |
| Apply mineral oil regularly | Keeps wood from drying out |
| Wash by hand with mild soap | Protects wood from damage |
| Avoid soaking in water | Prevents warping and cracks |
| Use a cutting board conditioner | Maintains wood health |

Credit: www.reddit.com
Frequently Asked Questions
How Do You Dry A Log For A Cutting Board?
To dry a log, first remove its bark and cut it to size. Store it in a dry, well-ventilated area for several months. Monitor the moisture content using a moisture meter, ensuring it reaches around 8-10% before proceeding with crafting your cutting board.
What Tools Are Needed To Make A Cutting Board?
You need a chainsaw for initial cuts, a planer for smoothing, and a saw for shaping. Sandpaper is essential for finishing, and mineral oil is recommended for treating the wood surface. A moisture meter can be helpful for checking wood dryness.
Can Any Wood Log Be Used For Cutting Boards?
Not all logs are suitable. Choose hardwoods like maple, walnut, or cherry. These woods are durable and less prone to knife marks. Avoid softwoods, as they may be too porous and prone to damage. Always ensure the wood is properly dried and free from toxins.
How Do You Ensure A Cutting Board Is Food-safe?
To ensure food safety, apply food-grade mineral oil regularly to the board. This prevents the wood from drying and cracking. Avoid using toxic finishes or sealants. Always clean the board with warm soapy water and dry it thoroughly after use to maintain hygiene.
Conclusion
Making a cutting board from a log is a fun and useful project. It needs some tools and careful work. The steps are easy to follow and give good results. You get a unique board that fits your kitchen style.
Wood care keeps it strong and safe for food. Enjoy your new cutting board every day. Try different woods for new looks. A small effort brings a big reward. Give it a try and see how it turns out.