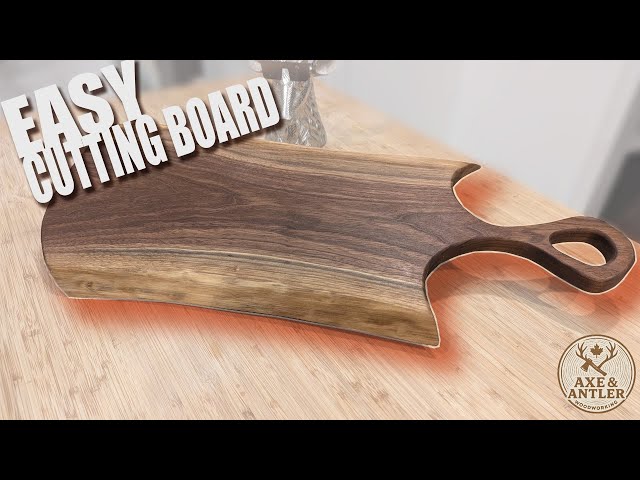
Are you ready to create a beautiful, sturdy cutting board that you can proudly use in your kitchen? Making a cutting board from wood is easier than you might think, and it gives you a unique piece that matches your style perfectly.
Imagine slicing your favorite ingredients on a board you made yourself—strong, smooth, and built to last. In this guide, you’ll discover simple steps and expert tips to turn a plain piece of wood into a kitchen essential. Keep reading, and by the end, you’ll have all the know-how to craft your own cutting board with confidence.
Choosing The Right Wood
Choosing the right wood is key for making a good cutting board. The type of wood affects the board’s durability and safety.
Wood hardness, safety for food contact, and how the wood handles moisture are important to know.
Hardwood Vs Softwood
Hardwoods come from trees that lose leaves in winter. Softwoods come from evergreen trees. Hardwoods are usually better for cutting boards.
Hardwoods are denser and resist scratches and cuts. Softwoods are softer and can get damaged easily.
Best Wood Types For Cutting Boards
- Maple: Hard, durable, and has a fine grain
- Walnut: Strong with a dark color, good for contrast
- Cherry: Hard and ages nicely with a warm tone
- Beech: Tight grain and good hardness
- Teak: Naturally oily and resists water
Wood Safety And Food Contact
| Factor | Why It Matters |
| Porosity | Less porous woods hold fewer bacteria |
| Grain Tightness | Tight grain reduces knife marks and germs |
| Natural Oils | Oily woods resist moisture and bacteria |
| Non-toxic | Safe woods avoid harmful chemicals or treatments |

Credit: www.youtube.com
Gathering Tools And Materials
Making a wooden cutting board needs the right tools and materials. Getting them ready helps the project go smoothly.
This guide covers the essential tools, materials, and workspace setup you need before starting.
Essential Tools
Use these tools to shape and finish your cutting board safely and accurately.
- Table saw or circular saw for cutting wood pieces
- Orbital sander or sanding block for smooth edges
- Clamps to hold wood pieces firmly together
- Measuring tape or ruler for precise dimensions
- Pencil for marking cut lines
- Wood glue to join pieces securely
- Safety gear like goggles and gloves
Required Materials
Choose quality materials for a strong and durable cutting board. Use wood that is safe for food contact.
| Material | Description |
| Hardwood | Maple, walnut, or cherry wood pieces |
| Wood glue | Food-safe adhesive for joining wood |
| Mineral oil | Food-safe oil to finish the board |
| Sandpaper | Fine grit (120 to 220) for smoothing surfaces |
| Clamps | To hold glued wood firmly while drying |
Workspace Setup
Prepare a clean and safe workspace before starting your cutting board project.
- Find a sturdy workbench or table
- Ensure good lighting to see fine details
- Keep tools organized and within reach
- Use a dust mask to protect from wood dust
- Have a trash bin for scraps and waste
Preparing The Wood
Preparing wood correctly is important for a sturdy cutting board. It helps the board last longer and look better.
This guide covers measuring and marking, cutting the wood to size, planing, and sanding.
Measuring And Marking
Use a tape measure to mark the wood pieces. Mark the desired length and width clearly with a pencil. Double-check your marks before cutting.
- Measure twice to avoid mistakes
- Use a square tool for straight lines
- Mark the wood on the face and edges
Cutting The Wood To Size
Cut the wood along your pencil lines using a saw. Keep your cuts straight for a good fit. Use clamps to hold the wood steady.
| Tool | Purpose |
| Handsaw | Simple, manual cutting |
| Table saw | Fast, precise cuts |
| Miter saw | Accurate angled cuts |
Planing And Sanding
Plane the wood to make it smooth and flat. After planing, sand the surface with sandpaper. Use finer grit paper for a smooth finish.
Follow this sanding sequence for best results:
- Start with 80 grit sandpaper
- Use 120 grit to remove rough marks
- Finish with 220 grit for a smooth surface
Assembling The Board
Assembling a wooden cutting board requires careful planning and precise work. This process includes choosing a design, gluing wood pieces, and clamping them firmly.
Each step affects the board’s strength and appearance. Follow these guidelines to create a solid and beautiful cutting board.
Choosing A Board Design
Select a design that fits your skill level and style. Common designs include edge grain, end grain, and face grain boards.
- Edge grain boards are simple and easy to make.
- End grain boards show the wood’s natural pattern well.
- Face grain boards use the flat side of the wood for a smooth look.
- Mix wood types for contrast and style.
Gluing The Pieces Together
Use wood glue that is strong and waterproof. Spread glue evenly on each board edge to ensure a tight bond.
| Glue Type | Drying Time | Water Resistance |
|---|---|---|
| Yellow Wood Glue | 30 minutes | Moderate |
| Waterproof PVA Glue | 45 minutes | High |
| Epoxy Resin | 60 minutes | Very High |
Press the glued edges firmly before clamping to avoid gaps. Clean any excess glue quickly with a damp cloth.
Clamping Techniques
Clamping holds the board pieces tightly until the glue dries. Use enough clamps to apply even pressure across the board.
- Place the glued pieces on a flat surface.
- Set clamps along the board, spacing them about 6 inches apart.
- Tighten clamps slowly to avoid shifting the pieces.
- Check that the board stays flat and edges align.
- Leave clamps on for at least one hour or as per glue instructions.
Shaping And Finishing
After cutting your wooden board to size, shaping and finishing make it safe and nice to use. This step improves the look and feel of your cutting board.
Take your time to shape the edges, smooth the surface, and add special features like grooves or handles. These details help keep your board practical and attractive.
Trimming Edges
Trim the edges to remove any rough or uneven parts. Use a saw or a router to get clean, straight sides. Rounded edges are safer and more comfortable to hold.
Carefully shape the corners by sanding or cutting to avoid sharp points. This makes the board easy to handle and less likely to cause splinters.
Sanding For Smoothness
Sanding is important to create a smooth surface. Start with coarse sandpaper to remove rough spots. Move to finer grits to make the wood soft to the touch.
Sanding also helps open the wood grain so finishing oils or sealers soak in better. Always sand along the grain to avoid scratches.
- Use 80-grit sandpaper first
- Follow with 120-grit for medium smoothness
- Finish with 220-grit for a very smooth surface
Adding Juice Grooves Or Handles
Juice grooves catch liquids from fruits or meats to keep your countertop clean. Use a router or chisel to carve a shallow channel near the edge.
Handles make moving the board easier. Cut out handholds or attach wooden handles on the sides. Make sure the edges of handles are smooth for comfort.
- Juice groove depth: about 1/4 inch
- Width of groove: 1/2 inch to 3/4 inch
- Handle openings: 1 inch wide and 3 inches long

Credit: www.youtube.com
Sealing And Treating
Sealing and treating your wooden cutting board keeps it safe and durable. It protects the wood from moisture and stains.
Using the right finish helps stop bacteria and keeps your board looking good for a long time.
Food-safe Finishes
Choose finishes that are safe for food contact. These finishes do not harm your health or taste your food.
Common food-safe finishes include mineral oil, beeswax, and walnut oil. Avoid finishes with chemicals or solvents.
- Mineral oil is easy to apply and renew.
- Beeswax adds a protective layer and shine.
- Walnut oil soaks into the wood and hardens.
Applying Mineral Oil
Mineral oil is a popular choice for treating cutting boards. It soaks into the wood and protects it from drying out.
Apply mineral oil with a clean cloth. Rub it into the wood evenly and let it soak overnight.
- Use food-grade mineral oil only.
- Apply generously and cover all surfaces.
- Wipe off extra oil after soaking.
- Repeat every few weeks for best results.
Maintaining The Board
Keep your cutting board clean and dry. Wash it with mild soap and warm water after use.
Reapply mineral oil regularly. This stops cracks and warping over time.
- Never soak the board in water.
- Dry it completely before storing.
- Use a sanding block to smooth rough spots.
- Oil the board after sanding or deep cleaning.
Tips For Longevity
Making a cutting board from wood is fun and useful. To keep it in good shape, you need to care for it well.
Good care helps your board last a long time and stay safe for food.
Cleaning And Care
Clean your wooden cutting board after every use. Use warm water and mild soap. Avoid soaking it in water.
Dry the board well with a towel. Let it air dry standing up to stop warping.
- Wash with soap and water quickly
- Do not put in the dishwasher
- Dry completely before storing
- Oil the board regularly with food-safe oil
Avoiding Common Mistakes
Do not cut on the same spot every time. This can cause deep grooves and cracks.
Avoid using harsh cleaners or bleach. They can damage the wood and make it unsafe for food.
- Do not soak or submerge the board
- Do not use strong chemicals
- Do not use rough scrubbers that scratch the surface
- Do not leave the board in direct sunlight
Storage Suggestions
Store the cutting board in a dry place. Keep it away from heat sources like stoves.
Stand the board on its side to let air flow around it. This helps prevent mold and cracks.
- Keep it upright for air circulation
- Store in a cool, dry area
- Avoid stacking heavy items on top
- Oil the board before storage for extra protection
Credit: medium.com
Frequently Asked Questions
What Type Of Wood Is Best For Cutting Boards?
Hardwoods like maple, walnut, and cherry are ideal. They resist knife marks and bacteria. Avoid softwoods to prevent deep cuts and wear.
How Do I Prevent A Wooden Cutting Board From Cracking?
Keep it dry and avoid soaking in water. Apply mineral oil regularly to maintain moisture and prevent cracks.
Can I Use A Wooden Cutting Board For Raw Meat?
Yes, but clean thoroughly after use. Sanitize with vinegar or diluted bleach to avoid cross-contamination.
How Often Should I Oil My Wooden Cutting Board?
Oil your board once a month or when it looks dry. Regular oiling extends its life and keeps it smooth.
Conclusion
Making a wooden cutting board is a fun and useful project. It needs some simple tools and patience. Choose good wood for a strong and safe board. Sand it smooth and treat it with oil for long life. This board will be a great kitchen helper.
Enjoy your work and the tasty meals you prepare. Keep practicing to improve your skills. Woodworking can bring joy and pride. Try making one today and see the results yourself.