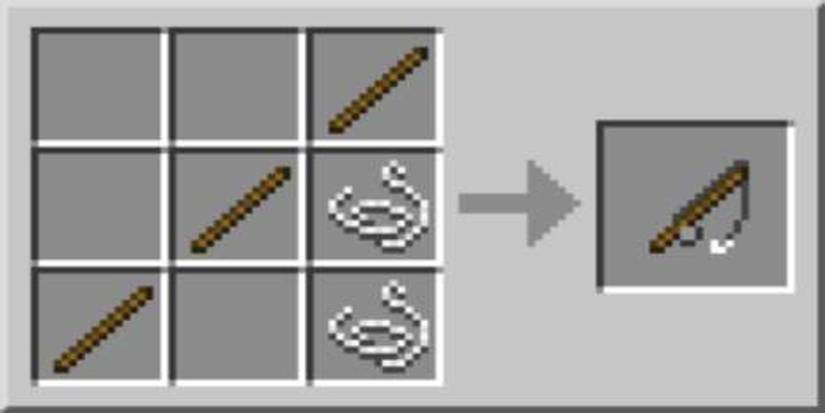
Have you ever wanted to create your very own fishing rod that matches your style and needs? Making a fishing rod yourself might sound tricky, but with the right steps, you can build one that’s perfect for your next fishing trip.
This guide will walk you through everything you need to know, from choosing materials to putting it all together. By the end, you’ll have a fishing rod that feels just right in your hands and helps you catch more fish.
Ready to get started? Let’s dive in and make your dream fishing rod a reality!
Materials Needed
Making a fishing rod requires careful selection of materials. The right items help create a strong and balanced rod. Gather all necessary supplies before you start.
This guide covers three main parts: the rod blank, the reel and line, and other supplies needed for assembly.
Choosing The Right Rod Blank
The rod blank is the main shaft of your fishing rod. It needs to be strong and flexible. Choose a blank based on the type of fishing you want to do.
| Material | Strength | Weight | Best For |
|---|---|---|---|
| Graphite | High | Light | Freshwater and saltwater fishing |
| Fiberglass | Medium | Heavier | Durability and heavy fish |
| Composite | Medium-High | Moderate | General use and beginners |
Selecting The Reel And Line
Pick a reel that fits your rod blank and the type of fish you want to catch. The line should match your reel and rod strength.
- Spinning reel for light to medium fishing
- Baitcasting reel for precise casting and heavy fish
- Monofilament line for flexibility and ease of use
- Braided line for strength and thin diameter
- Fluorocarbon line for invisibility underwater
Gathering Additional Supplies
You need extra tools and parts to assemble the rod. These help attach the reel and guide the fishing line.
- Rod handle (cork or EVA foam)
- Guides and tip-top
- Thread for wrapping guides
- Epoxy glue for securing parts
- Reel seat to hold the reel
- Sandpaper and finishing tools

Credit: www.sportskeeda.com
Preparing The Rod Blank
Preparing the rod blank is the first step in making a fishing rod. It sets the foundation for a strong and balanced rod.
This process includes measuring, cutting, sanding, and marking guide positions on the blank.
Measuring And Cutting
Measure the rod blank to your desired length. Use a tape measure for accuracy.
Mark the cutting point clearly with a pencil. Use a fine saw to cut the blank smoothly.
- Measure twice to avoid mistakes
- Cut slowly to prevent splintering
- Wear safety glasses during cutting
Sanding The Rod
Sanding smooths the cut edges and removes any rough spots on the blank. Use fine-grit sandpaper.
Sand gently in one direction to keep the blank even. Check for splinters or uneven areas.
- Start with 220-grit sandpaper
- Finish with 400-grit for a smooth surface
- Wipe the blank clean after sanding
Marking Guide Positions
Mark where the guides will go on the rod blank. Guides help control the fishing line.
Use a ruler and pencil to place marks evenly from the handle to the tip.
- Start placing guides about 6 inches from the handle
- Space guides closer near the tip
- Double-check measurements before gluing guides
Attaching The Guides
Attaching guides is a key step in making a fishing rod. Guides help control the fishing line. They need to be placed carefully for best performance.
This part explains how to pick guide sizes, place them, and secure them with thread wraps.
Selecting Guide Sizes
Use different guide sizes along the rod for smooth line flow. Start with a large guide near the reel. Use smaller guides toward the tip.
Choose guides that fit your rod’s length and fishing style. The right size guides improve casting distance and accuracy.
- Large guides reduce line friction near the reel
- Smaller guides keep the line close to the rod
- More guides give better line control
Aligning The Guides
Place guides in a straight line along the rod’s length. The line should flow through all guides without twisting.
Check guide spacing evenly. The first guide goes close to the reel seat. The last guide sits near the rod tip.
- Align guides on the rod’s front side
- Keep guides straight for smooth line movement
- Space guides evenly for balanced support
Securing With Thread Wraps
Use strong thread to wrap guides tightly to the rod. Wrap from the guide foot to the rod blank. Make sure the wraps are neat.
Apply several layers of thread. Add epoxy to protect the wraps and keep guides in place.
- Start with a tight base wrap on the rod
- Wrap evenly around guide feet
- Use epoxy to seal and protect thread wraps
Applying Epoxy Finish
Applying an epoxy finish protects your fishing rod and gives it a smooth look. This process seals the thread wraps and strengthens the rod.
Follow these steps carefully to get a clean and durable finish on your fishing rod.
Mixing The Epoxy
Mix the epoxy resin and hardener in equal parts for best results. Stir slowly to avoid bubbles. Use a clean container and mix enough for your project.
- Measure equal amounts of resin and hardener.
- Pour both into a mixing cup.
- Stir gently for at least two minutes.
- Check for bubbles and remove them by stirring slowly.
- Use the mixed epoxy within the recommended time.
Coating The Thread Wraps
Apply epoxy evenly over the thread wraps using a small brush. Rotate the rod slowly to cover all sides. Avoid thick layers to prevent runs or drips.
- Use a soft, fine brush for smooth application.
- Keep the rod horizontal while coating.
- Apply thin coats to avoid uneven drying.
- Wipe excess epoxy immediately with a clean cloth.
Drying And Curing Process
Let the epoxy dry in a dust-free area with good ventilation. The curing time depends on the epoxy type and room temperature. Avoid touching the rod during this period.
| Temperature | Approximate Curing Time |
|---|---|
| 70°F (21°C) | 24 hours |
| 80°F (27°C) | 16 hours |
| 90°F (32°C) | 12 hours |
Installing The Reel Seat And Handle
Installing the reel seat and handle is a key part of making your fishing rod. It affects how comfortable and sturdy the rod feels. Take your time to fit them well.
This guide covers choosing the right handle materials, fitting the reel seat, and securing the handle firmly to the rod blank.
Choosing Handle Materials
Pick handle materials that feel good in your hand and last long. Common options include cork, EVA foam, and wood. Each has its own benefits.
- Cork:Lightweight and comfortable with good grip.
- EVA Foam:Soft, durable, and easy to clean.
- Wood:Classic look but needs more care.
Fitting The Reel Seat
Make sure the reel seat fits the rod blank snugly. It should not move or wiggle after fitting. Measure the blank diameter first.
| Step | Action |
| 1 | Measure the rod blank diameter at the handle area. |
| 2 | Check reel seat inner diameter for fit. |
| 3 | Use epoxy to secure the reel seat onto the blank. |
| 4 | Align the reel seat so it points straight along the blank. |
| 5 | Let the epoxy cure fully before moving on. |
Securing The Handle
Attach the handle tightly to keep the reel seat stable. Use the right glue or epoxy. Wrap the handle for extra grip and strength.
- Sand the handle and blank surfaces to improve glue grip.
- Apply epoxy evenly to avoid gaps.
- Use masking tape to hold the handle in place while curing.
- Check for movement after curing and fix if needed.
Credit: www.thegamer.com
Final Assembly And Testing
After building your fishing rod parts, it is time to put everything together. This step ensures your rod works well and lasts a long time.
Testing the rod helps find any problems early. Fixing issues now saves trouble later on the water.
Attaching The Reel And Line
Start by securing the reel onto the rod handle. Make sure it fits tightly to avoid movement.
Next, thread the fishing line through the rod guides from the tip to the reel. Tie the line firmly to the reel spool.
- Place the reel foot in the reel seat and tighten the locking ring
- Run the line through each guide starting from the bottom
- Use a strong knot like the Arbor knot to attach the line to the reel
Testing Flexibility And Strength
Check how the rod bends by applying gentle pressure near the tip. It should flex smoothly without cracking.
Test the rod’s strength by pulling on the line. The rod should hold firm without feeling weak or loose.
- Bend the rod slowly to see if it returns to its shape
- Pull on the line with moderate force to test tension
- Listen for any unusual sounds like cracking or creaking
Making Adjustments
If the reel moves, tighten the reel seat. If the line slips, check the knot or spool tension.
Adjust the rod guides if the line does not run smoothly. Replace any damaged parts before use.
- Tighten loose reel seats or screws
- Retie knots if the line slips
- Realign or replace bent guides
- Check the handle for secure grip

Credit: www.thegamer.com
Frequently Asked Questions
How Do I Start Making A Fishing Rod Mc?
Begin by gathering basic materials: a rod blank, reel seat, guides, and handle. Follow step-by-step guides for assembly and ensure precise measurements for balance and strength.
What Materials Are Needed For Fishing Rod Mc?
You need a lightweight rod blank, quality reel seat, stainless steel guides, strong fishing line, and a comfortable handle for durability and ease of use.
How Long Does It Take To Make A Fishing Rod Mc?
Crafting a Fishing Rod Mc typically takes 3 to 5 hours, depending on your experience and the complexity of the design.
Can I Customize My Fishing Rod Mc Design?
Yes, you can customize colors, handle types, guide placements, and reel seats to match personal preferences and fishing styles.
Conclusion
Making a fishing rod Mc is easier than it seems. Follow the steps carefully and take your time. Choose the right materials to build a strong rod. Practice your skills to improve with each try. Enjoy the process and the fun of fishing.
Soon, you will have a rod ready for your next trip. Keep learning and experimenting for better results. Fishing becomes more enjoyable with your own handmade rod. Try it today and feel proud of your work.