Have you ever found yourself in the middle of cooking or baking, only to realize you don’t have a measuring cup handy? It’s frustrating, right?
What if you could make your own measuring cup quickly and easily, using things you already have around the house? You’ll discover simple steps to create a reliable measuring cup that saves you time and stress. Keep reading, and you’ll never have to worry about guessing measurements again.
Your kitchen skills—and your recipes—will thank you!
Materials Needed
Making your own measuring cup is simple and fun. You need a few materials to get started. These will help you create a useful and accurate tool.
Below are the main materials and tools you should gather before you begin. Each part plays a role in the final product.
Choosing The Right Container
Pick a container that is clear and sturdy. Glass or hard plastic containers work best. Avoid containers that are too flexible or opaque.
- Clear glass jars
- Plastic food storage containers
- Old measuring cups with faded marks
- Clean yogurt or pudding cups
Essential Tools
| Tool | Purpose |
| Permanent marker | Mark measurement lines |
| Ruler or measuring tape | Measure container height and width |
| Water or rice | Fill container to check measurements |
| Pen and paper | Record measurements |
Optional Accessories
These accessories can make your measuring cup easier to use or more durable. They are not required but helpful.
- Clear tape to protect measurement marks
- Colored markers to highlight different units
- Small funnel to fill the cup without spilling
- Sandpaper to smooth rough edges

Credit: studyx.ai
Preparing The Container
Making a measuring cup starts with choosing the right container. The container must be clean and dry for accurate measurements.
Preparing the container carefully helps you mark measurement lines clearly. This step ensures your measuring cup works well.
Cleaning And Drying
Clean the container to remove dirt and oils. Use warm water and soap to wash it well.
Rinse the container with clean water. Then, dry it completely with a towel or let it air dry.
- Use a mild soap to avoid residue
- Rinse thoroughly to remove soap
- Dry fully to prevent water marks
Marking Measurement Lines
Marking lines on the container shows how much it holds. Use a permanent marker or tape to make clear lines.
Measure the liquid carefully and mark each level. Label the lines with numbers for easy reading.
- Fill container with known amounts of water
- Mark the liquid level on the outside
- Write the measurement (e.g., 1 cup, 100 ml)
- Repeat for each measurement you want to include
Creating Measurement Marks
Making a measuring cup requires adding clear measurement marks. These marks help you measure liquids accurately. You can create marks by carefully measuring and labeling the container.
This guide explains how to measure liquid volumes, use water for calibration, and mark different units on your measuring cup.
Measuring Liquid Volumes
Start by choosing a container to use as your measuring cup. Use a measuring jug or a known volume container to pour liquid into it. Mark the liquid level at different volumes to create measurement lines.
Using Water For Calibration
Water is a good liquid to use for calibration. It is easy to measure and safe to handle. Use a kitchen scale to weigh the water to check volume accuracy.
- Fill the container with water up to a known volume, like 100 ml.
- Mark the water level on the container with a permanent marker.
- Repeat for other volumes, such as 200 ml, 300 ml, and so on.
- Check each mark by weighing the water to confirm the volume.
- Adjust marks if needed to improve accuracy.
Marking Different Units
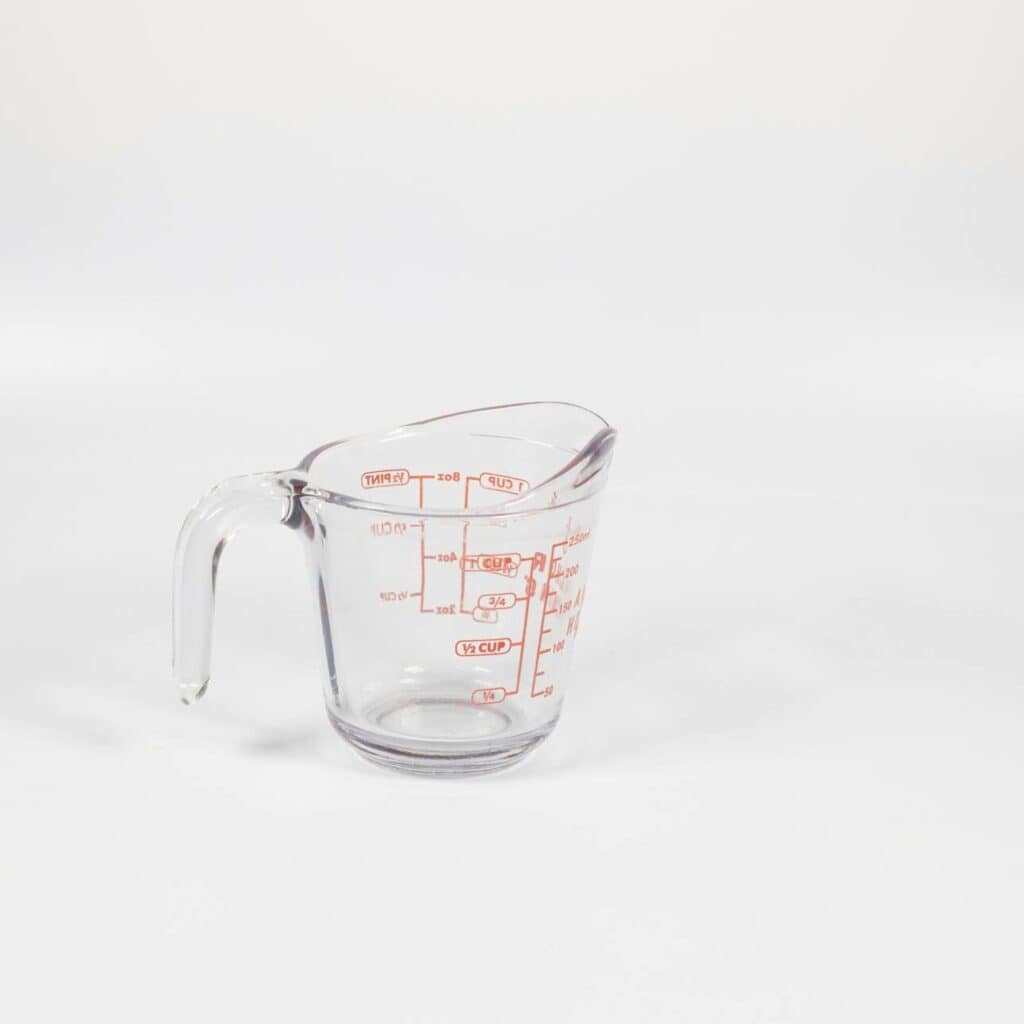
You can add measurement marks for different units, like cups, ounces, or milliliters. It helps to have a table of common conversions to mark your cup correctly.
| Unit | Equivalent in Milliliters (ml) |
|---|---|
| 1 cup | 240 ml |
| 1 ounce (oz) | 30 ml |
| 1 tablespoon (tbsp) | 15 ml |
| 1 teaspoon (tsp) | 5 ml |
Credit: www.recipesandplaces.com
Securing And Labeling
Making a measuring cup requires clear labels and strong markings. This helps users read measurements easily. It also keeps the cup useful for a long time.
This guide covers how to mark your measuring cup permanently. It also explains how to add measurement labels and make sure they last.
Permanent Marking Techniques
Use permanent methods to mark your measuring cup. Paint pens work well on plastic or glass. Engraving is good for metal cups.
- Use a fine-tip paint pen for clear lines.
- Engrave marks using a rotary tool.
- Apply waterproof stickers for a quick option.
- Heat-set paint to improve durability.
Adding Measurement Labels
Labels should show units like cups, ounces, or milliliters. Place them near the marks for easy reading. Use contrasting colors.
| Unit | Label Example | Color Suggestion |
| Cups | 1 cup, 2 cups | Black or dark blue |
| Ounces | 8 oz, 16 oz | Red or dark green |
| Milliliters | 250 ml, 500 ml | Black or dark gray |
Ensuring Durability
Protect your markings from wear and tear. Use clear sealant spray to cover the labels. Let it dry fully before use.
Tips to keep your measuring cup durable:
- Choose waterproof and fade-proof materials.
- Avoid harsh scrubbing on marked areas.
- Store the cup away from direct sunlight.
- Reapply sealant every few months if needed.
Testing Your Measuring Cup
After making your measuring cup, testing it is important. This ensures your measurements are correct for cooking or baking.
Testing helps find any mistakes in your cup’s size or markings. You can fix these before using it in recipes.
Accuracy Check
To check accuracy, use water and a known volume container. Fill your measuring cup with water, then pour it into the known container.
- Fill your cup to a marked line.
- Pour water into a standard measuring cup or graduated cylinder.
- Compare the water level with the mark on your cup.
- Note any difference in volume.
| Marked Volume (cups) | Measured Volume (cups) | Difference |
| 1 | 0.95 | -0.05 |
| 2 | 2.1 | +0.1 |
| 3 | 3.0 | 0 |
Adjustments If Needed
If your measurements are off, adjust the markings or shape. Small errors can cause big cooking mistakes.
- Mark new lines where water levels match correct volumes.
- Use a permanent marker or paint to redraw the lines.
- Test again to confirm changes improve accuracy.
- Repeat if needed until your cup measures well.

Credit: www.amazon.ae
Tips For Accurate Cooking
Using a measuring cup you made yourself can be fun and helpful. It lets you measure ingredients just right. This helps your recipes turn out well every time.
Here are some tips to use and care for your DIY measuring cup. Follow these steps to keep your cooking accurate and easy.
Using Your Diy Measuring Cup Correctly
To get the best results, use your measuring cup the right way. This helps you add the right amount of ingredients.
- Place the cup on a flat surface before measuring.
- Fill the cup to the top without packing the ingredient.
- Level off dry ingredients with a straight edge.
- For liquids, check the measurement at eye level.
- Use the right measuring cup for dry or wet ingredients.
Cleaning And Maintenance
Keep your measuring cup clean and in good shape. This ensures it stays accurate and lasts longer.
| Cleaning Task | How to Do It | Why It Matters |
|---|---|---|
| Wash after each use | Use warm water and mild soap | Removes food residues that affect measurements |
| Dry thoroughly | Use a clean towel or air dry | Prevents water spots and damage |
| Store properly | Keep in a dry, cool place | Protects from warping or breaking |
Frequently Asked Questions
How Do You Make A Homemade Measuring Cup?
To make a homemade measuring cup, use a clear container. Mark measurement lines using a ruler and permanent marker. Ensure the measurements are accurate by comparing with a standard measuring cup. This DIY method is useful for cooking or baking when specific sizes are unavailable.
What Materials Are Needed For A Diy Measuring Cup?
For a DIY measuring cup, you’ll need a clear container, a ruler, and a permanent marker. These materials help create accurate measurement lines. Choose a container that is easy to handle and durable. This simple method provides a cost-effective solution for measuring ingredients.
Can I Use Any Container For Measuring?
Yes, you can use any container for measuring. Ensure it’s clear and durable. Mark the measurements accurately using a ruler and permanent marker. This method is versatile and adaptable for various kitchen needs. However, for precision in baking, consider using standardized measuring cups.
How Accurate Is A Homemade Measuring Cup?
A homemade measuring cup can be quite accurate if marked correctly. Use a ruler and permanent marker for precise lines. Compare with a standard measuring cup to ensure accuracy. This DIY method is practical but might not replace commercial measuring tools for professional recipes.
Conclusion
Making your own measuring cup saves money and helps in cooking. You control the size and marks for your needs. It feels good to use something made by yourself. Try this simple project and see how easy it is. Cooking becomes more fun and precise with your own tool.
Give it a go and enjoy better meals every day. Small steps like this make a big difference in the kitchen. Keep practicing, and you will improve quickly. Happy cooking!