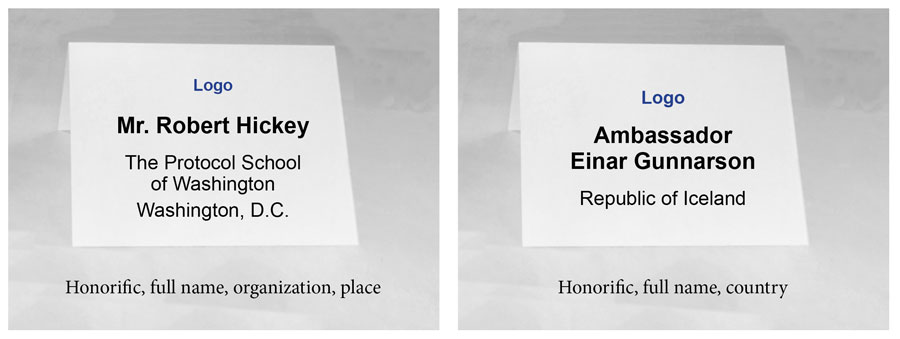
Are you looking for a simple way to create a professional-looking name tent using Word? Whether it’s for a meeting, a workshop, or a special event, having a clear and attractive name tent can make a big difference.
In this guide, you’ll discover easy steps to design your own name tent quickly, even if you’ve never used Word for this before. Keep reading, and you’ll be ready to impress your audience with a neat, personalized name tent in no time!

Credit: www.typecalendar.com
Setting Up Your Document
Before making a name tent in Word, set up your document correctly. This helps your name tents look neat and fit well on the paper.
Adjusting page size, margins, and orientation are key steps. These settings make sure your name tents print as you want.
Choosing The Right Page Size
Pick a page size that matches your name tent size. Common sizes are letter or A4 paper.
Using a standard size helps your printer handle the paper easily. It also fits well in folders or on tables.
- Letter size: 8.5 x 11 inches, common in the US
- A4 size: 210 x 297 mm, common internationally
- Custom sizes can work but may need special settings
Adjusting Margins For Name Tents
Set margins to give space around your name tent. Too small margins may cut off text when printed.
Usually, 0.5 to 1 inch margins work well. This keeps your content clear and easy to read.
- Go to Layout or Page Setup in Word
- Set top, bottom, left, and right margins equally
- Check print preview to avoid cutting text
Selecting Orientation: Landscape Vs Portrait
Choose landscape or portrait layout based on your name tent style. Landscape is wider, portrait is taller.
Landscape works well for folded name tents. Portrait suits single flat cards or tent cards standing tall.
- Landscape: wider, good for folding in half
- Portrait: taller, fits single-sided cards
- Pick the one that fits your design best

Credit: www.teacherspayteachers.com
Creating The Tent Shape
Making a name tent in Word is simple and fun. You can use basic tools to create a tent shape easily.
This guide will help you insert a text box, format it, and add shapes for design.
Inserting A Text Box
First, open Microsoft Word and start a new document. You need to insert a text box to create the tent shape.
Go to the “Insert” tab on the toolbar. Click on “Text Box” and choose “Simple Text Box” from the dropdown menu.
Formatting The Text Box For Tent Style
Once the text box appears, you need to format it to look like a tent. Click on the text box to highlight it.
Next, go to the “Format” tab. Adjust the size of the text box to fit your needs. You can also change the border style and color.
- Adjust the width to make it wider
- Use a dashed line for the border
- Choose a light color for the background
Using Shapes To Enhance Design
To make your name tent more attractive, you can add shapes. Go to the “Insert” tab again and click on “Shapes”.
Select a shape, like a triangle, to place above the text box. This adds a tent-like appearance to your design.
- Choose a triangle for the roof
- Place shapes symmetrically
- Match shape color with the text box
Adding And Styling Text
Creating a name tent in Word is simple. You can add your name and style it to look nice.
This guide helps you type your name, pick fonts and sizes, and use colors and effects.
Typing Your Name
First, open Word and click where you want your name. Then, type your full name clearly.
Make sure the text is in the center or where you want on the name tent.
Choosing Fonts And Sizes
Select a font that is easy to read. Avoid fancy fonts for better clarity.
Choose a size that fits the name tent space well and is visible from a distance.
- Use fonts like Arial, Calibri, or Times New Roman
- Try sizes between 24 and 48 points
- Adjust size to fit the name tent without crowding
Applying Colors And Effects
Pick colors that match your style or event theme. Dark colors usually show well.
You can add effects like bold or underline to make the name stand out.
- Use bold to make text thicker
- Underline to highlight the name
- Choose text colors like black, blue, or dark green
- Avoid too many colors to keep it simple
Duplicating And Arranging Tents
Making multiple name tents in Word saves time for events. You can copy one tent and place many on a page.
This guide explains how to copy tents, align them neatly, and get ready for printing.
Copying Name Tents Efficiently
Start by selecting the name tent you made. Use the copy and paste commands to duplicate it.
You can also use the drag-and-drop method while holding the Ctrl key to copy quickly.
- Select the tent by clicking its border.
- Press Ctrl + C to copy.
- Press Ctrl + V to paste.
- Repeat as many times as needed.
Aligning Multiple Tents On The Page
Arrange the tents in rows and columns for a tidy look. Use Word’s alignment tools to help.
| Action | How to Do It |
| Select all tents | Hold Shift and click each tent |
| Align left | Go to Layout > Align > Align Left |
| Distribute horizontally | Go to Layout > Align > Distribute Horizontally |
| Distribute vertically | Go to Layout > Align > Distribute Vertically |
Preparing For Printing
Check the page layout before printing to avoid wasted paper. Use print preview to see tents’ positions.
Follow these tips for printing:
- Set page margins to narrow for more tents.
- Choose landscape or portrait orientation based on tent shape.
- Print a test page to check alignment.
- Adjust tent size if needed before printing all.
Printing Tips For Best Results
Printing a name tent in Word is easy but needs care. Good printing makes your name tent look neat and last longer.
Follow simple tips to get the best print quality. This helps your name tent stand out and stay strong.
Selecting Print Settings
Choose the right print settings before printing your name tent. Check the paper size and layout options in Word.
Set the print quality to high for clear text and colors. Use the “Landscape” orientation if your tent design is wide.
- Set paper size to match your cardstock
- Choose “High Quality” or “Best” print option
- Use “Landscape” or “Portrait” based on design
- Preview before printing to avoid mistakes
Using Cardstock Or Heavy Paper
Cardstock or heavy paper works best for name tents. They hold their shape and look professional.
Choose paper with at least 80 lb weight or 200 gsm. This thickness prevents the tent from bending or falling over.
- Use cardstock, not regular printer paper
- Check printer support for heavy paper
- Buy smooth or matte finish for better printing
- Test print on regular paper first
Folding Techniques For Stability
Fold your name tent carefully to keep it stable on the table. Use sharp creases for a clean fold.
Fold the paper in half to make a tent shape. You can also fold the bottom edges slightly to create extra support.
- Fold along the center line for a strong base
- Use a ruler or bone folder for sharp creases
- Fold bottom edges inward for extra stability
- Check the tent stands upright without wobbling

Credit: www.teacherspayteachers.com
Frequently Asked Questions
How Do I Create A Name Tent In Word?
To create a name tent in Word, use the table or text box feature. Insert a table with two rows, type the name, then fold the paper. This method helps create a clear, professional-looking name tent.
Can I Customize Fonts And Colors In Name Tents?
Yes, Word allows full customization of fonts, colors, and styles. Select the text and use the Home tab to change font size, color, and style. Customization makes your name tent stand out and match your event theme.
What Paper Size Is Best For Name Tents?
Standard letter size (8. 5 x 11 inches) works best for name tents. It easily folds in half to stand upright. Using this size ensures compatibility with most printers and keeps your name tents neat.
How To Print Multiple Name Tents On One Page?
Use the table or multiple text boxes on one Word page. Arrange them evenly, then print. This saves paper and allows you to create several name tents quickly.
Conclusion
Making a name tent in Word is simple and quick. You just need a few steps to create a clear, neat design. This helps organize events or meetings smoothly. Try changing colors or fonts to fit your style. Practice a couple of times to feel confident.
Now, you can make name tents without any trouble. Give it a shot and see how easy it is!