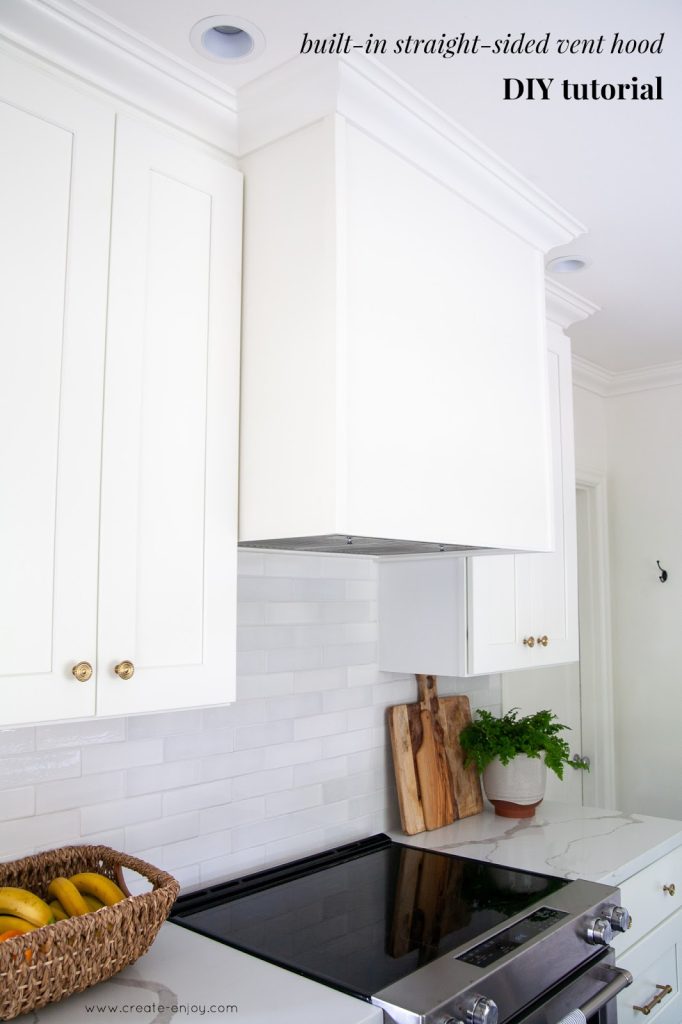
Are you tired of looking at the plain or outdated range hood in your kitchen? Do you dream of a stylish kitchen makeover but worry about the cost?
Creating your own range hood cover can be an easy and cost-effective way to transform the heart of your home. Imagine the satisfaction of designing something that reflects your personal style and complements your kitchen perfectly. In this guide, you’ll discover the simple steps to craft a custom range hood cover that not only enhances your kitchen’s aesthetic but also boosts its functionality.
Ready to turn your kitchen into a space that wows? Let’s dive into the details and unleash your creativity!
Choosing The Right Materials
Choosing the right materials for your range hood cover can transform your kitchen’s look and feel. The material you pick affects durability, style, and ease of cleaning. Think about your kitchen’s vibe and how much maintenance you’re willing to do before deciding.
Wood Options For Covers
Wood brings warmth and character to your kitchen. Pine and oak are popular because they’re sturdy and easy to work with. You can paint or stain wood to match your cabinets or create a contrasting feature.
Hardwoods like maple or cherry offer a sleek, high-end finish but can cost more. If you want a rustic or farmhouse look, reclaimed wood adds charm and uniqueness. Remember, wood needs to be sealed properly to resist heat and moisture.
Metal And Stainless Steel Choices
Metal covers, especially stainless steel, give a modern, professional kitchen vibe. They’re highly durable and easy to clean, which is ideal if you cook often. Stainless steel reflects light, making your kitchen appear brighter and larger.
If stainless steel feels too cold, consider brushed or matte finishes for a softer look. Aluminum is another lightweight option but may dent more easily. Metals can be combined with other materials, like wood accents, for a custom look.
Reclaimed And Upcycled Materials
Using reclaimed materials adds character and helps the environment. Old barn wood, metal sheets, or even vintage shutters can be turned into a stunning hood cover. These pieces often come with interesting textures and stories.
Upcycling challenges you to think creatively. It’s rewarding to see something old become a focal point in your kitchen. Before choosing reclaimed materials, check for any damage or chemicals, and ensure they’re safe to use near heat.

Credit: www.create-enjoy.com
Measuring Your Range Hood
Measuring your range hood correctly is essential before making a cover. Precise measurements ensure the cover fits well and looks good. This step helps avoid costly mistakes and extra work later.
Take your time and measure carefully. Use a tape measure and note down all the key dimensions. These details will guide you through the construction process.
Taking Accurate Dimensions
Start by measuring the width of the range hood from edge to edge. Measure the height from the bottom to the top of the hood. Don’t forget the depth, which is the distance from the front to the back.
Record all measurements in inches or centimeters, depending on your tools. Double-check each number to make sure it is correct. Small errors can cause the cover to fit poorly.
Considering Ventilation Needs
Your cover should not block air flow or vents. Measure the location and size of any vents on the hood. Leave enough space for air to pass freely.
Plan openings or slots in the cover to match the vent positions. Proper ventilation keeps your kitchen air clean and prevents overheating. Keep these needs in mind while measuring and designing your cover.
Design Ideas For Covers
Choosing the right design for your range hood cover can completely change the vibe of your kitchen. Your cover can either blend in with your existing décor or stand out as a bold statement piece. Think about how the style will complement your cabinets, countertops, and overall kitchen theme before you start building.
Rustic And Farmhouse Styles
If you like the cozy, lived-in feeling of farmhouse kitchens, a rustic range hood cover is a perfect fit. Use reclaimed wood or distressed finishes to add warmth and character. You might want to add simple wooden beams or use barn door-style panels for a unique touch.
Don’t be afraid to mix in metal accents like black iron handles or brackets. They add a nice contrast and keep the look grounded. Have you ever thought about how a rough wood texture can make your kitchen feel more inviting?
Modern And Minimalist Designs
For a sleek and clean look, go for modern and minimalist designs. Smooth surfaces, straight lines, and neutral colors like white, gray, or black work best here. You can use materials like stainless steel or painted MDF for a smooth finish.
Think about hiding the ductwork inside a simple box shape that matches your cabinets. This keeps the focus on clean, uninterrupted lines. Would a minimal design help your kitchen feel more spacious and less cluttered?
Decorative Trim And Molding
Adding decorative trim or molding can instantly upgrade your range hood cover, no matter the style you choose. Crown molding at the top adds elegance, while beadboard or panel molding adds texture and interest.
You can paint the trim to match your kitchen or use a contrasting color to make it pop. Small details like these often get overlooked but can be the difference between a basic cover and a custom-looking piece. What subtle detail could you add to make your cover uniquely yours?
Step-by-step Construction Guide
Building your own range hood cover can transform your kitchen’s look while giving you control over style and materials. The process is straightforward if you break it down into clear stages. Let’s walk through the essential steps that bring your design from idea to reality.
Cutting And Preparing Materials
Start by selecting the right wood or MDF board based on your kitchen’s style and budget. Measure the dimensions of your existing range hood carefully—accuracy here saves headaches later.
Use a fine-toothed saw for clean edges, especially if you want a smooth finish without extra sanding. Don’t forget to sand each piece lightly after cutting to remove splinters and rough spots.
Have you considered pre-drilling holes? It prevents wood from splitting when you assemble the frame.
Assembling The Frame
Arrange your cut pieces on a flat surface to visualize the final shape. Use wood glue on the joints before screwing them together; this adds extra strength.
Clamp the pieces while the glue dries to keep everything square and tight. Check the frame’s squareness with a carpenter’s square—it’s easy to fix at this stage but much harder later.
If you want a decorative touch, add trim or molding before final assembly. This can elevate a simple cover to something that looks professionally made.
Painting And Finishing Touches
Choose a paint that can handle kitchen heat and moisture, like semi-gloss or satin enamel. Apply a primer first to ensure the paint sticks well and lasts longer.
Use thin, even coats and let each layer dry completely before the next. This prevents drips and gives a smoother finish.
Finally, add any hardware like handles or vents that match your kitchen’s theme. How does this project change your view on DIY kitchen upgrades?
Installing The Range Hood Cover
Installing the range hood cover is a crucial step that transforms your kitchen’s look and protects the hood itself. It requires careful attention to both aesthetics and function. If you’ve ever struggled with a cover that just didn’t sit right or blocked airflow, you’ll understand why the installation details matter so much.
Mounting Techniques
Start by checking the weight of your range hood cover and the wall or cabinet surface you’ll attach it to. Use strong anchors or screws suitable for the material—drywall alone won’t hold heavy covers securely. If possible, mount into studs or solid wood for stability.
Consider using a French cleat system for easy removal and reattachment. This method lets you lift the cover onto a mounted cleat bracket, which is great if you need to clean or repair the hood later. Don’t forget to level the cover before final tightening to avoid a crooked look.
- Mark the mounting points carefully with a pencil.
- Pre-drill holes to prevent wood splitting.
- Use a stud finder to locate solid support behind walls.
- Ask a helper to hold the cover steady while you secure it.
Ensuring Proper Ventilation
Proper airflow is key to your range hood’s performance. Make sure your cover design doesn’t block vents or the duct opening. If your cover is too tight, it can trap heat and grease, reducing the hood’s efficiency.
Leave enough clearance around the vent area. You might need to add ventilation slots or mesh panels to help air pass through freely. Think about the materials you use too—some woods or finishes might warp or discolor if airflow is restricted.
Ask yourself: Does your cover allow the hood to breathe while still looking sleek? If not, small design tweaks can make a big difference. Check your hood’s manual for recommended clearances and ventilation needs before final installation.

Credit: www.create-enjoy.com
Maintenance And Care Tips
Proper maintenance keeps your range hood cover looking fresh and working well. Regular care prevents damage and extends its life. Follow simple steps to clean and fix your cover.
Cleaning Your Cover
Remove dust and grease often to avoid buildup. Use a soft cloth and mild soap mixed with warm water. Gently wipe the surface to clean dirt and stains. Avoid harsh chemicals that can damage paint or finish. Dry the cover thoroughly to stop rust or mold. Clean filters and vents to keep air flowing smoothly.
Repairing Damages
Check your cover regularly for cracks or loose parts. Small scratches can be fixed with touch-up paint matching the cover’s color. Tighten screws or brackets if the cover feels unstable. Replace broken parts quickly to prevent bigger problems. Sand rough edges before repainting to ensure a smooth surface. Use weather-resistant materials if your cover is near a window or open space.
Budget-friendly Alternatives
Creating a range hood cover doesn’t have to break the bank. Budget-friendly alternatives can refresh your kitchen’s look while saving money and time. These options let you experiment with style and function without committing to expensive materials or complex installations.
Using Fabric And Curtains
Fabric is a surprisingly versatile choice for covering your range hood. You can select a bold pattern or a calming solid color to match your kitchen décor.
Choose durable, washable fabric to handle kitchen heat and steam. Attaching it is simple—you can use tension rods or adhesive hooks for quick setup and removal.
Imagine swapping out fabrics seasonally or for different moods. This keeps your kitchen feeling fresh without buying new hardware or paint.
Temporary Cover Solutions
If you’re not ready for a permanent change, temporary covers offer flexibility. Materials like peel-and-stick vinyl, decorative contact paper, or even lightweight wood panels work well.
These options are easy to install and remove, making them perfect for renters or those testing design ideas. Plus, they protect your range hood from grease buildup while adding style.
Have you considered how a simple, removable cover might inspire other budget updates around your kitchen? Temporary covers might be the creative nudge you need.

Credit: www.create-enjoy.com
Frequently Asked Questions
What Materials Are Best For Making A Range Hood Cover?
Wood is the most popular material for range hood covers. It’s durable, easy to paint or stain, and complements kitchen decor. Plywood and MDF are budget-friendly options. Metal and stainless steel can also be used for a modern look. Choose materials that suit your style and ventilation needs.
How Do I Measure For A Custom Range Hood Cover?
Measure the width, height, and depth of your existing range hood. Add extra inches for overlap and design preferences. Ensure the cover allows proper airflow and access to filters. Accurate measurements prevent fitting issues and ensure a seamless installation in your kitchen.
Can I Paint Or Stain My Diy Range Hood Cover?
Yes, painting or staining enhances the appearance and protects the wood. Use heat-resistant paint or stain suitable for kitchen environments. Apply primer before painting for better adhesion. Allow proper drying time between coats to achieve a smooth, durable finish.
How Long Does It Take To Make A Range Hood Cover?
Building a range hood cover typically takes 3 to 6 hours. Time depends on design complexity and your skill level. Simple covers with basic cuts are faster, while intricate designs need more time. Plan accordingly and gather all materials before starting.
Conclusion
Making a range hood cover is a simple and rewarding task. You can customize it to fit your kitchen style. Using basic tools and materials makes the process easy. This project saves money compared to buying a new hood. Plus, it adds a personal touch to your cooking space.
Try different designs to match your taste. Enjoy the satisfaction of a fresh, new look. Start your project today and see the difference it makes.