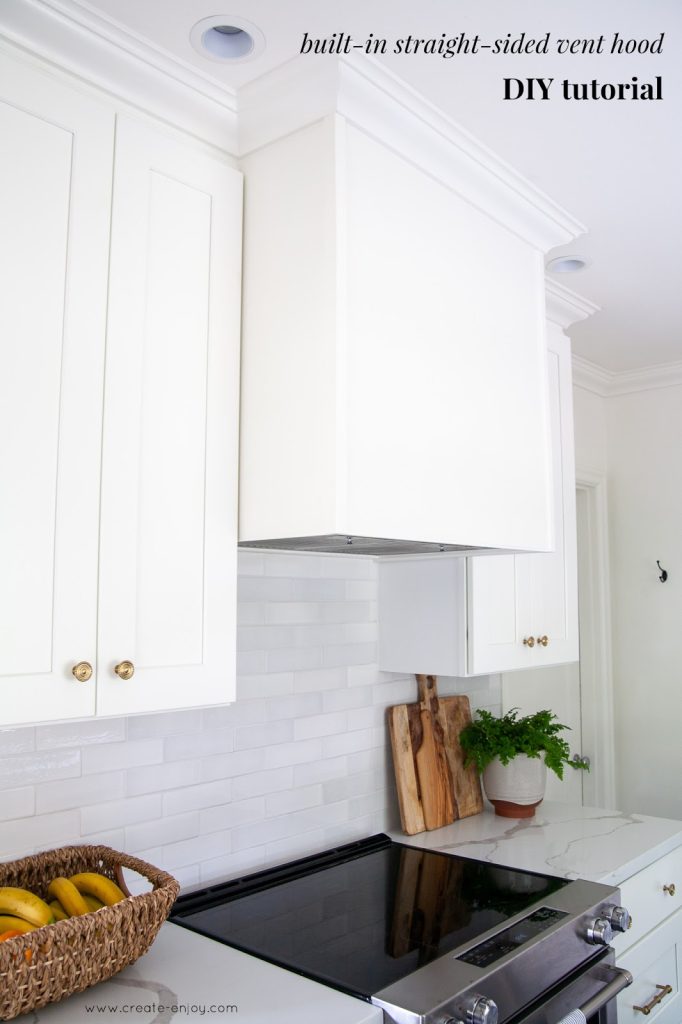
Are you dreaming of a kitchen that not only looks stunning but functions efficiently too? A range hood can be the secret ingredient to achieving just that.
Imagine cooking without smoke lingering in the air or odors clinging to your clothes. Making your own range hood might sound like a daunting task, but with the right guidance, you can do it yourself. This guide will show you step-by-step how to make a range hood that fits your style and needs.
Stay with us to discover how you can transform your kitchen into a cleaner, more inviting space. Your culinary adventures deserve an environment that enhances every experience. Let’s get started!
Choosing The Right Range Hood Style
Choosing the right range hood style can make a huge difference in both your kitchen’s look and how well it handles cooking fumes. Your choice affects airflow, noise levels, and even cleaning ease. Think about your kitchen layout and cooking habits before picking a style that fits perfectly.
Wall-mounted Vs Island Hoods
Wall-mounted range hoods attach directly to the wall above your stove. They usually offer strong ventilation and come in various designs, from sleek modern to classic chimney styles. If your stove is against a wall, this style often fits best and can become a kitchen focal point.
Island hoods hang from the ceiling over a stove placed in the middle of the kitchen. They need to work harder to pull smoke and odors upward, so they often have more powerful fans. If you love an open kitchen with a central cooking area, an island hood keeps the space feeling airy while controlling smells.
Material Options
Materials affect durability, maintenance, and style. Stainless steel is popular because it’s easy to clean and resists rust. It also matches many kitchen appliances for a cohesive look.
Wood range hoods add warmth and can be painted or stained to match cabinets. However, they need more care to avoid damage from heat and moisture.
Glass range hoods offer a modern, minimalist touch but show fingerprints easily and might require frequent cleaning. Think about how much upkeep you’re willing to do when choosing your material.
Size And Ventilation Needs
Your range hood should be at least as wide as your cooking surface—ideally a few inches wider. A hood that’s too small won’t capture all the smoke and steam, leaving your kitchen smelling less fresh.
Consider the power of the fan, usually measured in cubic feet per minute (CFM). High-heat cooking styles like frying or grilling need a hood with a higher CFM. If you rarely cook heavy meals, a lower CFM might be enough and quieter.
Have you measured your cooking area and thought about how much steam your meals create? Matching size and power to your cooking style can save you from regrets later.

Credit: www.create-enjoy.com
Gathering Essential Tools And Materials
Gathering the right tools and materials sets the foundation for building a functional range hood. This step ensures the project runs smoothly without delays or mistakes. Prepare everything before starting to save time and avoid frustration.
Having the proper equipment helps create a sturdy and efficient range hood. Each item plays a role in shaping the final product. Careful selection improves both safety and quality.
Basic Tools Checklist
- Measuring tape for precise dimensions
- Power drill with drill bits
- Screwdrivers (flathead and Phillips)
- Jigsaw or handsaw for cutting materials
- Clamps to hold pieces firmly
- Level to ensure even surfaces
- Sandpaper for smoothing edges
- Marker or pencil for marking cuts
- Wire stripper for electrical work
Materials For Construction
- Sheet metal or wood panels for the hood body
- Vent duct tubing for air flow
- Range hood fan or exhaust blower
- Screws and nails for assembly
- Sealant or caulk to prevent leaks
- Electrical wiring and connectors
- Filters to trap grease and smoke
- Paint or finish for surface protection
Safety Gear Essentials
- Safety goggles to protect eyes
- Work gloves to avoid cuts
- Dust mask for breathing safety
- Ear protection against loud tools
- Proper footwear to prevent slips
Preparing Your Workspace
Preparing your workspace is a crucial step before making a range hood. It helps keep the area safe and organized. A well-prepared space makes the project easier and faster. Take time to set up everything properly. Clear the area, measure carefully, and check ventilation.
Clearing The Area
Remove all items near the installation spot. Move furniture, decorations, and kitchen tools away. This prevents damage and gives you space to work. Clean the surface and floor for safety. A tidy area reduces accidents and distractions.
Measuring And Marking
Measure the space where the range hood will go. Use a tape measure to get exact dimensions. Mark the spots for screws and vents with a pencil. Check the marks twice to avoid errors. Accurate measuring helps the hood fit perfectly.
Ensuring Proper Ventilation
Ventilation is key for a range hood’s function. Confirm the kitchen has a vent or duct system. Make sure the vent path is clear and unobstructed. If no vent exists, plan how to add one. Good airflow keeps smoke and odors away.

Credit: www.create-enjoy.com
Building The Range Hood Frame
Building the frame of your range hood sets the foundation for a sturdy, functional, and attractive kitchen feature. Whether you choose wood or metal, the frame must be precise and strong enough to support the hood’s weight and any additional components. Let’s break down how to create a reliable frame that fits your space and style perfectly.
Cutting And Assembling Wood Or Metal
Start by selecting the right material based on your design and durability needs. Wood is easier to work with and gives a warm look, while metal offers sleekness and fire resistance.
Measure twice, cut once—accuracy here prevents headaches later. Use a saw suitable for your material: a miter saw for wood, or a metal-cutting saw for steel or aluminum.
Lay out all pieces before assembly to ensure they fit together well. You can assemble the frame using screws, nails, or welding, depending on the material. Remember, tight joints mean less vibration and noise during use.
Securing The Frame
The frame needs to be firmly attached to the wall or ceiling structure to avoid any movement. Use heavy-duty anchors or studs to provide maximum support.
Check for level and alignment often during installation; a crooked frame will affect the hood’s performance and appearance.
Consider the weight of the hood and any ductwork when choosing your fasteners. If you’ve ever seen a range hood sag or wobble, you know the importance of this step.
Adding Support Structures
Supports like braces or crossbars add extra strength and stability to the frame. This is especially important if you have a large or heavy hood.
Add diagonal braces in corners to prevent twisting or shifting over time. These small additions can save you from future repairs and safety issues.
Think about airflow clearance and wiring space when placing supports. You want a strong frame that doesn’t interfere with the hood’s function.
Installing The Vent And Fan System
Installing the vent and fan system is a crucial part of building your own range hood. It ensures that smoke, steam, and cooking odors are effectively removed from your kitchen. Getting this right will improve air quality and keep your space comfortable.
Choosing The Right Fan
Choosing a fan that matches your kitchen’s size and cooking style is essential. Look for fans with adjustable speeds so you can control airflow depending on your cooking needs. A fan with a high CFM (cubic feet per minute) rating moves more air, which is better for heavy cooking.
Consider noise levels too. Some powerful fans can be noisy, which might be distracting. I once picked a fan solely based on power, only to regret it because it was too loud during everyday cooking. Don’t forget to check decibel ratings before buying.
Connecting Ductwork
Proper ductwork connection is key for efficient venting. Use rigid metal ducts instead of flexible ones whenever possible, as they offer less resistance to airflow. Keep the duct runs as short and straight as you can to minimize air loss.
Seal all joints tightly with metal tape, not duct tape, to prevent leaks. Think about where the vent will exit your home—roof or wall—and select duct materials suitable for outdoor exposure. Have you mapped out your duct path yet? It makes the installation smoother.
Testing Airflow
Once everything is connected, testing airflow confirms your installation’s effectiveness. Turn on the fan at different speeds and feel if air is moving strongly through the vent outlet. You can use a simple smoke test by lighting an incense stick near the hood and watching if smoke is pulled up quickly.
If airflow feels weak, check for blockages or leaks in the ductwork. Testing early helps you avoid poor ventilation later, which can lead to lingering odors and moisture problems. How will you ensure your kitchen stays fresh after cooking?

Credit: www.create-enjoy.com
Adding Finishing Touches
Adding finishing touches to your range hood is where your project really starts to shine. These final steps bring together both functionality and style, ensuring your hood not only works well but looks great in your kitchen. Paying attention to details here can make a huge difference in your satisfaction with the finished product.
Painting Or Staining
Choose a paint or stain that matches your kitchen’s theme and the material of your hood. If you’re working with wood, a stain can highlight the natural grain and add warmth. For metal or MDF, a high-quality heat-resistant paint will protect your hood and keep it looking fresh.
Apply thin, even coats and allow each layer to dry thoroughly. Don’t rush this step; a smooth finish is worth the extra time. Have you considered a matte finish to reduce glare or a glossy one to catch the light?
Installing Filters And Lights
Filters are essential for trapping grease and keeping your kitchen air clean. Make sure you install the correct filter type for your hood design—mesh filters are common and easy to clean, while charcoal filters help with odors.
Lighting adds both utility and ambiance. LED lights are energy-efficient and long-lasting. Position them where they’ll best illuminate your cooking surface without causing shadows. What lighting style fits your cooking habits best—bright task lights or softer mood lighting?
Final Assembly And Mounting
Securely assemble all parts, double-checking screws and fittings for stability. Your range hood needs to be firmly mounted to avoid vibrations and noise during use.
Use a level to ensure it sits straight, and verify clearances according to your stove’s specifications. If you’ve ever dealt with a wobbly or crooked hood, you know how important this step is. Take your time here—it’s the last chance to fix any alignment issues before regular use.
Maintenance Tips For Longevity
Proper maintenance extends the life of your range hood. It keeps the device working efficiently and prevents costly repairs. Simple care routines protect your investment and improve kitchen air quality.
Cleaning Filters Regularly
Filters trap grease and dust during cooking. Clean filters improve airflow and reduce fire risk. Remove filters and soak them in warm, soapy water. Use a soft brush to scrub away stubborn dirt. Rinse well and let them dry completely before reinstalling. For metal filters, you can also use a dishwasher. Replace charcoal filters as recommended by the manufacturer.
Checking Fan Function
The fan moves air and smoke out of your kitchen. Test the fan speed settings often to ensure they work properly. Listen for unusual noises that may signal a problem. Clean the fan blades carefully to prevent dust buildup. Dusty blades reduce efficiency and strain the motor. Tighten any loose screws or parts that might cause vibrations.
Troubleshooting Common Issues
Range hoods may face common problems like poor suction or strange sounds. Check if the duct is blocked or damaged. Clear any obstructions to restore airflow. Inspect the power supply and switches for faults. Replace worn-out parts promptly to avoid bigger issues. Consult the user manual for specific troubleshooting tips and safety warnings.
Frequently Asked Questions
What Materials Do I Need To Make A Range Hood?
You need metal sheets, a fan, ducting, screws, and electrical wiring. Choose durable, heat-resistant materials for safety and efficiency.
How Do I Install A Diy Range Hood Properly?
Secure the hood above your stove, connect ducting to vent outside, and wire the fan safely to power.
Can I Customize The Size Of My Range Hood?
Yes, customize the size based on your stove and kitchen space for optimal ventilation and aesthetics.
How Much Does It Cost To Make A Range Hood?
Costs vary by materials and tools, typically ranging from $100 to $300 for DIY projects.
Conclusion
Making a range hood at home is simple and rewarding. You save money and get a custom fit for your kitchen. Using basic tools and materials makes the process easy to follow. Good ventilation keeps your cooking area fresh and clean.
Remember to measure carefully and follow safety steps. Enjoy your new range hood and better air quality. Try this project and see the difference yourself.