
If you’ve ever wanted to add a stunning, professional touch to your cookies or cakes, mastering a royal icing transfer is the perfect skill for you. Imagine creating delicate, detailed decorations that you can make ahead of time and simply place on your baked treats.
It sounds tricky, but with the right steps, you’ll find it easier than you think. You’ll discover how to make beautiful royal icing transfers that will impress everyone. Ready to take your baking to the next level? Let’s get started!
Ingredients And Tools
Creating royal icing transfers needs simple ingredients and the right tools. Quality ingredients ensure smooth, strong icing. Proper tools help shape and dry the designs perfectly. Preparing these basics is the first step to beautiful transfers.
Essential Ingredients
- Powdered sugar – for smooth sweetness and texture
- Egg whites or meringue powder – to bind and harden the icing
- Water – to adjust the icing consistency
- Vanilla or almond extract (optional) – for subtle flavor
- Food coloring (optional) – to add color to your transfers
Required Tools
- Piping bags – for precise icing application
- Small round piping tips – to create detailed designs
- Wax paper or parchment paper – to pipe designs onto
- Toothpicks or scribe tools – for fixing small mistakes
- Flat surface or tray – to hold transfers while drying
- Mixing bowls and spoons – to prepare your icing

Credit: www.yourbakingbestie.com
Preparing Royal Icing
Preparing royal icing is the first step to creating beautiful icing transfers. The icing must be smooth and hold its shape well. This ensures your design stays crisp and clean. Precise preparation helps avoid cracks and breaks once the icing dries.
Mixing The Icing
Start by combining powdered sugar and meringue powder in a clean bowl. Use cold water to wet the mixture slowly. Mix on low speed with an electric mixer. Increase speed to medium once ingredients start to combine. Mix until the icing becomes thick and glossy. Avoid overmixing, which can dry out the icing.
Achieving The Right Consistency
Royal icing needs the right thickness for transfers. Use the “10-second rule” to test consistency. When you lift the mixer, the icing should flow back slowly within 10 seconds. If it flows too fast, add more powdered sugar. If it is too stiff, add a few drops of water. Proper consistency prevents the icing from spreading or cracking.
Creating The Transfer Design
Begin by piping royal icing onto parchment paper to form your desired shapes. Let the designs dry completely before carefully peeling them off for decorating cakes or cookies. Patience ensures smooth, crisp transfers that hold their shape well.
Creating a royal icing transfer design can be both fun and rewarding. This process involves crafting intricate designs that add elegance to your baked creations. By using a template and tracing techniques, you can bring your artistic ideas to life with precision and ease. This section will guide you through selecting a suitable template and mastering tracing techniques for perfect results.Selecting A Template
Choose a simple design for your transfer. Beginners should start with basic shapes. Look for templates online or create your own. Ensure the design fits the size of your baked item. Use clear images with defined lines for best results. Print the template on paper that fits under parchment paper.Tracing Techniques
Place parchment paper over your template. Secure both papers with tape to prevent shifting. Use a piping bag filled with royal icing. Start tracing the outline of your design first. Ensure steady pressure for even icing flow. Allow each section to dry slightly before adding more details. This prevents colors from mixing. Practice makes perfect, so be patient.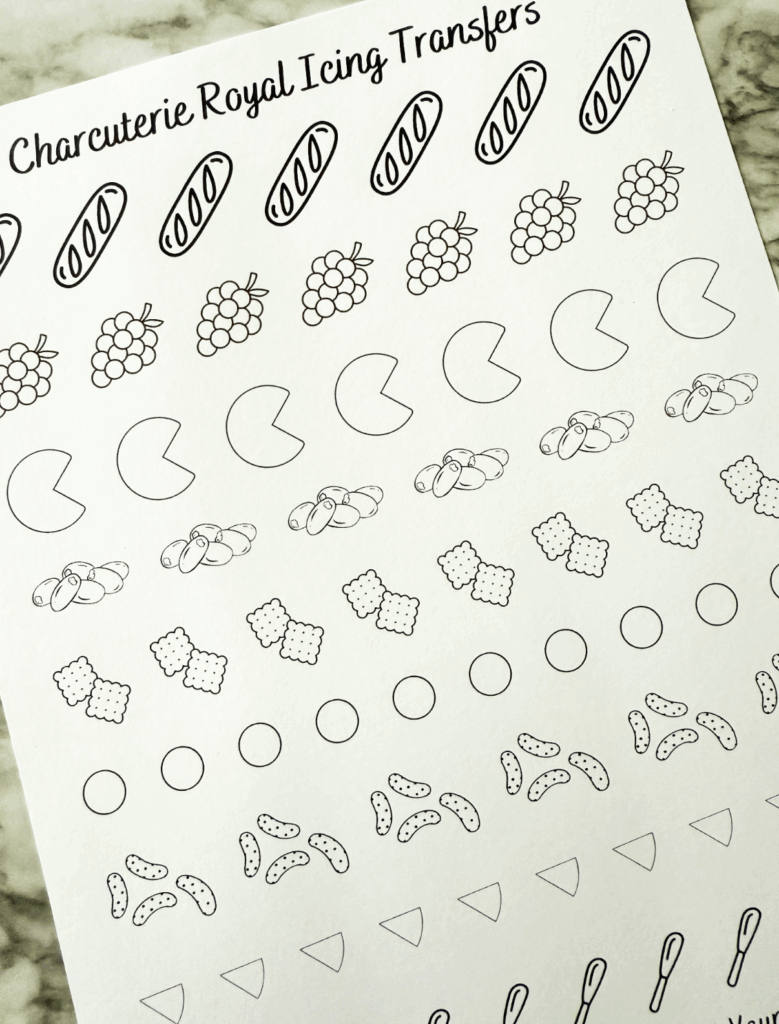
Credit: www.yourbakingbestie.com
Piping The Icing
Piping the icing is where your design starts to come alive. It requires a steady hand and patience, but the results can be truly rewarding. How you handle your piping bag at this stage can make all the difference between a neat transfer and a messy one.
Filling The Outline
Once you’ve piped the outline of your design, the next step is filling it in with icing. Use a slightly thinner consistency for this part so the icing spreads smoothly inside the borders.
Start from one edge and gently fill in the space, moving your piping tip back and forth. This helps avoid air bubbles and uneven layers. Don’t rush—take your time to ensure the icing settles nicely inside the outline.
Adding Details
After the base layer dries a bit, it’s time to add the details that make your transfer unique. Use a thicker icing for fine lines, dots, and any intricate patterns.
Try to keep your wrist steady and your pressure consistent for clean lines. If you make a mistake, you can gently scrape it off with a toothpick before the icing hardens.
Have you noticed how small details can completely change the look of your design? Experiment with different patterns to find what works best for your project.
Drying And Handling Transfers
Drying and handling royal icing transfers requires patience and care. Proper drying ensures the design stays intact and hardens fully. Handling transfers gently prevents cracks and breaks. Following the right steps protects your work and keeps decorations beautiful.
Drying Time Tips
Let transfers dry in a cool, dry place. Avoid direct sunlight or heat sources. Drying usually takes 8 to 24 hours depending on size and thickness.
- Place transfers on parchment paper or a silicone mat.
- Leave space between each transfer for air circulation.
- Do not stack transfers during drying.
- Check dryness by gently touching the edge; it should feel firm.
Removing Transfers Safely
Use a thin, flat tool like a palette knife to lift transfers. Slide the tool gently under the edge. Lift slowly to avoid breaking delicate parts. If the transfer sticks, wait longer before trying again.
- Handle transfers by edges only, avoid touching the decorated surface.
- Store transfers on a flat, dry surface until ready to use.
- Keep transfers away from moisture and humidity.

Credit: www.youtube.com
Applying Transfers To Cakes
Applying royal icing transfers to your cakes transforms simple designs into stunning edible art. The key is handling each transfer with care and planning its position thoughtfully. This step demands patience but offers great rewards when you see your cake come alive with delicate details.
Placement Ideas
Think about the cake’s shape and size before deciding where to place your transfers. You can arrange them around the sides for a continuous pattern or cluster them on top as a focal point.
Try mixing sizes and orientations to create depth and interest. For example, placing larger floral transfers at the base and smaller ones near the top adds a natural flow.
Ask yourself: Do you want your transfers to stand out boldly or blend gently with the frosting? This choice will guide your placement strategy.
Securing Transfers
Make sure your cake’s surface is slightly tacky but not wet before applying transfers. This helps them stick without melting or sliding off.
Use a small dab of royal icing as glue if the surface is dry. Gently press the transfer into place and hold it for a few seconds to ensure it adheres well.
If your transfer is delicate, chill the cake briefly after applying to firm up the icing and lock the design in place. This simple step prevented my transfers from shifting during transport, saving me from last-minute fixes.
Troubleshooting Tips
Troubleshooting royal icing transfers helps improve your decorating skills. Small errors can cause cracks or breaks. Knowing how to fix these problems saves time and ingredients. This section covers common mistakes and easy fixes for cracks and breaks.
Common Mistakes
- Using icing that is too runny. It will lose shape quickly.
- Applying icing too thick. It may crack while drying.
- Not letting the icing dry long enough. Transfers can break easily.
- Peeling transfers off the parchment too soon. They need full drying time.
- Storing transfers in a humid place. Moisture weakens them.
Fixing Cracks And Breaks
Small cracks can be repaired by applying a thin layer of fresh royal icing. Use a fine tip to cover the cracks gently. Let it dry fully before handling again.
For breaks, use a small brush to glue the broken pieces with royal icing. Hold the pieces together until the icing sets. Avoid heavy pressure to prevent new cracks.
Store finished transfers flat and in a dry place. This helps prevent future cracks and breaks.
Creative Design Ideas
Creative design ideas bring life to royal icing transfers. These ideas make your decorations unique and eye-catching. Simple techniques can turn plain icing into art. Explore themes and personal touches to inspire your next project. Discover ways to add charm and personality to your transfers.
Seasonal Themes
Seasonal themes fit perfectly with holidays and events. Use colors and shapes linked to each season. For example, soft pastels for spring or warm oranges for autumn. Snowflakes and holly leaves shine in winter designs. Bright flowers and butterflies bloom in summer decorations.
Seasonal themes create a festive mood. They match the party or celebration perfectly. Try mixing different seasonal elements for fresh looks. Your royal icing transfers will stand out at every occasion.
Personalized Touches
Personalized touches make your transfers special and meaningful. Add initials, names, or dates to celebrate milestones. Simple letters or elegant fonts work well for this. Small icons like hearts or stars can add charm too.
Use colors that reflect the person or event. Soft shades for babies or bold tones for birthdays. Personalization creates a connection that guests will remember. It shows care and attention in every detail.
Frequently Asked Questions
What Is A Royal Icing Transfer?
A royal icing transfer is a decorative piece made from piped royal icing. It dries hard and can be used to embellish cakes and cookies.
How Do I Prepare Royal Icing For Transfers?
Mix royal icing to a stiff consistency. It should hold its shape well when piped but remain smooth for detail work.
How Long Does Royal Icing Take To Dry?
Royal icing transfers typically dry for 6-12 hours. Drying time depends on thickness and humidity levels in the environment.
Can I Store Royal Icing Transfers Before Using?
Yes, store them in an airtight container once fully dry. Keep them in a cool, dry place to prevent moisture damage.
Conclusion
Making royal icing transfers takes patience and practice. Start with simple shapes and steady hands. Use the right icing consistency for best results. Let the transfers dry completely before handling. These small decorations add charm to your cakes and cookies.
Keep trying, and your skills will grow. Enjoy the process and have fun decorating!