Are you ready to create your very own sleeping bag? Imagine having a cozy, custom-made sleeping bag that fits you perfectly and keeps you warm on every adventure.
Making a sleeping bag might sound tricky, but with the right steps, you can do it yourself. In this guide, you’ll discover simple tips and clear instructions that make the process fun and easy. Keep reading, and by the end, you’ll have all the know-how to craft a sleeping bag that’s just right for you.
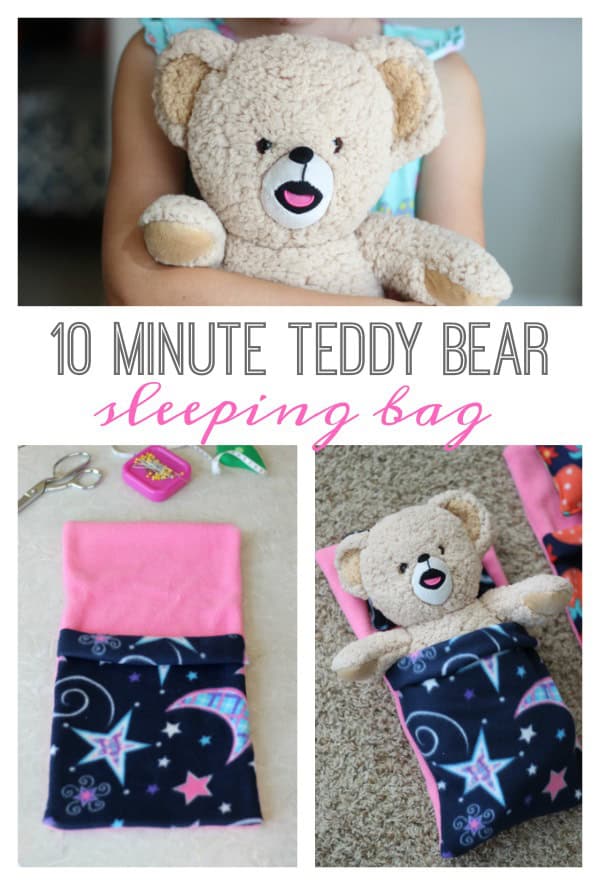
Credit: gluesticksblog.com
Choosing The Right Materials
Making a sleeping bag starts with selecting good materials. The right fabric and insulation keep you warm and comfortable.
This guide helps you pick fabrics, insulation, and supplies for your sleeping bag project.
Selecting Fabric Types
Choose fabrics that are durable and water-resistant for the outer shell. The inner lining should feel soft and breathable for comfort.
- Outer fabric:Nylon or polyester with a water-repellent finish
- Inner lining:Cotton or soft polyester for comfort
- Reinforcements:Use ripstop fabric in high-wear areas
Picking The Best Insulation
Insulation keeps heat inside your sleeping bag. Choose between natural and synthetic materials based on warmth and care.
| Insulation Type | Warmth | Weight | Care |
| Down | High | Light | Needs careful washing |
| Synthetic | Moderate | Heavier | Easy to clean |
Tools And Supplies Needed
Gather tools and supplies before you start sewing. This helps the process go smoothly and saves time.
- Sewing machine with heavy-duty needle
- Strong thread matching fabric colors
- Scissors or rotary cutter
- Measuring tape and fabric chalk
- Zipper or buttons for closure
- Insulation material cut to size
Designing Your Sleeping Bag
Designing a sleeping bag means thinking about size, shape, and comfort. It also means planning for the weather you will face.
These points help you create a sleeping bag that fits your needs and keeps you warm and cozy on your trips.
Determining Size And Shape
Choose a size that fits your body well. The bag should be long enough to cover your whole body but not too wide. A snug fit keeps you warmer.
The shape affects warmth and weight. Mummy shapes are tight and warm. Rectangular shapes offer more room but weigh more.
Adding Features For Comfort
Think about what makes you comfortable while sleeping. Features like hoods, draft collars, and zipper placement matter.
- Hood to keep your head warm
- Draft collar to block cold air
- Zippers that open from top or bottom
- Inner pockets for small items
- Soft lining fabric for skin comfort
Planning For Weather Conditions
| Weather | Insulation Type | Shell Material |
| Cold and dry | Down insulation | Water-resistant nylon |
| Wet and cold | Synthetic insulation | Waterproof fabric |
| Mild and dry | Light synthetic | Breathable polyester |
| Hot weather | Minimal or no insulation | Light mesh |
Choose insulation and fabric that match your camping weather. This keeps you warm and dry without extra weight.
Cutting And Preparing Fabric
Making a sleeping bag starts with cutting and preparing the fabric. This is a crucial step to ensure the final product is comfortable and durable.
In this section, we will cover measuring, marking, cutting patterns accurately, and prepping the fabric pieces.
Measuring And Marking
Start by measuring the dimensions of your sleeping bag. Use a measuring tape to get accurate results.
Mark the fabric with chalk or a fabric marker. Clear markings help in cutting the fabric accurately.
- Measure length and width
- Use straight lines for edges
- Double-check measurements
Cutting Patterns Accurately
Careful cutting ensures pieces fit together well. Use sharp scissors for clean edges.
Follow the marked lines closely. This prevents wasting fabric and ensures a good fit.
| Tool | Purpose |
| Scissors | Cut straight lines |
| Rotary cutter | For curves |
Prepping Fabric Pieces
Once cut, the fabric pieces need preparation. This helps in smooth sewing.
Iron the pieces to remove wrinkles. Lay them out flat to check for mistakes.
- Iron out wrinkles
- Lay flat for inspection
- Correct any errors
Sewing The Sleeping Bag
Sewing a sleeping bag needs careful work and patience. You join different layers to make it warm and comfy. The sewing must be strong to keep the parts together.
This guide shows how to sew the main parts: the outer shell, insulation, and inner lining. Follow each step to build a good sleeping bag.
Assembling Outer Shell
Start by cutting the fabric pieces for the outer shell. Use a durable material like nylon or polyester. Pin the pieces together along the edges before sewing.
- Align fabric pieces with right sides facing each other.
- Pin edges to keep fabric from shifting.
- Sew with a straight stitch, about 1/2 inch from edge.
- Reinforce stress points with backstitching.
- Leave an opening for attaching insulation later.
Inserting Insulation Layers
Insulation keeps the sleeping bag warm by trapping heat. Cut the insulation material to fit inside the outer shell. Insert it carefully to avoid bunching.
| Insulation Type | Warmth | Weight |
| Down | High | Light |
| Synthetic | Medium | Moderate |
| Fleece | Low | Heavy |
After placing the insulation, sew the opening closed with small, tight stitches. This keeps the insulation in place and avoids cold spots.
Attaching Inner Lining
The inner lining should feel soft and comfortable against the skin. Cut the lining fabric to match the shape of the sleeping bag. Pin it on top of the insulation layer.
- Place the lining fabric on the insulation with right sides facing out.
- Pin the edges evenly to prevent wrinkles.
- Sew all around, leaving a small gap for turning the bag inside out.
- Turn the sleeping bag right side out through the gap.
- Close the gap with a hidden stitch for a neat finish.
Adding Closures And Finishing Touches
Adding closures and finishing touches makes your sleeping bag practical and comfortable. These details help keep you warm and make the bag easy to use.
Closures like zippers or buttons close the sleeping bag securely. Draft collars and storage options add extra comfort and convenience.
Installing Zippers Or Buttons
Zippers are the most common closure for sleeping bags. They allow easy opening and closing. Choose a zipper that is smooth and durable.
Buttons can work too, but they may not seal as tightly. Use large buttons and strong thread for better hold.
- Measure the length needed for the closure
- Sew the zipper or buttons carefully along the edge
- Test the closure to make sure it moves smoothly
- Add a zipper guard to prevent skin pinching
Creating Draft Collars
A draft collar blocks cold air from entering near your neck. It helps keep heat inside the sleeping bag.
Use soft, warm fabric to make the draft collar. Sew it around the top inside edge of the bag.
- Cut a strip of fabric that fits around the neck opening
- Add padding for extra warmth
- Sew the collar firmly to the sleeping bag lining
- Make sure it fits snugly but feels comfortable
Adding Storage And Carry Options
Storage and carry options make it easier to bring your sleeping bag on trips. Small pockets or straps add convenience.
Add a stuff sack or compression straps to pack the bag tightly. You can also sew a small pocket inside for items like a flashlight.
- Sew loops or straps on the outside for carrying
- Create a stuff sack from durable fabric
- Add compression straps to reduce bag size
- Include an inside pocket for small essentials

Credit: www.youtube.com
Testing And Maintaining Your Bag
Testing and caring for your sleeping bag keeps it safe and comfy. You want to check it often before trips.
Proper care helps your bag last long and stay warm. Follow simple steps to keep it in good shape.
Checking For Comfort And Fit
Try your sleeping bag to see if it fits well. Move inside it to feel if it is roomy or tight.
Check the zipper and hood to make sure they work right. A good fit keeps heat inside and cold out.
- Lie down fully zipped to test length and width
- Check if the hood covers your head comfortably
- Make sure zippers open and close smoothly
- Feel for any tight spots or loose areas
Cleaning And Storage Tips
Clean your sleeping bag only when needed. Use mild soap and cold water to keep the materials safe.
Store your bag loosely in a big sack or hang it. Avoid tight compression to protect the insulation.
- Spot clean small stains with gentle detergent
- Wash in a front-load washer on a gentle cycle
- Air dry fully before storing to avoid mold
- Store in a large cotton or mesh bag, not a tight stuff sack
- Keep in a dry, cool place away from direct sunlight
Repairing Wear And Tear
Fix small holes or tears quickly to stop damage from growing. Use patches or special glue made for fabrics.
Check zippers and seams for loose threads or damage. Replace parts if needed to keep your bag working well.
- Patch holes with fabric tape or sewing kits
- Use fabric glue for small rips without sewing
- Lubricate zippers if they stick or jam
- Replace broken zipper sliders or pulls
- Reinforce seams with needle and thread if loose
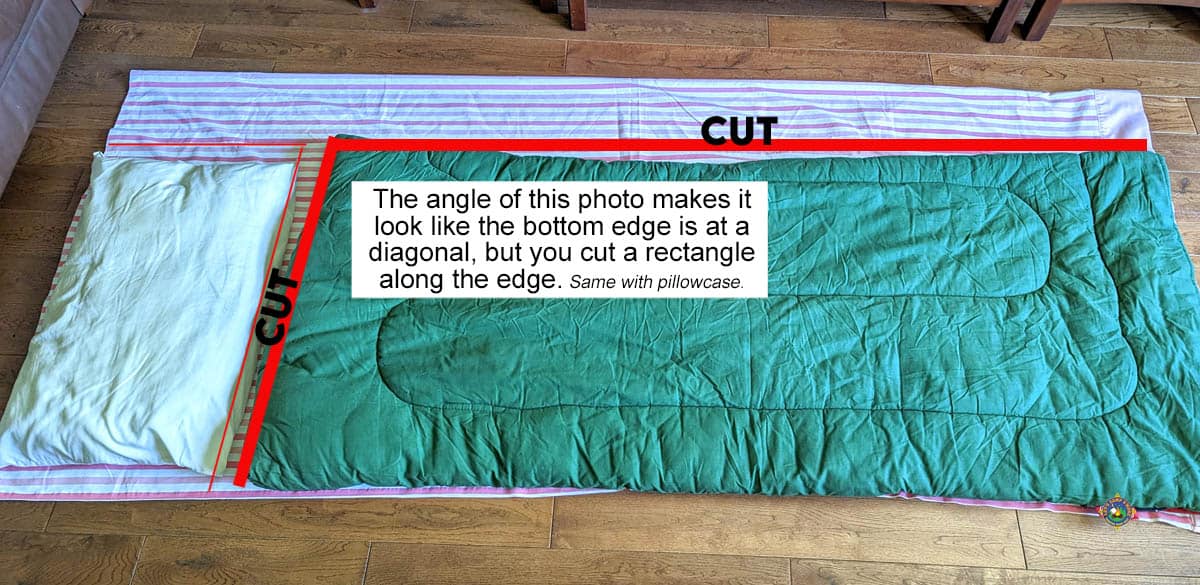
Credit: letscampsmore.com
Frequently Asked Questions
What Materials Do I Need To Make A Sleeping Bag?
You need fabric like nylon or polyester, insulation such as down or synthetic fill, thread, zipper, and sewing tools. Choose materials based on warmth and weight preferences for your sleeping bag.
How Do I Choose The Right Insulation For A Sleeping Bag?
Select insulation based on climate and budget. Down is lightweight and warm but costly. Synthetic fills are affordable and perform well in wet conditions.
What Is The Best Sleeping Bag Shape For Camping?
Mummy-shaped sleeping bags offer excellent warmth and compactness. Rectangular bags provide more space but less heat retention. Choose based on comfort and intended use.
How Do I Sew A Sleeping Bag Step-by-step?
Cut fabric pieces, sew insulation between layers, attach the zipper, and finish edges. Follow a pattern carefully to ensure proper fit and durability.
Conclusion
Making your own sleeping bag takes time and care. Choose good materials for warmth and comfort. Follow the steps carefully to sew it right. A homemade sleeping bag can save money and fit you well. It feels great to use something you made yourself.
Try different fabrics to find what suits you best. Keep practicing, and your skills will improve. Enjoy your outdoor trips with your new sleeping bag. Simple, useful, and made by you.