Are you ready to create your very own sleeping bag? Making a sleeping bag might sound tricky, but with the right steps, you can craft one that fits your style and keeps you cozy.
Imagine having a sleeping bag designed just for you—perfect size, your favorite colors, and the comfort you need for a good night’s sleep. In this guide, you’ll discover simple tips and easy instructions to make your own sleeping bag from scratch.
Keep reading, and by the end, you’ll have everything you need to start your project and enjoy the satisfaction of using something you made yourself. Your next adventure deserves it!
Choosing Materials
Making a sleeping bag starts with choosing the right materials. The quality of fabric and insulation affects warmth and comfort.
Gathering the correct tools makes the sewing process easier and more precise. Use good materials and tools for best results.
Selecting Fabric Types
Pick fabrics that are lightweight, durable, and water-resistant. The outer fabric should protect against wind and moisture.
- Nylon: Strong and water-resistant, ideal for outer layers
- Polyester: Dries quickly and resists mildew
- Cotton: Comfortable but absorbs moisture, less ideal
- Ripstop Fabric: Prevents tears and adds durability
Picking Insulation Options
Insulation keeps you warm by trapping body heat. Choose between natural and synthetic fills based on your needs.
| Insulation Type | Pros | Cons |
| Down | Very warm, lightweight, compressible | Expensive, loses warmth when wet |
| Synthetic | Water-resistant, affordable, quick drying | Heavier, bulkier than down |
| Wool | Warm when wet, natural material | Heavy, less compressible |
Gathering Necessary Tools
Use proper tools to cut and sew fabric and insulation precisely. This makes your sleeping bag stronger and more comfortable.
- Sharp fabric scissors
- Measuring tape
- Heavy-duty sewing needles
- Strong polyester or nylon thread
- Sewing machine (optional but helpful)
- Pins or clips to hold fabric
- Chalk or fabric marker
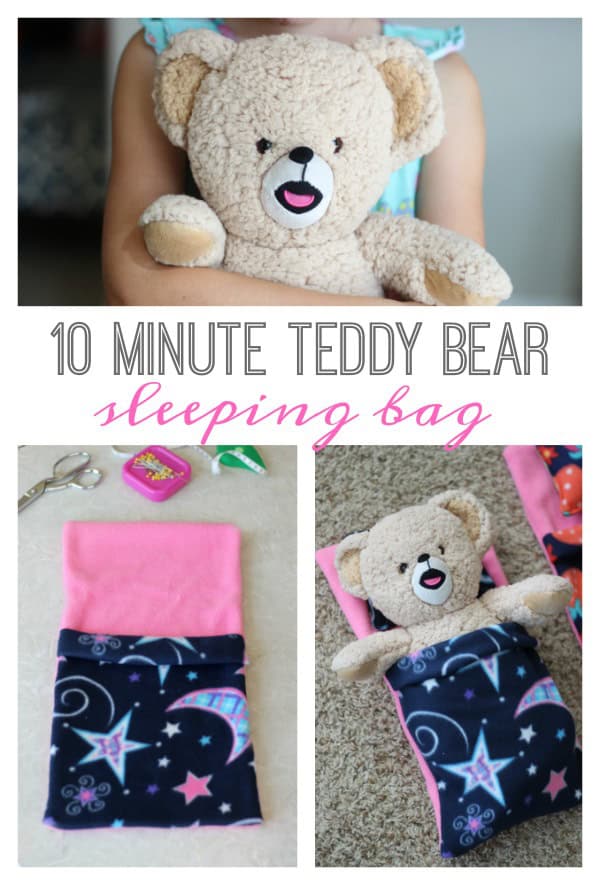
Credit: gluesticksblog.com
Measuring And Cutting
Making a sleeping bag starts with careful measuring and cutting. These steps ensure the bag fits well and keeps you warm.
Take your time to get accurate measurements and clean cuts. This will make sewing easier and your sleeping bag better.
Determining Size And Shape
Decide how long and wide your sleeping bag should be. Consider your height and extra space for comfort.
Choose a shape that fits your needs. Rectangular bags offer more room, while mummy shapes are warmer.
- Measure your height plus 6 to 12 inches for length
- Add width for shoulder and hip room
- Pick a shape that suits your sleeping style
Marking Fabric Accurately
Use a fabric pencil or chalk to mark your fabric. Clear marks help you cut the right size and shape.
Lay the fabric flat on a clean surface. Double-check your measurements before drawing lines.
- Measure twice to avoid mistakes
- Mark seam allowances around the edges
- Use straight edges or rulers for neat lines
Cutting With Precision
Cut the fabric slowly along the marked lines. Use sharp fabric scissors to get clean edges.
Keep the fabric flat and steady while cutting. Avoid lifting it to prevent uneven cuts.
- Follow the marked lines closely
- Cut one layer at a time for accuracy
- Store scissors safely after use
Sewing The Outer Shell
The outer shell of a sleeping bag protects you from wind and moisture. Sewing it well ensures durability and comfort. Follow these steps to sew the outer shell correctly.
Use strong fabric and precise sewing to make the shell last through many camping trips. Pay attention to how you join the pieces and secure the seams.
Assembling Fabric Pieces
Start by cutting all fabric pieces according to your sleeping bag pattern. Lay them out flat to check the shapes and sizes.
Pin the pieces together along the edges that will be sewn. This keeps them from shifting while you sew.
- Cut fabric carefully using sharp scissors
- Match edges and corners precisely
- Use pins or clips to hold pieces in place
- Double-check the layout before sewing
Stitching Seams Securely
Sew the pinned edges using a strong stitch like a straight or backstitch. This holds the fabric firmly without gaps.
Keep your stitches even and close together to avoid weak spots. Use a sewing machine if possible for better strength.
- Sew slowly to keep lines straight
- Use polyester thread for durability
- Backstitch at the start and end
- Check for missed stitches and fix them
Adding Reinforcements
Reinforce areas that get extra stress, like corners and zipper edges. This helps prevent tearing and wear.
Add extra fabric patches or double stitching in these spots. Reinforcements make your sleeping bag stronger and longer-lasting.
- Use small fabric patches inside corners
- Sew double lines on zipper seams
- Apply bar tacks on stress points
- Check reinforcements after sewing

Credit: www.youtube.com
Adding Insulation Layer
Adding an insulation layer helps keep you warm inside the sleeping bag. It traps heat and blocks cold air.
Choose the right insulation material to make your sleeping bag cozy and comfortable.
Positioning Insulation
Place the insulation between the outer fabric and inner lining. It should cover the whole area evenly.
Make sure the insulation fits well without bunching up or leaving gaps.
- Lay the outer fabric flat on a surface
- Spread insulation evenly over the fabric
- Add the inner lining on top of the insulation
- Check that all edges line up properly
Securing With Stitching
Sew the layers together to keep the insulation in place. Use small stitches for strength.
Stitch around the edges and in sections inside the sleeping bag. This stops the insulation from moving.
- Sew around the sleeping bag’s border
- Create lines or patterns inside to hold insulation
- Use strong thread to avoid tears
Ensuring Even Distribution
Check the insulation after sewing to make sure it is spread evenly. No thick or thin spots.
Fluff the insulation gently to fill any gaps. Even distribution keeps you warm all night.
- Feel for lumps or empty areas
- Adjust insulation by hand if needed
- Test by pressing gently on different spots
Creating The Inner Lining
The inner lining of a sleeping bag adds comfort and protects the insulation. It needs to be soft and durable. Choosing the right fabric helps keep you warm and cozy.
We will cover how to cut the fabric, attach it to the insulation, and finish the seams inside the bag.
Cutting Lining Fabric
Start by choosing a smooth, breathable fabric like cotton or nylon. Use a pattern or measure the sleeping bag’s inside size to cut the fabric pieces. Leave extra space for seams.
- Lay the fabric flat on a clean surface.
- Place the pattern or measure the sleeping bag’s interior.
- Mark the fabric with tailor’s chalk or a pencil.
- Cut carefully along the marks with sharp scissors.
- Cut all pieces needed for the front, back, and sides.
Attaching To Insulation
Attach the lining fabric to the insulation layer using pins or clips. Sew slowly to avoid shifting. Use a sewing machine or hand stitch with strong thread.
| Attachment Method | Description |
|---|---|
| Pinning | Use fabric pins to hold lining and insulation together before sewing. |
| Machine Sewing | Sew with a straight stitch for strong, even seams. |
| Hand Stitching | Use a backstitch for durable seams if no machine is available. |
Finishing Interior Seams
Finish the seams inside the sleeping bag to prevent fraying. Use seam tape, zigzag stitches, or bind the edges. This makes the lining last longer and feel better.
- Trim seam allowances neatly.
- Apply seam tape over raw edges.
- Sew zigzag stitches along the edges.
- Or use bias binding to cover seams.
- Press seams flat with an iron if fabric allows.
Installing Zippers And Closures
Adding zippers and closures to your sleeping bag makes it easy to open and close. It also helps keep the cold air out. This guide explains how to choose the right zippers and sew them correctly.
We will also cover how to add draft collars or flaps. These extra layers block wind and keep you warmer at night.
Choosing Suitable Zippers
Select a zipper that matches your sleeping bag size and fabric type. Look for durable zippers that can handle outdoor use. The zipper length should fit the bag’s opening well.
- Use coil or molded plastic zippers for smooth operation
- Choose a zipper with teeth size between 5mm to 7mm
- Pick zippers with nylon tape to resist moisture
- Select zippers with double sliders for more flexibility
Sewing Zippers In Place
Attach the zipper carefully to avoid gaps and puckering. Use a sewing machine with a zipper foot for better control. Pin the zipper in place before sewing.
- Align the zipper edge with the sleeping bag opening edge
- Pin or baste the zipper tape to the fabric
- Sew slowly using a straight stitch along the zipper teeth
- Backstitch at the start and end to secure stitches
- Test the zipper by opening and closing it fully
Adding Draft Collars Or Flaps
Draft collars or flaps block cold air from entering through the zipper. They add extra warmth and comfort during cold nights.
| Type | Description | Material |
|---|---|---|
| Draft Collar | Insulated tube around the neck area inside the bag | Soft fleece or down-filled fabric |
| Draft Flap | Strip of fabric sewn behind the zipper | Same fabric as sleeping bag shell |
Sew the draft collar inside the top edge of the sleeping bag. Attach the draft flap behind the zipper tape. Make sure both fit snugly without blocking zipper movement.
Final Touches
After sewing the main parts of the sleeping bag, it is time for the final touches. These steps make the bag more comfortable and durable.
Adding special features and checking the fit ensures your sleeping bag works well for camping or outdoor use.
Adding Hoods Or Drawstrings
Adding a hood keeps your head warm during cold nights. Drawstrings help close the hood tightly around your face.
You can sew a hood using the same fabric as the bag. Attach drawstrings with small loops or eyelets for easy tightening.
- Sew the hood to the top edge of the sleeping bag
- Insert drawstrings through a sewn channel
- Use toggles or knots to secure the drawstrings
- Make sure the hood fits comfortably around the head
Testing Comfort And Fit
Try lying inside the sleeping bag to check comfort. Move around to see if it feels tight or loose.
Check the length and width to make sure there is enough room to stretch. Adjust the size if needed.
- Test the bag on different sleeping surfaces
- Check if the zipper moves smoothly
- Ensure the hood fits without pressure
- Feel the insulation for warmth
Performing Quality Checks
Inspect all seams to make sure they are tight and neat. Loose threads can cause the bag to fall apart.
Check the zipper and other closures for smooth operation. Test for any leaks or weak spots in the fabric.
- Look for holes or tears in the fabric
- Test all stitching under slight tension
- Make sure zippers open and close easily
- Confirm drawstrings and toggles work properly
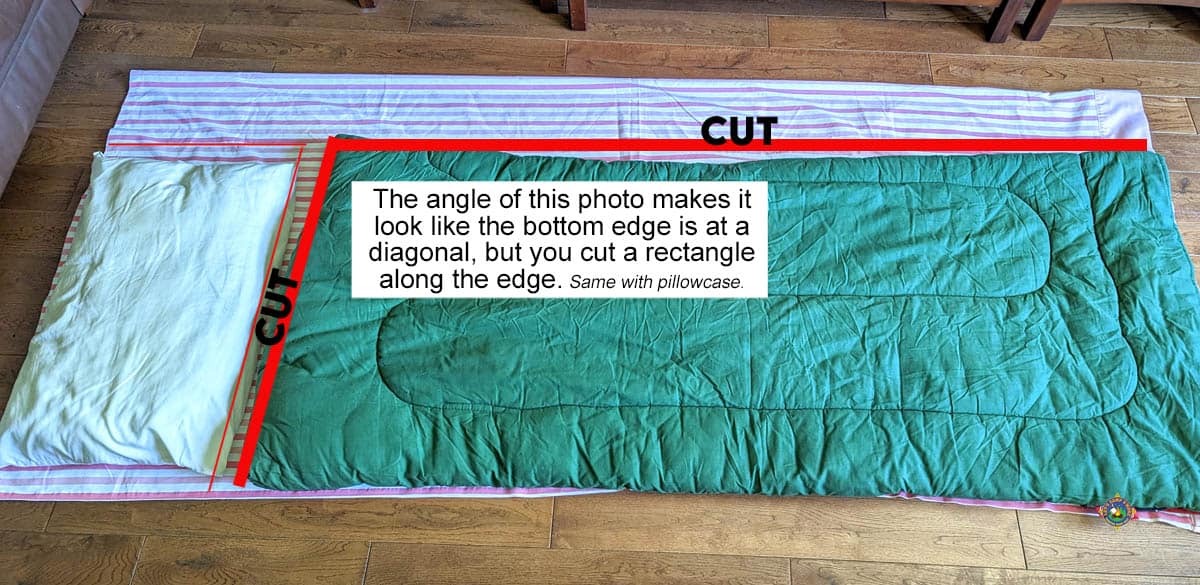
Credit: letscampsmore.com
Frequently Asked Questions
What Materials Do I Need To Make A Sleeping Bag?
You need fabric like nylon or polyester, insulation like down or synthetic fill, thread, zipper, and sewing tools. These materials ensure warmth, durability, and comfort in your sleeping bag.
How Do I Choose The Right Insulation For Sleeping Bags?
Choose down insulation for lightweight warmth and compressibility. Opt for synthetic fill if you want water resistance and affordability. Both provide good insulation but suit different weather conditions.
What Sewing Techniques Are Best For Sleeping Bags?
Use straight stitches for seams and reinforce stress points with double stitching. Consider baffle construction to evenly distribute insulation and prevent cold spots.
How Can I Make My Sleeping Bag More Warm?
Add extra insulation layers, use draft tubes around zippers, and choose fabrics with good thermal properties. Proper sealing and design also prevent heat loss effectively.
Conclusion
Creating your own sleeping bag can be rewarding and fun. You now know the steps involved. From choosing the right material to final stitching. Each part is important. Your homemade sleeping bag offers comfort and warmth. Plus, it’s uniquely yours.
You save money and gain a new skill. Remember to enjoy the process. Take your time with each step. Soon, you’ll have a cozy sleeping bag. Perfect for camping or home use. Celebrate your achievement and keep crafting. Your efforts have paid off.
Happy camping!