Looking to build a shelter that’s quick, affordable, and reliable? Making a tent out of tarps is a skill you can easily learn, and it could save you from unexpected weather or uncomfortable nights outdoors.
Whether you’re camping, hiking, or preparing for emergencies, knowing how to turn simple tarps into a sturdy tent puts you in control of your comfort and safety. Keep reading, and you’ll discover step-by-step tips that make this task simple—even if you’ve never done it before.
Your next adventure just got a whole lot easier.

Credit: tytarp.com
Choosing The Right Tarps
Making a tent out of tarps requires the right materials. The choice of tarp affects comfort and protection.
Consider factors like material, size, and waterproof features before buying a tarp for your tent.
Material Types
Tarps come in different materials. Each has strengths and weaknesses for tent building.
- Polyethylene:Affordable and waterproof but less durable.
- Canvas:Strong and breathable but heavier and not fully waterproof.
- Nylon:Lightweight and durable, often treated for water resistance.
- Vinyl:Very waterproof and strong but heavier and less flexible.
Size And Thickness
Size and thickness affect tarp coverage and durability. Larger tarps cover more space.
| Thickness (mil) | Use | Pros | Cons |
| 5-7 mil | Lightweight shelter | Easy to carry | Less durable |
| 8-10 mil | General purpose | Good balance of strength and weight | May tear under rough use |
| 12+ mil | Heavy duty | Very durable and strong | Heavy and bulky |
Waterproof Features
Waterproof tarps keep you dry in rain. Look for tarps with good waterproof ratings.
- Check if the tarp has a waterproof coating like polyurethane or vinyl.
- Sealed seams prevent water from leaking through stitches.
- Some tarps repel water but still allow breathability to reduce condensation.

Credit: www.youtube.com
Essential Tools And Supplies
Making a tent out of tarps is a simple and fun activity. You need the right tools and supplies to ensure a sturdy setup.
This guide will help you learn about the essential items required for the task. Let’s explore the necessary tools and supplies below.
Ropes And Paracords
Ropes and paracords are crucial for securing your tarp tent. They provide stability and structure, keeping your shelter intact.
- Select durable ropes to withstand outdoor conditions.
- Use paracords for flexibility and strength.
- Ensure the ropes are long enough to tie around trees or stakes.
Stakes And Poles
Stakes and poles form the backbone of your tarp tent. They maintain the tent’s shape and keep it elevated.
| Material | Benefits |
| Aluminum Poles | Lightweight and durable |
| Wooden Stakes | Eco-friendly and sturdy |
| Plastic Stakes | Affordable and easy to use |
Clips And Bungee Cords
Clips and bungee cords are useful for quick assembly and adjustments. They help in fastening the tarp securely.
Selecting The Campsite
Picking the right place to pitch your tarp tent is very important. It makes your camping safe and comfortable.
You should look for a spot that is flat, offers some shelter, and has no dangers nearby.
Flat Ground
Choose a flat area to set your tarp tent. This keeps you comfortable and stops the tent from sliding.
Look for soft soil or grass. Avoid rocky or uneven spots that can hurt you while sleeping.
Sheltered Areas
Find a place protected from wind and rain. Trees and bushes can act as natural windbreaks.
- Set up near tall trees but not directly under dead branches.
- Use hills or ridges to block strong winds.
- Avoid open fields that let the wind hit your tent hard.
Avoiding Hazards
| Hazard | Reason to Avoid |
|---|---|
| Dead Trees or Branches | Can fall and cause injury |
| Low-Lying Areas | Prone to flooding in rain |
| Animal Trails | Risk of wildlife encounters |
| Steep Slopes | Hard to set up tent and unsafe |
Always check the area for these hazards before setting your tarp tent. Safety comes first.
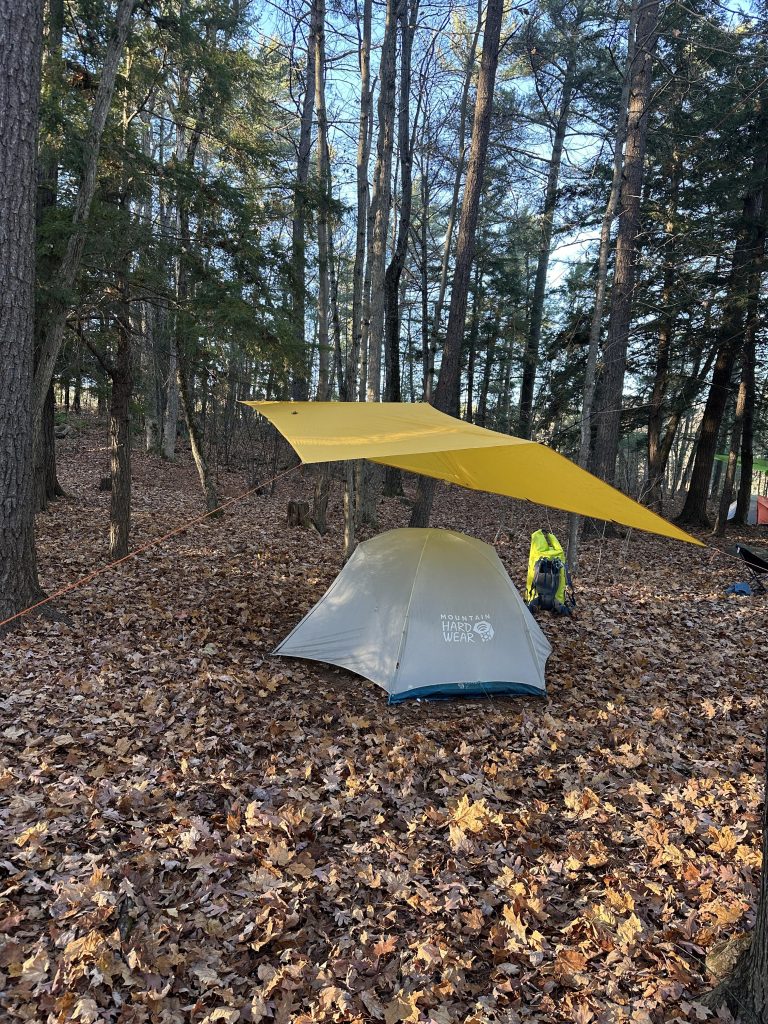
Basic Tarp Tent Designs
Tarp tents are simple shelters made from tarps and ropes. They protect you from rain, wind, and sun.
There are many ways to set up tarp tents. This guide shows three easy styles anyone can try.
A-frame Style
The A-frame style looks like a triangle. It is stable and sheds rain well. You need two trees or poles to tie the ridge line.
- Find two trees about 6 feet apart.
- Tie a rope between the trees as a ridge.
- Drape the tarp over the rope evenly.
- Secure the tarp corners to the ground with stakes.
- Tighten the tarp so it stays firm.
Lean-to Style
The lean-to style uses one high side and one low side. It is quick to set up and good for wind protection.
| Step | Action |
|---|---|
| 1 | Tie one edge of the tarp to a tree or pole. |
| 2 | Pull the tarp tight and stake the opposite edge to the ground. |
| 3 | Adjust the angle to block wind or rain from one side. |
Pup Tent Style
The pup tent style is a small, cozy shelter. It uses a ridge line and stakes to form a tent shape.
- Set up a ridge line between two points.
- Drape the tarp over the ridge line evenly.
- Stake all four corners close to the ridge line.
- Make sure the tarp is taut to avoid sagging.
- Use extra ropes for side support if needed.
Step-by-step Setup
Making a tent out of tarps is a simple way to create shelter outdoors. This guide shows how to set it up in clear steps.
Follow these instructions to build a sturdy and safe tarp tent for your next camping trip.
Preparing The Site
Choose a flat area free from sharp rocks or sticks. Clear the ground to avoid damage to the tarp and discomfort.
- Remove sticks, stones, and debris
- Check for overhead hazards like dead branches
- Ensure the site is dry and not prone to flooding
- Consider wind direction for tarp placement
Anchoring The Tarps
Secure the tarp firmly to the ground or nearby supports. This prevents the shelter from blowing away or collapsing.
- Lay the tarp flat over the chosen area
- Use stakes or rocks to anchor the tarp corners
- Tie cords to trees or poles for extra support
- Adjust tension to keep the tarp tight and stable
Securing The Shelter
Check all connections and fix any loose ends. A secure shelter keeps you safe and dry in changing weather.
| Action | Purpose |
|---|---|
| Tighten all ropes | Prevent sagging or flapping |
| Double knot tie points | Ensure strong holds |
| Place heavy objects on edges | Stop wind from lifting edges |
| Check for gaps | Keep rain and wind out |

Credit: www.reddit.com
Tips For Durability And Weatherproofing
Making a tent from tarps can be simple and effective. To keep your shelter strong, focus on durability and protection from weather. These tips will help you build a tarp tent that lasts and keeps you dry.
Pay attention to the seams, wind resistance, and how water drains from the tarp. Each part affects how well your tent performs in tough conditions.
Reinforcing Seams
Seams are weak spots in a tarp tent. Strengthen them to avoid tears and leaks. Use strong tape or sew with waterproof thread. Cover stitches with seam sealer to block water.
- Apply waterproof tape along all seams
- Sew edges with heavy-duty waterproof thread
- Use seam sealer to cover needle holes
- Double-fold edges before taping or sewing
Adjusting For Wind
Wind can tear your tent or blow it away. Secure the tarp tight and low. Use strong stakes and ropes. Angle the tarp to reduce wind pressure. Check and tighten ropes often.
| Tip | Action |
| Use strong stakes | Anchor tarp firmly in the ground |
| Tighten ropes | Keep tarp stretched to avoid flapping |
| Low profile | Set tarp close to ground to reduce wind force |
| Wind direction | Face narrow edge toward wind |
Managing Rain And Drainage
Rain can pool on your tarp and cause leaks or collapse. Set the tarp with a steep slope so water runs off. Clear the area under your tent to avoid water buildup. Dig small trenches if needed.
Here are ways to manage rain and drainage:
- Angle tarp to create a peak for water runoff
- Keep tent floor clear of debris and holes
- Dig shallow ditches to direct water away
- Use waterproof tarp material for best protection
Adding Comfort And Safety
Making a tent out of tarps can be simple and effective. Adding comfort and safety makes your shelter better. Small changes help keep you warm, dry, and safe inside.
Use easy tips to improve your tarp tent. Focus on floor insulation, air flow, and good lighting. These help you stay cozy and alert during your outdoor stay.
Floor Insulation Options
A cold or wet floor can spoil your rest. Use layers to block cold and dampness. This keeps your sleeping area warm and dry.
- Place a plastic sheet under your tarp to stop moisture
- Use foam pads or camping mats for soft insulation
- Lay dry leaves or pine needles for natural padding
- Bring blankets or sleeping bags to add warmth
Ventilation Techniques
Good air flow prevents stuffiness and moisture build-up. It lowers the chance of mold and keeps you comfortable.
| Ventilation Method | How to Do It | Benefit |
| Open Flaps | Lift tarp edges slightly | Fresh air enters, moisture leaves |
| Use Mesh Screens | Attach screens to openings | Keeps bugs out, allows air in |
| Raise Center High | Use poles to make a peak | Warm air rises and escapes |
Lighting And Visibility
Good lighting helps you move safely inside your tent. It also helps you see outside at night.
- Use battery-powered lanterns or flashlights
- Hang lights from tarp poles or ropes
- Keep lights away from flammable materials
- Use reflective tape on tarp edges to see boundaries
Maintenance And Storage
Taking good care of your tarp tent helps it last longer. Proper maintenance keeps the tarp strong and clean. Storing it the right way prevents damage over time.
Follow simple steps to clean, repair, and pack your tarp tent. This guide shows how to keep your tarp ready for your next trip.
Cleaning Tarps
Clean your tarp after each use to remove dirt and debris. Use mild soap and water with a soft brush or cloth. Avoid harsh chemicals that can weaken the material.
- Lay the tarp flat on a clean surface.
- Mix warm water with gentle soap.
- Scrub the tarp gently to remove stains.
- Rinse thoroughly with clean water.
- Hang or lay flat to dry completely before storing.
Repairing Tears
Fix small tears quickly to avoid bigger damage. Use tarp repair tape or patch kits designed for outdoor materials. Clean the area before applying any patch.
| Damage Type | Repair Method | Tools Needed |
| Small Tear | Apply repair tape over the tear | Scissors, repair tape |
| Large Tear or Hole | Use a patch with adhesive or sew if needed | Patch kit, needle, heavy thread |
| Worn Edges | Reinforce with extra tape or patches | Repair tape, patch material |
Proper Folding And Packing
Fold your tarp carefully to avoid creases that cause wear. Make sure the tarp is dry and clean before packing. Store it in a cool, dry place away from sunlight.
- Lay the tarp flat and smooth out wrinkles.
- Fold in halves or thirds to a manageable size.
- Roll or fold tightly but gently to avoid damage.
- Place the tarp in a storage bag or container.
- Keep it away from sharp objects or heavy items.
Frequently Asked Questions
How Do You Start Making A Tarp Tent?
Begin by selecting a durable tarp and a flat area. Secure the tarp with stakes or ropes tied to trees. Create a ridge line for support. Adjust angles to ensure water runoff and proper ventilation for comfort.
What Materials Are Needed To Build A Tarp Tent?
You need a strong tarp, rope or paracord, sturdy stakes, and optional poles. These materials help create a stable and weather-resistant shelter. Choose waterproof and tear-resistant tarps for best results.
How To Secure A Tarp Tent In Windy Conditions?
Use extra stakes and guy lines to anchor the tarp firmly. Tie ropes tightly around solid objects like trees or rocks. Angle the tarp to minimize wind resistance and prevent flapping or collapse.
Can You Make A Tarp Tent Without Poles?
Yes, use trees or other fixed structures as anchor points. Create a ridge line between two trees and drape the tarp over it. Secure edges with stakes to form a stable shelter.
Conclusion
Making a tent from tarps is simple and practical. You need just a few tools and some patience. This method saves money and gives you shelter anywhere. Experiment with shapes to find what works best. Practice helps you set up faster each time.
Enjoy the outdoors with your DIY tarp tent. It’s a useful skill for camping or emergencies. Try it today and stay protected from weather.