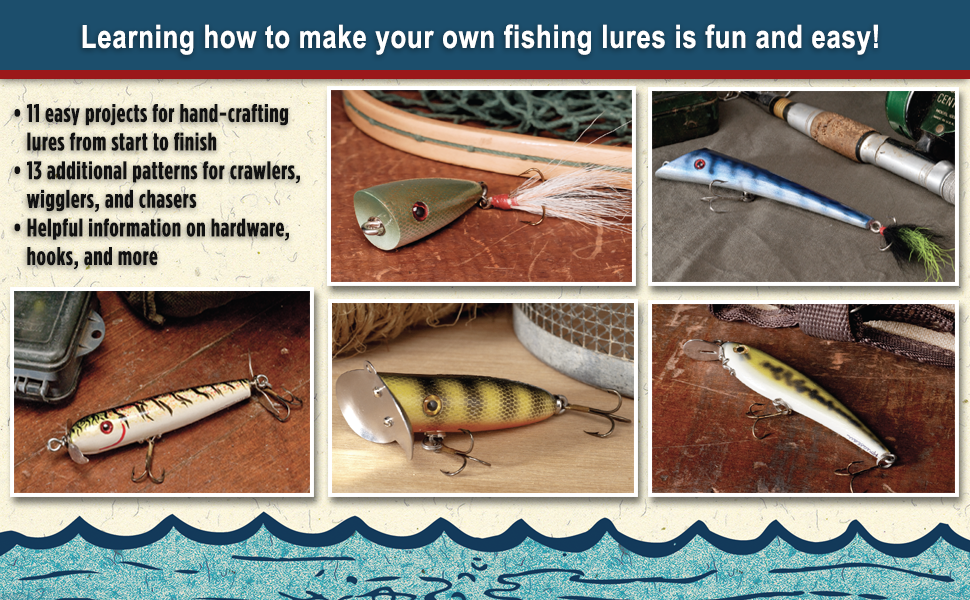
If you love fishing and enjoy working with your hands, making your own wood fishing lure can be both fun and rewarding. Imagine casting a lure you crafted yourself, knowing it’s unique and built to catch fish.
In this guide, you’ll discover simple steps to create a wooden lure that looks great and works well in the water. Whether you’re a beginner or have tried lure making before, this easy-to-follow process will help you bring your fishing skills to the next level.
Ready to turn a block of wood into your next favorite fishing tool? Let’s get started!

Credit: www.youtube.com
Choosing The Right Wood
Choosing the right wood is key for making a strong fishing lure. The wood affects how the lure floats and moves in water.
Different woods have unique qualities. You need wood that is light, durable, and easy to shape.
Best Wood Types For Lures
Some woods work better than others for fishing lures. Here are common types used by many lure makers.
- Balsa – Very light and easy to carve. It floats well.
- Cedar – Strong and water-resistant. It has a nice scent.
- Basswood – Soft and smooth, good for detailed shaping.
- Mahogany – Dense and durable but heavier than others.
- White Pine – Lightweight with good durability.
Wood Grain And Durability
The grain of the wood affects how the lure holds up. Tight grain means the wood is strong and less likely to crack.
| Grain Type | Durability | Workability |
| Tight Grain | High | Moderate |
| Loose Grain | Low | Easy |
| Straight Grain | High | Good |
| Wavy Grain | Moderate | Challenging |

Credit: www.amazon.com
Gathering Essential Tools
Making a wood fishing lure needs the right tools. These tools help you cut, shape, and finish the lure properly.
This guide covers the main tools needed for cutting, shaping, sanding, and finishing your lure.
Cutting And Shaping Tools
You need sharp and precise tools to cut and shape the wood for your lure. These tools help you get the right size and form.
- Hand saw or coping saw for cutting wood blocks
- Carving knives for detailed shaping
- Files and rasps to smooth rough edges
- Small chisels for fine shaping
- Drill with small bits for holes
Sanding And Finishing Supplies
Sanding and finishing tools give your lure a smooth look and protect it from water damage. Use different grits of sandpaper and finishing materials.
| Supply | Purpose |
| Coarse sandpaper (80-120 grit) | Remove rough spots and shape edges |
| Medium sandpaper (150-220 grit) | Smooth surfaces before finishing |
| Fine sandpaper (320-400 grit) | Prepare for final finish |
| Wood sealer or primer | Protect wood and help paint stick |
| Paint or varnish | Give color and water resistance |
| Small brushes or spray gun | Apply finish evenly |
Designing Your Lure
Designing a wood fishing lure is a creative and important step. Your design affects how well the lure works in water.
Good design helps attract fish and makes your lure stand out. Focus on shape, size, and weight for best results.
Sketching The Shape
Start by drawing the shape of your lure on paper. Use simple lines to form the body.
Think about the fish you want to catch. Choose a shape that moves well in water.
- Use smooth curves for a natural look
- Try different shapes like minnows or frogs
- Make sure the shape is balanced for good swimming
Selecting Size And Weight
Pick the right size for the fish you want to catch. Small lures work for small fish, big lures for big fish.
Weight affects how the lure moves and sinks. Too heavy or too light can change how fish see it.
- Light lures float or move slowly
- Heavy lures sink fast and reach deep water
- Choose weight based on fishing spot and fish type

Credit: www.youtube.com
Cutting And Shaping The Wood
Cutting and shaping the wood is an important part of making a wood fishing lure. The shape affects how the lure moves in water.
Start with a good piece of wood that is easy to carve. Take your time to create the right shape.
Marking The Outline
Mark the shape of the lure on the wood before you start cutting. Use a pencil to draw the outline clearly.
Check the design to make sure the size and shape fit your fishing needs. Mark any details like where the hooks will go.
- Use a ruler for straight lines
- Draw smooth curves for natural shapes
- Mark hook positions carefully
- Double-check measurements before cutting
Carving Techniques
Carve the wood slowly following the outline. Use sharp tools to get smooth edges and the right shape.
Start by removing large pieces of wood, then refine the shape with smaller tools. Sand the lure to smooth rough areas.
- Use a coping saw or band saw for rough cuts
- Try a carving knife for detailed shaping
- Sand with coarse to fine grit paper
- Work carefully to keep the design balanced
Sanding And Smoothing
Sanding and smoothing are key steps in making a wood fishing lure. These steps help shape the lure and prepare it for finishing. Proper sanding removes rough spots and makes the surface even.
Taking time to sand well improves how the lure looks and performs in water. This guide covers choosing the right sandpaper grits and how to get a smooth finish.
Choosing Sandpaper Grits
Selecting the correct sandpaper grit is important. Start with rough grit to shape the lure. Then use finer grits to smooth the surface. This process avoids scratches and makes the wood ready for painting or varnishing.
- Begin with 80 or 100 grit to remove large rough areas.
- Move to 150 or 180 grit to refine the shape.
- Use 220 grit or finer for a smooth finish.
- Wet sanding with 320 grit can further polish the surface.
Achieving A Smooth Finish
A smooth finish makes your lure look professional and helps paint stick better. Sanding must be even and careful. Use light pressure to avoid gouges or uneven spots.
| Step | Action | Tip |
|---|---|---|
| 1 | Sand with medium grit (150-180) | Follow the wood grain for best results |
| 2 | Switch to fine grit (220+) | Check for smoothness by touch |
| 3 | Use wet sanding (optional) | Helps remove very fine scratches |
| 4 | Clean dust before finishing | Use a soft cloth or air blower |
Painting And Sealing
Painting and sealing are key steps to make your wood fishing lure look good and last long. Paint adds color and style. Sealing protects the lure from water damage.
Use the right paint and sealant to keep your lure strong and attractive. This guide helps you pick paint types and apply protective coatings.
Selecting Paint Types
Choose paint that sticks well to wood and dries fast. Acrylic paint is a popular choice. It is easy to use and comes in many colors.
Oil-based paints are also good. They give a shiny finish and resist water better than acrylic. Use paint made for outdoor or marine use for best results.
- Acrylic paint: quick drying, easy to clean
- Oil-based paint: durable, water resistant
- Marine paint: designed for wet conditions
- Spray paint: smooth finish, fast application
Applying Protective Coatings
Seal your lure with a clear protective coating. This stops water from soaking into the wood. It also keeps the paint from peeling.
Use varnish, epoxy, or polyurethane as sealants. Apply thin coats and let each dry fully. Sand lightly between coats for a smooth finish.
- Varnish: glossy look, easy to apply
- Epoxy: very strong, waterproof
- Polyurethane: tough, available in matte or gloss
- Apply 2-3 coats for best protection
Adding Hooks And Hardware
Adding hooks and hardware is an important step in making a wood fishing lure. These parts help catch fish and make the lure work properly.
You need to choose the right hooks and attach the hardware securely. This will make your lure strong and ready to use.
Choosing Hook Sizes
Pick hooks that fit the size of your lure. Big lures need big hooks, small lures need small hooks. The right size helps catch fish better.
Check the hook packaging to find the size. Common sizes range from 2 to 6 for most wood lures.
- Size 2 hooks are good for large lures
- Size 4 hooks fit medium lures
- Size 6 hooks work with small lures
Attaching Split Rings And Eyes
Split rings connect the hooks to the lure. Eyes are small metal loops that attach to the lure body. Both parts must be strong.
Use pliers to open the split rings. Slide the ring onto the eye and then attach the hook. Close the ring tightly to avoid losing hooks.
- Use pliers to open and close split rings
- Attach split rings to the metal eyes on the lure
- Connect hooks to the split rings securely
- Check that all parts are tight and not loose
Testing Your Lure
Testing your wood fishing lure is important. It helps you see how the lure moves in water.
You can find out if your lure floats, dives, or swims well by testing it carefully.
Water Testing Techniques
Test your lure in a bucket or small pond first. This lets you watch its action closely.
Cast the lure gently and see how it moves. Check if it swims straight or spins.
- Watch the lure float or sink
- Notice how it moves when pulled
- Check if it wiggles or stays still
- Try different speeds and pauses
Adjusting Weight And Balance
Weight and balance affect how your lure swims. Add small weights to change its action.
Place weights inside the lure to help it dive or balance it for better movement.
- Add weight near the front to dive deeper
- Place weight in the center for balance
- Use light weight for floating lures
- Test often to find the best setup
Tips For Successful Fishing
Using wood fishing lures can improve your fishing experience. These lures look natural and attract many fish types.
Knowing when and how to use wood lures helps you catch more fish. Follow these tips to get better results.
Best Conditions For Using Wood Lures
Wood lures work best in clear water with calm weather. Fish can see the natural look of the lure more easily in these conditions.
Early morning and late afternoon are good times. Fish are more active and likely to bite during these hours.
- Use wood lures on sunny days with light wind
- Choose calm lakes or slow-moving rivers
- Try fishing near logs, rocks, or plants where fish hide
- Fish during cooler parts of the day for better results
Maintenance And Storage
Keep your wood lures in good shape to last longer. Clean them after every use to remove dirt and fish slime.
Store lures in a dry place to prevent wood damage. Avoid keeping them in direct sunlight or damp areas.
- Rinse lures with fresh water after fishing
- Dry completely before storing
- Use tackle boxes with compartments to keep lures separated
- Apply a light coat of oil or varnish to protect the wood
Frequently Asked Questions
What Materials Are Needed To Make A Wood Fishing Lure?
You need basswood or cedar, carving tools, sandpaper, waterproof paint, hooks, split rings, and a clear sealant. These materials ensure durability and effectiveness in water.
How Do You Shape A Wooden Fishing Lure?
Start by sketching the lure shape on wood. Use carving tools to cut and shape it, then smooth with sandpaper for a streamlined finish.
Which Paint Is Best For Wood Fishing Lures?
Use waterproof acrylic or enamel paint. These paints resist water damage and maintain vibrant colors, attracting fish effectively.
How Long Does It Take To Make A Wood Fishing Lure?
It typically takes 2 to 4 hours. Time varies by design complexity and drying time for paint and sealant.
Conclusion
Crafting your own wood fishing lure can be rewarding. It allows personalization. You control every detail, from shape to color. The process strengthens your fishing experience. You gain new skills and creativity. Plus, it’s cost-effective. You save money by making your own.
Friends might admire your unique creations. Remember to always use safe tools. Practice patience and enjoy the journey. Each lure you make tells a story. The story of your skills and imagination. So, gather your materials and start creating. Enjoy your fishing adventures with handmade lures.
Happy fishing!