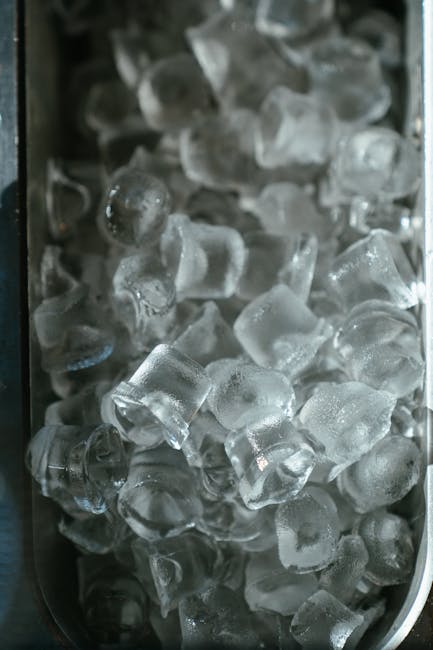
Have you ever needed a perfect ice block but didn’t know where to start? Whether you want to chill your drinks just right or create something cool for a special event, knowing how to make an ice block is a handy skill.
You might think it’s as simple as freezing water, but there’s more to it if you want clear, solid ice without cracks or cloudiness. Keep reading, and you’ll discover easy steps and smart tips that will have you making ice blocks like a pro in no time.
Your next cold drink or creative project will thank you!
Choosing The Right Water
Pure, clean water freezes clearer and lasts longer as an ice block. Avoid tap water with minerals or impurities for the best results. Using filtered or boiled water helps create a solid, transparent ice block.
Choosing the right water is crucial for making clear ice blocks. The water you use affects the ice’s clarity and taste. Using the correct type ensures your ice is pure and visually appealing.Distilled Vs Tap Water
Distilled water often makes clearer ice than tap water. It is free from minerals and impurities. Tap water contains minerals that can cloud the ice. Using distilled water helps achieve a crystal-clear appearance. This can enhance the presentation of drinks. Tap water can also carry unwanted tastes into the ice.Importance Of Purity
Purity in water is important for health and aesthetics. Impurities in water affect the ice’s texture and flavor. Clear ice is often preferred because it looks nicer in beverages. Pure water ensures the ice doesn’t alter drink flavors. Contaminants in tap water may also affect the freezing process. This can lead to uneven or cloudy ice blocks.
Credit: thelowtoxproject.com.au
Tools And Materials Needed
Making an ice block requires a few simple tools and materials. Choosing the right items helps create clear, solid ice. These essentials make the process smooth and effective.
Containers For Freezing
Select containers that suit your needs. Plastic, silicone, or metal molds work well. Larger containers create bigger ice blocks. Small containers make ice cubes or smaller blocks.
- Use clean containers to avoid odors and impurities.
- Choose containers with straight sides for easy ice removal.
- Consider silicone molds for flexible and quick ice release.
- Metal containers freeze ice faster than plastic ones.
Freezer Setup Tips
Prepare your freezer for the best ice results. Keep the freezer temperature at or below 0°F (-18°C). Avoid placing containers near the freezer door to prevent temperature changes.
- Keep the freezer stable and undisturbed during freezing.
- Place containers on a flat surface for even freezing.
- Freeze slowly for clearer ice blocks by reducing freezer airflow.
Freezing Techniques For Clear Ice
Clear ice adds a touch of elegance to your drinks, but achieving it requires more than just freezing water. The key lies in controlling how the ice freezes, which affects clarity and purity. Understanding specific freezing techniques can help you create crystal-clear ice blocks right at home.
Directional Freezing Method
Directional freezing means freezing water from one direction only, usually top to bottom. This pushes impurities and air bubbles down and out of the way, leaving the top clear and transparent.
You can try this at home by using an insulated cooler without a lid inside your freezer. Fill it with water and let it freeze slowly. The insulation slows freezing on the sides and bottom, forcing ice to form from the top down.
Once fully frozen, you’ll notice a cloudy layer at the bottom containing trapped air and minerals. Simply chip off this layer, and you’re left with a clear ice block perfect for your cocktails. Have you experimented with freezing in different containers to see how shape affects clarity?
Controlling Freezer Temperature
Freezing ice too quickly often traps air bubbles, making it cloudy. Slowing down the freezing process by adjusting your freezer’s temperature can improve clarity.
Set your freezer to a slightly warmer temperature, around 20°F (-6°C), instead of the usual 0°F (-18°C). This slower freeze allows air to escape before the ice fully forms.
Patience pays off here. It might take several hours longer, but the result is a much clearer ice block. Have you noticed how a small temperature change can impact the texture and look of your homemade ice?

Credit: www.youtube.com
Removing Air Bubbles And Impurities
Removing air bubbles and impurities is key to making a clear ice block. Air bubbles cause cloudiness, and impurities create spots inside the ice. Clear ice looks better and melts slower. The water used plays a big role. Treating the water before freezing helps get rid of trapped air and unwanted particles.
Boiling And Cooling Water
Boiling water removes dissolved gases that cause bubbles. As water heats, air escapes. Let the water boil for about 5 minutes. After boiling, cool the water slowly. Use a clean container and cover it to avoid dust. Cooling slowly stops new air from entering. This process helps make clearer ice by reducing trapped air.
Using Filters And Degassing
Filters catch dirt and impurities before freezing. Use a fine filter to remove particles. Degassing removes dissolved gases without boiling. Special degassing tools or vacuum pumps can help. This step improves water purity further. Clean water freezes into clearer, stronger ice blocks. Combine filtering and degassing for best results.
Cutting And Storing Ice Blocks
Cutting and storing ice blocks properly can make a big difference in how you use them later. Whether you’re preparing ice for a party or need large blocks for cooling, the right tools and storage techniques will save you time and effort. Let’s dive into how to shape and keep your ice blocks in top condition.
Tools For Shaping Ice
Choosing the right tools helps you cut ice blocks safely and efficiently. A sharp ice pick or an ice saw works best for precise cuts. You can also use a sturdy serrated knife, but make sure it’s strong enough to handle the cold and hardness of the ice.
Gloves are essential to protect your hands from the cold and provide a better grip. Using a flat, stable surface to place your ice block prevents slipping and accidents. Have a mallet or hammer handy to tap the tools gently when you need to break the ice into smaller pieces.
Best Practices For Storage
Storing ice blocks properly keeps them from melting and sticking together. Wrap each block in a thick plastic bag or cling film to prevent moisture loss and contamination. Keep them in a freezer that maintains a steady temperature below 0°F (-18°C).
Stack the blocks with some space between them to allow cold air circulation. If you don’t have much space, separate blocks with pieces of cardboard or plastic sheets. Have you noticed how tightly packed ice can turn into one big block? Avoid that by giving your ice room to breathe.
Common Mistakes To Avoid
Making a clear, solid ice block takes more than just freezing water. Many people face common problems that affect the ice’s look and strength. Knowing what to avoid helps create perfect ice blocks every time.
Avoiding Cloudy Ice
Cloudy ice usually happens because of trapped air and impurities in water. Using tap water often causes this issue. Boiling water before freezing helps remove air bubbles and impurities. Freezing water slowly also reduces cloudiness. Use a cooler or insulated container to slow the freezing process. This helps ice freeze from one direction and pushes air out.
Preventing Cracks And Breakage
Cracks form when ice freezes too fast or unevenly. Avoid freezing ice in very cold freezers set below -10°F (-23°C). Sudden temperature changes cause stress and cracks. Removing ice too quickly from molds can also cause breakage. Let ice sit at room temperature for a few minutes before unmolding. Use flexible molds to reduce stress on ice blocks. Handle ice gently to keep it intact.
Creative Uses For Clear Ice Blocks
Clear ice blocks bring more than just coldness. Their crystal-clear look adds style to many settings. They work well beyond drinks. These blocks offer creative ways to improve presentation and function. Using clear ice blocks can impress guests and keep food fresh. Explore some practical ideas below.
Cocktail Presentation
Clear ice blocks enhance any cocktail’s appearance. Their transparency shows off the drink’s colors. Large blocks melt slower, keeping drinks cool longer. Use these tips:
- Cut blocks into stylish shapes for unique glasses.
- Place blocks in clear glasses for a classy look.
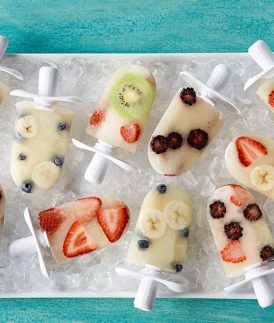
- Use molds to create ice with embedded fruits or herbs.
Clear ice adds a touch of elegance to bars and parties. It makes every sip feel special.
Food Display And Preservation
Clear ice blocks help keep food fresh and attractive. Their clarity highlights the colors and textures of seafood or fruit. Use them to:
- Line display trays with ice blocks to keep items cold.
- Create ice beds for shellfish at buffets.
- Preserve freshness without hiding the food’s natural beauty.
These blocks maintain ideal temperatures while offering a clean, modern look. They are perfect for catering and outdoor events.
Credit: www.driscolls.com.au
Frequently Asked Questions
How Long Does It Take To Make An Ice Block?
Making an ice block typically takes 4 to 6 hours in a standard freezer. Larger blocks may require up to 24 hours. For faster results, use cold water and a well-insulated mold. Consistent freezing temperatures ensure a clear, solid ice block.
What Materials Are Needed To Make An Ice Block?
To make an ice block, you need a mold or container, clean water, and a freezer. Optional materials include distilled water for clarity and insulation for slower freezing. Use food-safe containers to ensure the ice block is safe for consumption.
How Can I Make Clearer Ice Blocks?
Use distilled or boiled water to reduce impurities and air bubbles. Freeze water slowly by insulating the container to control freezing direction. Avoid stirring during freezing. This method produces clearer, denser ice blocks ideal for drinks and presentations.
Can I Reuse Ice Blocks After Melting?
Yes, you can reuse melted ice blocks by refreezing them. However, repeated freezing may reduce clarity and cause cracks. For best results, use clean water each time. Reusing ice blocks is practical and reduces waste.
Conclusion
Making an ice block is simple and fun. Use clean water for clear ice. Freeze slowly to avoid cracks. Choose the right container to shape your block. Patience helps the ice form perfectly. Now, you can enjoy ice blocks for drinks or cooling.
Practice a few times to get the best results. Making ice blocks at home saves money and adds convenience. Try different sizes and shapes to suit your needs. Easy steps lead to great ice blocks every time.