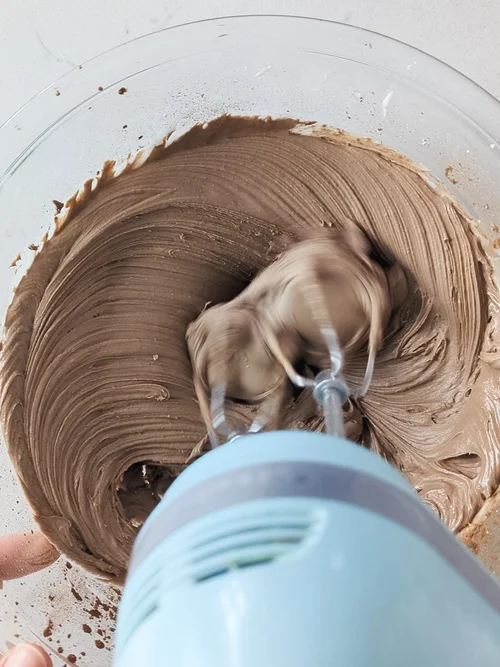
Are you ready to take your baking to the next level? Learning how to make brown royal icing is a simple way to add a rich, beautiful touch to your cookies and cakes.
This unique icing not only looks stunning but also offers a delicious flavor twist that will impress everyone. In this guide, you’ll discover easy steps to create smooth, perfectly tinted brown royal icing that holds up well for decorating. Keep reading, and you’ll soon master a skill that makes your treats stand out every time.
Ingredients Needed
Making brown royal icing starts with gathering the right ingredients. Each component plays a key role in texture, flavor, and color. Using quality ingredients ensures smooth, tasty icing that holds its shape well. Precision in measuring also helps achieve the perfect consistency.
Essential Components
- Powdered sugar:The base of royal icing, finely ground for smoothness.
- Egg whites or meringue powder:Provides structure and helps the icing harden.
- Water:Adjusts the icing consistency for piping or flooding.
- Vanilla or almond extract:Adds a subtle flavor that balances sweetness.
- Brown coloring:Gives the icing its brown shade without affecting taste.
Choosing The Right Brown Coloring
Brown coloring comes in several types. Gel colors are thick and concentrated, giving rich hues without thinning the icing. Powdered colors also work well and do not change consistency. Liquid colors can make the icing too runny, so use them carefully.
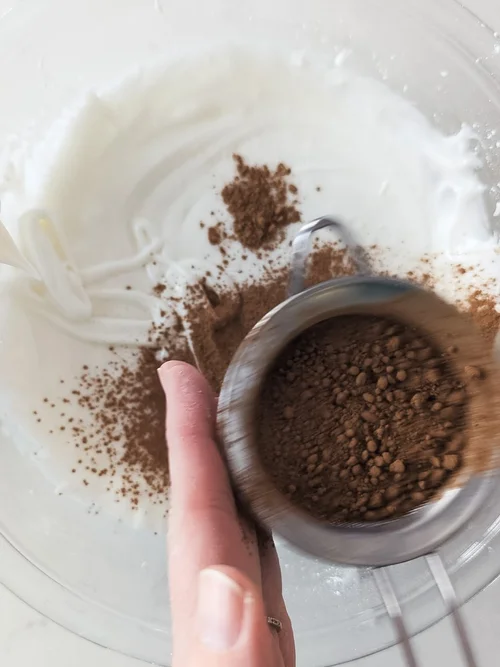
Natural options include cocoa powder or coffee, which add flavor along with color. Adjust sugar and liquid amounts to keep the right texture if you use these.

Credit: bakabee.com
Tools Required
Gathering the right tools makes preparing brown royal icing easier and more efficient. Each tool plays a role in achieving smooth texture and perfect color. Having these ready avoids interruptions and ensures consistent results.
Mixing Equipment
- Mixing bowl: Use a medium-sized, clean bowl for combining ingredients.
- Electric mixer or hand whisk: An electric mixer speeds up mixing but a whisk works well too.
- Measuring cups and spoons: Precise measurements keep the icing consistent every time.
- Sifter: Sift powdered sugar to remove lumps for a smooth finish.
- Spatula: A flexible spatula helps scrape the sides of the bowl clean.
Decorating Supplies
- Piping bags: Use disposable or reusable bags for easy icing application.
- Piping tips: Choose fine or medium tips to control icing flow and details.
- Food-safe brushes: Useful for adding color or smoothing icing on designs.
- Toothpicks or skewers: Perfect for small details and fixing mistakes.
- Turntable (optional): Rotates your work for easier decorating and even coverage.
Step-by-step Mixing
Creating brown royal icing can add elegance to your baked goods. The mixing process requires precision and patience. Follow these steps to achieve the perfect brown hue and consistency. Let’s dive into the detailed process.
Preparing The Base
Start by gathering your ingredients. You will need powdered sugar, meringue powder, and water. Mix 4 cups of powdered sugar with 3 tablespoons of meringue powder in a bowl. Slowly add 6 tablespoons of water. Stir until the mixture is smooth. Ensure no lumps remain for a silky base.
Adding Brown Color Gradually
Use gel or paste food coloring for a richer brown shade. Add a small amount of brown coloring to the base. Stir thoroughly after each addition. Check the color intensity regularly. This helps you control the final shade. You can mix different colors for a custom hue.
Achieving The Right Consistency
Consistency is key for royal icing. For outlining, aim for a thicker texture. Add powdered sugar if the icing is too runny. For flooding, a thinner consistency is ideal. Add water gradually to thin it out. Test the icing’s flow by lifting the spoon. It should drizzle smoothly back into the bowl.

Credit: www.thehoneyblonde.com
Tips For Perfect Texture
Achieving the perfect texture for brown royal icing is key to beautiful, smooth decorations. The right consistency helps the icing hold its shape and stick well. Pay close attention to texture while mixing and adjusting your icing.
Avoiding Clumps
Use sifted powdered sugar to prevent lumps in your icing. Stir gently but thoroughly to combine ingredients without creating air bubbles. Add liquids slowly to keep the mixture smooth. If clumps appear, strain the icing through a fine mesh sieve. This ensures a silky, even texture every time.
Adjusting Thickness
Thin icing is great for flooding cookies, while thick icing holds details better. Add small amounts of water to thin the icing, stirring well after each addition. To thicken, mix in extra powdered sugar little by little. Test the consistency by lifting the spoon; the icing should fall slowly and hold soft peaks. Adjust carefully for the right balance.
Common Mistakes To Avoid
Making brown royal icing can be tricky. Many beginners face common mistakes that affect the icing’s look and texture. Avoiding these errors helps create smooth, rich, and perfect brown icing every time.
Overmixing
Mixing royal icing too long changes its texture. It can become too thick and dry quickly. Overmixed icing loses its smooth shine and becomes hard to pipe. Mix just until ingredients combine well. Stop as soon as the icing reaches the right consistency.
Using Too Much Color
Adding too much brown food coloring can ruin the icing’s texture. Excess color thins the icing and makes it runny. It also changes the taste slightly. Use small amounts of concentrated color. Add more little by little to reach the shade you want.
Credit: www.thehoneyblonde.com
Storage And Shelf Life
Knowing how to store your brown royal icing properly can save you time and reduce waste. The right storage method keeps the icing fresh, smooth, and ready for your next decorating adventure. Understanding its shelf life helps you avoid using icing that’s lost its perfect texture or taste.
Proper Containers
Use airtight containers to keep your brown royal icing from drying out or absorbing odors from the fridge. Plastic containers with tight-fitting lids or glass jars work well. Avoid containers that allow air to seep in, as this causes the icing to harden quickly.
Label your container with the date you made the icing. This simple step helps you track freshness, so you know when it’s time to make a new batch.
Reusing Leftover Icing
Leftover brown royal icing doesn’t have to go to waste. If it’s been stored correctly, you can bring it back to life by adding a few drops of water and stirring gently. This restores its smooth, pipeable consistency.
Have you ever tossed icing simply because it felt too stiff? Try this trick next time—you might find it surprisingly easy to reuse. Just remember, if the icing smells off or looks grainy, it’s better to make fresh icing for your best results.
Creative Uses For Brown Royal Icing
Brown royal icing offers a warm, rich tone that can add depth and uniqueness to your baked creations. Its earthy hue makes it perfect for a variety of decorating projects that go beyond the usual white icing. If you’re wondering how to make the most of this versatile icing, consider how it can transform your designs with texture, color, and style.
Decorating Ideas
Use brown royal icing to create realistic tree bark on gingerbread houses or woodland-themed cookies. Its natural color pairs beautifully with leaf shapes, acorns, and animal designs, making your decorations look more authentic.
Try piping intricate patterns like lattice or basketweave on cakes to add a rustic charm. The subtle sheen of royal icing highlights details, so even simple shapes gain elegance with brown icing.
Have you thought about using it for lettering? Brown icing stands out on light-colored backgrounds and adds a vintage feel to invitations or cake toppers. It’s a great choice if you want your messages to be noticeable but not too bold.
Combining With Other Colors
Pair brown royal icing with pastel shades like pale pink or mint green for a soft, natural palette. This combination works well for seasonal treats, especially around autumn or spring celebrations.
For more contrast, use it alongside bright colors like turquoise or coral. The brown provides a grounding effect that balances vibrant hues, making your designs pop without overwhelming the eye.
Experiment with mixing brown icing with small amounts of white to create lighter shades of tan and beige. This gradient effect can add dimension to your decorations, especially in floral or animal motifs.
Have you noticed how combining colors can completely change the mood of your baked goods? Play around with different pairings to find what feels right for your style and occasion.
Frequently Asked Questions
What Ingredients Are Needed For Brown Royal Icing?
Brown royal icing requires powdered sugar, egg whites or meringue powder, vanilla extract, and cocoa powder or brown food coloring to achieve its color.
How Do You Adjust Consistency For Brown Royal Icing?
Add small amounts of water to thin or powdered sugar to thicken until the icing reaches your desired consistency for piping or flooding.
Can Brown Royal Icing Be Stored For Later Use?
Yes, store brown royal icing in an airtight container at room temperature. Use within 3-5 days and stir before use.
What Are Common Uses For Brown Royal Icing?
Brown royal icing is ideal for decorating cookies, cakes, and gingerbread houses, adding a rich color and smooth finish to baked goods.
Conclusion
Making brown royal icing is simple and fun. Use the right ingredients and follow the steps carefully. This icing adds a rich color and smooth texture to your baked goods. Practice helps you get the perfect consistency every time. Enjoy decorating cookies, cakes, and more with your homemade icing.
Try different shades by adjusting the cocoa or coloring. Baking becomes more creative and enjoyable with this skill. Keep experimenting and have fun with your sweet creations!