
Craving a cool, creamy treat but don’t want to wait for the ice cream maker? What if you could whip up delicious chocolate ice cream right in a bag, using just a few simple ingredients and no fancy equipment?
You’re about to discover an easy, fun way to make your own ice cream at home. This method is perfect for kids, parties, or when you just want a quick, homemade dessert. Keep reading, and you’ll learn exactly how to turn everyday items into a mouthwatering chocolate ice cream that will impress everyone—and satisfy your sweet tooth instantly!
Ingredients Needed
Gathering the right ingredients is the first step to making delicious chocolate ice cream in a bag. Each item plays a specific role in creating the perfect creamy texture and rich flavor. Knowing what you need before you start saves time and makes the process smoother.
Basic Ingredients
- Heavy cream or half-and-half:This is the base that gives your ice cream its creamy texture.
- Milk:Use whole milk for a richer taste; it balances the creaminess.
- Sugar:Sweetens the ice cream and enhances the chocolate flavor.
- Cocoa powder:Choose unsweetened cocoa powder for that deep chocolate taste.
- Vanilla extract:Adds a subtle hint that rounds out the chocolate flavor.
- Ice:Needed to freeze the mixture quickly inside the bag.
- Salt:Rock salt or kosher salt helps lower the freezing point of ice, speeding up the chilling process.
Have you ever wondered why salt and ice work so well together in this recipe? The salt melts the ice but also makes it colder, which helps freeze your ice cream faster without a machine.
Optional Add-ins
- Chocolate chips or chunks:For an extra burst of chocolate in every bite.
- Mini marshmallows:Add a fun, chewy texture that kids love.
- Crushed cookies or brownies:Mix in for a crunchy surprise.
- Nuts:Chopped almonds or pecans add crunch and flavor contrast.
- Peanut butter:Swirl in for a creamy, nutty twist on classic chocolate.
Think about what you enjoy most in your ice cream. Would you prefer a smooth chocolate experience, or do you want to surprise your taste buds with some crunchy or gooey textures? Adding these extras can transform a simple treat into something uniquely yours.
Equipment Required
Making chocolate ice cream in a bag is a fun and simple way to enjoy a homemade treat without an ice cream maker. Before you start shaking, it’s important to gather the right equipment to ensure your ice cream turns out creamy and delicious. Having the proper tools makes the process smoother and keeps your kitchen mess-free.
Types Of Bags
The main equipment you need is two plastic bags: one large and one small. The small bag holds your ice cream mixture, so it should be sturdy and seal tightly to prevent leaks. A quart-size freezer bag works best because it fits comfortably inside the larger bag without too much extra space.
The large bag acts as the ice pack container and should be strong enough to handle ice and salt without breaking. A gallon-size freezer bag is ideal here. Double-bagging the smaller bag can help avoid spills if it breaks during shaking. Have you ever experienced a messy kitchen from a burst bag? Choosing the right bags can save you from that hassle.
Additional Tools
Besides the bags, you’ll need a few extra tools to make the process easier. Measuring cups and spoons are essential for getting the right proportions of cream, sugar, and cocoa powder. A sturdy spoon or small whisk helps mix the ingredients well before sealing the bag.
You’ll also want a kitchen towel or gloves to hold the cold bag comfortably while shaking. The mixture can get very cold, and protecting your hands helps you shake longer and more effectively. Do you have a timer or stopwatch handy? Tracking your shaking time can help you find the perfect texture for your ice cream.
Step-by-step Process
Making chocolate ice cream in a bag is a fun and simple activity that anyone can try at home. The process breaks down into easy parts you can enjoy doing yourself or with kids. Let’s dive into how you can create delicious ice cream using just a few ingredients and some shaking.
Mixing Ingredients
Start by combining your basic ingredients: heavy cream, milk, sugar, and cocoa powder. Use a small sealable plastic bag to mix them thoroughly. Press out as much air as possible before sealing to avoid spills.
Make sure the sugar is fully dissolved to prevent grainy ice cream. Have you ever noticed how the texture changes when sugar isn’t mixed well? This step is key to a smooth, creamy result.
Sealing The Bags
Next, place the small bag inside a larger, sealable bag filled halfway with ice and rock salt. The salt lowers the freezing point, making the ice cream freeze faster. Seal the larger bag tightly to keep everything contained.
Check the seals carefully—any leaks will turn your ice cream into a salty mess. Ever had a bag burst in the freezer? This simple precaution saves a lot of clean-up time.
Shaking And Freezing
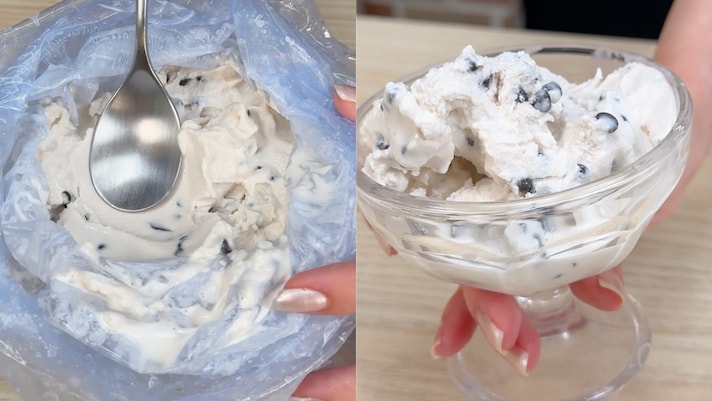
Now comes the fun part: shake the bags vigorously for about 5 to 10 minutes. The constant movement helps the mixture freeze evenly and quickly. You’ll feel the bag getting harder as the ice cream forms.
Take breaks if your arms get tired, but keep it moving. Have you noticed how shaking the bag turns a liquid into something creamy? It’s a quick workout and a tasty reward all in one.
Credit: www.cookist.com
Tips For Best Results
Making chocolate ice cream in a bag is fun and simple. Small tips can make a big difference in taste and texture. Follow these tips for the best results and a smooth, creamy treat.
Preventing Leaks
- Use a strong, sealable plastic bag designed for food storage.
- Double-bag the mixture to avoid spills during shaking.
- Press out extra air before sealing tightly.
- Check the bag for holes or weak spots before starting.
Shaking Techniques
- Shake the bag with firm, even pressure.
- Use circular motions to mix ingredients well.
- Hold the bag with both hands to keep control.
- Take short breaks to prevent your hands from getting too cold.
Timing Suggestions
- Shake for about 5 to 10 minutes for creamy ice cream.
- Stop and check texture every few minutes.
- Longer shaking makes the ice cream thicker.
- Do not shake too long to avoid over-freezing.
Fun Variations
Try mixing in crushed cookies or fresh fruit for extra flavor. Experiment with different types of chocolate or add a pinch of cinnamon for a unique twist. Simple changes can make this easy treat even more fun and tasty.
Making chocolate ice cream in a bag is not just a delightful treat; it’s a canvas for creativity. The basic recipe is versatile, allowing you to experiment with a variety of flavors and toppings. Imagine the fun of mixing and matching to create your own signature ice cream. Ready to elevate your homemade dessert? Let’s dive into some fun variations that will transform your chocolate ice cream experience.Different Flavors
Why stick to plain chocolate when you can mix in other flavors? Adding a few drops of vanilla or mint extract can create a refreshing twist. You might also try blending in some instant coffee powder for a mocha flavor. For a fruity burst, consider pureeing some fresh strawberries or raspberries and mixing them into the ice cream. Each addition opens a new flavor dimension that can surprise your taste buds.Toppings And Mix-ins
Toppings and mix-ins can take your ice cream to the next level. Think about sprinkling crushed cookies or nuts on top for added crunch. Marshmallows or chocolate chips can enhance the richness and texture. How about adding a drizzle of caramel or chocolate syrup? These simple additions can make your ice cream more exciting and visually appealing. You can even create a “sundae bar” experience by setting out various toppings and letting everyone customize their own creation. Experimenting with these variations not only makes the process fun but also allows you to cater to different tastes and preferences. What’s your favorite twist on classic chocolate ice cream?
Credit: lmld.org
Troubleshooting Common Issues
Making chocolate ice cream in a bag is fun, but sometimes things don’t go as planned. You might find your ice cream isn’t freezing, the bag leaks, or the texture isn’t quite right. These issues can be frustrating, but with a few tips, you can fix them quickly and enjoy your creamy treat.
Ice Cream Not Freezing
If your ice cream stays liquid, it might be because the ice isn’t cold enough. Using regular ice from the freezer might not be enough. Try adding rock salt to the ice; it lowers the freezing point and helps the mixture freeze faster.
Also, make sure you shake the bags continuously. If you stop too soon, the mixture won’t harden. Have you noticed how your hands get cold after shaking? That’s a good sign the process is working.
Bag Leaks
Bag leaks can ruin your ice cream experiment and create a mess. To prevent leaks, use two bags: place the ice cream mixture in a small, sealed bag and put it inside a larger one filled with ice and salt. This double-bag method adds extra protection.
Check the bags for tiny holes before starting. Sometimes, even a small puncture can cause leaks. If you find leaks during shaking, stop immediately and replace the bags to save your mixture.
Texture Problems
If your ice cream turns out icy or too soft, the ingredients or shaking time might be off. Using heavy cream instead of milk can make it creamier. Also, make sure you shake long enough—roughly 5 to 10 minutes—until the mixture thickens.
Adding a little sugar helps prevent ice crystals, giving you smoother ice cream. Have you tried experimenting with the amount of sugar or cream? Small changes can make a big difference in texture.
Safety And Cleanup
Making chocolate ice cream in a bag is a fun and interactive activity, but safety and cleanup should never be overlooked. Handling cold ingredients properly protects your skin and ensures a smooth experience. Cleaning up efficiently keeps your kitchen ready for the next delicious adventure.
Handling Cold Ingredients
Ice and salt can get extremely cold, sometimes causing skin irritation or even mild frostbite if touched for too long. Always use a thick kitchen towel or gloves when handling the ice-salt mixture. This small precaution keeps your hands comfortable and safe during the shaking process.
Have you ever felt your fingers go numb after shaking the bag? That’s a sign to take a break and warm your hands. Remember, safety means you can enjoy making ice cream again and again without any discomfort.
Cleaning Up
After your ice cream is ready, you might find melted ice and sticky salt water on your counter. Wipe spills immediately to avoid slippery surfaces or salt damage to your countertops. Use a damp cloth and mild soap for a quick, effective cleanup.
Don’t forget to rinse and dry the bags thoroughly if you plan to reuse them. This simple step prevents odors and keeps everything fresh for your next batch. What’s your favorite way to keep the kitchen mess-free after a fun cooking session?

Credit: lmld.org
Frequently Asked Questions
How Do You Make Chocolate Ice Cream In A Bag?
To make chocolate ice cream in a bag, mix cream, sugar, cocoa, and vanilla in a small bag. Seal it tightly, then place it inside a larger bag filled with ice and salt. Shake vigorously for 5-10 minutes until the mixture hardens into ice cream.
What Ingredients Are Needed For Bagged Chocolate Ice Cream?
You need heavy cream, sugar, cocoa powder, vanilla extract, ice, and rock salt. These simple ingredients create creamy chocolate ice cream using only bags. The salt lowers the ice temperature, helping the mixture freeze faster while shaking.
How Long Should You Shake The Ice Cream Bag?
Shake the ice cream bag for about 5 to 10 minutes. The mixture will thicken and freeze into ice cream during this time. Stop shaking when the texture becomes firm but still scoopable for the best results.
Can Kids Safely Make Ice Cream In A Bag?
Yes, kids can safely make ice cream in a bag with adult supervision. The process is fun, simple, and involves no electricity. Adults should handle adding salt and sealing the bags tightly to avoid spills.
Conclusion
Making chocolate ice cream in a bag is simple and fun. You only need a few ingredients and a little time. Shake the bag well to mix everything and freeze it quickly. This method is great for kids and adults alike.
Enjoy fresh, creamy ice cream anytime at home. Give it a try and taste the difference today. Easy, quick, and delicious—what’s not to like?