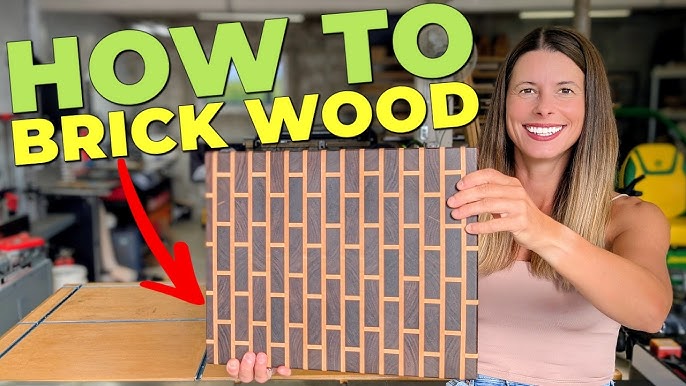
If you love cooking or woodworking, making your own end grain cutting board is a project you’ll enjoy. Imagine having a sturdy, beautiful board that’s gentle on your knives and lasts for years.
This guide will show you step-by-step how to create a cutting board that not only looks amazing but also works perfectly in your kitchen. You’ll learn simple tips and tricks to avoid common mistakes and make the process smooth. Ready to turn raw wood into something practical and stunning?
Let’s get started!
Choosing The Right Wood
Choosing the right wood is very important for making an end grain cutting board. The wood must be strong and safe for food use.
Wood type affects the board’s durability and how it looks. Pick wood that holds up well over time.
Best Wood Types For End Grain Boards
Some woods are better for end grain boards because they resist cuts and do not dull knives. Hardwoods are best choices.
- Maple: Very hard and has a light, clean look.
- Walnut: Darker wood that is strong and attractive.
- Cherry: Offers a warm color and good hardness.
- Beech: Hard wood with a fine grain and light color.
- Teak: Naturally oily, resists water and bacteria.
Wood Quality And Grain Patterns
Wood quality matters for strength and safety. Look for wood without cracks or knots.
The grain pattern shows the direction of the wood fibers. End grain boards show the fibers on the cutting surface.
- Choose tight, straight grain for even cutting surface.
- Avoid loose or open grain woods that absorb moisture.
- Check that wood is dry to prevent warping.
- End grain boards last longer because fibers absorb cuts.
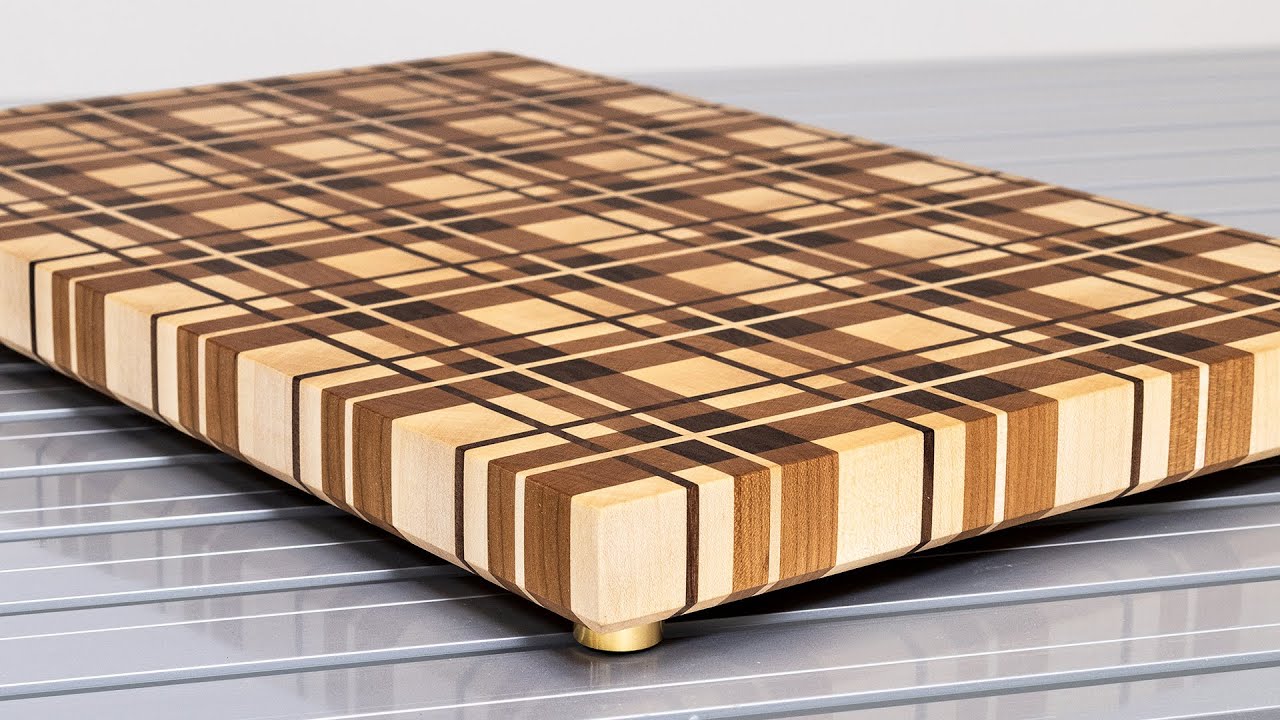
Credit: www.youtube.com
Tools And Materials Needed
Making an end grain cutting board requires specific tools and materials. Using the right items helps you build a sturdy and beautiful board.
This guide covers essential tools and some extra supplies you may want to have on hand.
Essential Tools
You need these main tools to cut, shape, and finish your board properly. Safety gear is also important to protect yourself.
- Table saw or circular saw for cutting wood pieces
- Planer or hand plane to smooth surfaces
- Clamps to hold pieces during glue-up
- Random orbital sander for sanding the board
- Measuring tape and square for accurate cuts
- Wood glue for strong joints
- Safety glasses and ear protection
Additional Supplies
These extra materials help improve the look and durability of your cutting board. You may already have some of them at home.
| Supply | Purpose |
| Hardwood boards (e.g., maple, walnut) | Main material for the cutting surface |
| Food-safe mineral oil | Seals and protects the wood |
| Beeswax or board cream | Adds extra finish and moisture resistance |
| Sandpaper (various grits) | For smoothing the board edges and surface |
| Disposable gloves | Protect hands during finishing |
Preparing The Wood
Preparing the wood is a key step to make a sturdy end grain cutting board. Good preparation ensures the pieces fit well.
This guide covers how to cut lumber to size and how to plane and joint the wood properly.
Cutting Lumber To Size
Start by cutting your lumber into pieces that match your design. Use a saw with a sharp blade for clean cuts.
- Measure the length and width carefully
- Mark the wood with a pencil before cutting
- Cut pieces slightly longer to allow for trimming
- Use clamps to hold wood steady during cutting
- Wear safety gear to protect your eyes and ears
Planing And Jointing
After cutting, plane and joint the edges to make smooth, flat surfaces. This helps the boards glue tightly.
| Tool | Purpose |
| Planer | Flattens and smooths board surfaces |
| Jointer | Creates flat edges for tight joints |
| Hand Plane | Used for small adjustments and fine smoothing |

Credit: www.reddit.com
Assembling The Board
Assembling an end grain cutting board needs patience and care. You join many small wood blocks to form the board.
This part of the process sets the foundation for a strong and beautiful cutting board.
Arranging The Wood Blocks
Arrange the wood blocks so their end grains face up. This shows the unique patterns of the wood.
Mix different wood colors and sizes to create an attractive pattern. Make sure all blocks fit tightly without gaps.
- Lay out blocks on a flat surface
- Check for even edges and no gaps
- Balance colors for a nice look
- Test fit before gluing
Gluing Techniques
Use food-safe wood glue for strong bonding. Apply glue evenly on each block’s edges.
Work quickly but carefully to avoid glue drying before clamping. Avoid excess glue to reduce cleanup.
- Spread glue thinly on all touching surfaces
- Use a brush or small roller for even coverage
- Remove glue squeeze-out with a damp cloth
- Glue all blocks before clamping
Clamping For Best Results
Clamp the glued blocks tightly to hold them in place. Strong pressure helps the glue bond well.
Use multiple clamps to apply even pressure across the board. Check for gaps and adjust clamps if needed.
- Place clamps along all sides of the board
- Apply firm but not excessive pressure
- Wipe off glue squeeze-out quickly
- Let glue dry for the time suggested by manufacturer
Cutting And Reassembling
Making an end grain cutting board needs careful cutting and reassembling. This process creates a strong and beautiful surface.
You will cut the glued wood pieces and then rearrange them to form the final board pattern.
Crosscutting The Glue-up
First, crosscut the glued wood block into strips. These cuts go across the grain to expose the end grain.
Use a table saw or miter saw for clean, straight cuts. Make sure each strip is the same width for a uniform pattern.
- Mark your cut lines clearly on the block
- Cut strips carefully to keep edges straight
- Keep strips the same width for balance
- Use a sharp blade to avoid tear-out
Rotating And Rearranging Pieces
After cutting, rotate each strip 90 degrees to show the end grain on top. This step gives the board its unique look.
Next, rearrange the strips in a pattern you like. You can alternate colors or keep a simple design.
- Rotate strips so end grain faces up
- Arrange strips in a repeating pattern
- Check the fit and adjust as needed
- Glue the strips together to form the final board

Credit: www.youtube.com
Final Gluing And Clamping
Final gluing and clamping are important steps for a strong end grain cutting board. This process holds the wood pieces tightly while the glue dries.
Proper gluing and clamping help avoid gaps and ensure the board lasts a long time. Take your time to do this carefully.
Second Glue-up Process
The second glue-up joins the glued strips from the first step. Arrange them to match your design pattern before applying glue.
Spread glue evenly on all edges. Press the strips tightly together to avoid gaps and weak spots.
- Check for any dry spots on the glue surfaces
- Use a brush or roller for even glue coverage
- Apply glue to all edges that will touch
Ensuring Strong Bonds
Use clamps to press the board pieces together firmly. The pressure helps the glue form a strong bond.
Make sure to use enough clamps to cover the entire board. Avoid over-tightening which can squeeze out too much glue.
- Place clamps evenly across the board
- Use cauls to protect the wood surface
- Wipe off excess glue before it dries
- Let the glue dry for at least 24 hours
Sanding And Finishing
Sanding and finishing are key steps to make an end grain cutting board safe and smooth. These steps protect the wood and prepare it for use.
Proper sanding removes rough spots and makes the surface even. Finishing seals the wood and keeps it from drying out.
Sanding For Smoothness
Start sanding with coarse grit sandpaper to remove glue and uneven parts. Then, use finer grits to get a smooth finish.
- Begin with 80-grit sandpaper to even the surface.
- Move to 120-grit to remove scratches from coarse sanding.
- Use 220-grit for a smooth, fine finish.
- Finish with 320-grit for extra smoothness.
- Wipe off dust with a damp cloth between grits.
Applying Food-safe Finishes
Choose a finish that protects wood and is safe for food contact. Apply it evenly to keep the board durable and clean.
| Finish Type | Description | Drying Time |
| Mineral Oil | Penetrates wood and seals moisture. | 30 minutes |
| Beeswax Blend | Adds a protective, water-resistant layer. | 1 hour |
| Coconut Oil (Refined) | Natural oil that conditions wood well. | 30 minutes |
Apply finish with a clean cloth. Let it soak in, then wipe off extra. Repeat for best results.
Maintenance Tips
Keeping your end grain cutting board in good shape takes some care. Regular maintenance helps it last longer.
Follow simple steps to clean and oil your board. This keeps it safe and looking nice.
Cleaning The Board
Wash your cutting board by hand right after use. Use warm water and mild soap to clean it well.
Do not soak the board in water or put it in the dishwasher. This can cause the wood to crack.
- Use a soft sponge or cloth to clean
- Rinse with warm water
- Dry with a towel immediately
- Let it air dry standing up
Periodic Oiling And Care
Oiling your board keeps the wood from drying out. It also helps protect against stains and cracks.
Apply food-safe mineral oil or cutting board oil every few weeks or when the wood looks dry.
- Use a clean cloth to apply oil
- Rub oil evenly into the surface
- Let the oil soak for a few hours
- Wipe off excess oil before use
Frequently Asked Questions
What Materials Are Needed For An End Grain Cutting Board?
To make an end grain cutting board, you’ll need hardwood like maple or walnut, wood glue, clamps, a saw, and sandpaper. Consider using a food-safe finish like mineral oil. These materials ensure durability and safety for food preparation. A planer or router can help achieve a smooth surface.
How Do You Prepare Wood For Cutting Boards?
Begin by selecting quality hardwood, then cut it into strips. Ensure each strip has smooth edges and is of uniform size. Arrange these strips in a pattern before gluing. Proper preparation ensures the cutting board’s durability and aesthetic appeal. Sand the surface to remove any rough edges.
Why Choose An End Grain Cutting Board?
End grain cutting boards are durable and gentle on knives. The wood fibers absorb impacts, keeping knives sharper. They also have a unique, checkerboard appearance, adding aesthetic value to kitchens. Their design minimizes wear and tear, making them a preferred choice for professional chefs.
How Do You Maintain An End Grain Cutting Board?
Regularly apply mineral oil to keep the wood hydrated. Clean with mild soap and water, then dry immediately. Avoid soaking or placing in dishwashers. Periodically, sand the surface to remove deep cuts. Proper maintenance enhances longevity and keeps the board safe for food preparation.
Conclusion
Making an end grain cutting board takes time and care. Each step builds a strong, beautiful board. Choose good wood and cut it carefully. Glue the pieces tightly and let them dry fully. Sand the board smooth for safe use.
Finish with oil to protect the wood. This project brings both function and style to your kitchen. You can enjoy using a board made by your own hands. Try this craft and see how rewarding it feels. Keep practicing to improve your skills and results.