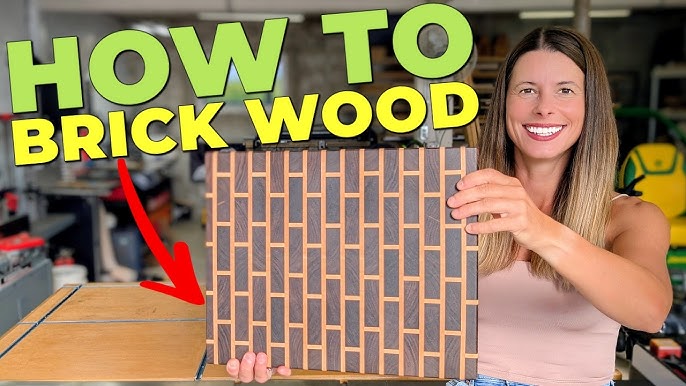
Are you ready to create a cutting board that’s not only beautiful but also built to last? Making your own end grain cutting board is a rewarding project that turns simple wood into a durable kitchen essential.
Imagine having a board that protects your knives and stands up to daily use, all crafted by your own hands. You’ll discover step-by-step how to transform wood blocks into a stunning end grain cutting board. Keep reading, and by the end, you’ll have the know-how to make a board that’s both practical and a true conversation piece in your kitchen.

Credit: www.reddit.com
Choosing The Right Wood
Picking the right wood is key to making a strong end grain cutting board. The wood must be hard enough to resist cuts and safe for food use. It also needs to look nice after finishing.
Different woods offer various colors and grain patterns. Some woods last longer and stand up better to knives. Knowing which wood to pick helps your board stay useful for years.
Best Wood Types For End Grain Boards
Choose hardwoods that are dense and have tight grains. These woods absorb less moisture and resist cutting marks. Common choices include maple, walnut, and cherry.
- Maple:Very hard and light-colored. It is food safe and widely used.
- Walnut:Dark and rich in color. It adds a beautiful contrast in boards.
- Cherry:Medium hardness with a warm reddish tone.
- Beech:Durable and pale wood that resists bacteria.
- Oak:Strong and coarse-grained but can be used if sealed well.
Wood Quality And Preparation
Good wood must be dry, straight, and free from cracks or knots. Proper preparation avoids warping and breaks later on. Cut wood into even strips before gluing.
| Quality Factor | What to Check | Why It Matters |
|---|---|---|
| Dryness | Moisture content below 8% | Prevents warping and shrinkage |
| Grain | Tight and straight | Increases strength and durability |
| Knots | Minimal or none | Avoid weak spots and cracks |
| Surface | Clean and smooth | Better glue adhesion and finish |
Credit: www.youtube.com
Tools And Materials Needed
Making an end grain cutting board requires specific tools and materials. Using the right items helps you build a strong and beautiful board.
This guide covers the essential tools and materials needed for your project.
Essential Tools List
You need these tools to cut, shape, and finish your cutting board properly. Some tools are common woodworking tools, while others are specific to cutting boards.
- Table saw or circular saw for cutting wood pieces
- Planer or hand plane to smooth the wood surface
- Jointer to straighten edges
- Clamps to hold pieces tightly while gluing
- Belt sander or orbital sander for sanding
- Measuring tape and square for precise measurements
- Wood glue with strong bonding power
- Mineral oil or cutting board finish for sealing
Materials And Supplies
Choosing the right wood and supplies ensures your cutting board lasts long and looks good. Select hardwoods that resist cuts and moisture.
| Material | Purpose |
| Hardwood (Maple, Walnut, Cherry) | Main cutting surface |
| Wood glue (food safe) | Bond wood pieces securely |
| Mineral oil | Protect and seal the wood |
| Beeswax (optional) | Add extra finish and shine |
| Sandpaper (various grits) | Smooth edges and surface |
Preparing The Wood Blanks
Preparing wood blanks is the first step to making a strong end grain cutting board. It ensures the wood pieces fit well and last a long time. This process includes cutting, planing, and jointing the wood.
Careful preparation helps avoid gaps and weak spots in your cutting board. Use the right tools and take your time for the best results.
Cutting And Planing
Cut the wood blanks to the correct size using a saw. After cutting, use a planer to smooth the surfaces. This step removes roughness and makes the wood flat. Flat surfaces help the pieces glue tightly together.
- Measure the wood pieces carefully before cutting.
- Cut pieces slightly larger than the final size.
- Run each piece through the planer for smoothness.
- Check the thickness to keep all pieces even.
- Remove any knots or defects from the wood.
Jointing For Perfect Edges
Jointing creates straight edges on wood blanks. Straight edges are important for strong glue joints. Use a jointer or a table saw with a straight edge guide. Test the edges by placing two pieces together.
| Step | Purpose | Tool |
|---|---|---|
| 1. Check wood edge | Identify uneven or rough areas | Visual inspection, straightedge |
| 2. Run edge through jointer | Create a flat, straight edge | Jointer or table saw guide |
| 3. Test fit with adjacent piece | Ensure edges meet without gaps | Hands and visual check |
| 4. Repeat if needed | Perfect the edge for a tight fit | Jointer or table saw |

Credit: www.youtube.com
Gluing And Clamping Techniques
Making an end grain cutting board needs strong glue joints. Using good gluing and clamping keeps the board solid.
Proper steps help the glue dry right and prevent gaps. Clamping holds the wood tight while the glue sets.
Arranging The End Grain Pattern
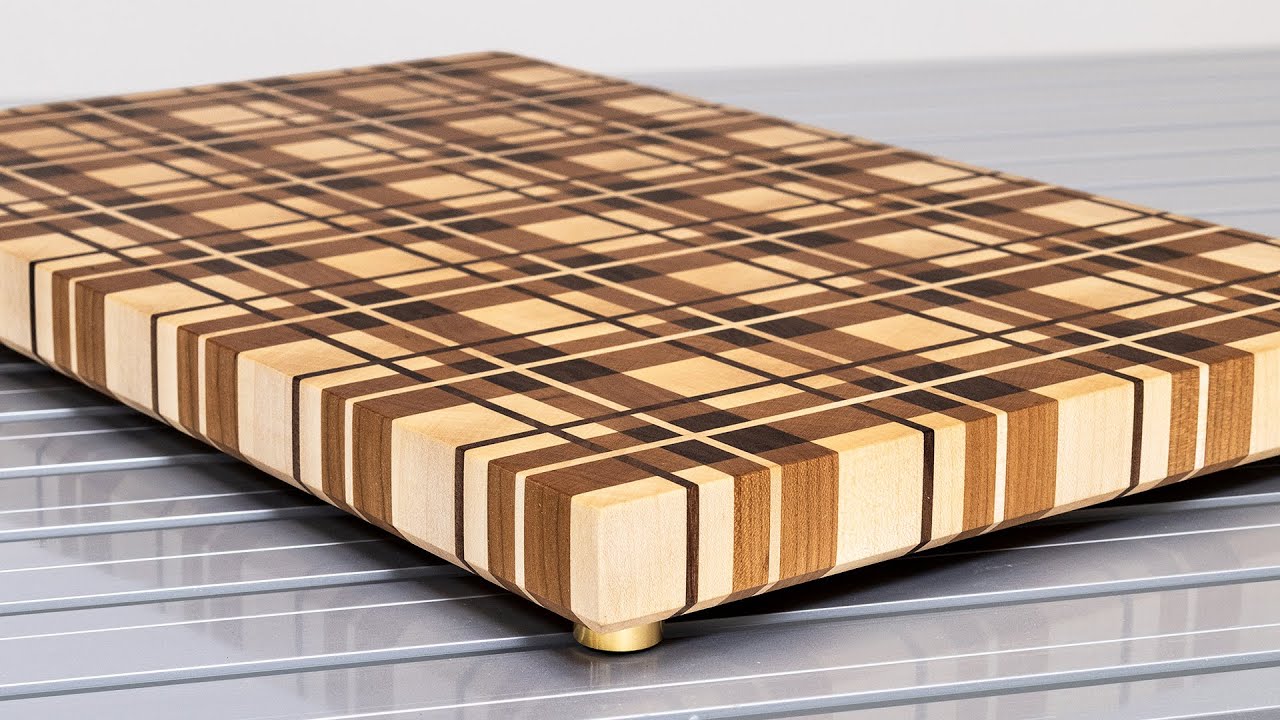
Arrange the wood pieces so the end grain shows on the board’s surface. This pattern is good for cutting and looks nice.
Mix different wood blocks for a strong and interesting design. Make sure all pieces fit tightly before gluing.
- Lay out blocks on a flat surface first
- Check for color and grain balance
- Keep tight joints to avoid gaps
- Use a dry fit to confirm pattern
Effective Clamping Tips
Use clamps to press the wood pieces together evenly. This helps glue bond all parts strongly without movement.
Apply even pressure with multiple clamps. Check for squeeze-out glue and clean it before it dries.
- Use bar clamps or pipe clamps for wide boards
- Place cauls to spread clamp pressure evenly
- Tighten clamps gradually, not all at once
- Leave clamps on for at least one hour
- Wipe glue squeeze-out with a damp cloth
Flattening And Sanding The Board
After gluing the pieces, your end grain cutting board needs to be flat and smooth. Flattening removes uneven spots. Sanding finishes the surface for safe use.
Both steps are important to make a durable and beautiful board. This guide explains how to flatten and sand correctly.
Flattening Methods
Flattening ensures the board is even on all sides. You can use hand tools or machines depending on your setup.
Common methods include using a planer, a router sled, or hand sanding with a flat surface.
- Planer:A thickness planer quickly removes high spots. Move the board slowly for a flat surface.
- Router Sled:A router on a sled cuts down the board evenly. This is great for large or thick boards.
- Hand Sanding:Use a sanding block on a flat table. Sand with coarse grit first to level the board.
Sanding For Smooth Finish
Sanding removes scratches and smooths the wood. Start with coarse grit and move to finer grits for the best finish.
Use a random orbital sander or hand sanding. Always sand along the grain to avoid marks.
- Begin with 80 grit sandpaper to remove rough spots.
- Move to 120 grit for a smoother surface.
- Finish with 220 grit for a silky touch.
- Wipe the board clean between grits to check progress.
Applying Finish And Maintenance
Applying the right finish keeps your end grain cutting board safe and beautiful. Proper maintenance helps it last longer and stay strong.
Use food-safe finishes that protect wood without harmful chemicals. Regular care prevents cracks and drying out.
Food-safe Finishes
Choose finishes that are safe for food contact and easy to apply. Mineral oil is a popular choice. Beeswax adds extra protection and shine.
- Apply mineral oil evenly with a soft cloth.
- Let the oil soak for several hours or overnight.
- Rub beeswax on top for a water-resistant layer.
- Buff the board with a clean cloth to remove excess wax.
- Avoid finishes with solvents or harmful chemicals.
Care And Longevity Tips
Keep your cutting board clean and well-maintained. Proper care extends its life and keeps it safe for food preparation.
| Care Tip | Details |
|---|---|
| Cleaning | Hand wash with mild soap and warm water. Dry immediately. |
| Oiling | Reapply mineral oil monthly or when wood looks dry. |
| Storage | Store in a dry place, away from direct sunlight. |
| Avoid | Do not soak or put in dishwasher to prevent warping. |
| Sanding | Lightly sand the surface if rough or stained, then re-oil. |
Common Mistakes To Avoid
Making an end grain cutting board is a rewarding woodworking project. Avoiding common errors can save time and improve your results.
This guide highlights key mistakes to watch for during the process. Focus on glue failures and warping issues for a sturdy board.
Glue Failures
Glue failures are one of the most frequent problems in end grain cutting boards. They happen when the glue does not bond properly between wood pieces.
- Using the wrong type of glue can weaken joints.
- Applying too little or too much glue reduces strength.
- Not clamping the pieces firmly causes gaps.
- Rushing the drying time leads to weak bonds.
- Failing to prepare the wood surface prevents good adhesion.
Warping Issues
Warping is another common issue that spoils cutting boards. It happens when wood pieces dry unevenly or are not sealed well.
| Cause | Effect | Prevention |
|---|---|---|
| Uneven moisture in wood | Board bends or twists | Use well-dried wood with similar moisture content |
| Incomplete sealing | Water soaks in and swells wood | Apply finish on all surfaces, including edges |
| Improper storage | Board warps over time | Store flat in a dry place |
Design Variations And Customization
End grain cutting boards can be made in many designs. You can choose shapes, colors, and patterns to fit your style.
Customizing your board makes it unique and personal. This lets you create a cutting board that looks special.
Adding Decorative Elements
You can add decoration to your cutting board to make it stand out. Small details make a big difference.
Common decorative elements include different wood types and patterns. Using contrasting woods creates eye-catching designs.
- Use stripes by alternating wood colors
- Create checkerboard patterns with small blocks
- Inlay shapes like hearts or stars
- Carve grooves or juice channels
- Add a live edge for a natural look
Personalizing Your Board
Personalizing your board adds a special touch. It can make a great gift or a keepsake.
Popular ways to personalize include engraving names, dates, or messages. You can also add custom shapes or logos.
- Laser engraving for precise text or images
- Burning designs with a wood burner
- Adding metal or resin accents
- Using custom shapes for the board outline
- Including handles or feet for function and style
Frequently Asked Questions
What Wood Is Best For End Grain Boards?
Hardwoods like maple, walnut, and cherry are ideal for end grain cutting boards. They provide durability and a beautiful finish. These woods are dense and resist knife marks, ensuring longevity. Always ensure the wood is properly dried and untreated to maintain food safety.
How Often Should I Oil My Cutting Board?
Oil your end grain cutting board every 3-4 weeks. Regular oiling helps maintain its moisture and prevents cracking. Use food-grade mineral oil for the best results. Apply a generous amount, let it soak in, and wipe off the excess with a clean cloth.
Can I Use My Board For Cutting Meat?
Yes, end grain cutting boards are perfect for cutting meat. Their surface absorbs knife impact, preserving sharpness. Ensure thorough cleaning after each use to prevent bacteria build-up. Use separate boards for raw and cooked meats to avoid cross-contamination. Regular maintenance will keep your board in top condition.
How Do I Clean My End Grain Board?
Clean your board with warm soapy water after each use. Avoid soaking it in water to prevent warping. Dry it immediately with a clean towel. For deeper cleaning, use a mixture of vinegar and water. Regularly sanitize with lemon juice or baking soda for freshness.
Conclusion
Making end grain cutting boards can be a fun and rewarding project. It takes some patience and attention to detail. The result is a strong, beautiful board that lasts long. Remember to sand well and apply oil for protection. Regular care keeps your board looking fresh and safe to use.
Try creating your own design to add a personal touch. Enjoy the process and the final product in your kitchen. Simple steps lead to a useful and attractive cutting board.