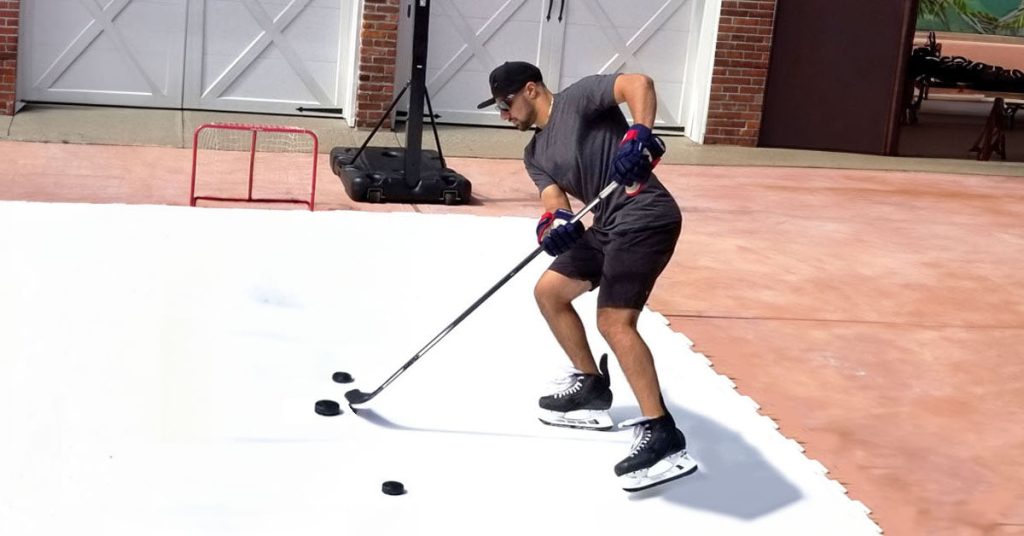
Imagine transforming your backyard into a winter wonderland, complete with a glistening ice rink where you and your loved ones can glide effortlessly. Sounds like a dream, right?
But what if I told you that creating your own fake ice rink is not only possible but also easier than you might think? You don’t need freezing temperatures or a huge budget to make it happen. With a few materials and some clever tricks, you can build a realistic ice rink that brings joy to your home.
Intrigued? Keep reading to uncover the simple steps and secrets that will turn your space into a skater’s paradise.
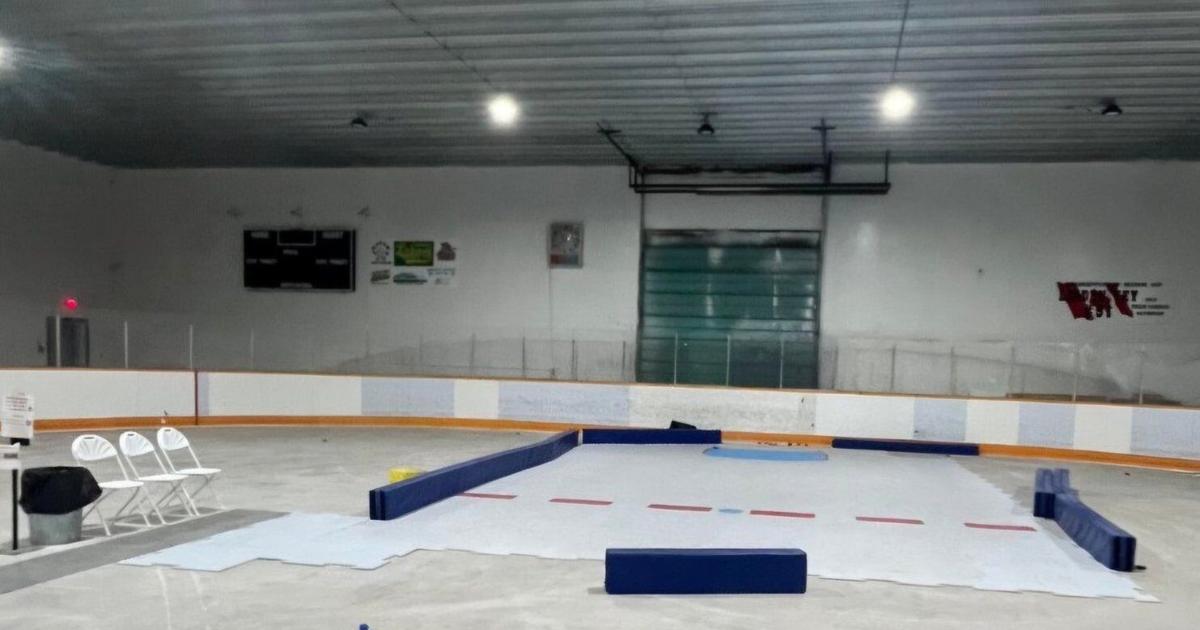
Credit: www.thespec.com
Choosing The Right Location
Choosing the right location is the foundation of creating a successful fake ice rink. The spot you pick affects the rink’s stability, appearance, and how much fun you’ll have. Let’s look at key factors that help you find the perfect place.
Assessing Space And Surface
Start by measuring your available space carefully. Your fake ice rink needs enough room not just for the rink itself but also for safe movement around it.
The surface should be flat and smooth to prevent any bumps that could ruin your skating experience. Concrete or wooden decks work well because they provide a solid base. Avoid uneven ground like grass or dirt, which can cause instability and wear down the rink material quickly.
Think about the size you want. Would a small, cozy rink fit your backyard, or do you want something larger for group activities? Planning your space clearly helps avoid last-minute surprises.
Considering Sunlight And Shade
Sunlight affects your fake ice rink more than you might expect. Direct, strong sunlight can heat up the surface and make it less slick, impacting your skating enjoyment.
Look for a location that offers a mix of sun and shade throughout the day. Trees or nearby structures that provide shade can keep the rink cooler and extend the life of your materials.
Ask yourself: Does this spot get too much afternoon sun? Could I set up a canopy or tarp for extra protection? These simple tweaks can keep your rink in great condition and comfortable to use.
Gathering Materials
Before you start building your fake ice rink, gathering the right materials is crucial. The quality of your supplies will directly affect how realistic and durable your rink looks and feels. Taking time to collect everything you need can save you from last-minute trips and frustration.
Essential Supplies List
- Plastic Sheets or Tarp:Use thick, smooth plastic like polyethylene or vinyl to create the ice surface. It needs to be sturdy and waterproof.
- Water:Clean water is necessary if you’re going for a more realistic look by adding a thin layer on top.
- Wooden or Metal Frame:This supports your rink’s shape and keeps the plastic taut.
- Tape or Adhesive:Strong duct tape or waterproof adhesive will secure the edges of your plastic sheet.
- Sand or Foam Padding:To protect the ground underneath and prevent sharp objects from puncturing the plastic.
- Markers or Paint:Optional but helpful to outline rink boundaries or create hockey lines.
One time, I overlooked the padding and ended up with a few holes in my plastic sheet from small rocks. Adding a layer of foam made a huge difference in durability. What small detail could you be missing that might improve your rink’s lifespan?
Optional Tools For Better Results
- Heat Gun or Hair Dryer:Helps smooth out wrinkles in plastic sheets for a cleaner surface.
- Spray Bottle:Useful for lightly misting the plastic if you want a slicker, shinier surface.
- Measuring Tape and Level:Ensures your frame is even and your rink surface is flat, preventing water pooling.
- Utility Knife or Scissors:For cutting plastic sheets and trimming tape precisely.
- Clamps or Weights:Keep the plastic tight while assembling your rink, avoiding sagging.
Using a heat gun to remove wrinkles made the surface look surprisingly professional. Have you ever used a simple tool that transformed your DIY project’s quality? Small upgrades to your toolkit can make your rink feel more real and last longer.
Preparing The Base
Preparing the base is a crucial part of creating a fake ice rink that looks good and lasts long. A solid, even foundation helps the surface stay smooth and prevents water from pooling or leaking. Taking the time to clear and level the area properly sets you up for success and saves you from headaches down the line.
Clearing And Leveling The Area
Start by removing any debris, rocks, or plants from the space where your rink will go. You want a clean, flat surface to work with. Uneven ground can cause your fake ice to crack or become unstable.
Use a rake or shovel to smooth out bumps and fill in low spots. If the ground is very uneven, consider using a leveling tool or even renting a small roller. A level base means your rink will look professional and be safer to use.
Laying A Waterproof Barrier
Next, add a waterproof barrier to protect the base and keep moisture from seeping through. A heavy-duty plastic sheet or tarp works well for this. Make sure it covers the entire area with some overlap at the edges.
Secure the barrier with weights or stakes to prevent it from shifting. This layer prevents water damage and keeps the fake ice surface intact longer. Have you thought about how water might affect your lawn or patio underneath? This barrier is your best defense.

Credit: soilssolutions.com
Building The Frame
Building the frame is the first key step in creating a fake ice rink. A strong frame holds everything together and shapes the rink. It needs to be sturdy and safe for skating. The frame also supports the surface where the ice effect will appear. Planning the frame carefully saves time and effort later.
Selecting Frame Materials
Choose materials that are strong and weather-resistant. Wood is a popular choice because it is easy to work with and affordable. Look for treated lumber to prevent rotting. Metal pipes work well too and provide good strength. Plastic or PVC can be used for smaller rinks. Make sure the materials can hold weight and handle outdoor conditions.
Assembling The Rim
Start by cutting the frame materials to the rink’s size. Lay them out on a flat surface. Connect the pieces to form a solid rim or border. Use screws or bolts for secure joints. Check corners with a square tool to keep them straight. A tight rim keeps the rink shape stable and supports the fake ice surface.
Filling With Water
Filling your fake ice rink with water is a crucial step that sets the stage for a smooth, ice-like surface. The goal is to create a thin, even layer of water that can freeze uniformly, mimicking real ice. Paying close attention to how you distribute and contain the water can save you from frustrating leaks and uneven patches later.
Tips For Even Water Distribution
Pour water slowly and steadily to avoid creating deep spots or puddles. Use a long-handled squeegee or flat board to spread the water gently across the rink’s surface. This helps maintain a consistent depth, which is key for a smooth finish.
Check the rink’s base for levelness before filling. If you notice any low areas, add a bit more water there to balance out the surface. A level rink means your ice will freeze evenly and last longer.
Try filling the rink in stages rather than all at once. Adding water in thin layers allows you to control the surface better and catch any issues early. Have you ever had water pool in one spot? Spreading it gradually helps prevent that problem.
Preventing Leaks And Spills
Inspect your rink’s edges and seams carefully before filling. Use waterproof tape or sealant to fix any small holes or gaps. Even a tiny leak can cause a big mess and waste water.
Place a tarp or waterproof liner underneath your rink to catch any accidental spills. This protects your floor or ground and makes cleanup easier. It also gives you peace of mind as you fill the rink.
Keep towels or a mop handy during filling. If you notice water escaping, quickly soak it up to avoid slipping hazards. Are you prepared to handle unexpected spills? Being proactive keeps your rink area safe and dry.

Credit: www.cbc.ca
Freezing Techniques
Creating a fake ice rink requires careful freezing techniques to form a solid, smooth surface. The right approach helps the water freeze evenly and stay frozen longer. Understanding weather and methods to speed up freezing improves the rink’s quality and durability.
Best Weather Conditions
Cold temperatures below 20°F (-6°C) are ideal for freezing. Clear, calm nights help water freeze faster. Avoid windy days to prevent uneven ice formation. Consistent freezing temperatures over several days create stronger ice layers. Sunny days with low temperatures prevent melting and refreezing cycles.
Speeding Up The Freezing Process
Use thin water layers to freeze quickly and evenly. Spray water gently to form smooth ice. Freeze in small sections for better control. Cover the rink at night with a tarp to keep cold air close. Use fans to circulate cold air over the rink surface. Adding a saltwater solution lowers freezing temperature and speeds ice formation.
Maintaining The Rink
Maintaining a fake ice rink ensures it stays smooth and safe for skating. Regular care helps keep the surface firm and attractive. Proper upkeep extends the rink’s usability and enjoyment. Focus on surface smoothness and managing melting cycles for the best results.
Smoothing The Surface
Clear debris and dirt from the rink daily. Use a soft broom or brush to avoid scratches. Fill any cracks or holes with water to freeze smooth. Lightly spray water over the surface to create a fresh, even layer. Smooth ice helps skaters glide easily and prevents accidents.
Handling Melting And Refreezing
Check the rink temperature often to control melting. Remove puddles quickly to avoid uneven patches. Use shade or covers during warm parts of the day. Allow the rink to freeze overnight for a solid surface. Avoid heavy use during thawing times to keep ice intact.
Safety Measures
Safety is key when creating a fake ice rink at home. Taking the right precautions keeps everyone safe. It helps avoid accidents and ensures fun for all ages. Some simple safety steps can prevent slips, falls, and other injuries.
Avoiding Slips And Falls
Keep the fake ice surface clean and dry. Wipe off any water or spills quickly. Use a non-slip mat around the rink edges. Make sure the ground is flat before setting up. Wear shoes with good grip to reduce slipping. Avoid overcrowding on the rink to prevent collisions. Clear away any obstacles near the rink area.
Supervising Children And Pets
Always watch children while they play on the rink. Set clear rules about safe play and no roughhousing. Keep pets away from the rink to avoid accidents. Use barriers or fencing to limit access if needed. Teach kids how to move carefully on the surface. Stay close by to help if anyone falls. Supervision lowers the risk of injuries for all.
Creative Enhancements
Creative enhancements can transform your fake ice rink from a simple setup into an exciting, memorable experience. These little touches bring the rink to life, making it inviting and fun for everyone. Think beyond just the surface and imagine how you can engage your visitors with lights, decorations, and interactive activities.
Adding Lights And Decorations
Lighting sets the mood and highlights the rink’s features. String fairy lights around the perimeter or hang colorful LED strips to give your rink a vibrant glow after dark.
Consider themed decorations like snowflakes, icicles, or winter-themed banners to add a festive touch. You can also place small lanterns or spotlights at different angles to create interesting shadows and depth.
Have you tried using colored lights that change slowly? It creates a dynamic atmosphere that keeps the space feeling fresh and exciting.
Incorporating Games And Activities
Adding games turns your fake ice rink into a place full of laughter and friendly competition. Simple activities like relay races or timed skating challenges can keep everyone entertained for hours.
Set up stations with different activities such as ring toss on cones or target shooting with soft balls. These add-ons encourage visitors to engage actively rather than just glide around.
Think about including music and short dance sessions on skates to keep the energy high. What games would you add to make your rink the go-to spot in your neighborhood?
Frequently Asked Questions
What Materials Are Needed To Make A Fake Ice Rink?
You need a smooth surface, plastic panels or rink tiles, water spray, and optional ice paint. These materials create a realistic skating experience without real ice.
How Do You Prepare The Surface For A Fake Ice Rink?
Clean and level the ground thoroughly. A flat, smooth surface ensures the rink panels fit tightly, providing a safe skating area.
Can Fake Ice Rinks Be Used Outdoors?
Yes, fake ice rinks work well outdoors. They resist weather changes but should be stored properly after use to prolong durability.
How Long Does It Take To Set Up A Fake Ice Rink?
Setup usually takes 2 to 4 hours, depending on rink size and number of helpers. Preparation and panel fitting are the main tasks.
Conclusion
Creating a fake ice rink can bring winter fun anywhere. It uses simple materials and easy steps. You can enjoy skating without real ice or cold weather. This project saves money and time, too. Try it in your backyard or local park.
Kids and adults will love the experience. Making your own rink is both creative and practical. Start today and enjoy skating anytime you want.