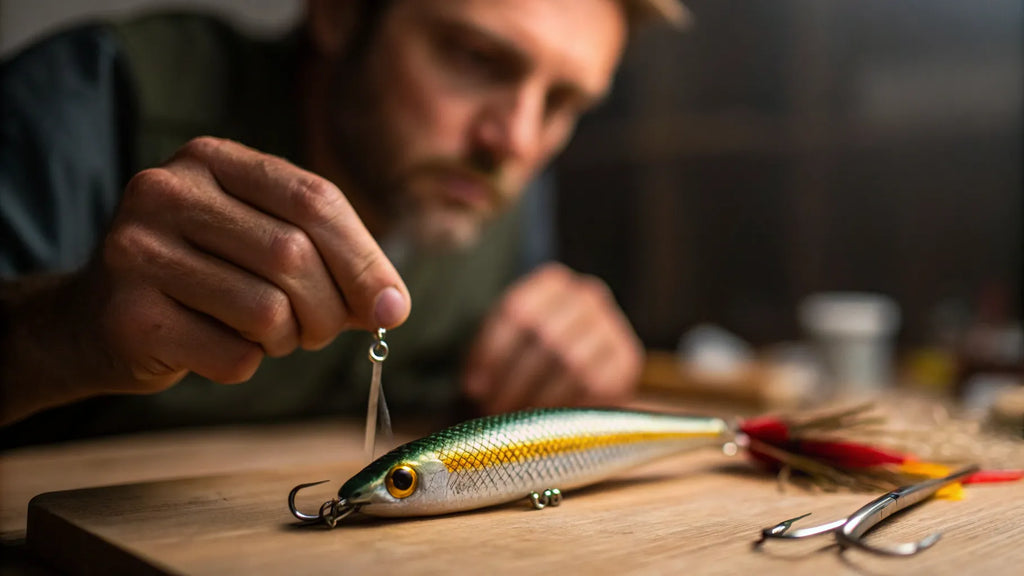
Are you tired of spending too much on fishing lures that don’t always work? Imagine having the power to create your own custom lures right at home—designed exactly the way you want.
Making fishing lures yourself is easier than you think, and it can save you money while giving you a unique edge on the water. In this guide, you’ll discover simple steps and tips that anyone can follow to craft effective, eye-catching lures.
Ready to boost your fishing game and impress your fishing buddies with your homemade creations? Keep reading, and let’s get started!
Choosing Materials
Making fishing lures at home starts with picking the right materials. The materials affect how well the lure works in water.
Good materials make your lure look real and last longer. You will also need tools and places to find supplies.
Types Of Lure Materials
You can use wood, plastic, or metal for fishing lures. Each material has its own benefits and uses.
- Wood is easy to shape and floats well.
- Plastic can be molded into many shapes and colors.
- Metal is strong and sinks fast for deep fishing.
- Rubber and silicone work well for soft lures.
Where To Find Supplies
You can buy lure materials from craft stores, hardware stores, and online shops. Some materials you may already have at home.
- Wood pieces and blocks from craft or lumber stores
- Plastic sheets or old lures to recycle
- Metal parts from hardware or fishing stores
- Rubber or silicone from craft shops
- Paints and sealers from art supply stores
Tools You’ll Need
Having the right tools helps you make better lures. Some tools are basic and easy to find.
- Knife or carving tools for shaping wood
- Sandpaper for smoothing surfaces
- Drill for making holes
- Paint brushes for adding colors
- Glue or epoxy for assembling parts
- Files for shaping metal or plastic
Credit: fishingstone.com
Basic Lure Designs
Making your own fishing lures can be fun and rewarding. You can design lures that fit your fishing needs. Here are some basic designs you can try at home.
Soft Plastic Baits
Soft plastic baits are popular for catching fish. They are flexible and can mimic real prey.
- Choose a mold for your bait shape.
- Mix liquid plastic and color it.
- Pour the mixture into the mold.
- Let it cool and remove the bait.
Wooden Lures
Wooden lures are classic and durable. They are great for catching larger fish.
Spinnerbaits And Jigs
Spinnerbaits and jigs add movement to your lure. They can attract fish from a distance.
| Type | Best Use |
| Spinnerbait | Clear water |
| Jig | Murky water |
Step-by-step Making Process
Making fishing lures at home can be fun and rewarding. You can create lures that fit your fishing style. This guide shows simple steps to make your own lures.
Follow the process carefully to prepare, shape, and add hooks. Each step helps you build a strong and effective lure.
Preparing The Base
Start by choosing the right material for your lure base. Common materials include wood, plastic, or foam. Cut the material to the size you want.
- Pick a block of wood or foam
- Draw the shape of your lure on the material
- Use a saw or knife to cut the shape carefully
- Smooth the edges with sandpaper
Shaping And Molding
Shape the lure to look like a small fish or insect. Use tools to carve details and make it attractive to fish.
| Tool | Purpose |
| Sandpaper | Smooth the surface |
| Carving knife | Create details and shape |
| Paintbrush | Apply colors and patterns |
| Drill | Make holes for hooks |
After shaping, paint your lure with bright colors and patterns. Let the paint dry before moving on.
Adding Hooks And Hardware
Attach hooks and other hardware to make your lure functional. Use strong glue and screws if needed.
- Drill small holes where hooks will go
- Insert eye screws or hooks into the holes
- Secure hooks with glue or tighten screws
- Add split rings to connect hooks and lure body
- Attach a swivel or line tie at the front
Check that all parts are tight and secure. Your lure is now ready to use for fishing.
Painting And Finishing
Painting and finishing fishing lures at home give them a lifelike look. The right colors and coatings make lures more attractive to fish.
Good painting protects the lure and lasts longer in water. This guide covers paints, patterns, and sealing methods for DIY lure making.
Choosing Paints And Coatings
Select paints that stick well to wood or plastic lures. Acrylic paints dry fast and resist water. Use spray paints for smooth, even coats.
- Use non-toxic paints safe for water
- Choose bright colors to catch fish attention
- Matte and glossy finishes depend on fishing conditions
- Test paint on small lure parts before full use
- Apply multiple thin layers instead of one thick layer
Creating Realistic Patterns
Realistic patterns make lures look like real fish or prey. Use fine brushes or airbrushes for detail. Layer colors for depth and texture.
| Pattern | Description |
|---|---|
| Stripes | Long lines that mimic fish scales |
| Spots | Small dots for natural camouflage |
| Gradient | Smooth color fades from one tone to another |
| Speckles | Random tiny dots for texture |
Sealing For Durability
Seal your painted lure to protect it from water and damage. Use clear coatings that dry hard and stay shiny.
- Apply thin layers of clear epoxy or polyurethane
- Let each layer dry completely before adding the next
- Smooth rough spots with fine sandpaper between coats
- Finish with a glossy or matte seal based on preference
- Test the sealed lure in water before fishing
Testing And Adjusting
Testing your homemade fishing lures is important to see how they work in water. Adjusting them helps improve their movement and catch more fish.
Use simple techniques to check if your lure swims right. Fix common problems by tuning parts carefully.
Water Testing Techniques
Test your lure in calm water first. Watch how it moves and floats. Check if it spins, dives, or floats as planned.
- Use a small pool or bathtub to test lure action.
- Pull the lure slowly to observe its swimming pattern.
- Try different speeds to see how it behaves.
- Look for any unwanted spins or flips.
- Note if the lure sinks or floats too fast.
Tuning For Action
Adjust your lure parts like hooks, weights, and lips to improve action. Small changes can make a big difference.
| Part | Adjustment | Effect |
| Hook | Bend slightly outward | Improves hook set |
| Weight | Add or remove small split shots | Changes diving depth |
| Lip | Trim edges carefully | Alters swimming angle |
| Body | Balance with clay or paint | Stabilizes swimming |
Troubleshooting Common Issues
If your lure does not swim well, try these fixes. Check each part and test again.
- If lure spins too much, adjust weight placement.
- If it sinks too fast, reduce weight or use lighter materials.
- If it floats without diving, add weight near the front.
- If hooks snag too much, bend them slightly inward.
- If lure moves unevenly, rebalance with clay or paint.

Credit: www.amazon.com
Safety Tips And Best Practices
Making fishing lures at home can be fun and rewarding. It is important to keep safety in mind while crafting. Proper practices protect you and your workspace.
This guide covers key safety tips for handling tools, storing materials, and crafting in an eco-friendly way. Follow these steps to make lure-making safe and enjoyable.
Handling Tools Safely
Use tools carefully to avoid injuries. Keep sharp items away from children. Always wear safety glasses and gloves if needed. Work on a clean, stable surface to prevent accidents.
- Keep blades sharp but handle with care
- Store tools in a secure box after use
- Use pliers and cutters with proper grips
- Do not rush when cutting or shaping materials
- Wear protective gear such as gloves and goggles
Storage And Maintenance
Proper storage keeps tools and materials in good condition. Clean your tools after each use to prevent rust and damage. Store chemicals and paints in labeled containers away from heat.
| Item | Storage Tip | Maintenance |
| Hooks | Dry container | Check for rust |
| Paints | Cool, dark place | Seal tightly |
| Knives | Toolbox with blade cover | Sharpen regularly |
| Glue | Closed bottle upright | Clean nozzle |
Eco-friendly Crafting
Choose materials that are safe for the environment. Reuse scraps and recycle waste. Avoid toxic paints and glues. Dispose of harmful materials properly to protect nature.
Tips for eco-friendly lure making:
- Use natural or biodegradable materials
- Recycle leftover plastic and metal pieces
- Pick water-based, non-toxic paints
- Dispose of hazardous waste at proper facilities
- Limit waste by measuring materials carefully

Credit: fishgenix.com
Frequently Asked Questions
What Materials Do I Need To Make Fishing Lures At Home?
You need basic materials like wood, hooks, paint, and glue. Optional items include beads, feathers, and wire. These materials help create effective and attractive lures.
How Long Does It Take To Make A Homemade Fishing Lure?
Making a simple lure usually takes 30 to 60 minutes. Complex designs may require several hours. Practice improves speed and quality over time.
Can Homemade Lures Catch Fish As Well As Store-bought Ones?
Yes, homemade lures can be equally effective. Custom designs match local fish preferences. Experimenting improves lure performance and success rates.
What Are The Safest Tools For Beginners To Use?
Start with a small saw, sandpaper, and pliers. Use non-toxic paint and glue. Always wear protective gear and work in a safe environment.
Conclusion
Making fishing lures at home can be fun and rewarding. You save money and create unique baits. Small steps and simple tools make the process easy. Try different shapes and colors to find what works best. Enjoy crafting and fishing with your own lures.
Keep practicing to improve your skills. This hobby brings both creativity and joy to your fishing trips. Give it a try and see the difference yourself.