
Imagine savoring a scoop of creamy, rich gelato that you crafted right in your own kitchen. With the Kitchenaid Ice Cream Maker, this isn’t just a dream—it’s your new reality.
If you’ve ever been captivated by the silky texture and intense flavors of gelato, you’re in the right place. This guide will unlock the secrets to making authentic gelato that melts perfectly in your mouth, using the tools you already have.
Why settle for store-bought when you can create a masterpiece tailored to your taste buds? Whether you’re a seasoned home chef or a curious beginner, making gelato at home is easier than you think. You’ll discover how simple ingredients and a few expert tips can transform into a dessert that rivals your favorite gelato shop. Keep reading, and you’ll learn not just the “how,” but also the “why,” turning you into a gelato-making aficionado.
Choosing Ingredients
Choosing the right ingredients is the first and most important step in making gelato with your KitchenAid Ice Cream Maker. The quality of your base and the flavors you pick will directly affect the creaminess and taste of your final product. Think of this as setting the stage for a delicious homemade treat that’s uniquely yours.
Fresh Dairy Options
Using fresh dairy is key to achieving that rich, smooth texture gelato is known for. Whole milk and heavy cream are traditional, but you can also experiment with half-and-half or even milk with a higher fat content for a silkier finish.
Have you tried using locally sourced milk? It can add a subtle difference in flavor that’s hard to beat. Also, avoid ultra-pasteurized dairy if you can, as it sometimes affects the final texture.
Sweeteners And Flavorings
Sugar is the classic sweetener, but you might want to try alternatives like honey, agave syrup, or even brown sugar for a different depth of flavor. Remember, the type of sweetener you choose can change how your gelato freezes and tastes.
Vanilla extract, citrus zest, or coffee are excellent flavor boosters. Adding them early in the mix helps infuse the gelato with richer aromas. What new flavor combinations are you curious about trying in your next batch?
Adding Mix-ins
Crunchy nuts, chocolate chips, or fresh fruit chunks can add a delightful surprise to every bite. Add these toward the end of the churning process to keep their texture intact.
Think about texture contrasts—creamy gelato with crunchy pistachios or soft swirls of caramel. How do your favorite snacks inspire your gelato mix-ins?
Preparing The Base
Preparing the base is the foundation of making delicious gelato with your KitchenAid Ice Cream Maker. This step affects the texture, flavor, and smoothness of the final product. Paying close attention here will save you from common pitfalls like icy or grainy gelato.
Heating And Combining Ingredients
Start by gently heating your milk and cream in a saucepan over medium heat. Stir occasionally to prevent burning and ensure an even temperature. Then, whisk in sugar and any flavorings like vanilla or cocoa until fully dissolved.
Next, beat the egg yolks separately until they are smooth and slightly pale. Slowly pour the warm milk mixture into the yolks while whisking constantly. This gradual blending avoids cooking the eggs too quickly, which can ruin the texture.
Pour the combined mixture back into the saucepan and cook on low heat. Stir continuously until the base thickens enough to coat the back of a spoon. This custard-like consistency is essential for that creamy gelato you want.
Chilling The Mixture
After heating, cool your gelato base quickly to prevent bacterial growth and maintain freshness. Transfer the custard to a bowl and cover it with plastic wrap, pressing the wrap directly onto the surface to avoid a skin forming.
Place the bowl in the refrigerator for at least 4 hours, or better yet, overnight. The longer chilling time helps the flavors meld and ensures the mixture is cold enough for the ice cream maker to work its magic.
Have you noticed how skipping this chilling step makes your gelato less smooth? Taking the time here is a simple trick that many overlook but makes all the difference in your final scoop.
Setting Up The Kitchenaid Ice Cream Maker
Getting your KitchenAid Ice Cream Maker ready is a key step to making perfect gelato at home. Proper setup ensures smooth operation and the best texture for your frozen treat. Let’s break down what you need to do before you start churning your delicious gelato.
Freezing The Bowl
The bowl must be completely frozen before you begin. This usually means placing it in your freezer for at least 15 hours. I once tried starting with a partially frozen bowl, and the gelato didn’t firm up well—don’t make that mistake.
Keep these tips in mind:
- Place the bowl in the coldest part of your freezer.
- Avoid opening the freezer frequently during the freezing period.
- Check for frost buildup on the inside of the bowl before use; it should look solid and icy.
Assembling The Machine
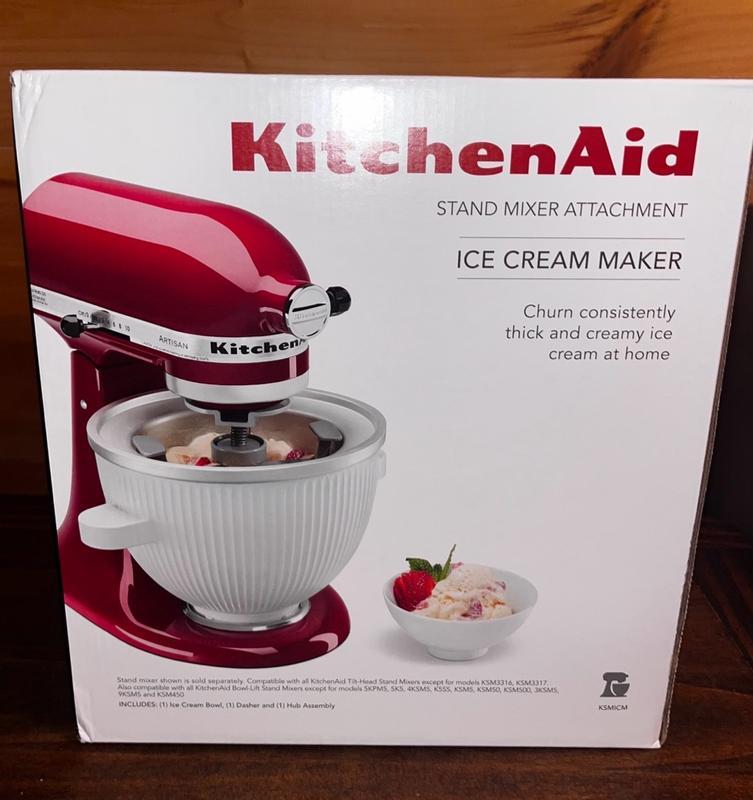
Once your bowl is ready, it’s time to put the machine together. The assembly is straightforward but requires attention to detail to avoid any issues during churning.
Follow these steps for smooth assembly:
- Attach the frozen bowl securely to the mixer base.
- Insert the dasher (the paddle) into the bowl; it should fit snugly and rotate freely.
- Lock the pouring shield on top to avoid spills when adding your gelato mix.
Make sure all parts are properly aligned before turning on the mixer. Have you ever started mixing only to find a loose part wobbling? Taking a moment now can save you from cleaning up a mess later.
Credit: www.kitchenaid.com
Churning The Gelato
Churning gelato is a key step in creating its smooth, creamy texture. The process mixes air into the gelato base while freezing it slowly. This transforms the liquid base into a soft, dense treat. Using the KitchenAid Ice Cream Maker makes churning simple and efficient.
Pouring The Base
Pour the chilled gelato base gently into the ice cream maker bowl. Avoid overfilling to ensure proper mixing. The KitchenAid bowl must be completely frozen before use. This keeps the gelato cold as it churns.
Selecting The Right Speed
Set the KitchenAid mixer to a low or medium speed. Slow churning creates the dense texture gelato needs. High speed can add too much air, making it more like ice cream. Keep the speed consistent throughout the process.
Monitoring Consistency
Watch the gelato as it thickens inside the bowl. It usually takes 20 to 30 minutes to reach the right texture. The gelato should look creamy and hold soft peaks. Stop churning once the gelato is firm but still smooth.
Storing And Serving
Once you’ve crafted your delicious gelato using the KitchenAid Ice Cream Maker, handling it properly ensures you enjoy the perfect texture and flavor later. Storing and serving gelato right can make all the difference between a creamy delight and a frozen block. Let’s dive into some practical tips that keep your gelato fresh and ready to impress every time.
Freezing Tips
Gelato is best enjoyed fresh, but you may want to store leftovers for later. Use an airtight container to prevent ice crystals from forming and to keep the gelato tasting fresh. Avoid using plastic wrap directly on the gelato’s surface; instead, place parchment paper or wax paper on top before sealing.
Freeze the gelato flat and avoid stirring it after freezing to maintain its creamy texture. If your gelato becomes too hard, let it sit at room temperature for 5–10 minutes before scooping—it softens quickly without melting. Have you ever noticed how some gelatos turn icy after freezing? Proper storage is the key to avoiding that.
Serving Suggestions
Serving gelato at the right temperature enhances its rich flavor and silky mouthfeel. Aim to serve it slightly warmer than ice cream, around 10°F to 15°F (-12°C to -9°C). You can scoop it easily with a warmed spoon or ice cream scoop to create smooth, rounded servings.
Try pairing your gelato with fresh fruits, biscotti, or a drizzle of honey for added texture and taste. You could also serve it alongside a warm dessert like a chocolate brownie or espresso cake to create a delightful contrast. How could you elevate your gelato experience with toppings you already have at home?

Credit: www.amazon.com
Troubleshooting Tips
Making gelato with your KitchenAid Ice Cream Maker can be a delightful experience, but sometimes things don’t go as planned. Troubleshooting common issues can save you time and help you achieve the creamy texture you crave. Let’s dive into some practical tips to fix problems you might encounter.
Common Issues
Sometimes your gelato might not freeze properly or could turn out too icy. This often happens if the bowl isn’t frozen solid before use. Make sure to freeze the bowl for at least 15 hours, ideally overnight.
Another frequent problem is the gelato overflowing during churning. This usually means your mixture is too full or too warm. Try filling the bowl only halfway and chilling your base thoroughly before starting.
Have you noticed your gelato tastes bland? Check if your ingredients are fresh and balanced. Adding a pinch of salt can enhance flavors without making it salty.
Fixing Texture Problems
Texture is everything in gelato. If your gelato is too hard, it might be over-frozen or churned for too long. Stop the machine once the gelato thickens but is still soft.
If it’s too soft or runny, your mixture might need more stabilizer like milk powder or a longer chilling period before churning. Also, avoid opening the machine frequently, as this interrupts the freezing process.
Grainy or icy gelato usually means ice crystals formed during freezing. To fix this, try blending the gelato once it’s churned to break up crystals before freezing it solid.
Have you experimented with adding a little alcohol like vodka? It lowers the freezing point and keeps gelato smooth but use it sparingly to avoid affecting the taste.

Credit: www.reddit.com
Frequently Asked Questions
How Long Does Gelato Take To Freeze In Kitchenaid?
Gelato typically takes 20-30 minutes to freeze in a KitchenAid ice cream maker. The exact time depends on the recipe and ingredient temperature. Pre-freezing the bowl ensures faster and smoother results. Avoid overfreezing to maintain gelato’s creamy texture and rich flavor.
Can I Use Any Gelato Recipe With Kitchenaid?
Yes, most gelato recipes work well with the KitchenAid ice cream maker. Adjust the recipe’s liquid and sugar ratios for optimal texture. Avoid recipes with high fat content as gelato is traditionally lower in fat than ice cream. Follow your machine’s instructions for best results.
What Is The Best Ingredient For Creamy Gelato Texture?
Whole milk and sugar are essential for creamy gelato texture. Adding a small amount of cream enhances richness without overpowering gelato’s lightness. Use fresh ingredients and chill the mixture before freezing. Proper churning in the KitchenAid ensures smooth consistency and prevents ice crystals.
How Do I Clean The Kitchenaid Gelato Maker Bowl?
Clean the bowl immediately after use by rinsing with warm water. Avoid using harsh detergents or abrasive scrubbers. Dry the bowl thoroughly before storing to prevent odors and bacteria. Following these steps preserves the bowl’s freezing quality and extends its lifespan.
Conclusion
Making gelato with a KitchenAid ice cream maker is simple and fun. You only need a few ingredients and some patience. Fresh gelato at home tastes much better than store-bought. Try different flavors and enjoy the creamy texture. Keep your machine clean for the best results every time.
This method lets you enjoy a classic Italian dessert anytime. Give it a try and share your gelato with friends and family. Homemade gelato brings joy and a sweet treat to your day.