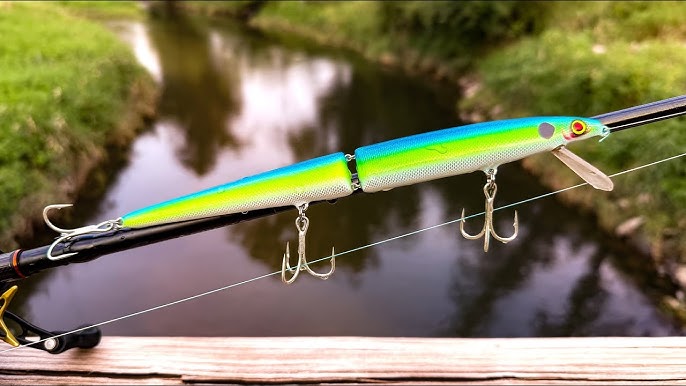
Have you ever wanted to catch your own fish with a rod you made yourself? Making a homemade fishing rod is easier than you think.
With just a few simple materials and steps, you can create a rod that feels personal and unique to you. Imagine the pride of catching fish using something crafted by your own hands. In this guide, you’ll learn exactly how to build your fishing rod from start to finish.
Keep reading, and soon you’ll be ready to enjoy fishing like never before.

Credit: www.littlegeniusworkshop.com
Materials Needed
Creating a homemade fishing rod is a rewarding experience. You’ll need the right materials to ensure your rod is strong and durable.
Let’s explore what you need for each part of the rod, from the blank to the handle.
Choosing The Right Rod Blank
The rod blank is the main part of your fishing rod. It determines the rod’s strength and flexibility.
- Consider the type of fish you want to catch.
- Choose between graphite, fiberglass, or composite materials.
- Check the length and power rating of the blank.
Selecting Guides And Reel Seat
Guides and the reel seat are crucial for casting and reeling. They should align with your rod blank’s features.
| Guide Type | Material |
| Single-foot | Ceramic |
| Double-foot | Stainless Steel |
| Micro guides | Titanium |
Picking The Handle And Grip
The handle and grip provide comfort and control. Choose materials that fit your fishing style and conditions.
- Cork handles for lightweight and comfort.
- EVA foam for durability and grip.
- Wood handles for classic aesthetics.
Essential Tools
Gathering the right tools is important for assembling your fishing rod. They ensure precision and safety.
Tools needed include:
- Epoxy glue for securing components
- Thread for wrapping guides
- Sandpaper for smoothing surfaces
- Heat gun for curing glue
- Measuring tape for accurate length
Preparing The Rod Blank
Preparing the rod blank is the first step in making a fishing rod. It shapes the foundation for your rod’s strength and flexibility.
This process involves measuring, cutting, and smoothing the blank to fit your fishing style and needs.
Measuring And Cutting
Start by measuring the length of the rod blank. The length depends on the type of fishing you plan to do.
Use a fine-toothed saw or rod cutter to make a clean cut. Cut slowly to avoid splintering the blank.
- Mark the desired length with a pencil.
- Double-check the measurement before cutting.
- Cut straight to keep the blank balanced.
- Wear safety glasses to protect your eyes.
Sanding For Smoothness
Sanding the rod blank removes rough spots and splinters. It also helps the finish and guides stick properly.
Use fine-grit sandpaper and sand gently along the blank. Check often to avoid sanding too much.
- Start with 220-grit sandpaper for rough areas.
- Switch to 400-grit for a smoother finish.
- Wipe the blank with a damp cloth after sanding.
- Ensure the surface feels smooth and even.
Attaching The Guides
Attaching guides to your homemade fishing rod helps the line move smoothly. Proper guide placement and secure wrapping keep the guides strong.
This part is important to make your rod work well and last long.
Guide Placement Tips
Place the guides evenly along the rod to balance the line. Start with the largest guide near the handle.
Smaller guides go closer to the tip. Keep them aligned so the line does not rub on the rod.
- Space guides closer near the tip
- Keep guides in a straight line
- Use enough guides to support the line
Securing Guides With Thread
Wrap strong thread tightly around the guide feet and rod. This holds the guides firm during casting and fishing.
Use thin but strong thread. Wrap many layers to cover the guide foot fully.
- Start wrapping a few inches before the guide foot
- Wrap tightly without gaps or overlaps
- Finish with a knot or special thread finish
- Apply clear epoxy to protect the thread
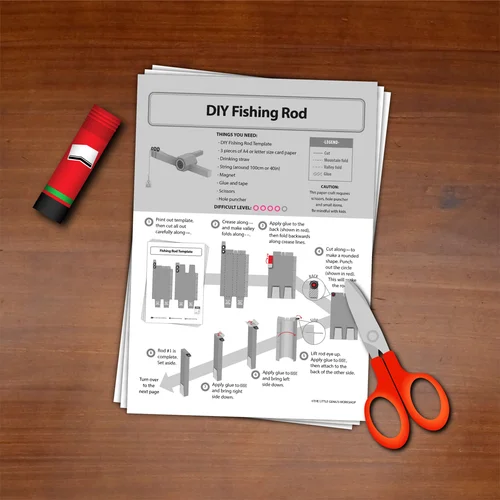
Credit: www.littlegeniusworkshop.com
Installing The Reel Seat
Installing the reel seat correctly is important for a strong fishing rod. This part holds the reel firmly in place. A good installation helps you fish with confidence.
In this guide, you will learn how to position the reel seat and attach it using epoxy. Follow each step carefully for the best results.
Positioning The Reel Seat
Place the reel seat where it feels comfortable in your hand. The spot should allow easy access to the reel handle. Check that the seat aligns with the rod guides for smooth line flow.
- Hold the reel seat against the rod blank.
- Mark the spot where your fingers rest naturally.
- Make sure the seat does not block any guides.
- Test reel fit before gluing it down.
Using Epoxy For Attachment
Epoxy glue creates a strong bond between the reel seat and the rod. Use a slow-setting epoxy for better control. Mix the resin and hardener carefully before application.
| Step | Action | Tip |
| 1 | Mix epoxy resin and hardener well. | Use a disposable container for mixing. |
| 2 | Apply a thin layer inside the reel seat. | Cover all contact surfaces evenly. |
| 3 | Slide the seat onto the marked spot on the rod. | Rotate slightly to spread epoxy evenly. |
| 4 | Wipe off any excess epoxy immediately. | Use a clean cloth or paper towel. |
| 5 | Let the rod rest until epoxy cures fully. | Follow the epoxy manufacturer’s cure time. |
Adding The Handle
The handle is an important part of your homemade fishing rod. It gives you comfort and control.
Choosing the right materials and shaping the grip well will help you fish longer without fatigue.
Choosing Handle Materials
Pick a material that feels good in your hand and is strong enough to hold. Common choices include cork, foam, and wood.
- Cork:Lightweight and comfortable, it absorbs sweat and feels soft.
- Foam:Easy to shape and provides good grip even when wet.
- Wood:Strong and classic but may be heavier and needs finishing to prevent water damage.
Shaping And Gluing The Grip
After choosing the material, shape it to fit your hand. Smooth edges and a proper size make the handle comfortable.
| Tool | Purpose |
|---|---|
| Sandpaper | To smooth rough edges and shape the handle |
| Wood Glue or Epoxy | To attach the grip firmly to the rod blank |
| Clamps | To hold the grip in place while glue dries |
| Protective Finish | To seal and protect wooden handles |
Apply glue evenly on the rod blank, then slide the grip on. Use clamps to hold it tight until dry. Sand again if needed.
Finishing Touches
Adding the final touches to your homemade fishing rod makes it strong and ready to use. The last steps protect your work and improve its look.
Two important parts of finishing are applying an epoxy coating and allowing the rod to dry and cure properly. These steps keep your rod safe from water and damage.
Applying Epoxy Coating
Epoxy coating seals the rod and makes it waterproof. Use a clear epoxy for a smooth, shiny finish. Apply thin coats evenly for best results.
- Mix the epoxy resin and hardener as per instructions.
- Use a small brush or roller to spread the epoxy over the rod.
- Work quickly to avoid bubbles forming in the coating.
- Cover the entire rod, including guides and handle.
- Wipe off any drips or excess epoxy before it hardens.
Drying And Curing Process
After applying epoxy, the rod needs time to dry and cure. This makes the coating hard and durable. Follow these tips for the best results.
| Stage | Time | Details |
|---|---|---|
| Initial Dry | 4-6 hours | Epoxy feels tacky but is not sticky. |
| Hard Dry | 24 hours | Surface is hard but not fully cured. |
| Full Cure | 3-7 days | Epoxy reaches full strength and water resistance. |
Testing The Rod
After making your fishing rod, testing it is important. This step helps you find out if the rod works well for fishing.
Testing includes practicing casting and checking the rod’s balance and flex. These checks ensure the rod performs as expected.
Casting Techniques
Try casting the rod in an open area. Use different styles to see how the rod handles each cast.
- Start with a basic overhead cast.
- Try sidearm casting for quick, low throws.
- Practice roll casting for tight spaces.
- Check how far and accurately the rod casts.
Adjusting For Balance And Flex
Balance and flex affect comfort and control. Adjust the rod if it feels heavy or too stiff.
| Test Aspect | What to Check | Adjustment Tips |
| Balance | Rod feels even in hand | Add or remove weight near handle |
| Flex | Rod bends smoothly without breaking | Try different materials or change rod length |
Maintenance Tips
Keeping your homemade fishing rod in good shape helps it last longer. Proper care makes sure it works well every time.
Follow simple maintenance steps to avoid damage and keep your rod ready for fishing trips.
Cleaning And Storage
Clean your fishing rod after each use to remove dirt and salt. Use fresh water and a soft cloth to wipe it down gently.
Store your rod in a dry place. Keep it away from direct sunlight and extreme temperatures to avoid damage.
- Rinse rod with fresh water after use
- Dry rod completely before storing
- Use a rod holder or rack to keep it straight
- Avoid leaning rod against walls for long periods
- Store in a cool, dry area away from sunlight
Handling Repairs
Check your rod regularly for cracks or loose parts. Fix small problems quickly to stop them from getting worse.
Use strong glue or tape for minor repairs. Replace worn-out guides or handles to keep your rod working well.
- Inspect rod for cracks and damage often
- Use waterproof glue for small cracks
- Tape loose parts temporarily until fixed
- Replace damaged guides with new ones
- Fix or replace worn handles promptly
Credit: www.littlegeniusworkshop.com
Frequently Asked Questions
What Materials Are Needed To Make A Homemade Fishing Rod?
You need a sturdy rod, fishing line, reel, guides, handle grip, and epoxy glue. Choose lightweight, durable materials for best results.
How Do You Attach Guides To A Homemade Fishing Rod?
Align guides evenly along the rod’s length. Use strong thread to wrap and secure them tightly. Finish with epoxy for durability.
What Is The Best Type Of Rod For Beginners?
A medium-action fiberglass rod is ideal. It offers flexibility, strength, and ease of use, perfect for novice anglers.
How Long Does It Take To Make A Homemade Fishing Rod?
Making a rod typically takes 2 to 4 hours, including drying time for epoxy and assembling parts carefully.
Conclusion
Making your own fishing rod can be fun and rewarding. It helps you learn new skills and saves money. You control the materials and design, making it personal. Try different parts to see what works best. Each rod you build improves your fishing experience.
Start simple, then add features as you go. Enjoy the process and the time outdoors. Fishing feels better with a rod you made yourself. Keep practicing, and you will get better every time.