Have you ever wanted to add a colorful twist to your outdoor fun? Making ice chalk is an easy and exciting way to brighten up your sidewalk or driveway with vibrant art that melts away as the day warms up.
Imagine creating your own chilly masterpieces that combine creativity with a splash of science. This simple project is perfect for kids and adults alike, and you only need a few ingredients to get started. Ready to discover how to make ice chalk that will keep your summer days cool and colorful?
Let’s dive in!

Credit: www.youtube.com
Materials Needed
Creating ice chalk at home is a fun and easy activity. It requires simple materials to get started. Gather these items to make vibrant, homemade ice chalk.
Essential Ingredients
- Water:The base for your ice chalk mixture.
- Cornstarch:Gives the chalk its texture and consistency.
- Food Coloring:Adds color to your ice chalk.
These ingredients are easy to find in any kitchen. They form the core of your ice chalk.
Optional Tools
- Ice Cube Trays:Shape your chalk into fun, easy-to-hold sizes.
- Mixing Bowl:Helps in blending the ingredients smoothly.
- Spoon or Stirrer:Useful for mixing the cornstarch and water.
- Measuring Cup:Ensures you use the right amounts of each ingredient.
These tools make the process easier. They enhance the experience of making ice chalk.
Credit: naturinginmadison.com
Preparing The Mixture
Preparing the mixture is a key step in making ice chalk. It ensures the chalk has the right texture and consistency for easy use. Careful preparation helps the chalk freeze properly and last longer. Follow these simple guidelines to prepare your mixture perfectly.
Measuring Ingredients
Accurate measuring is important for the right mixture balance. Use a clear container with measurement marks or a kitchen scale. Keep ingredients simple:
- Water
- Chalk powder or calcium carbonate
- Optional: a small amount of rubbing alcohol
Measure water and chalk powder in equal parts for a smooth mix. Too much water makes it runny. Too much chalk makes it crumbly. A little rubbing alcohol helps the mixture freeze faster.
Mixing Techniques
Mix slowly to avoid lumps and bubbles. Use a spoon or small whisk for best results. Stir until the chalk powder fully dissolves in water. If lumps remain, gently press them against the container’s side.
Mix just enough to combine ingredients well. Over-mixing can cause the mixture to become too thick. Pour the mixture into molds or ice trays immediately for freezing.
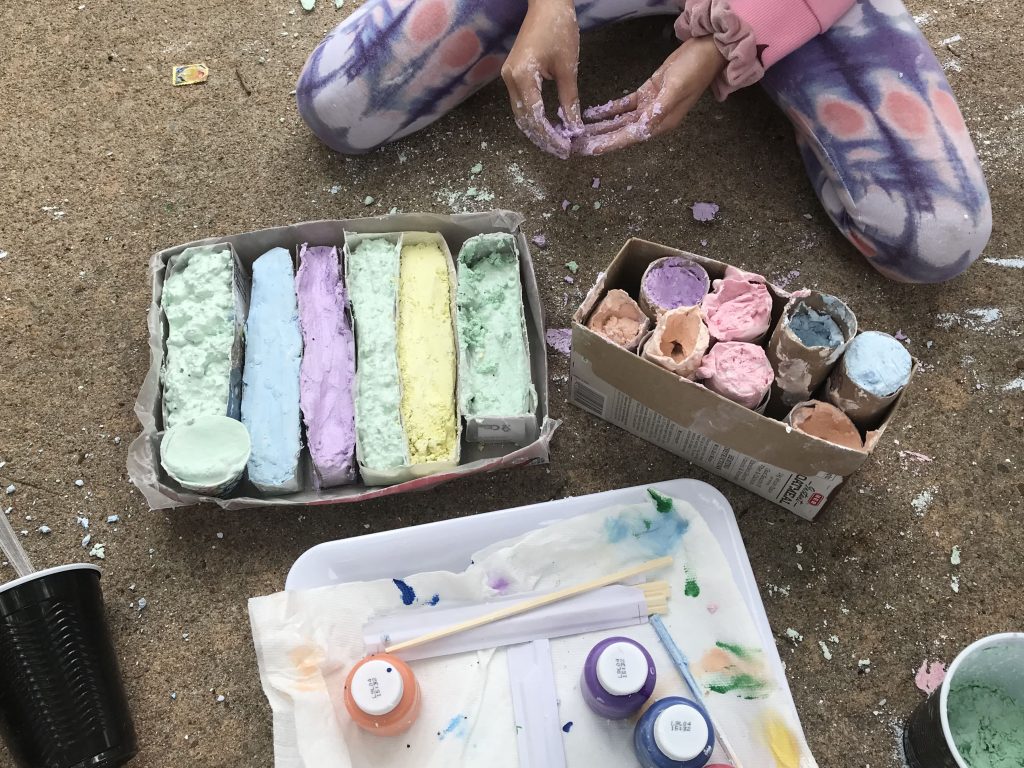
Shaping The Chalk
Shaping the chalk is a crucial step in making ice chalk that looks great and works well. The shape affects how easy it is to hold and how neatly it marks surfaces. Paying attention to this part can make a big difference in your final product’s performance and appeal.
Molding Options
You can use a variety of molds to shape your ice chalk. Silicone molds are excellent because they’re flexible and make it easy to pop out the chalk without breaking it. Ice cube trays or small plastic containers work well too, especially if you want simple shapes like cubes or rectangles.
If you want a more customized shape, try using cookie cutters placed inside a shallow container. Pour the chalk mixture into the cutter and freeze it. This approach lets you create unique shapes that fit your style or needs.
Tips For Smooth Shapes
To get smooth shapes, fill the molds slowly to avoid air bubbles. Tap the mold gently on the table to release trapped air. Smoothing the surface with a small spatula or the back of a spoon before freezing helps too.
Freezing the chalk mixture at a consistent temperature is another key. Fluctuating temperatures can cause cracks or rough edges. Have you noticed how uneven freezing can turn a perfectly good mixture into something fragile? Avoid this by placing molds on a flat surface inside the freezer.
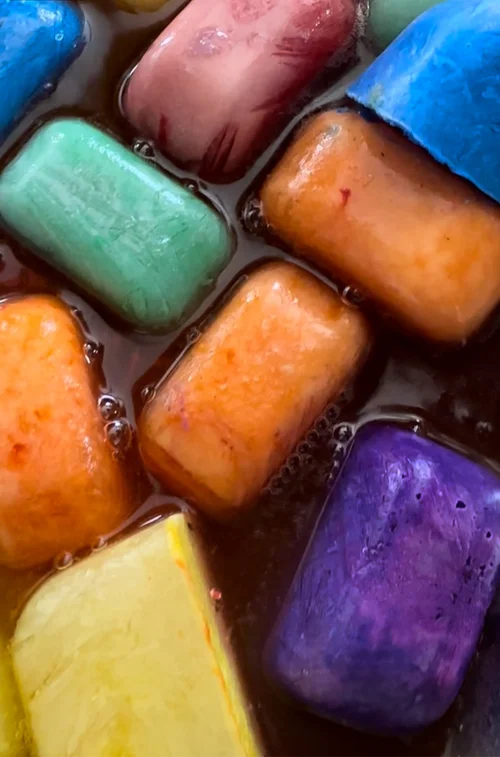
Freezing Process
The freezing process is crucial when making ice chalk, as it determines the final texture and usability of your chalk. Getting the temperature and freezing time right ensures the chalk is solid enough to handle but not so brittle that it cracks easily. Let’s look at how you can control these factors to make perfect ice chalk every time.
Setting The Temperature
Your freezer’s temperature plays a big role in how well the ice chalk forms. Ideally, set your freezer between -10°C to -15°C (14°F to 5°F). This range is cold enough to freeze the mixture quickly, preventing large ice crystals that can make the chalk crumbly.
If your freezer is too cold, below -20°C (-4°F), the chalk may become too hard and difficult to use. On the other hand, a temperature warmer than -5°C (23°F) might not freeze the chalk completely, leaving it too soft and messy.
Ideal Freezing Time
Timing is just as important as temperature. Freeze your chalk for about 4 to 6 hoursto achieve the best consistency. This time frame allows the chalk to solidify fully without becoming overly brittle.
If you freeze it for less than 4 hours, you risk having a chalk that’s too soft and prone to breaking apart when used. Freezing beyond 6 hours won’t necessarily improve quality and can make the chalk too fragile.
Have you ever tested different freezing times to see how it changes the chalk’s feel? Try experimenting a bit with your freezer’s settings and timing to find what works best for your environment.
Using Ice Chalk
Using ice chalk opens up a world of fun and creativity that goes beyond ordinary sidewalk chalk. Its cool texture and vibrant colors make your artwork stand out, especially on hot days when the ice slowly melts, creating unique effects. Let’s dive into some ways you can enjoy ice chalk safely while making the most of your creative moments.
Creative Drawing Ideas
Try drawing colorful patterns that change as the ice melts—like rainbow swirls or geometric shapes that blur into new designs. You can also create temporary murals on sidewalks or driveways that last just long enough for you and your friends to admire before they disappear.
Another fun idea is writing messages or drawing games such as hopscotch grids. The coolness of the ice chalk adds a sensory element that kids especially love. Have you ever noticed how a melting chalk drawing feels different to touch? That little surprise keeps your creativity fresh and exciting.
Safety Tips
Keep your ice chalk use outdoors to avoid slippery surfaces inside your home. Since it melts into water, it can make floors slick and dangerous. Always supervise young children to prevent them from putting chalk pieces in their mouths.
Wear gloves if you have sensitive skin or plan to draw for a long time, as the cold can be uncomfortable. Also, use non-toxic food coloring for coloring the ice chalk to ensure it’s safe if it comes into contact with skin or accidentally gets ingested.
Have water nearby to rinse off hands after playtime, especially before eating. Do you think about how simple precautions can keep your fun safe and worry-free? Keeping these safety tips in mind lets you enjoy ice chalk fully without any mishaps.
Storage And Maintenance
Proper storage and care keep ice chalk effective and easy to use. Maintaining the right temperature stops it from melting. Good handling extends its life and performance. Follow these simple tips to keep your ice chalk ready for your next session.
Keeping Ice Chalk Frozen
Store ice chalk in a freezer at all times. Use an airtight container to protect it from moisture. Avoid placing it near strong-smelling foods to prevent odor absorption. Label the container with the date for easy tracking. Check the freezer temperature regularly to keep it steady below 0°C (32°F).
Handling Melting Issues
If ice chalk starts to melt, dry it quickly with a clean cloth. Avoid refreezing completely melted chalk; it may lose texture and grip. Use a cooler bag for transport to keep it cold outside the freezer. Handle chalk with dry hands to reduce early melting. Keep it away from warm surfaces and direct sunlight during use.

Credit: www.kidspot.com.au
Frequently Asked Questions
What Materials Do I Need To Make Ice Chalk?
To make ice chalk, you’ll need chalk powder, water, and ice cube trays. Mix chalk powder with water until smooth, pour into trays, and freeze. This simple process creates colorful ice chalk perfect for outdoor drawing activities.
How Long Does Ice Chalk Take To Freeze?
Ice chalk typically takes about 4 to 6 hours to freeze completely. Freezing time may vary based on your freezer’s temperature. For best results, leave the trays overnight to ensure the ice chalk is solid and ready to use.
Can Ice Chalk Be Used On All Surfaces?
Ice chalk works best on rough surfaces like concrete and asphalt. It may not show well on smooth or wet surfaces. Always test a small area first to ensure good color visibility and easy cleanup after use.
Is Ice Chalk Safe For Children To Use?
Yes, ice chalk is safe for children when made with non-toxic chalk powder. It is a fun and washable alternative to traditional chalk. Always supervise young kids during use to prevent ingestion or misuse.
Conclusion
Making ice chalk is simple and fun. You only need a few common items. The process does not take long. You can create colorful ice chalk for outdoor play. It dries quickly and works well on sidewalks. Kids will enjoy the cool, creative activity.
Try different colors to make it bright. Keep it safe and clean up afterward. Ice chalk brings a new twist to chalk drawing. Give it a try and enjoy the cool art!