Craving a creamy, homemade ice cream but don’t have fancy ingredients or a machine? You’re in the right place.
Making ice cream with just milk and eggs is easier than you think, and the results will surprise you. Imagine scooping rich, smooth ice cream that you made yourself—no special tools, just simple ingredients from your kitchen. Ready to learn how?
Keep reading, and you’ll discover a step-by-step way to create delicious ice cream that will impress your taste buds and anyone you share it with.
Ingredients Needed
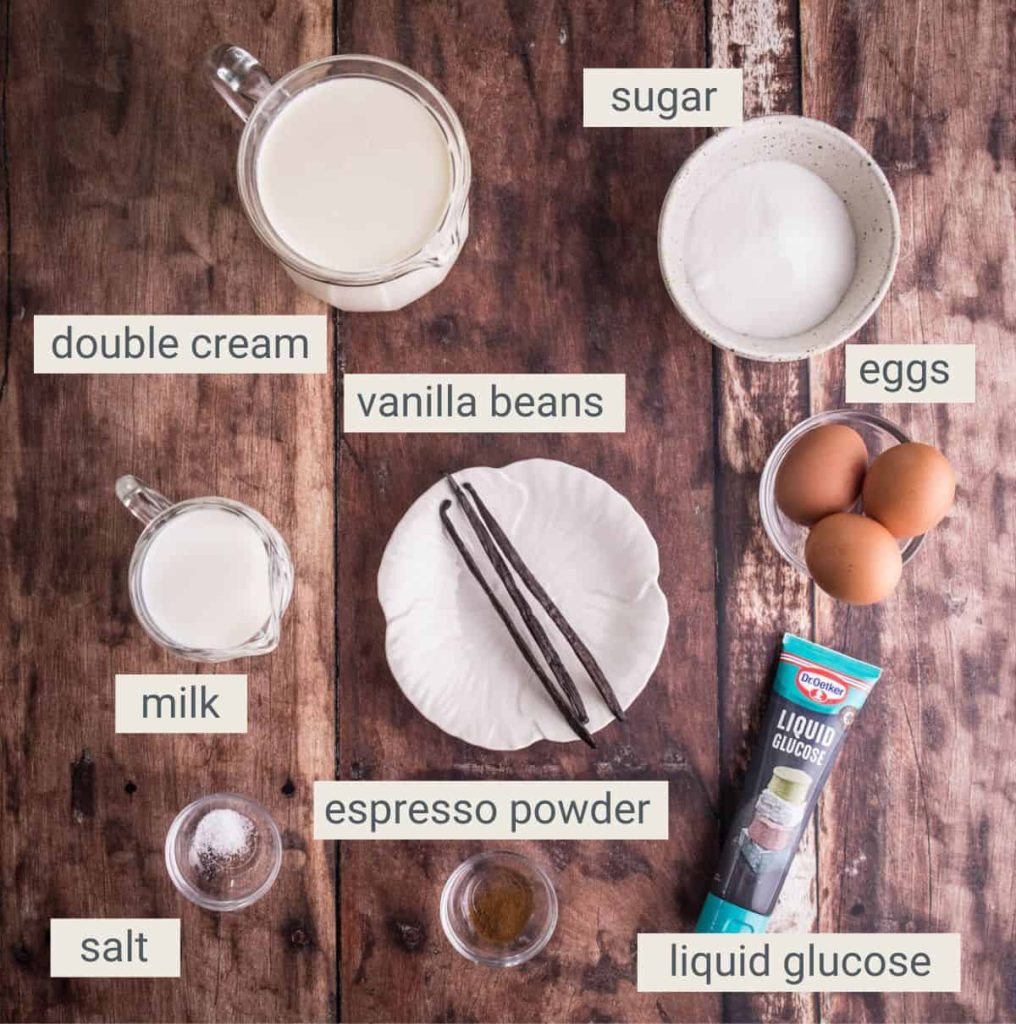
Getting the ingredients right is the first step to making delicious ice cream with milk and eggs. Each component plays a unique role in the texture and flavor of your final treat. Let’s break down what you need to gather before you start churning.
Milk Selection
Milk is the base of your ice cream, so choosing the right type matters. Whole milk is ideal because its higher fat content creates a creamy texture. If you only have low-fat or skim milk, your ice cream might turn out less rich but still tasty.
Some people like to mix milk with cream for extra smoothness. You can experiment with this ratio to find what suits your taste. Have you ever tried making ice cream with just milk? Notice how the texture differs compared to cream-based versions.
Eggs And Their Role
Eggs are the secret to smooth, custard-style ice cream. The yolks add richness and help thicken the mixture when heated gently. They also prevent ice crystals from forming, which keeps your ice cream creamy instead of icy.
Make sure to use fresh eggs and separate the yolks carefully. Using too many whites can make the ice cream grainy. Have you noticed how ice cream without eggs tends to be less smooth? That’s why eggs are essential for this recipe.
Additional Flavorings
Vanilla extract is a classic choice that enhances the sweetness and overall flavor. You can also add cocoa powder, fresh fruit puree, or spices like cinnamon for a twist. Sugar is necessary to sweeten and improve texture, so don’t skip it.
Think about what flavors excite you the most. Would you prefer a simple vanilla or something adventurous like cardamom or coffee? Your choice here will make your homemade ice cream truly unique.

Credit: www.youtube.com
Equipment Required
Making ice cream with milk and eggs is surprisingly simple, but having the right equipment makes the process smoother and more enjoyable. You don’t need fancy gadgets to get started, just some basic tools that you likely already own. However, a few optional devices can make your life easier and improve the texture of your homemade treat.
Basic Kitchen Tools
- Mixing Bowls:Use medium to large bowls to whisk your eggs and milk together comfortably.
- Whisk or Hand Mixer:A whisk is essential to blend the eggs smoothly into the milk and create a creamy base.
- Medium Saucepan:You’ll need this to gently heat the milk and cook the egg mixture without scrambling it.
- Wooden Spoon or Heatproof Spatula:Stirring constantly is key; a wooden spoon helps you do this without scratching your pan.
- Fine Mesh Strainer:Straining the custard ensures a silky smooth texture by removing any cooked egg bits.
- Container for Freezing:Use a shallow, airtight container to freeze your ice cream evenly and avoid ice crystals.
I remember the first time I made ice cream, I skipped the strainer and ended up with tiny lumps that ruined the smoothness. That simple tool made a huge difference in my next batch.
Optional Gadgets For Ease
- Ice Cream Maker:This appliance churns the mixture while freezing it, giving you a creamy texture with less effort.
- Thermometer:A candy or instant-read thermometer helps you monitor the custard’s temperature precisely, preventing overcooking.
- Electric Hand Mixer or Stand Mixer:These tools can speed up whisking and help achieve a fluffier mixture if you want to whip air into your ice cream base.
- Silicone Spatula:Its flexible edges scrape the bowl clean, ensuring no mixture is wasted.
Have you ever wondered why some ice creams feel creamier than others? Churning while freezing, which an ice cream maker does perfectly, keeps ice crystals small and your texture just right. If you don’t have one, don’t worry—you can still get great results with patience and regular stirring.
Preparing The Custard Base
Preparing the custard base is a key step in making smooth, creamy ice cream. This base combines milk and eggs to create a rich texture. The process requires careful heating and mixing to avoid curdling. Patience and attention ensure the perfect custard for your ice cream.
Heating Milk And Eggs
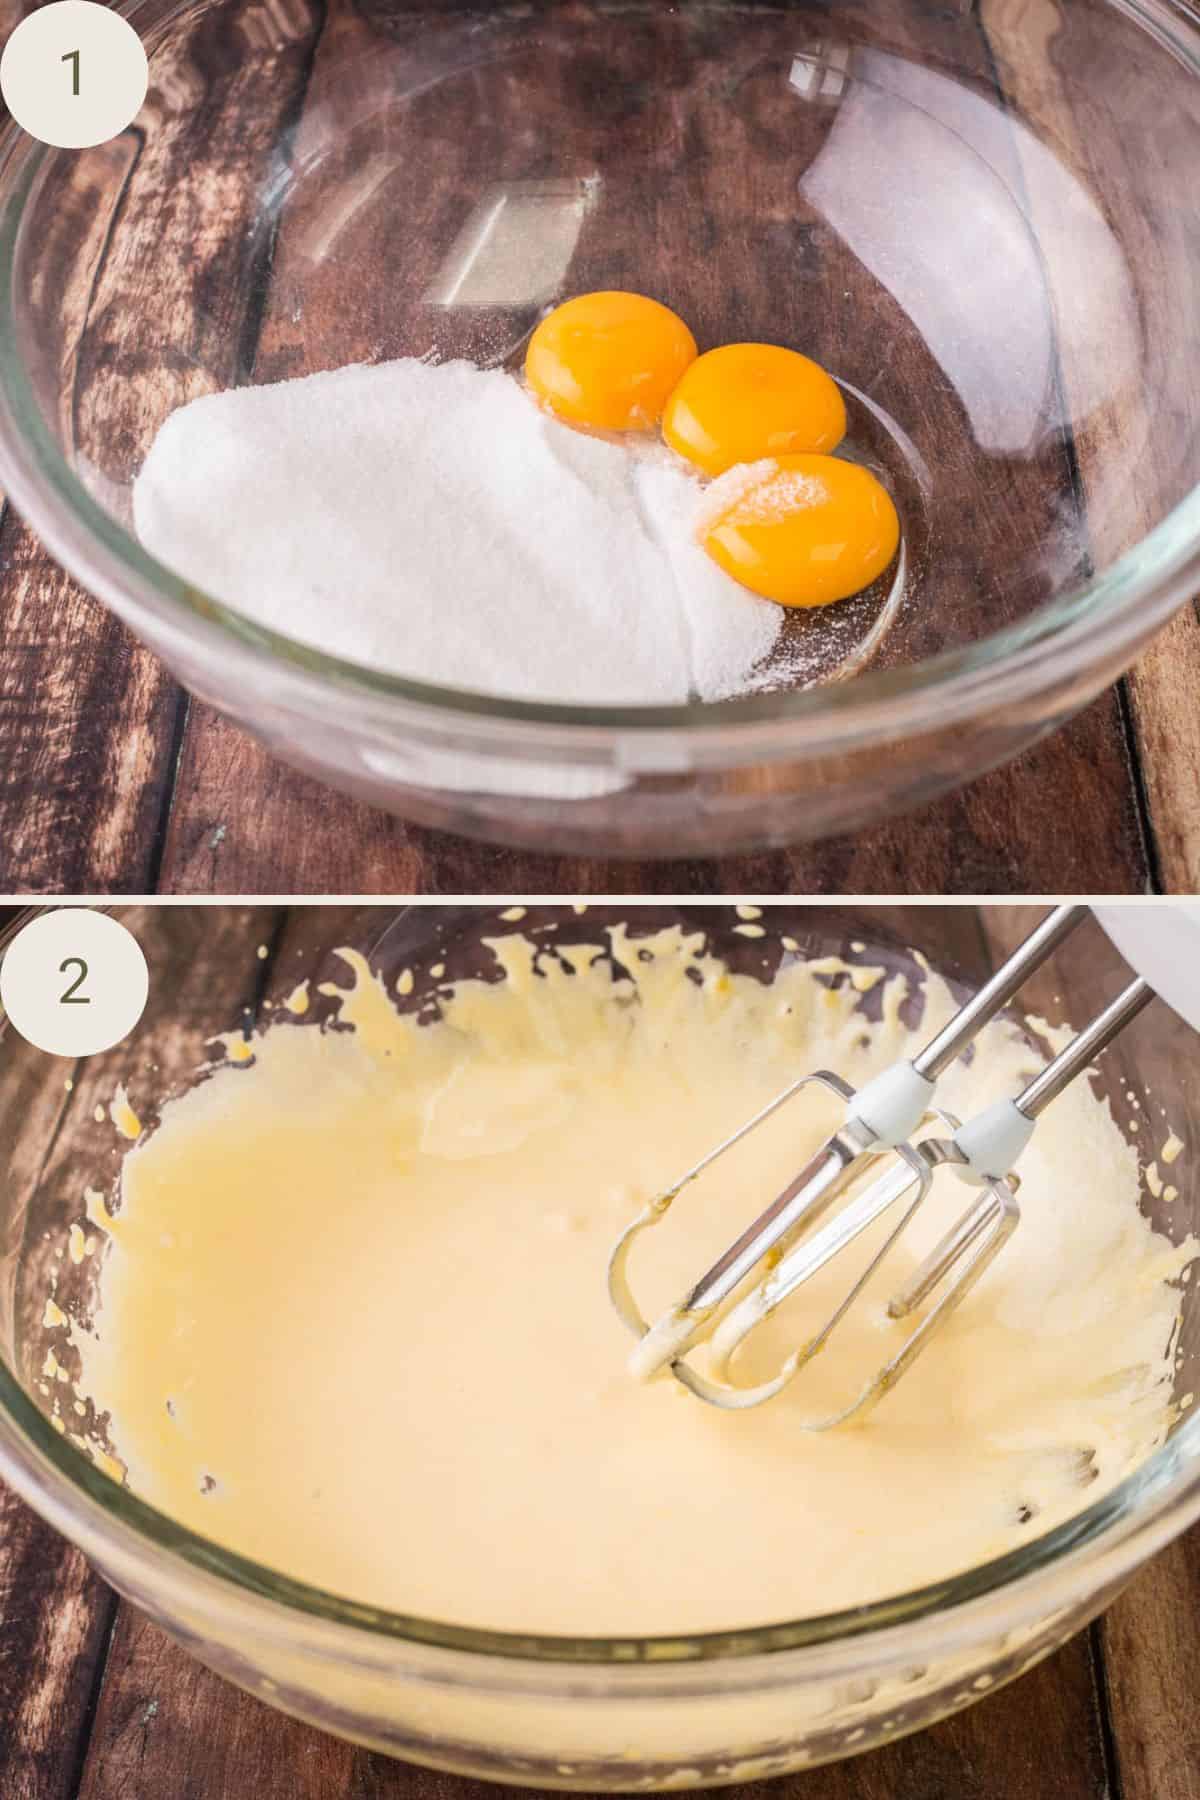
Start by warming the milk gently in a saucepan. Heat it until small bubbles appear around the edges. Do not let it boil. In a separate bowl, whisk the eggs until smooth. Slowly pour the warm milk into the eggs while stirring constantly. This prepares the eggs for cooking without scrambling them.
Tempering The Eggs
Tempering is the process of slowly raising the eggs’ temperature. This stops them from cooking too fast and turning lumpy. Pour a small amount of warm milk into the eggs while whisking. Repeat several times until the eggs feel warm. Then, pour the egg mixture back into the saucepan with the rest of the milk.
Cooking To Perfect Consistency
Cook the mixture over low heat, stirring constantly. Use a wooden spoon or heatproof spatula for even stirring. The custard will thicken slowly. When it coats the back of the spoon and leaves a clear line after running your finger, it is ready. Remove from heat immediately to avoid curdling. Cool the custard before freezing to make ice cream.

Credit: www.allrecipes.com
Adding Flavors
Adding flavors to your homemade ice cream makes it exciting and delicious. Flavors bring life to the creamy base made from milk and eggs. Simple ingredients can create rich and tasty results. Experimenting with different tastes keeps your ice cream fresh and fun.
Vanilla And Sweeteners
Vanilla is a classic flavor that enhances the ice cream’s creaminess. Use pure vanilla extract or vanilla beans for a natural taste. Sweeteners balance the cold dessert’s texture and flavor. White sugar is common, but honey or maple syrup works well too.
Adjust sweetness to your liking. Start with less, then add more after tasting the mixture. Sweeteners dissolve best when added to warm milk before cooling. This process helps the flavors blend evenly throughout the ice cream.
Mix-ins And Variations
Mix-ins add texture and surprise to your ice cream. Nuts, chocolate chips, or fruit pieces bring different flavors and crunch. Fold these in at the last moment before freezing to keep their shape.
Try spices like cinnamon or nutmeg for a warm twist. Citrus zest brightens the flavor and adds freshness. Small amounts go a long way in enhancing the base.
- Chopped nuts for crunch
- Fresh or dried fruit pieces
- Chocolate chips or chunks
- Spices like cinnamon or nutmeg
- Citrus zest for brightness
Chilling The Mixture
Chill the mixture well to help it thicken and develop flavors. Cold mixture freezes better, making smoother ice cream. Keep it in the fridge for several hours or overnight.
Chilling the mixture is a vital step in making creamy ice cream. Proper chilling ensures a smooth texture. It prevents ice crystals from forming. This step requires patience and precision. Let’s explore how to chill your ice cream mixture effectively.Cooling Techniques
There are several ways to cool your mixture quickly. Use an ice bath. Fill a large bowl with ice and water. Place your ice cream mixture bowl inside. Stir occasionally. This method cools the mixture evenly. Another option is to refrigerate the mixture. Pour it into a shallow dish. Cover and place it in the fridge. This takes a bit longer. But it ensures gradual cooling.Importance Of Proper Chilling
Proper chilling is crucial for perfect ice cream. It helps achieve the desired creamy texture. If the mixture isn’t chilled well, ice crystals form. This results in a grainy texture. Chilling also enhances flavors. When the mixture rests, flavors meld together. This creates a richer taste. Always ensure your mixture is cold before churning. This sets the stage for delicious homemade ice cream.Freezing The Ice Cream
Freezing your homemade ice cream is the crucial step that turns a creamy mixture into the delightful frozen treat you crave. How you freeze it affects the texture and flavor, so choosing the right method matters. Whether you have an ice cream maker or not, you can still achieve a smooth, creamy dessert with a bit of patience and care.
Using An Ice Cream Maker
An ice cream maker is designed to churn your mixture while freezing it, which helps prevent large ice crystals from forming. This churning process is key to creating a smooth texture that feels rich and creamy in every bite.
To use your ice cream maker, first chill the mixture in the fridge for a few hours. This step makes freezing faster and improves texture. Pour the cold mixture into the machine and let it churn according to the manufacturer’s instructions—usually about 20 to 30 minutes.
If you’ve used an ice cream maker before, you know how rewarding it is to watch the mixture thicken and transform. If not, consider this: the constant movement is what keeps your ice cream from turning hard and icy. When the consistency looks like soft serve, transfer it to a freezer-safe container and freeze for a few hours to firm up.
No-machine Methods
No ice cream maker? No problem. You can still make delicious ice cream using just a few simple steps. The key is to freeze the mixture while stirring it regularly to break up ice crystals.
Pour your ice cream mixture into a shallow dish or bowl. Place it in the freezer and stir every 30 minutes. Use a fork or whisk to mix vigorously, scraping the edges and breaking up any forming ice crystals.
This method requires patience, but it’s surprisingly effective. After about 3 to 4 hours of freezing and stirring, you’ll get a creamy texture that’s close to what an ice cream maker produces. Have you tried this before? You might find the hands-on process quite satisfying and a fun way to connect with your dessert.
Serving Tips
Serving homemade ice cream made with milk and eggs offers a delightful experience. Presentation and storage play key roles in enjoying its fresh taste. Thoughtful serving tips enhance both flavor and appearance.
Presentation Ideas
- Use clear glass bowls to show off the creamy texture.
- Add fresh fruit like strawberries or blueberries on top.
- Sprinkle crushed nuts or chocolate chips for crunch.
- Serve with a wafer or cookie for extra appeal.
- Drizzle a little honey or caramel sauce for sweetness.
- Place a small mint leaf for a fresh look.
- Use colorful spoons or cups to make it fun for kids.
Storage And Shelf Life
Store ice cream in an airtight container to keep it fresh. Place a piece of plastic wrap directly on the surface before sealing. This reduces ice crystals and keeps texture smooth.
Keep the container in the coldest part of the freezer. Homemade ice cream lasts best for up to two weeks. Avoid refreezing melted ice cream to maintain quality.
Credit: fromthelarder.co.uk
Frequently Asked Questions
What Is The Role Of Eggs In Homemade Ice Cream?
Eggs provide richness and creaminess to ice cream. They also help stabilize the mixture and improve texture. Using eggs creates a smooth, custard-like base that enhances flavor and mouthfeel. This classic method results in a richer, more luxurious ice cream.
Can I Use Regular Milk Instead Of Heavy Cream?
Yes, you can use regular milk, but the texture may be lighter. Heavy cream adds fat, making ice cream creamier and smoother. Using only milk results in a less rich, more icy consistency. For best results, combine milk and cream.
How Do I Prevent Eggs From Curdling In Ice Cream?
To avoid curdling, slowly heat eggs with milk while whisking constantly. Temper eggs by gradually adding warm milk before cooking. Cook gently on low heat until mixture thickens. This ensures a smooth, creamy custard base without lumps or curdling.
How Long Should Homemade Ice Cream Be Churned?
Churn ice cream for about 20-30 minutes until it thickens and soft peaks form. Proper churning incorporates air, improving texture and creaminess. Over-churning can cause icy texture, so stop when the mixture reaches a soft-serve consistency.
Conclusion
Making ice cream with milk and eggs is simple and fun. You only need a few ingredients and some patience. The process lets you enjoy fresh, creamy ice cream at home. Try different flavors by adding fruits or vanilla. Homemade ice cream tastes better and has no extra preservatives.
It’s a great way to impress friends and family. Give it a try and enjoy your sweet, cold treat anytime. Easy, tasty, and rewarding. Why not start today?