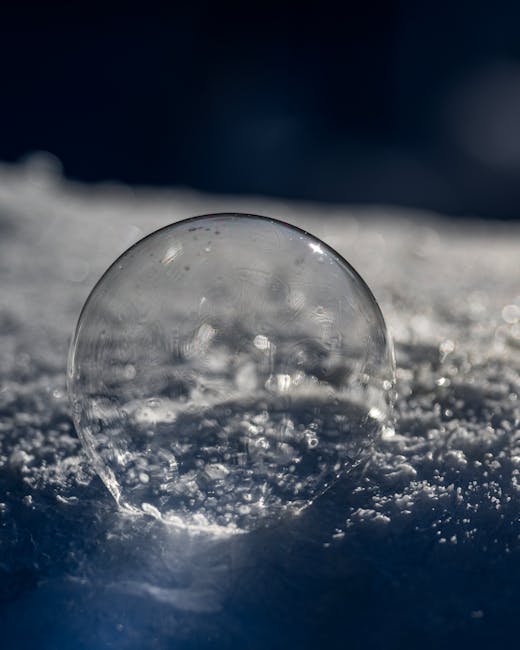
Have you ever noticed how most ice cubes look cloudy and dull? It’s frustrating when you want your drinks to look perfect, but those cloudy ice cubes just don’t cut it.
What if you could make your ice freeze clear, crystal-like, and impressive every time? You’ll discover simple tricks that anyone can use to achieve that perfect, clear ice. Whether you’re hosting friends or just want to enjoy your drink in style, this guide will help you turn ordinary water into stunning ice that looks as good as it tastes.
Keep reading, and you’ll soon be making clear ice like a pro.

Credit: www.hungryhuy.com
Why Ice Gets Cloudy
Have you ever noticed how ice from your freezer often looks cloudy instead of crystal clear? This common occurrence happens because of the way water freezes and what’s inside it. Understanding why ice gets cloudy can help you make ice cubes that look as pure as those served in high-end bars.
Air Bubbles And Impurities
One major reason ice turns cloudy is trapped air bubbles. As water freezes, the dissolved air is pushed out and gets caught inside the ice. These tiny bubbles scatter light, making the ice look white or cloudy instead of clear.
Impurities in your water also contribute to cloudiness. Minerals, dust, and other particles don’t freeze the same way as pure water. They get pushed to the center or edges of the ice cube, disrupting the uniform freezing process.
Freezing Speed Effects
The speed at which water freezes plays a big role in clarity. When water freezes quickly, it traps more air and impurities inside. This rapid process doesn’t give the air enough time to escape, leading to cloudy ice.
Slower freezing lets air escape and impurities settle before the water solidifies. This creates clearer ice with fewer trapped bubbles. Have you ever tried freezing water in a cooler inside your freezer? It slows down freezing and often results in much clearer ice cubes.

Credit: craftklaris.com
Choosing The Right Water
Choosing the right water is a crucial step to making clear ice. The quality and purity of the water you use directly affect the transparency of the ice cubes. Impurities and dissolved gases create cloudiness, so selecting and preparing your water carefully can make a noticeable difference.
Using Filtered Or Distilled Water
Filtered water removes many minerals and impurities that cause cloudiness. Distilled water goes even further by eliminating almost all dissolved solids. Using either type reduces particles that scatter light inside the ice, helping your ice freeze clear and bright.
Many people find that filtered water from a high-quality home filter works well and is easy to access. If you want the clearest ice possible, distilled water is the best choice but can be more expensive. Have you tried both? You might notice how much clearer ice looks after switching to distilled water.
Boiling Water For Clarity
Boiling water helps remove dissolved gases like oxygen, which create tiny bubbles during freezing and make ice look cloudy. Boil the water twice, letting it cool slightly between boils, for best results. This simple step dramatically improves the clarity of your ice cubes.
Once boiled, pour the water gently into your ice tray to avoid reintroducing air bubbles. You’ll see fewer cracks and less cloudiness in the finished ice. Have you ever noticed how freshly boiled water freezes differently than cold tap water? Try it yourself and compare the difference.
Freezing Techniques
Getting crystal-clear ice is about more than just freezing water. The way you freeze water affects the clarity of your ice cubes. Freezing techniques control how air bubbles and impurities get trapped, so mastering them can dramatically improve your results.
Directional Freezing Method
Directional freezing means cooling water from one direction only—usually from the top down. This forces impurities and air bubbles to move away from the freezing front, collecting at the bottom instead of being trapped inside the ice.
You can try this by filling a small cooler with water and placing it uncovered in your freezer. The cooler’s insulation slows freezing on the sides and bottom, so ice forms from the top down. After 24 hours, you’ll get a block of clear ice on top with cloudy, impurity-filled ice below.
Cut off the cloudy part at the bottom, and you have clear ice for your drinks. Have you noticed how this method mimics natural ice formation in lakes? It’s a simple trick that creates impressive results without fancy tools.
Using Insulated Containers
Insulated containers help control the freezing process by slowing down how quickly water freezes. Slower freezing means fewer air bubbles and less trapped impurities, which leads to clearer ice.
Use containers made from materials like silicone or thick plastic with lids. These containers keep the cold air from hitting the water evenly, encouraging ice to freeze directionally.
- Fill the container with boiled or distilled water for best clarity.
- Place it in the freezer without sealing it tightly to allow some air exchange.
- Remove the ice before it freezes solid to cut off cloudy portions.
This method lets you experiment with freezing times and container shapes. What shapes do you think would produce the clearest ice? Trying different options can be a fun way to learn how freezing speed and insulation work together.
Step-by-step Freezing Process
Freezing clear ice requires attention to detail and a slow, careful process. The goal is to reduce air bubbles and impurities that cause cloudiness. Following the right steps ensures your ice looks crystal clear and melts slowly in drinks.
Preparing The Water
Use pure, filtered water for the best results. Boil the water and let it cool before freezing. Boiling removes dissolved gases that cause bubbles. Pour the cooled water into a clean container. Use a container with straight sides for uniform ice blocks.
Setting Up The Freezer
Place the container in the freezer with the lid off. Keep the freezer temperature just below freezing, around 28°F (-2°C). This slows down freezing, allowing impurities to settle. Position the container so it freezes from the top down. This pushes air and impurities toward the bottom.
Removing And Storing Clear Ice
Once frozen, take the container out gently. Let it sit at room temperature for a few minutes. This loosens the ice from the container walls. Remove the clear ice block carefully. Cut away the cloudy part at the bottom. Store the clear ice in a sealed plastic bag or container. Keep it in the freezer until ready to use.
Tools And Equipment
Getting perfectly clear ice starts with the right tools and equipment. The quality of your ice depends heavily on how you freeze it, and having the proper gear can make a noticeable difference. Let’s look at some essentials that help you achieve crystal-clear cubes in your drinks.
Ice Molds For Clear Cubes
Not all ice molds are created equal when aiming for clear ice. Look for molds made of silicone or plastic that allow slow, directional freezing. This process pushes air and impurities away from the center, leaving the ice transparent.
Some molds come with lids to prevent dust or odors from affecting your ice. You might find molds shaped for whiskey glasses or large cubes that melt slower and look impressive. Have you tried experimenting with different shapes? It can change both the look and the way your ice chills your drink.
Coolers And Insulated Boxes
Using a small cooler or insulated box inside your freezer is a simple trick to control how your ice freezes. The cooler slows the freezing process and directs it from the top down, which helps clear ice form by forcing bubbles and impurities out.
I once used a small lunch cooler to freeze water, and the cubes were noticeably clearer than those frozen directly on freezer shelves. This method doesn’t require special equipment—just a cooler you already have at home. What kind of containers do you have that could double as an insulated box?
Troubleshooting Common Issues
Creating clear ice can be tricky. Sometimes, unexpected issues arise during the freezing process. Understanding these problems helps in achieving perfect clarity. Let’s explore some common challenges and solutions.
Dealing With Cracks And Bubbles
Cracks and bubbles are common in homemade ice. Use filtered or distilled water. This reduces impurities that cause cloudiness. Freeze the water slowly. A slow freeze allows air to escape. Insulate the sides of your container. This directs freezing from top to bottom. Avoid disturbing the ice while it freezes. Movement can introduce cracks and bubbles.
Maintaining Clarity Over Time
Clear ice can lose its clarity over time. Store your ice in a sealed container. This prevents exposure to odors and air. Do not store ice near strong-smelling foods. Odors can seep into the ice. Use your ice within a few days. This ensures it remains clear and fresh. Avoid stacking ice cubes too tightly. This can cause them to stick and crack.
Creative Uses For Clear Ice
Clear ice isn’t just about aesthetics; it opens up a world of creative possibilities that can elevate your drinks and dishes. Once you master making ice freeze clear, you’ll want to show it off in ways that make your guests pause and appreciate the little details. Clear ice can be a subtle yet powerful addition to your kitchen and bar, adding a touch of sophistication and enhancing the overall experience.
Cocktails And Beverages
Clear ice melts slower than cloudy ice, which means your drinks stay cold without getting watered down quickly. This is perfect for cocktails that rely on balance and subtle flavors, like an Old Fashioned or a Negroni.
Try using large clear ice cubes or spheres to keep your drink chilled and looking sharp. You can even freeze herbs, citrus peels, or edible flowers inside the ice for a stunning visual twist.
Have you ever noticed how a drink with clear ice just looks more inviting? It’s not just your imagination—clear ice can make colors pop and give your beverage a crystal-clear appearance that’s hard to beat.
Food Presentation Ideas
Clear ice is great for more than just drinks. Use it to create eye-catching food presentations, especially for seafood or desserts that benefit from staying chilled.
For example, display fresh oysters or sushi on a bed of clear ice cubes to keep them fresh and add an elegant touch. It makes the dish look professional and ensures the food stays at the perfect temperature.
You can also use clear ice trays to freeze flavored liquids or edible flowers, then place these cubes on serving platters to surprise your guests with both taste and appearance.
What’s your favorite way to impress guests with food or drinks? Clear ice might just be the secret ingredient you didn’t know you needed.

Credit: www.hungryhuy.com
Frequently Asked Questions
How Do You Make Ice Cubes Freeze Clear?
To make clear ice cubes, boil water first to remove air bubbles. Then freeze it slowly in a cooler or insulated container to avoid cloudiness.
Why Is My Ice Cloudy Instead Of Clear?
Cloudy ice forms from trapped air and impurities. Using boiled or filtered water and freezing it slowly reduces cloudiness.
What Water Type Is Best For Clear Ice?
Filtered or distilled water is best. It contains fewer impurities and gases, which helps ice freeze clear and transparent.
Can Freezing Ice Slowly Improve Clarity?
Yes, freezing ice slowly pushes air bubbles out. Using an insulated container or directional freezing method helps create clearer ice.
Conclusion
Clear ice makes drinks look better and taste fresher. Use pure water and slow freezing for best results. Remove air bubbles to avoid cloudy ice. Simple steps create beautiful, clear ice cubes at home. Enjoy clearer ice in your drinks anytime you want.
Practice a few times, and you will improve quickly. Clear ice adds a special touch to every beverage.