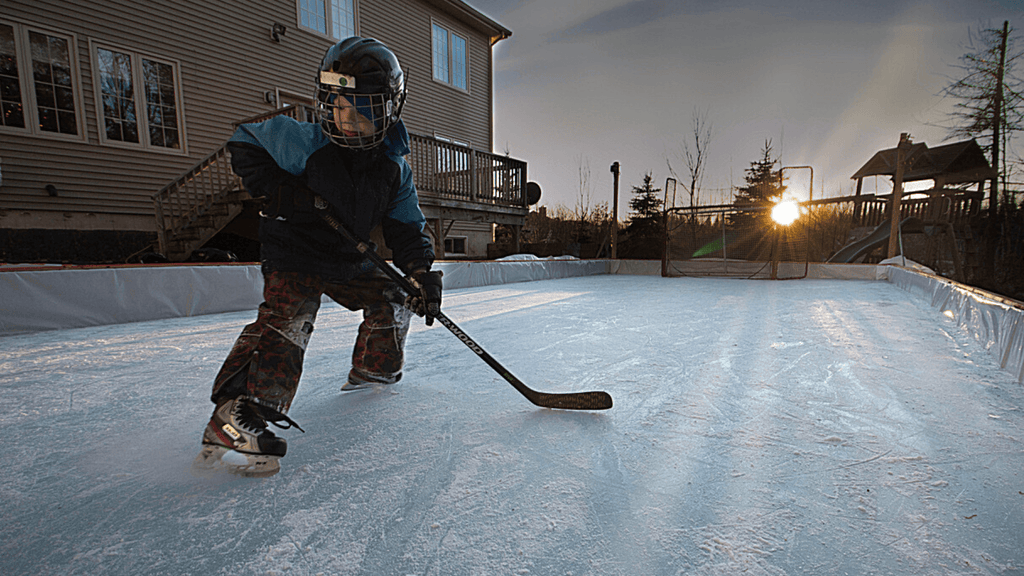
Have you ever dreamed of having your own ice rink right at home? Imagine gliding smoothly on fresh ice whenever you want, without leaving your yard.
Making your own ice rink might sound tricky, but with the right steps, it’s easier than you think. In this guide, you’ll discover simple tips and tricks to build a safe, fun ice rink that’s perfect for you and your family.
Keep reading, and soon you’ll be creating unforgettable winter memories just steps from your door.
Credit: downbeach.com
Choosing The Right Location
Choosing the right location is crucial for building a successful ice rink. The spot you pick affects the rink’s durability, ice quality, and how much you’ll enjoy skating. Let’s dive into the key factors to help you find the perfect place.
Assessing Space And Terrain
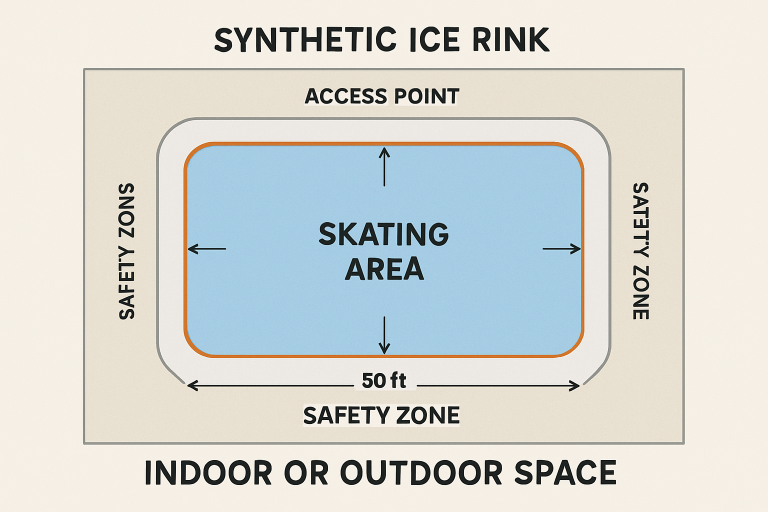
Start by measuring the available space. You want enough room not just for the rink itself but also for safety zones around it. Flat terrain is a big plus because it makes flooding and leveling much easier.
If your ground slopes, can you level it without too much work? Uneven terrain leads to thin ice in some spots and puddles in others. That ruins the skating experience quickly.
Considering Sunlight And Shade
Look at how sunlight hits your chosen spot during the day. Direct sun can melt your ice fast, turning your rink into a skating puddle by afternoon. Shade helps keep the ice solid longer, especially if the rink is outdoors.
Does the location get morning sun but afternoon shade? That’s often ideal, giving you early warmth without overheating the ice later. Think about nearby trees or buildings that might block the sun.
Checking Local Climate Conditions
What’s the typical temperature range where you live? Ice needs consistently cold weather to stay frozen without constant refreezing. If your winters are mild, you might need extra equipment or insulation to keep the rink solid.
Also, consider wind and precipitation. Strong winds can dry out or damage the ice, while heavy snow means more shoveling and maintenance. How often are you ready to manage these challenges?
Gathering Materials And Tools
Gathering the right materials and tools is the foundation of creating a smooth, reliable ice rink. Skipping this step can lead to frustration and extra work down the line. Think about what you’ll need before you start digging or spreading water—this saves time and ensures your rink holds up through the season.
Selecting The Best Liner
The liner is the heart of your ice rink. It holds the water in place and forms the ice surface, so choose it carefully. Look for heavy-duty polyethylene liners that are at least 10 mil thick to prevent leaks and tears.
Consider the size of your rink and add extra material for overlap and securing edges. Some liners come with UV protection, which helps prevent cracking if your rink is in direct sunlight. Have you thought about how your liner will handle uneven ground or sharp objects? Padding underneath can make a big difference.
Essential Tools For Setup
- Shovel and Rake:For leveling the ground and removing debris.
- Measuring Tape:To mark the rink dimensions accurately.
- Utility Knife or Scissors:To trim the liner to fit.
- Water Source and Hose:A reliable way to fill your rink evenly.
- Wooden Boards or Pipes:To create a sturdy frame around the rink.
- Level:Ensures your rink surface is flat for even ice.
Having these tools ready before you start will keep your project moving smoothly. What tools do you already have at hand, and which ones will you need to pick up?
Optional Accessories For Maintenance
Keeping your ice rink in top shape requires a few extras that make maintenance easier. Consider investing in an ice resurfacer or a simple hand scraper to smooth out rough spots. Even a large, flat board attached to a handle can help you manage the ice surface.
Covering your rink with a tarp when not in use protects it from snow and debris. You might also want to use a water pump or buckets to help with flooding if you want to build up a thicker ice layer. These accessories aren’t essential but can save you effort and keep your rink safer and more enjoyable.
Preparing The Ground
Preparing the ground is the foundation of a successful ice rink. Without a properly prepared surface, your ice won’t freeze evenly or last long. Taking the time to clear, level, and protect the area ensures a smooth skating experience and saves you from headaches down the line.
Clearing And Leveling The Surface
Start by removing all debris like rocks, sticks, and leaves from your chosen spot. A clean surface prevents bumps and holes in the ice.
Next, check the ground for any uneven areas. Use a rake or shovel to fill low spots and knock down high spots until the surface is flat.
Have you ever tried skating on a bumpy rink? It’s frustrating and can be unsafe. Level ground means safer and more enjoyable skating for everyone.
Creating Borders And Barriers
Setting up borders helps contain the water as it freezes and defines the rink’s shape. You can use wood planks, plastic boards, or even inflatable barriers.
Make sure your borders are sturdy and firmly anchored to avoid shifting during freezing or use.
Think about the size and shape you want. Do you want a small family rink or a larger area for friends? Proper barriers keep your ice rink neat and functional.
Ensuring Proper Drainage
Water pooling under or around your rink can ruin your ice quickly. Check if the ground slopes away from your rink area to prevent water buildup.
If natural drainage is poor, consider digging small channels or installing a simple drainage pipe to divert excess water.
Have you noticed puddles forming after a snowfall? Fixing drainage issues before flooding happens keeps your ice solid and ready to skate on.
Installing The Liner
Carefully spread the liner over the rink area, making sure it lies flat without wrinkles. Secure the edges firmly to prevent shifting during freezing. Proper liner installation keeps water contained and creates a smooth ice surface.
Installing the liner is a crucial step in creating a durable and efficient ice rink. It acts as a barrier between the ground and the water, helping to maintain the ice’s integrity. A well-installed liner ensures a smooth skating experience and prolongs the life of your rink.Spreading And Securing The Liner
Begin by unrolling the liner across the rink’s base. Ensure it covers the entire area, with some excess on the edges for securing. If you’ve ever wrapped a present, you’ll understand the importance of keeping the liner flat and wrinkle-free. Use clips or stakes to secure the liner’s edges. The trick is to keep it taut without overstretching, preventing it from shifting as water is added. Do you remember pinning a poster on your wall? It’s a similar process, ensuring a snug fit.Fixing Wrinkles And Gaps
Wrinkles in the liner can cause uneven ice surfaces, which are not fun for skaters. As you spread the liner, use a broom to gently smooth out any wrinkles. Think of it as ironing clothes; the smoother the surface, the better the outcome. Gaps can lead to water leakage, so fill them by adjusting the liner. Ensuring a tight fit around the edges is key. Picture zipping up a jacket; it needs to be seamless to keep the cold out.Testing For Leaks
Before filling the rink with water, conduct a thorough leak check. Slowly add a small amount of water and observe any areas where water might escape. It’s a bit like checking for a flat tire; you need to find the issue before it becomes a bigger problem. Patch any leaks immediately using liner repair tape or patches. This proactive approach saves time and resources in the long run. How often do we wish we caught a problem early on? Here’s your chance to do just that with your ice rink.Filling With Water
Filling your ice rink with water is a crucial step that sets the stage for a smooth, durable ice surface. The quality of the ice depends largely on how you manage this process. Paying attention to water depth, filling techniques, and temperature control can save you time and frustration later.
Optimal Water Depth
Getting the water depth right makes a huge difference in how well your rink freezes and holds up. Aim for about 1 to 2 inches of water per layer when building your ice. Thinner layers freeze faster and reduce the risk of cracking.
Multiple thin layers also create a clearer, harder surface. Think about how you feel walking on ice that’s too thin—it’s unstable and unsafe. Maintaining the right depth ensures a solid foundation for skating.
Filling Techniques
How you fill your rink impacts the smoothness and evenness of the ice. Pour water slowly and evenly across the surface to avoid pooling. Using a hose with a spray nozzle or a watering can helps distribute water gently.
Try to fill the rink in sections rather than all at once. This method allows each part to settle and freeze properly before adding more water. Have you noticed how rushing water in one spot causes uneven ice? Avoid that by pacing your filling process.
Managing Water Temperature
The temperature of the water you use directly affects freezing time and ice quality. Use cold water if possible; it freezes faster and creates clearer ice. Warm water can cause slow freezing and cloudy patches.
In my experience, using water straight from a cold outdoor source made a noticeable difference. If you can’t access cold water, consider storing your water in a shaded or cool place before filling. This simple step can improve your rink’s surface dramatically.
Credit: www.ice-world.com
Freezing Process
Creating a smooth ice rink begins with the freezing process. This step turns water into solid ice, forming a safe and fun skating surface. Understanding how to control freezing helps build strong, clear ice. It also reduces cracks and bumps that can spoil the skating experience.
Ideal Weather Conditions
Cold temperatures are essential for freezing water quickly. The best temperature is below 20°F (-6°C). Clear skies help because sunlight can warm the surface. Calm wind keeps the ice smooth by preventing debris from falling on it. Avoid freezing during rain or snow, which can weaken the ice.
Monitoring Ice Formation
Check the ice thickness regularly. Safe ice should be at least 4 inches thick for skating. Use an ice auger or a long stick to test. Look for cracks or soft spots. Remove snow often to let cold air reach the ice. Watch for uneven freezing and fix it by adding water to low areas.
Speeding Up The Freeze
Use cold water to start the rink faster. Cold water freezes quicker than warm water. Spray thin layers of water instead of one deep layer. This builds ice gradually and evenly. Shade the rink to keep it cool during the day. Use fans to blow cold air over the surface at night.
Maintaining The Ice Surface
Maintaining the ice surface is key to a safe and smooth skating experience. A well-kept rink lasts longer and feels better to skate on. It also prevents accidents and keeps the ice looking fresh. Regular care helps avoid major repairs and saves time.
Regular Cleaning Tips
Keep the ice clean by removing debris and dirt daily. Use a soft broom or a specialized ice scraper. Avoid sharp tools that can damage the surface. Clear the edges where snow and ice chips collect. Clean water pools quickly to stop freezing bumps.
Repairing Cracks And Rough Spots
Fix cracks as soon as you see them to prevent growth. Use warm water to fill small cracks and smooth the surface. For bigger rough spots, shave the ice gently with a scraper. Apply thin layers of water to rebuild damaged areas. Let each layer freeze fully before adding more.
Preparing For Skating
Before skaters arrive, make sure the ice is level and smooth. Spray a thin mist of water to fill tiny holes. Use a resurfacer or a hand tool to polish the ice. Check temperature and ice thickness for safety. Clear the area of any leftover snow or ice chunks.
Safety Measures
Creating an ice rink requires strong safety measures. Ice can be dangerous if not handled properly. Taking steps to protect everyone is very important. Focus on ice thickness, barriers, and emergency plans. Each part helps keep skaters safe and prevents accidents.
Checking Ice Thickness
Ice thickness is the first safety check. Thin ice can break easily. Measure ice with an ice auger or drill. The ice should be at least 4 inches thick for walking or skating. For groups or heavier use, aim for 5 to 6 inches. Always check ice thickness regularly. Avoid skating on cloudy or soft ice. Clear, solid ice is the safest.
Setting Up Safety Barriers
Barriers protect skaters from falling off edges. Use strong materials like wood or plastic boards. Place barriers around the rink perimeter. Make sure barriers are high enough to stop falls. Mark entrances and exits clearly. Barriers help control where skaters go. They also keep spectators safe from the ice surface.
Emergency Preparedness
Prepare for emergencies before opening the rink. Have a first aid kit nearby. Keep safety ropes and life jackets handy. Train helpers in basic rescue skills. Set clear rules about safe skating. Display emergency contact numbers visibly. Quick response can save lives in accidents. Regularly review and update emergency plans.

Credit: www.polyglidesyntheticice.com
Frequently Asked Questions
How Do You Prepare The Ground For An Ice Rink?
Clear and level the area, removing debris and grass. Compact the soil to create a smooth, firm base. Lay a waterproof liner to prevent water seepage and protect the surface beneath the rink.
What Materials Are Needed To Make An Ice Rink?
You need a waterproof liner, wood or metal boards for the frame, water, a hose, and a freezing environment. Optional tools include a shovel, level, and ice resurfacer for maintenance.
How Long Does It Take To Freeze An Ice Rink?
Freezing time depends on temperature and water depth. Typically, it takes 24 to 48 hours of consistent freezing below 20°F (-6°C) to form solid ice suitable for skating.
How Do You Maintain The Ice Rink During Winter?
Regularly remove snow and debris to keep the surface smooth. Use water to fill cracks and resurface the ice. Maintain cold temperatures to prevent melting and weakening of the ice.
Conclusion
Creating an ice rink can be fun and rewarding. Start with a flat surface and keep water cold. Use simple tools and follow the steps carefully. Regularly check the ice to stay safe. Enjoy skating with friends and family once it’s ready.
Small efforts bring great results. Everyone can make their own ice rink at home. Try it this winter and see the joy it brings.