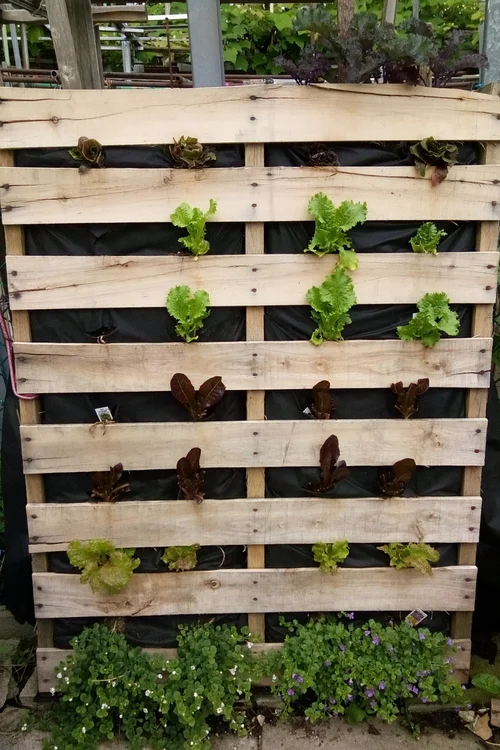
Are you looking for a creative way to add charm to your garden or balcony without spending a fortune? Making pallet planters is a simple, fun project that you can easily do yourself.
Imagine turning old wooden pallets into beautiful, rustic homes for your favorite plants. Not only will you save money, but you’ll also give your space a unique, personalized touch. In this guide, you’ll discover step-by-step how to transform pallets into stunning planters that will brighten up any corner.
Ready to get your hands dirty and create something amazing? Let’s dive in!
Choosing The Right Pallet
Making pallet planters starts with picking the right pallet. The right pallet gives your planter a good base and lasts long.
Look closely at the pallet type, size, and safety before you start building your planter.
Types Of Pallets
Pallets come in different materials and styles. Wood pallets are the most common for planters. Plastic and metal pallets exist but are less popular for gardening.
- Wooden pallets:Easy to find and work with. They offer a natural look.
- Plastic pallets:Lightweight and water-resistant but less sturdy.
- Metal pallets:Very strong but can rust and are hard to cut.
Checking For Safety
Safety is key when choosing pallets for your planter. Some pallets carry chemicals or bacteria that harm plants or people.
| Safety Check | What to Look For | Reason |
|---|---|---|
| Stamp Markings | Look for “HT” (heat treated) stamp | Safe; no chemicals used |
| Avoid | Palettes with “MB” (methyl bromide) stamp | Contains harmful pesticide |
| Wood Condition | Check for mold, rot, or cracks | Unstable and unsafe |
| Nails and Splinters | Ensure no sharp or loose nails | Prevents injury |
Selecting The Size
Choose a pallet size that fits your planting space. Small pallets work well for balconies. Larger pallets suit garden beds.
- Measure your space before picking a pallet.
- Consider the depth for plant roots.
- Think about the planter height for easy care.

Credit: www.youtube.com
Gathering Tools And Materials
Making pallet planters is a fun and creative project. Before starting, you need to gather all tools and materials. Having everything ready helps your work go smoothly.
This guide will help you find the essential tools, extra supplies, and safety gear needed for the job.
Essential Tools
Essential tools help you cut, assemble, and finish your pallet planter. These tools make the work easier and more precise.
- Saw – for cutting the pallet wood to size
- Hammer – to drive nails or remove old ones
- Drill – for making holes and driving screws
- Screwdriver – to tighten screws securely
- Measuring tape – to measure wood pieces accurately
- Sandpaper or electric sander – to smooth rough edges
Additional Supplies
Besides tools, you will need some extra supplies to build and decorate your pallet planter. These help protect the wood and keep plants healthy.
- Wood screws or nails – to join the wood parts
- Wood stain or paint – to protect and beautify the wood
- Plastic liner – to prevent soil from damaging the wood
- Potting soil – to fill your planter
- Plants or seeds – to grow in your planter
- Wood glue – for extra hold on small parts
Safety Gear
Safety gear protects you during the project. It helps avoid injuries while working with tools and wood.
- Gloves – to protect your hands from splinters and cuts
- Safety glasses – to shield your eyes from dust and wood chips
- Dust mask – to avoid breathing sawdust
- Ear protection – to reduce noise from power tools
Preparing The Pallet
Creating pallet planters is a fun and eco-friendly project. The first step is preparing your pallet for use. This ensures your planter is safe and looks great.
Let’s go through the steps to get your pallet ready. We’ll clean, sand, disassemble if necessary, and treat the wood.
Cleaning And Sanding
Start by cleaning the pallet with water and soap. Remove any dirt or debris. This makes the surface smooth and ready for sanding.
Use sandpaper to smooth the wood. Sanding prevents splinters and helps the wood look nicer. Pay special attention to rough spots.
Disassembling If Needed
Some pallets need to be taken apart before use. Use a crowbar or a hammer to remove nails. Be careful not to damage the wood.
Check if your design needs full or partial planks. Disassemble only if it’s necessary for your planter design.
Treating The Wood
Treat the wood to protect it from weather and pests. Use a non-toxic wood sealant for safety. Apply it evenly and let it dry completely.
This step ensures your planter lasts longer. It also makes the wood look better.
Designing Your Planter
Designing a pallet planter is a fun way to add greenery to your space. You can create a planter that fits your style and needs.
Think about the size, shape, and how you want to use the planter before you start building.
Planter Styles
There are many styles for pallet planters. Choose one that matches your space and plants.
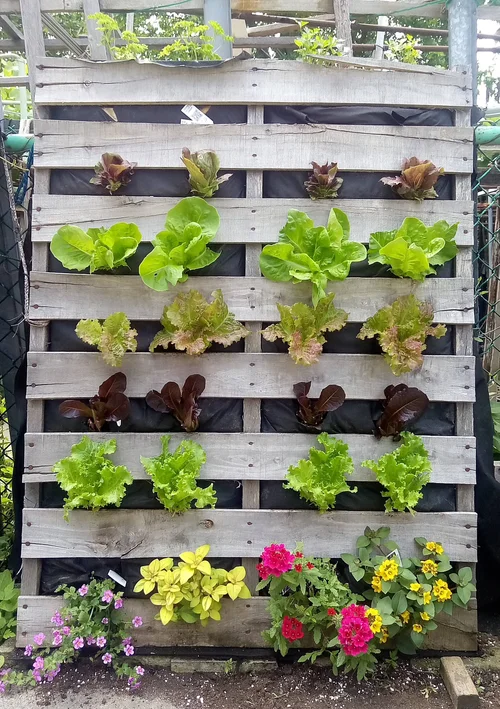
- Vertical planters save space and look modern
- Box planters are good for flowers or vegetables
- Tiered planters show off many plants at once
- Hanging planters add a unique touch
Measuring And Marking
Measure your pallet carefully before cutting. Mark the wood to guide your cuts.
Use a tape measure and pencil. Double-check measurements for accuracy.
- Measure the height, width, and depth of your planter
- Mark where you will cut or join pieces
- Plan spaces for drainage holes if needed
Customization Ideas
Make your planter unique with simple custom touches. These ideas add style and function.
- Paint or stain the wood for color and protection
- Add hooks or shelves for extra plant space
- Use different pallet wood patterns for texture
- Attach wheels to move the planter easily
Building The Pallet Planter
Building a pallet planter is a fun and easy project. It lets you reuse wood and create a space for your plants.
This guide helps you build the pallet planter step by step. You will learn how to make a strong frame and add planter boxes.
Assembling The Frame
Start by choosing a sturdy pallet. Check for strong wood and no loose nails. This will be the base of your planter.
Use a saw to cut the pallet to the size you want. Sand the edges to avoid splinters. Then, join pieces using screws for extra support.
- Select a pallet with no cracks or damage
- Cut to desired width and height
- Smooth edges with sandpaper
- Use screws to join loose parts
Adding Planter Boxes
Create planter boxes from wooden boards that fit inside the frame. Make sure they are deep enough for your plants’ roots.
Attach the boxes securely to the frame using nails or screws. Leave space between the boxes for water drainage and air flow.
- Cut boards to fit inside the frame
- Build boxes with four sides and a bottom
- Fix boxes inside the frame with screws
- Ensure small gaps for drainage
Securing The Structure
Check all screws and nails to make sure the structure is stable. Add corner braces if needed for extra strength.
Place the planter on a flat surface. You can also attach legs or wheels to make it easier to move.
- Tighten all screws and nails
- Add corner braces for support
- Set planter on even ground
- Optional: add legs or wheels

Credit: www.redhousegarden.com
Finishing Touches
After building your pallet planter, it is important to add finishing touches. These make your planter last longer and look better. Finishing also protects the wood from weather damage.
You can paint, stain, waterproof, or add decorations. Each step improves your planter’s style and durability.
Painting And Staining
Painting or staining your pallet planter adds color and protects the wood. Paint covers the wood completely. Stain soaks into the wood and shows the grain.
Choose outdoor paint or stain for long-lasting results. Apply at least two coats for good coverage. Let each coat dry fully before adding the next.
- Use a brush or spray for even coverage
- Wear gloves to keep hands clean
- Work in a well-ventilated area
Waterproofing
Waterproofing protects your planter from rain and moisture. This helps prevent wood rot and damage. Use a clear waterproof sealant made for outdoor wood.
Apply sealant after painting or staining. Use a brush to cover all surfaces well. Let the sealant dry completely before using the planter.
- Seal edges and corners carefully
- Reapply sealant every year
- Choose a non-toxic sealant for plants
Decorative Elements
Adding decorations makes your pallet planter unique. You can use paint designs, stencils, or attach small items. Flowers, stones, or signs add charm and personality.
Make sure decorations do not block drainage. Use weather-proof materials to keep decorations looking good outside.
- Paint patterns or shapes on the wood
- Attach small metal or wooden signs
- Glue pebbles or shells for texture
- Add small hooks for hanging tools
Planting And Placement
Pallet planters add charm to gardens and patios. Choosing the right plants and placing them well is key.
This guide covers choosing plants, filling and arranging, and picking the best locations for display.
Choosing Plants
Select plants that fit the size and depth of your pallet planter. Use hardy varieties for better growth.
- Succulents work well for shallow pallets
- Herbs like basil and thyme grow nicely
- Small flowers add color and charm
- Choose drought-tolerant plants for less watering
Filling And Arranging
Fill the pallet planter with good soil and arrange plants for healthy growth and beauty.
| Material | Purpose |
|---|---|
| Potting soil | Provides nutrients and drainage |
| Gravel | Prevents waterlogging at the bottom |
| Landscape fabric | Keeps soil inside the pallet |
Place taller plants at the back or top. Smaller plants go in front or lower areas.
Best Locations For Display
Choose spots that match your plants’ light and temperature needs. Proper placement helps plants thrive.
- Sunny patios suit sun-loving plants
- Shaded balconies work for shade plants
- Near windows for indoor pallet planters
- Keep away from strong winds
Credit: www.littlewoollylamb.com
Maintenance Tips
Taking care of pallet planters helps them last longer. Good maintenance keeps plants healthy and wood strong.
Follow simple steps to protect your pallet planter from damage and weather effects.
Watering Advice
Water your plants regularly to keep soil moist but not soggy. Check soil with your finger before watering.
Use a watering can or hose with a gentle spray to avoid washing away soil. Water early in the morning or late afternoon.
- Water when top inch of soil feels dry
- Use gentle watering to protect roots
- Water in cooler parts of the day
Preventing Wood Damage
Wood can rot or crack if exposed to too much moisture or sun. Seal the wood with a weatherproof finish to protect it.
Keep the planter off wet ground using small blocks or feet. Check for signs of damage regularly and fix small cracks quickly.
- Apply a wood sealant before planting
- Raise planter slightly to avoid water pooling
- Repair cracks or splinters early
Seasonal Care
Prepare your pallet planter for different seasons to keep it in good shape. Move it to a sheltered spot during heavy rain or snow.
Clean out old soil and dead plants at the end of each season. Add fresh soil and check the wood for damage before replanting.
- Move planter indoors or cover in winter
- Remove dead plants and old soil regularly
- Inspect wood and reseal if needed
Frequently Asked Questions
What Materials Do I Need To Make Pallet Planters?
You need wooden pallets, a saw, nails, sandpaper, paint or sealant, and soil. Also, gather plants suitable for planters. Safety gear like gloves is recommended.
How Do I Prepare A Pallet For Planting?
First, sand the pallet to remove splinters. Then, reinforce weak areas. Apply sealant to protect wood from moisture. Finally, add a plastic lining to retain soil.
Can Pallet Planters Be Used Indoors?
Yes, pallet planters work indoors if lined properly. Use a plastic liner to prevent water damage. Choose plants suited for indoor light conditions.
How Long Do Pallet Planters Last Outdoors?
With proper sealing and maintenance, pallet planters last 2-3 years outdoors. Regularly check for rot and repaint or reseal annually to extend lifespan.
Conclusion
Creating pallet planters brings fun and life to any space. You can reuse old pallets and add green beauty. These planters suit gardens, balconies, or patios well. Start with simple steps and build your confidence. Each planter will show your personal style clearly.
Enjoy watching your plants grow in these unique homes. Try making one today and see the joy it brings!