
Are you tired of bending down every time you use your washer and dryer? Imagine making your laundry routine easier and more comfortable with just a simple addition.
Building pedestals for your washer and dryer not only saves your back but also adds extra storage space for your laundry essentials. In this guide, you’ll discover easy steps to create sturdy, stylish pedestals that fit your machines perfectly. Ready to transform your laundry area and make your chores less of a hassle?
Keep reading to learn how you can do it yourself without spending a fortune.
Benefits Of Washer And Dryer Pedestals
Raising your washer and dryer on pedestals can make laundry easier. It helps reduce bending and stretching.
Pedestals also add extra space and improve the stability of your machines.
Improved Ergonomics
Pedestals lift your washer and dryer to a comfortable height. This reduces strain on your back and knees. You can load and unload clothes without bending too much.
Additional Storage Space
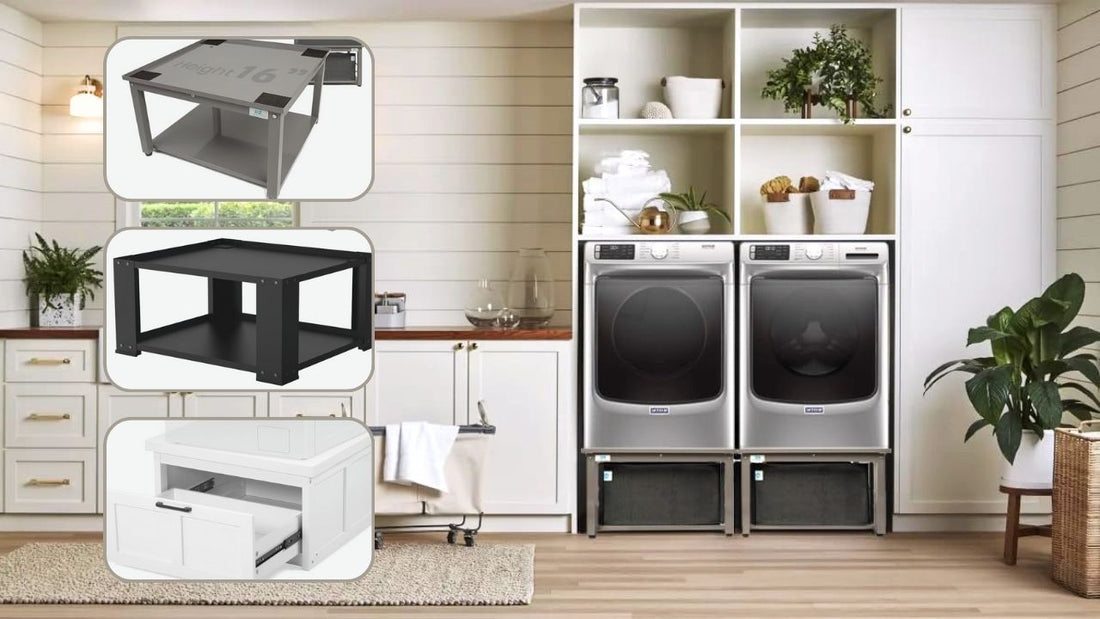
Many pedestals come with built-in drawers. These drawers create extra storage for laundry supplies.
- Store detergent and fabric softener
- Keep dryer sheets close at hand
- Organize small laundry tools
Enhanced Appliance Stability
Pedestals add a strong base for your washer and dryer. This helps reduce vibrations and shaking during use.
| Benefit | Effect |
| Reduced Vibration | Less noise and movement |
| Stronger Support | Appliances stay steady |
| Longer Appliance Life | Less wear and tear |

Credit: www.reddit.com
Materials And Tools Needed
Building pedestals for your washer and dryer helps raise them to a comfortable height. This makes loading and unloading easier. It also creates extra storage space underneath.
Before you start, gather all the materials and tools you will need. This will make your project smooth and safe.
Essential Materials
You need strong, durable materials to build sturdy pedestals. These materials should support the weight of your washer and dryer safely.
- 3/4 inch plywood sheets for the frame and top
- 1×4 or 1×6 lumber for framing support
- Wood screws, 1 1/4 inch and 2 1/2 inch sizes
- Wood glue for extra bonding strength
- Sandpaper, medium and fine grit for smooth edges
- Primer and paint or wood stain for finishing
- Rubber or foam pads to reduce vibration
Required Tools
You will also need some basic tools to cut, assemble, and finish the pedestals. Make sure all tools are in good condition.
| Tool | Purpose |
| Measuring tape | Measure dimensions accurately |
| Circular saw or table saw | Cut plywood and lumber |
| Electric drill | Drill holes and drive screws |
| Screwdriver bits | Fit the wood screws |
| Clamps | Hold pieces together while gluing |
| Sandpaper or power sander | Smooth edges and surfaces |
| Paintbrush or roller | Apply paint or stain |
| Safety gear (gloves, goggles) | Protect yourself during work |
Measuring Your Appliances
Before making pedestals for your washer and dryer, measure the appliances carefully. Accurate measurements help build the right pedestal size.
Good measurements ensure your appliances sit securely on the pedestals. This makes loading and unloading easier and safer.
Determining Pedestal Height
Decide how high you want your washer and dryer to sit. The pedestal height affects comfort and space under the appliances.
Common pedestal heights range from 12 to 18 inches. Choose a height that fits your washing area and your needs.
- Measure the distance you want between the floor and appliance bottom.
- Consider if you want storage space inside the pedestal.
- Make sure the height allows easy access to controls and doors.
Checking Washer And Dryer Dimensions
Measure the width, depth, and height of both appliances. This helps make pedestals that fit well and hold the weight safely.
Write down the exact measurements of each machine. Compare them to avoid making pedestals that are too small or too big.
| Appliance | Width (inches) | Depth (inches) | Height (inches) |
|---|---|---|---|
| Washer | Measure side to side | Measure front to back | Measure bottom to top |
| Dryer | Measure side to side | Measure front to back | Measure bottom to top |
Credit: www.ezlaundry.co
Cutting And Preparing Wood
Cutting and preparing wood is an essential step in building a sturdy washer and dryer pedestal. It requires careful planning and execution to achieve a smooth finish.
Selecting Wood Type
When selecting wood for your washer and dryer pedestal, consider the type of wood that is durable and resistant to moisture. Some popular options include:
- Oak
- Maple
- Cherry
It’s essential to choose wood that can withstand the weight and moisture of the washer and dryer.
Cutting Panels To Size
Cutting panels to size requires careful measurement and precision cutting to avoid errors.
- Measure the dimensions of the washer and dryer to determine the required panel size.
- Use a miter saw or circular saw to cut the panels to size.
- Check the cuts for accuracy and make adjustments as needed.
It’s crucial to cut the panels accurately to ensure a proper fit and a smooth finish.
Sanding For Smooth Finish
Sanding is an essential step in preparing the wood for finishing. It helps to smooth out any imperfections and creates a surface for staining or painting.
| Sanding Grade | Description |
| 80-grit | Coarse sanding for rough wood |
| 120-grit | Medium sanding for smoothing wood |
| 220-grit | Fine sanding for final smoothing |
Use a sanding block or sandpaper to achieve a smooth finish.
Assembling The Pedestal Frame
Making a pedestal frame for your washer and dryer lifts them for easier access. This project needs basic tools and wood. Follow simple steps to build a strong frame.
Start by measuring your appliances. This helps you cut the wood to the right size. A sturdy frame keeps your washer and dryer safe.
Building The Base
The base holds the entire pedestal and supports the weight. Use thick wood boards for a strong foundation. Cut the boards to fit the width and depth of your washer and dryer.
Attach the boards together to form a rectangle. Make sure the corners are square. This helps the pedestal stay stable and level.
- Use 2×6 or 2×8 lumber for the base
- Cut two long pieces for the sides
- Cut two shorter pieces for the front and back
- Join the pieces with wood screws or nails
- Check corners with a carpenter’s square
Attaching Side Panels
Side panels add strength and give the pedestal a finished look. Use plywood or similar wood sheets cut to the height and depth of the base. Attach them to the sides with screws.
Make sure the panels fit flush with the base. This keeps the pedestal sturdy and neat. Sand the edges for a smooth finish.
- Cut two side panels to the base height
- Align panels with the base edges
- Secure panels using wood screws every 6-8 inches
- Sand edges to avoid splinters
Reinforcing The Structure
Reinforce the pedestal to hold heavy washers and dryers safely. Add support beams inside the frame. These beams stop the pedestal from wobbling or bending.
Use corner braces or metal brackets for extra strength. Attach these at the corners and where the base meets the side panels. This keeps the pedestal solid during use.
- Place 2×4 support beams inside the base frame
- Install corner braces at all four corners
- Secure brackets with screws for tight fit
- Double-check stability before placing appliances
Adding Storage Features
When renovating your laundry room, consider adding storage features to keep your washer and dryer organized and clutter-free. This will not only improve the aesthetic appeal of the space but also make it more functional.
Installing Drawers
Drawers are a great way to store laundry supplies, cleaning products, and other essentials within easy reach. You can install drawers under the washer and dryer or in a nearby cabinet.
- Choose a drawer design that fits your laundry room’s style and size.
- Select a drawer material that is durable and easy to clean, such as stainless steel or wood.
- Consider adding a drawer organizer system to maximize storage space.
Creating Open Shelves
Open shelves are perfect for displaying laundry-related items, such as detergent, fabric softener, and dryer sheets. You can install shelves above the washer and dryer or in a nearby corner.
| Shelf Type | Benefits |
| Fixed Shelf | Provides a stable surface for displaying items. |
| Adjustable Shelf | Allows for customizable storage and display options. |
By incorporating storage features like drawers and open shelves, you can create a functional and organized laundry room that makes doing laundry a breeze.
Finishing Touches
Adding finishing touches to your washer and dryer pedestals makes them look great and last longer. Proper painting, staining, and sealing help protect the wood from damage.
These steps also make cleaning easier and keep your pedestals looking fresh over time. Let’s explore how to paint or stain and seal your pedestals.
Painting Or Staining
Painting or staining adds color and style to your pedestals. Choose paint or stain that matches your laundry room decor. Use a brush or roller to apply an even coat.
- Sand the wood surface smooth before applying paint or stain.
- Apply a primer if you use paint for better adhesion.
- Use thin, even coats and let each coat dry fully.
- Apply multiple coats for a deeper color or better coverage.
- Lightly sand between coats for a smooth finish.
Sealing For Durability
Sealing protects your pedestals from moisture, dirt, and wear. Use a clear wood sealer, polyurethane, or varnish to keep the finish strong.
| Sealer Type | Best Use | Drying Time |
|---|---|---|
| Polyurethane | Heavy use areas, water resistance | 4-6 hours |
| Varnish | Enhances wood grain, moderate protection | 6-8 hours |
| Clear Wood Sealer | Light protection, indoor use | 2-4 hours |
Apply sealers with a brush or spray. Allow full drying before placing the washer and dryer on the pedestals. This keeps your pedestals sturdy and good-looking for years.
Installing The Pedestals
Installing pedestals for your washer and dryer lifts them off the floor. This makes loading and unloading easier. It also helps protect the machines from water damage.
Follow these steps carefully to position and secure the appliances on the pedestals.
Positioning Under Appliances
Start by moving the washer and dryer close to where the pedestals will go. Make sure the pedestals match the size of each appliance.
- Clear the floor area to avoid obstacles.
- Place each pedestal exactly where the appliance will sit.
- Check that the pedestal’s feet are stable and level.
- Lift the appliance carefully and lower it onto the pedestal.
- Ensure the appliance sits flat and does not wobble.
Securing The Washer And Dryer
Securing your washer and dryer to the pedestals keeps them safe during use. This prevents movement and reduces noise.
| Tool | Purpose |
|---|---|
| Screwdriver | Tighten screws on brackets |
| Wrench | Secure bolts firmly |
| Level | Check appliance stability |
| Brackets and Screws | Attach appliance to pedestal |
Follow these steps to secure the appliances:
- Locate the mounting holes on the pedestal and appliance base.
- Align the brackets with the holes.
- Insert screws or bolts through the brackets and into the appliance.
- Tighten all fasteners securely using a screwdriver or wrench.
- Use a level to confirm the appliance is stable and even.
Safety Tips And Maintenance
Building pedestals for your washer and dryer helps raise them to a better height. This makes loading and unloading easier. Keeping these pedestals safe and well-maintained is very important.
Regular checks and cleaning keep your pedestals stable and in good condition. This prevents accidents and extends their life. Follow simple safety and maintenance tips below.
Checking Stability Regularly
Check the pedestal’s stability often to avoid any accidents. A loose pedestal can cause your washer or dryer to tip or move during use.
- Place your hand on top of the appliance and gently rock it side to side.
- Look for any wobbling or movement in the pedestal base.
- Check that all screws and bolts are tight and secure.
- If you find any loose parts, tighten them with the right tools.
- Make sure the pedestal sits flat on the floor without gaps.
Doing these checks monthly helps keep your appliances safe and stable.
Cleaning And Upkeep
Clean the pedestal regularly to stop dust and dirt from building up. Dirt can cause damage over time and affect the pedestal’s stability.
| Cleaning Task | Frequency | Tools Needed |
| Wipe down pedestal surfaces | Weekly | Soft cloth, mild detergent |
| Check for rust or damage | Monthly | Flashlight, inspection |
| Tighten loose screws | Monthly | Screwdriver or wrench |
| Clear floor area around pedestal | Monthly | Broom or vacuum |
Keeping the pedestal clean and well-maintained helps prevent problems. It also keeps your laundry area safe and tidy.

Credit: www.reddit.com
Frequently Asked Questions
What Materials Are Needed To Build Washer And Dryer Pedestals?
You need plywood, 2×4 lumber, screws, wood glue, paint, and a measuring tape. These materials ensure sturdy and durable pedestals for your appliances.
How High Should A Washer And Dryer Pedestal Be?
A pedestal height of 12 to 15 inches is ideal. This height raises appliances for easy access and provides extra storage space underneath.
Can I Add Storage To My Washer And Dryer Pedestals?
Yes, you can add drawers or shelves inside the pedestal. This helps organize laundry supplies and maximizes space efficiency.
Is It Difficult To Build Pedestals For Washer And Dryer?
No, building pedestals is a simple woodworking project. Basic tools and materials are enough for a functional and attractive result.
Conclusion
Making pedestals for your washer and dryer saves space and adds convenience. You get extra storage and a better working height. The steps are simple, and materials are easy to find. A sturdy pedestal keeps your machines steady and safe.
Take your time and measure carefully for the best fit. Enjoy a neater laundry room and easier chores. Small effort, big difference. Try building your own pedestal today!