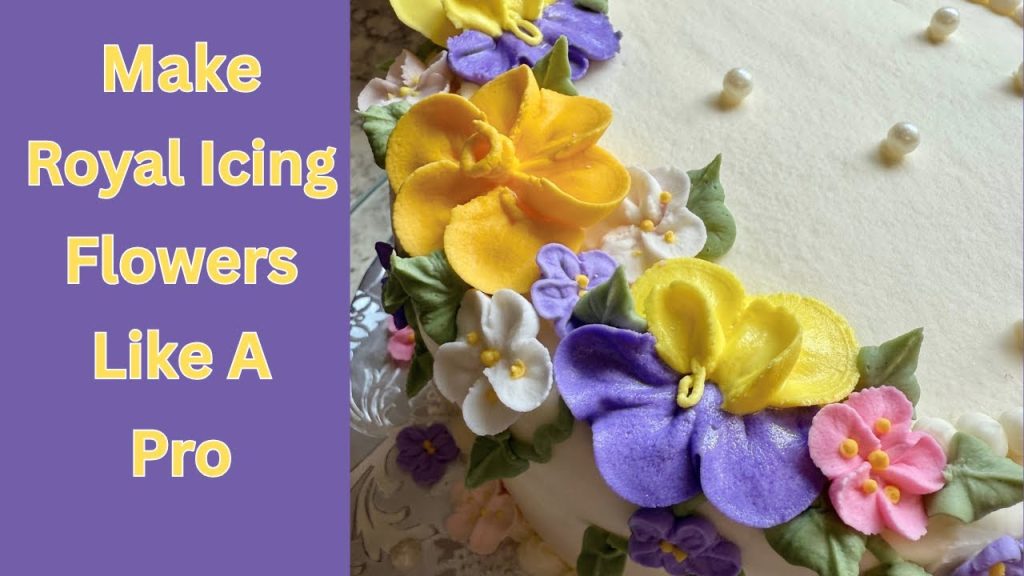
Have you ever wanted to create beautiful, delicate flowers that can transform any cake into a masterpiece? Making royal icing flowers is easier than you think, and once you learn the basics, you’ll be amazed at how quickly your baking skills can bloom.
Whether you’re decorating for a special occasion or just want to add a personal touch to your treats, mastering this skill will set your creations apart. Ready to impress your friends and family with stunning edible art? Let’s dive into the simple steps that will help you make royal icing flowers like a pro.

Credit: thegracefulbaker.com
Ingredients And Tools
Creating beautiful royal icing flowers starts with having the right ingredients and tools at your fingertips. Without them, your icing might not hold its shape, or your flowers could lose their delicate details. Let’s look closely at what you’ll need to get those petals perfect and your designs flawless.
Essential Ingredients
Your royal icing’s success depends heavily on the ingredients you choose. The main components are simple but must be high quality.
- Egg whites or meringue powder:These provide structure and help the icing dry hard. Meringue powder is a safer, shelf-stable alternative if you’re concerned about raw eggs.
- Powdered sugar:It creates the smooth texture and sweetness. Sift it well to avoid lumps that can ruin the flow of your icing.
- Lemon juice or cream of tartar:A small amount helps stabilize the icing and adds a subtle tang that balances the sweetness.
- Water:Use sparingly to reach the right consistency. Too much water makes the icing runny; too little makes it stiff and hard to pipe.
Have you noticed how minor changes in ingredient amounts can dramatically alter your icing? Testing small batches helps you find the perfect balance for your climate and style.
Must-have Tools
Even with the best ingredients, your tools shape the final look of your royal icing flowers. Choosing the right ones can save you time and frustration.
- Piping bags:Disposable or reusable, they let you control the flow of icing precisely. Consider using small tip bags for detailed petals.
- Couplers and piping tips:Different tips create different petal shapes and textures. A petal tip (101 or 102) is essential for flower petals.
- Flower nails:These provide a rotating surface to build flowers on. They help maintain symmetry and keep your hands steady.
- Toothpicks or fine brushes:Perfect for adjusting small details or fixing edges before the icing sets.
- Bowls and spatulas:Use them to mix your icing smoothly without introducing air bubbles.
Have you ever tried piping delicate flowers without a flower nail? It’s tricky! Investing in this small tool can make a huge difference in your control and final presentation.
Credit: www.yourbakingbestie.com
Preparing Royal Icing
Preparing royal icing is a key step in making delicate icing flowers. The icing needs to be smooth and firm enough to hold shapes well. Too soft, and the flowers will lose form. Too hard, and it will be difficult to pipe details. The right preparation ensures beautiful, lasting decorations.
Mixing The Icing
Start with fresh egg whites or meringue powder. Beat them until frothy. Gradually add sifted powdered sugar. Mix slowly at first to avoid sugar flying everywhere. Increase speed until the icing becomes thick and glossy. Avoid overbeating to keep the texture smooth.
Achieving The Right Consistency
Check the icing by lifting the whisk. It should form stiff peaks that hold their shape. Add small amounts of water or lemon juice to adjust thickness. For flower petals, use stiff consistency. For fine details, slightly thinner icing works better. Keep the icing covered to prevent drying out.
Coloring The Icing
Coloring royal icing is key to making beautiful flower decorations. The right color makes your flowers look real and vibrant. It also helps express your creativity. Using proper colors ensures your icing stays the right texture and consistency. Take your time to choose and mix colors carefully. This will give you the best results for your royal icing flowers.
Choosing Food Colors
Pick gel or paste food colors for royal icing. These types give bright colors without changing icing texture. Avoid liquid colors because they can make icing too soft. Choose colors that match the flowers you want to create. Use small amounts to start. You can always add more to reach your desired shade. Mixing primary colors can help create custom shades.
Mixing Colors Evenly
Mix food color into icing gently but thoroughly. Use a toothpick or small spoon for better control. Stir until the color is consistent throughout the icing. Avoid overmixing to keep icing fluffy and smooth. Let the icing sit a few minutes to deepen the color. Stir again before piping your flowers to ensure even color.
Basic Flower Shapes
Mastering basic flower shapes is the key to creating stunning royal icing decorations. These shapes form the foundation for more intricate designs. Getting comfortable with simple forms allows you to build confidence and explore your creativity.
Simple Petal Techniques
Start with a small round tip for your piping bag to create delicate petals. Use gentle pressure and steady hands to pipe teardrop shapes that mimic real flower petals. Practice spacing petals evenly around a central point to give your flower balance.
Experiment with angle and length of each petal to make different flower types. For example, slightly longer petals can resemble daisies, while shorter, rounded ones look like roses. Have you tried layering petals for a fuller effect? It adds depth and realism that really stands out.
Creating Leaves And Buds
Leaves add life and contrast to your flowers. Use a leaf tip to pipe pointed shapes with a slight curve. Adding a central vein with a thin line of icing makes them look more natural.
Buds bring a dynamic touch to your floral arrangement. Pipe small oval shapes close to the flowers to simulate unopened blossoms. Don’t worry if your first buds aren’t perfect—they often look more authentic with slight irregularities.
Think about how leaves and buds interact with your petals. Could a few well-placed leaves make your flower pop? Try pairing different sizes and shapes to create a natural cluster effect.
Piping Tips And Techniques
Creating royal icing flowers requires steady hands and the right piping tips for detailed petals. Practice simple shapes first, then layer petals carefully for a natural look. Use consistent pressure to keep the icing smooth and avoid air bubbles.
Creating royal icing flowers can transform any cake or cookie into a work of art. Mastering the piping tips and techniques is crucial to bring your floral designs to life. Whether you’re a novice or an experienced baker, understanding how to use your tools effectively can make all the difference. Let’s dive into the essentials that will help you pipe like a pro.Using Different Nozzles
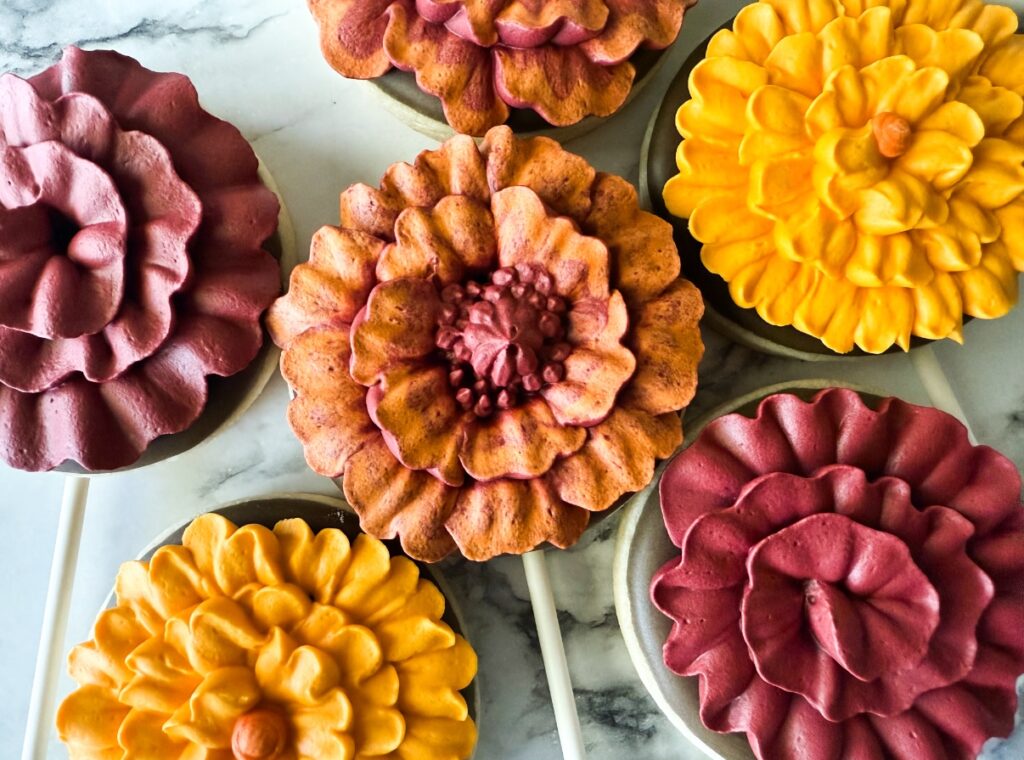
Different nozzles create different petal shapes and textures. The star tip is perfect for ruffled flowers like chrysanthemums, while the petal tip is ideal for roses and tulips. Experiment with round tips for simple dots or detailed flower centers. Consider keeping a variety of nozzles in your toolkit. This flexibility allows you to mix and match styles, bringing diversity to your icing flowers. Changing nozzles can be quick and easy with couplers, ensuring smooth transitions between designs.Controlling Pressure And Speed
The pressure you apply to the piping bag affects the thickness and flow of your icing. A gentle squeeze creates delicate petals, while firmer pressure results in bolder designs. Adjusting the speed at which you move the bag also influences the final look. Practice makes perfect. Spend time getting a feel for how pressure and speed interact. Remember, it’s not just about the right technique—it’s about finding what feels right in your hands. Have you ever found your flowers looking uneven or droopy? This often comes down to how you control your piping. Adjust your grip and take a moment to breathe and steady your hand for consistent results. Engage with the process, enjoy the learning curve, and soon you’ll be piping beautiful royal icing flowers with confidence.Drying And Storing Flowers
Drying and storing your royal icing flowers correctly is key to preserving their delicate beauty and ensuring they stay intact until you’re ready to use them. Skipping or rushing this step can lead to cracked petals or bent stems, which ruins all the hard work you put into piping each detail. Taking time to dry and store flowers properly gives you more flexibility and confidence to decorate cakes or cupcakes whenever inspiration strikes.
Proper Drying Methods
Air drying is the most common way to harden royal icing flowers, but it requires patience. Place your flowers on a flat surface lined with parchment paper or a silicone mat to prevent sticking. Avoid touching them while they dry to keep edges sharp and details intact.
Drying time can vary depending on humidity and flower thickness. Thin petals may dry within 4 to 6 hours, while thicker flowers might need up to 24 hours or more. Check the firmness gently by touching the back of a petal; if it feels hard and snaps slightly, it’s ready.
Using a fan can speed up drying but keep it on a low setting to avoid blowing the flowers away or causing uneven drying. Some bakers use a food dehydrator on low heat, but be cautious as too much heat can melt or discolor the icing. Have you noticed how different drying environments affect your flowers’ texture?
Storing For Longevity
Once dry, store your royal icing flowers in an airtight container to protect them from moisture, which can cause softening or stickiness. Layer the flowers with parchment or wax paper between them to prevent pieces from sticking or breaking.
Keep the container in a cool, dry place away from direct sunlight to maintain color vibrancy and structural integrity. Avoid refrigeration, as condensation can damage the flowers.
If you plan to store flowers for weeks, consider adding a small packet of silica gel inside the container to absorb any excess moisture. Have you tried storing flowers this way? It can make a noticeable difference in how fresh they look when you pull them out for your next cake project.
Decorating With Royal Icing Flowers
Decorating with royal icing flowers adds charm and elegance to cakes. These delicate decorations create a stunning visual appeal. They bring a natural, handmade touch to your baked creations. Using royal icing flowers can turn a simple cake into a work of art.
Applying Flowers On Cakes
Attach royal icing flowers carefully to avoid damage. Use a small dab of royal icing as glue. Press the flower gently onto the cake surface. Hold it for a few seconds to secure. Space flowers evenly for a balanced look. Place larger flowers first, then fill gaps with smaller ones. Avoid overcrowding to keep the design clean and elegant.
Combining Flowers For Designs
Mix different flower shapes and colors for variety. Create clusters for a natural garden feel. Use leaves and buds to add depth and texture. Match flower sizes to keep the design harmonious. Arrange flowers in lines or circles for structure. Repeat patterns for a cohesive and polished look. Experiment with color shades to enhance visual interest.

Credit: www.youtube.com
Troubleshooting Common Issues
Making royal icing flowers can be tricky. Common problems often arise during the process. These issues can affect the final look of your flowers. Knowing how to fix them saves time and frustration.
This section helps you troubleshoot common problems. Learn how to repair cracks and breaks. Adjusting icing consistency also improves your results.
Fixing Cracks And Breaks
Cracks and breaks happen when the icing dries too fast or is too brittle. To fix small cracks, gently press the edges together while the icing is still slightly soft. Use a small brush dipped in water to smooth out the surface. For bigger breaks, pipe fresh icing along the crack and blend it carefully.
Let the repaired area dry completely before handling. Avoid rough movements to prevent new breaks. Store flowers in a dry, cool place to reduce cracking.
Adjusting Icing Consistency
Icing that is too thick or too thin causes problems with shaping flowers. Thick icing is hard to pipe and cracks easily. Thin icing spreads out and loses shape.
To fix thick icing, add a few drops of water and mix well. Add water slowly to avoid making it too runny. For thin icing, add more powdered sugar little by little. Mix until the icing holds a soft peak.
- Test icing by lifting your spatula; it should form soft peaks.
- Use thicker icing for detailed petals and thin icing for flooding petals.
- Keep icing covered with a damp cloth to prevent drying out.
Frequently Asked Questions
What Ingredients Are Needed For Royal Icing Flowers?
Royal icing flowers require powdered sugar, egg whites or meringue powder, and lemon juice or water. These ingredients create a smooth, stiff icing perfect for detailed flower designs.
How Do I Achieve Stiff Consistency For Royal Icing?
Beat the royal icing until it holds stiff peaks but remains pipeable. Add powdered sugar gradually to thicken, ensuring it supports delicate flower shapes without collapsing.
What Tools Are Essential For Making Royal Icing Flowers?
You need piping bags, flower nail, small round and petal tips, and parchment paper. These tools help shape and decorate precise, beautiful royal icing flowers.
How Long Does Royal Icing Take To Dry Completely?
Royal icing flowers typically dry in 8 to 12 hours at room temperature. Drying time depends on humidity and thickness of the icing design.
Conclusion
Creating royal icing flowers takes practice but brings great rewards. Start with simple shapes and build your skills step by step. Use fresh ingredients for the best texture and color. Patience helps your flowers dry perfectly without cracks. These decorations add beauty to cakes and cupcakes.
Enjoy the process and let your creativity grow. Soon, you will craft stunning floral designs with ease. Keep practicing, and your skills will improve every time. Happy decorating!