
If you love decorating cookies or cakes, mastering royal icing transfers can take your creations to the next level. Imagine adding delicate, beautiful shapes and designs that look like they came from a professional bakery.
You might think it’s hard, but with the right steps, you can make stunning transfers right at home. In this guide, you’ll learn how to create perfect royal icing transfers that will impress your friends and family. Ready to add that wow factor to your baked goods?
Let’s dive in!
Ingredients For Royal Icing
Royal icing transfers are delicate and beautiful decorations. The right ingredients make a big difference. Using quality components ensures smooth, hard-drying icing. This section covers the key ingredients and how to get the perfect consistency for your transfers.
Essential Components
Royal icing needs a few simple ingredients. Each plays a special role in texture and drying.
- Powdered Sugar:Provides sweetness and structure. Use fine powdered sugar for smooth icing.
- Egg Whites or Meringue Powder:Acts as a binder. Egg whites create a natural texture, while meringue powder is easier and safer.
- Water:Adjusts the icing consistency. Use little at a time to avoid thinning too much.
- Lemon Juice or Cream of Tartar:Stabilizes and adds slight tang. Helps icing hold shape better.
Choosing The Right Consistency
The consistency of royal icing affects how well transfers hold their shape. Too runny, and details blur. Too stiff, and piping becomes difficult.
For transfers, a medium-stiff icing works best. It should hold peaks but still pipe smoothly.
| Consistency | Description | Use |
|---|---|---|
| Flood Consistency | Thin and smooth, flows easily | Filling large areas |
| Medium-Stiff Consistency | Holds shape, pipes clean lines | Ideal for transfers |
| Stiff Consistency | Very firm, holds peaks | Fine details and borders |
Mix a small batch and test piping on parchment paper. Adjust water or sugar to get the right flow. Perfect consistency leads to crisp, beautiful transfers every time.

Credit: www.youtube.com
Tools You’ll Need
Before you start creating beautiful royal icing transfers, gathering the right tools is essential. The quality of your supplies affects your control and the final look of your designs. Having the right tools not only makes the process easier but also helps you achieve cleaner, sharper details.
Piping Bags And Tips
Piping bags are your main tool for shaping the icing. You can choose between disposable or reusable bags, depending on your preference and budget. Make sure the bag feels comfortable in your hand since you’ll be working with it for some time.
Choosing the right piping tips is equally important. Small round tips, like a 1 or 2, give you precision for delicate outlines and fine details. Larger tips work well for filling in bigger areas quickly.
Have you ever struggled with icing leaking out the back of the bag? A bag clip or twist tie can solve that by keeping the icing in place and your hands clean. If you haven’t tried these, give them a shot—they’ll change your piping experience.
Templates And Stencils
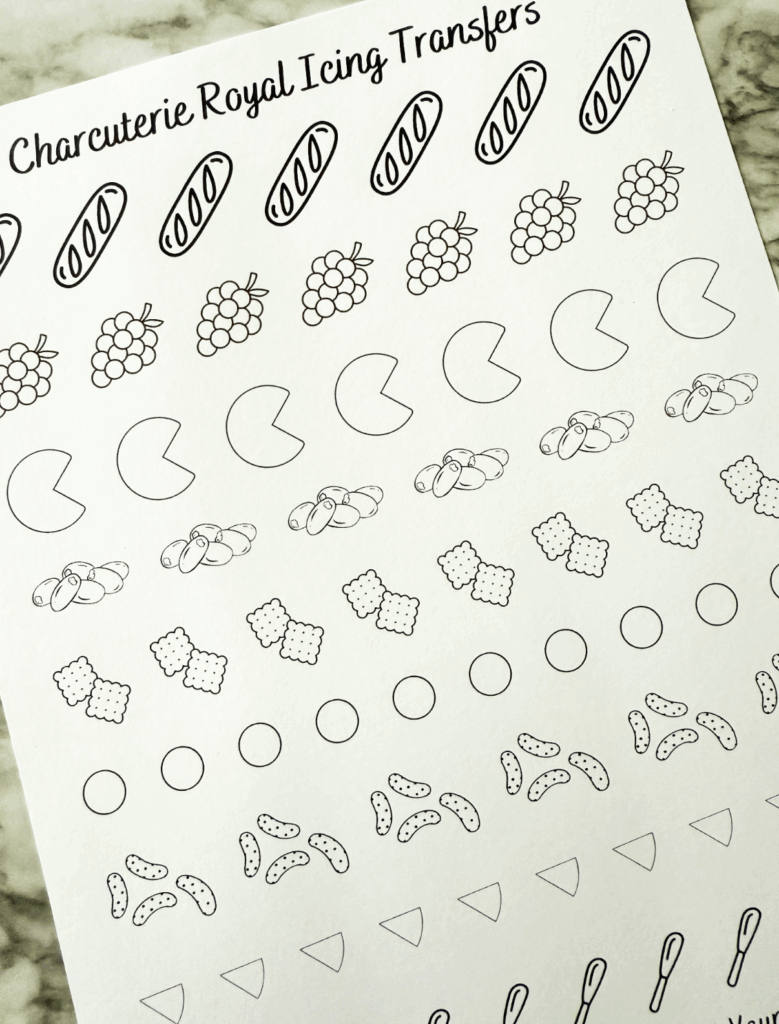
Templates and stencils help you keep your designs consistent and symmetrical. You can print or draw your designs on paper and place them under parchment paper as a guide for your transfers. This method helps you replicate shapes exactly, especially if you’re making multiple pieces.
Stencils come in handy when you want to add patterns or textures quickly. They’re perfect for adding intricate details without spending too much time on freehand piping. Using a stencil also reduces mistakes and helps you achieve professional-looking results.
Do you find it hard to maintain uniformity in your designs? Try using a template or stencil to see how much easier and more enjoyable the process becomes. It’s a small step that makes a big difference in your final product.
Preparing The Icing
Mix powdered sugar, egg whites, and a bit of lemon juice until smooth and thick. The icing should hold its shape but still flow easily. Use a piping bag for precise designs on your transfers.
Preparing the icing is a crucial step when it comes to making royal icing transfers. The right preparation ensures your icing sets perfectly, creating beautiful, intricate designs. It’s not just about mixing ingredients; it’s about understanding the chemistry behind the perfect icing texture.Mixing Techniques
When mixing royal icing, consistency is key. Start by whisking your egg whites or meringue powder until they are frothy. Gradually add powdered sugar while keeping the mixer on a low speed to avoid a sugar storm in your kitchen. Once the sugar is incorporated, increase the speed to medium. This ensures a smooth, lump-free mixture. You want to aim for a glossy finish, which indicates that the sugar and egg whites have combined well.Achieving Perfect Texture
The texture of your icing determines how well your transfers will hold their shape. For detailed designs, the icing should be thick enough to hold a peak but not so stiff that it’s hard to pipe. Check the consistency by lifting the whisk out of the bowl; the icing should form a peak that slightly bends. If it’s too stiff, add a few drops of water. If it’s too runny, add more powdered sugar. A personal trick is to test a small amount by piping onto parchment paper. If it holds without spreading, you’ve nailed it! Have you ever noticed how a slight tweak can make all the difference? Try adjusting the consistency and see how it transforms your designs. Engage with your icing; don’t just follow the recipe blindly. Your kitchen environment can affect the consistency. Humidity might require a bit more sugar, while a dry day might need a drop more liquid. Understanding these subtleties can turn a good icing into a great one.Creating Icing Transfers
Creating icing transfers is a fun and creative way to decorate cakes and cookies. These delicate designs add charm and detail to your baked goods. The process needs patience and a steady hand to achieve beautiful results.
Start by preparing royal icing with the right consistency. Too thick icing will be hard to pipe, while too thin icing may spread too much. Use a piping bag fitted with a small round tip for control.
Using Templates
Templates guide your design and keep shapes consistent. Print or draw the design on paper. Place it under a sheet of parchment paper or acetate. Trace the outline by piping icing over the template.
- Choose simple shapes for beginners.
- Secure the template to avoid slipping.
- Work in a cool, dry place to prevent icing from melting.
Piping Techniques For Precision
Hold the piping bag at a 45-degree angle. Use gentle pressure to control the flow of icing. Start by outlining the shape, then fill in the center with thinner icing.
- Practice steady, slow movements for clean lines.
- Use a toothpick to fix small mistakes immediately.
- Allow each layer to dry before adding details.
Drying And Storing Transfers
Drying and storing royal icing transfers properly is essential for perfect results. Transfers must harden completely before moving or storing. This prevents cracks or breaks. Correct drying and storage keep transfers fresh and ready for decorating.
Proper Drying Time
Allow transfers to dry at room temperature. It usually takes 8 to 12 hours. For thicker designs, drying may take up to 24 hours. Avoid humid or damp areas. Humidity slows drying and softens transfers.
Place transfers on parchment paper or a non-stick surface. Keep them flat and undisturbed. Do not stack or cover transfers until fully dry. Touch gently to check hardness. They should feel firm and dry all through.
Storage Tips To Maintain Shape
Store dry transfers in an airtight container. Use wax or parchment paper between layers to avoid sticking. Keep containers in a cool, dry place away from sunlight.
- Do not refrigerate; moisture can ruin texture.
- Use transfers within 1 to 2 weeks for best quality.
- Handle with care to prevent chipping.
Proper storage keeps transfers crisp and ready for easy use.

Credit: www.yourbakingbestie.com
Decorating With Transfers
Decorating with royal icing transfers opens up a world of creative possibilities. These delicate designs add intricate details without the mess of piping directly onto your cake. You can prepare transfers ahead of time, giving yourself more freedom on the day of decorating.
Attaching Transfers To Cakes
Attaching transfers requires a gentle touch. Use a small brush dipped in water or edible glue to moisten the back of the transfer. Then carefully press it onto your cake’s surface, whether it’s fondant, buttercream, or ganache.
Make sure the cake’s surface is slightly tacky but not wet, so the transfer sticks without sliding. If the transfer is large, support it with a spatula or your fingers as you place it down. Have you noticed how a perfectly attached transfer instantly elevates the whole cake’s appearance?
Combining Colors And Patterns
Mixing colors and patterns with transfers lets you customize your cake’s theme easily. Try pairing bold, bright transfers with soft pastel backgrounds to create contrast. Or layer small, detailed transfers over larger, simple ones for depth.
Think about your event’s vibe—do you want something playful, elegant, or rustic? Use transfers in complementary colors or opposite shades on the color wheel to make your design pop. How could you use unexpected color combos to surprise your guests?
Troubleshooting Common Issues
Troubleshooting common issues with royal icing transfers helps create perfect decorations. Small problems can cause cracks, breaks, or poor designs. Fixing these issues improves both appearance and strength. Understanding icing consistency is key to avoid many problems.
Fixing Cracks And Breaks
Cracks appear when icing dries too fast or is too thin. Slight breaks happen if the transfer is handled too soon. Handle transfers gently after drying to avoid damage. You can fix small cracks by brushing a thin layer of fresh royal icing over them. Let it dry completely before moving the transfer again. For larger breaks, pipe a small amount of icing as glue to join pieces. Press gently and allow full drying.
Adjusting Icing Consistency
Royal icing consistency affects how well transfers hold shape. Too runny icing spreads and loses detail. Too thick icing cracks and is hard to pipe. Add water a few drops at a time to thin icing. Add powdered sugar slowly to thicken it. The perfect consistency looks like thick glue and holds a peak. Test icing on parchment paper to check flow before piping. Adjust slowly for best results.
Credit: www.yourbakingbestie.com
Frequently Asked Questions
What Ingredients Are Needed For Royal Icing Transfers?
Royal icing transfers require powdered sugar, meringue powder, and water. These ingredients create a smooth, pipeable icing perfect for detailed designs. Ensure you use fresh meringue powder for best stability and texture.
How Long Does Royal Icing Take To Dry?
Royal icing typically takes 8 to 12 hours to dry completely. Drying time varies with humidity and thickness. For best results, leave transfers overnight in a cool, dry place.
Can Royal Icing Transfers Be Stored Before Use?
Yes, royal icing transfers can be stored in an airtight container. Keep them at room temperature for up to two weeks. Avoid refrigeration as moisture can soften the transfers.
What Tools Are Essential For Making Royal Icing Transfers?
Basic tools include piping bags, small round tips, parchment paper, and a flat surface. These help create clean, precise designs. Use toothpicks to fix small mistakes in the icing.
Conclusion
Making royal icing transfers is simple with practice and patience. Start with the right icing consistency and clean tools. Let each design dry fully before handling. These transfers add a delicate touch to your cakes and cookies. Try different shapes and colors to make unique decorations.
Enjoy the process and have fun creating sweet art. Your baking will look more professional and inviting. Keep practicing, and your skills will grow quickly.