Are you tired of waking up cold or uncomfortable during your camping trips? A sleeping bag liner could be the simple solution you need to stay cozy all night.
Making your own liner is easier than you think, and it lets you customize comfort and warmth exactly how you want it. In this guide, you’ll discover step-by-step how to create a sleeping bag liner that fits perfectly, feels soft against your skin, and adds an extra layer of warmth.
Ready to upgrade your outdoor sleep experience? Let’s get started!

Credit: us.alpkit.com
Materials Needed
Making a sleeping bag liner requires some basic materials. These materials help create a comfortable and warm liner.
Choosing the right fabric and tools makes the project easier and improves the final product.
Fabric
Select a soft, lightweight fabric that feels good on the skin. Cotton, silk, or flannel works well for liners.
Thread
Use strong thread that matches the fabric color. Polyester thread is durable and easy to work with.
Sewing Tools
- Sewing machine or needle for hand sewing
- Scissors for cutting fabric
- Measuring tape or ruler
- Pins to hold fabric pieces together
- Chalk or fabric marker for marking cuts
Additional Items
| Item | Purpose |
| Iron | Press fabric and seams for neat sewing |
| Seam ripper | Fix mistakes by removing stitches |
| Elastic (optional) | Add stretch for a snug fit inside sleeping bag |

Credit: www.amazon.com
Choosing The Right Fabric
Picking the right fabric is important for making a good sleeping bag liner. The fabric affects comfort, warmth, and durability.
Some fabrics keep you warm, some feel soft, and some dry quickly. Choose a fabric that fits your needs.
Cotton Fabric
Cotton is soft and comfortable. It feels nice against your skin and is easy to sew.
It is breathable but does not dry quickly. Cotton can get heavy if it gets wet, so it is best for dry conditions.
Silk Fabric
Silk is very light and smooth. It adds warmth without much weight, making it great for cold weather.
Silk dries faster than cotton but costs more. It is delicate and needs gentle care.
Fleece Fabric
Fleece is soft and warm. It keeps heat well even if it gets damp, which helps in cold or wet areas.
Fleece is thicker and heavier than silk or cotton. It can add bulk but gives extra warmth.
Nylon Or Polyester Fabric
Nylon and polyester fabrics are strong and dry very fast. They resist wind and water better than natural fabrics.
These fabrics can feel less soft but are good for outdoor use. They are lightweight and easy to pack.
Consider Breathability And Warmth
Breathable fabrics allow moisture to escape. This keeps you dry and comfortable inside the liner.
Warm fabrics trap heat close to your body. Choose fabric depending on the weather you will camp in.
- Cotton: High breathability, low warmth
- Silk: Moderate breathability, good warmth
- Fleece: Low breathability, high warmth
- Nylon/Polyester: Moderate breathability, moderate warmth
Measuring For Size
Measuring your sleeping bag liner correctly is important for comfort. The liner should fit well inside your sleeping bag without being too tight or loose.
To get the right size, you will measure the length and width carefully. This guide will help you with both.
Length And Width Considerations
Start by measuring your sleeping bag’s interior length from top to bottom. Add extra length if you want more room to move or if you are tall.
- Measure from your head to your feet while lying down.
- Add 4 to 6 inches for extra comfort.
- Check the width at the widest point of your sleeping bag.
- Remember to allow space for your shoulders and hips.
Allowing For Seam Allowance
Seam allowance is extra fabric added to your measurements. It gives room for stitching the liner together without making it too small.
| Measurement | Recommended Seam Allowance |
| Length | 1 inch (2.5 cm) |
| Width | 1 inch (2.5 cm) |
Always add the seam allowance to your length and width before cutting the fabric. This helps your liner keep the right size after sewing.
Cutting The Fabric
Cutting the fabric is the first step to make a sleeping bag liner. It sets the shape and size of your liner.
Use a flat surface and sharp scissors to get clean edges. Precise cutting helps with easy sewing later.
Select The Right Fabric
Choose a light, soft fabric like cotton or silk for your liner. It should be smooth and warm against your skin.
Make sure your fabric is wide enough for your sleeping bag size. Wash it before cutting to prevent shrinking.
Measure Your Sleeping Bag
Lay your sleeping bag flat and measure its length and width. Add a few extra inches for seams and ease.
Write down your measurements clearly. This helps you cut fabric pieces that fit well inside your bag.
Mark The Fabric
Use a fabric chalk or pencil to mark your measurements on the fabric. Draw straight lines for easy cutting.
Double-check your marks before cutting. Correct marks make sure your pieces fit together perfectly.
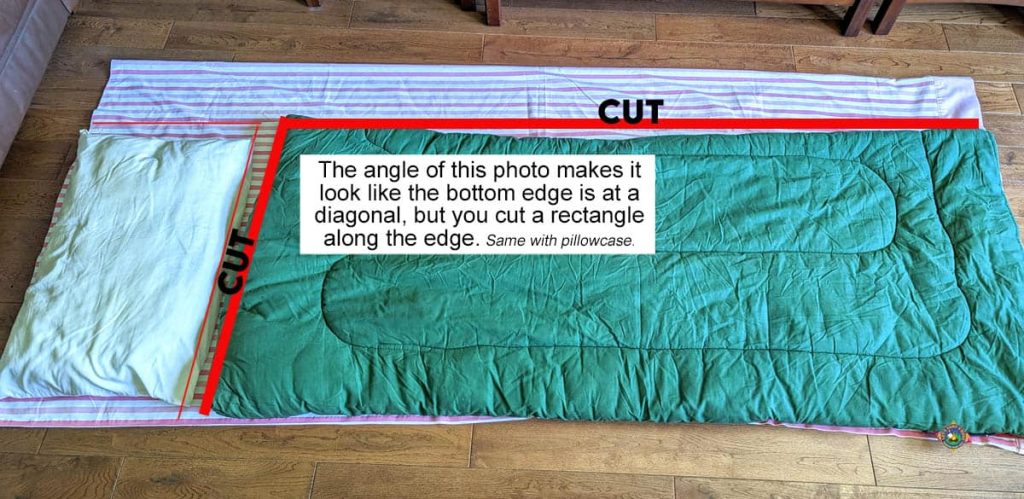
Cut The Fabric Pieces
Cut along the marked lines slowly and carefully. Use sharp fabric scissors for clean edges.
Cut two pieces of fabric: one for the top and one for the bottom of the liner. Keep the edges straight.
Cutting The Drawstring Channel
Cut a narrow strip of fabric to make a channel for the drawstring. The strip should be long enough to fit the liner’s opening.
Fold and sew this strip later to create a neat drawstring area at the top of the liner.
Sewing The Edges
Sewing the edges of your sleeping bag liner is important. It keeps the fabric from fraying and makes the liner last longer.
Use simple sewing techniques to make strong, neat edges. This helps the liner hold its shape during use.
Straight Stitch Technique
The straight stitch is the most basic and strong stitch for sewing edges. It is easy to do and works well on most fabrics.
Keep the stitches even and close to the edge. This prevents the fabric from coming apart when the liner is used.
- Set your sewing machine to a straight stitch
- Use a short stitch length for durability
- Start sewing about 1/4 inch from the fabric edge
- Sew all around the edges, keeping stitches straight
Adding Reinforced Corners
Corners get more stress when using a sleeping bag liner. Reinforcing them makes the liner stronger and longer lasting.
Use extra stitches or a small patch of fabric to strengthen each corner. This stops the fabric from tearing easily.
- Sew a small square or triangle patch on each corner inside the liner
- Use a backstitch or zigzag stitch to secure the patch
- Double stitch the corner edges for extra strength
- Trim excess fabric to keep corners neat
Creating The Opening
Making the opening for your sleeping bag liner is important. It lets you get in and out easily. The opening should be comfortable and secure.
You can choose different ways to create the opening. Two common options are using a zipper or Velcro. Each has its own benefits.
Zipper Or Velcro Options
Zippers give a tight and secure closure. They keep the liner closed well and stop cold air from coming in. Velcro is easier to fix and adjust. It is soft and quiet but may not close as tightly.
- Zipper: durable and strong
- Zipper: seals the liner completely
- Velcro: easy to open and close
- Velcro: soft and quiet
- Velcro: adjustable size for comfort
Ensuring Easy Access
Make sure the opening is wide enough. You want to slide in without trouble. The opening should be on the side or top, depending on your design.
| Opening Type | Best Use | Notes |
| Side Zipper | Quick entry and exit | Seals well, avoids drafts |
| Top Zipper | Easy to open fully | Good for warmer weather |
| Velcro Flap | Adjustable fit | Less secure but quiet |
Adding Personal Touches
Making a sleeping bag liner lets you add your own style. Personal touches make it unique and special.
You can add designs and details that show your personality. These small changes make your liner more fun and cozy.
Decorative Stitching
Decorative stitching adds color and texture to your liner. Use different thread colors to create patterns.
Try simple stitches like zigzags or waves. These patterns make the liner look handmade and pretty.
- Use bright thread for contrast
- Try shapes like stars or hearts
- Keep stitches even and neat
- Test stitches on scrap fabric first
Monogramming Your Liner
Monogramming adds your initials to the liner. It gives a personal and classy look.
You can sew or use embroidery to add letters. Pick a clear font that is easy to read.
- Choose thread color that stands out
- Place monogram in a visible spot
- Keep letters simple and clean
- Use a hoop for steady stitching
Testing The Fit
After making your sleeping bag liner, it is important to test how well it fits. A good fit makes your liner comfortable and easy to use. This helps you stay warm and relaxed during sleep.
Testing the fit lets you find any problems early. You can then fix these issues before using the liner on a trip. Below are two key steps to check and improve the fit of your liner.
Checking Comfort Level
Try placing the liner inside your sleeping bag. Lie down and move around as you would when sleeping. Notice if the liner feels tight or loose in any area. Pay attention to your shoulders, hips, and feet.
- Check if the liner allows easy movement.
- Feel if any part is bunching up or slipping.
- Make sure the liner covers your entire body.
- Test how warm the liner keeps you.
Making Adjustments If Needed
If the liner feels too tight or loose, you need to make changes. Adjusting the liner helps improve comfort and fit. You can change the size or shape by sewing or cutting the fabric.
| Issue | Possible Adjustment |
| Tight at shoulders | Let out side seams |
| Loose at feet | Take in fabric at bottom |
| Bunching in middle | Add darts or seams |
| Liner too short | Add fabric extension |
Maintaining Your Liner
Keeping your sleeping bag liner clean and in good shape helps it last longer. Proper care makes sure it stays fresh and comfy.
Follow simple steps to wash and store your liner well. This keeps it ready for your next trip.
Washing Tips
Wash your liner gently to avoid damage. Use mild detergent and cold water for best results.
Hand washing is often better, but a gentle machine cycle works too. Avoid bleach and fabric softeners.
- Use mild soap or detergent
- Wash in cold water
- Choose gentle cycle or hand wash
- Avoid bleach and fabric softeners
- Air dry to keep fabric soft
Storage Recommendations
Store your liner in a dry, cool place. Keep it loose to avoid wrinkles and damage to the fabric.
Use a breathable bag or pillowcase for storage. Avoid tight stuff sacks that can crush the material.
- Keep liner dry before storing
- Store in a breathable bag or pillowcase
- Avoid tight compression bags
- Place in a cool, dark spot
- Check liner for damage before storing

Credit: www.amazon.com
Frequently Asked Questions
What Materials Are Best For Making A Sleeping Bag Liner?
Lightweight cotton, silk, and flannel are ideal materials for sleeping bag liners. They offer comfort, breathability, and warmth, enhancing your sleeping bag’s performance.
How Do You Sew A Sleeping Bag Liner Step-by-step?
Cut fabric to size, sew edges leaving one side open, then hem. Turn inside out for smooth seams and add a drawstring for closure.
Can I Use A Sleeping Bag Liner To Stay Warm?
Yes, a liner adds an extra insulation layer, boosting warmth. It helps retain body heat, especially in cold weather or high altitudes.
How Do You Clean And Maintain A Sleeping Bag Liner?
Hand wash or machine wash on gentle cycle with mild detergent. Air dry to prevent shrinking and maintain fabric softness and durability.
Conclusion
Making your own sleeping bag liner is simple and useful. It keeps you warm and clean inside your sleeping bag. You can choose soft, comfortable fabric that suits you. Plus, it is light and easy to carry. Sewing it yourself saves money and lets you customize size and style.
This small project improves your camping or travel sleep. Try it once, and you will see the difference. Enjoy cozy nights outdoors with your DIY sleeping bag liner.