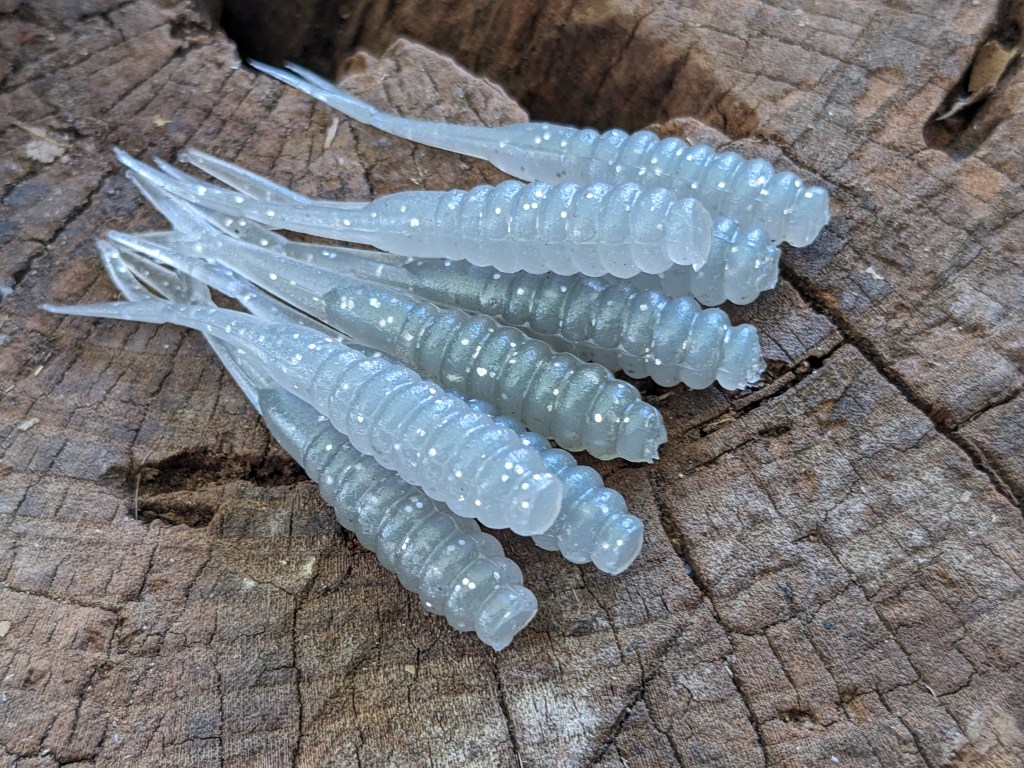
Are you ready to catch more fish with lures you made yourself? Making soft plastic fishing lures can give you a real edge on the water.
Not only do you get to customize the size, shape, and color, but you also save money and have fun creating something unique. Imagine the satisfaction of reeling in a big catch using a lure you crafted with your own hands.
In this guide, you’ll discover simple steps and tips to make soft plastic lures that work like a charm. Keep reading, and you’ll be ready to boost your fishing game in no time!

Credit: www.youtube.com
Materials Needed
Making soft plastic fishing lures requires specific materials. These help you create durable and flexible lures. Knowing what you need saves time and effort.
Below, you will find details about the types of soft plastics, essential tools, and safety gear required for this craft.
Types Of Soft Plastics
Soft plastics vary in texture and color. Choose the right type for your fishing needs. The most common types include:
- PVC (Polyvinyl Chloride): Flexible and easy to shape.
- Soy-based plastics: Eco-friendly and biodegradable.
- Silicone blends: Durable and stretch-resistant.
- Rubber-based plastics: Soft and highly flexible.
Essential Tools
| Tool | Purpose |
| Double Boiler | Melts plastic safely without burning |
| Molds | Shape the soft plastic into lure forms |
| Mixing Sticks | Stir colorants and plastic evenly |
| Measuring Cups | Ensure correct plastic and additives amounts |
| Heat Gun | Removes air bubbles and smooths surface |
Safety Gear
Protect yourself while making soft plastic lures. Wear the following safety gear:
- Heat-resistant gloves to avoid burns
- Safety goggles to protect eyes from splashes
- A dust mask to prevent inhaling fumes
- Long sleeves to protect arms
- Ventilated workspace to reduce exposure to vapors
Credit: www.battlbox.com
Preparing The Mold
Creating soft plastic fishing lures requires proper mold preparation. This ensures high-quality results and smooth finishes.
Let’s explore how to choose the right mold and prepare it for crafting your lures.
Choosing The Right Mold
The mold you choose affects the design and effectiveness of your lures. Pick one that matches the size and shape you want.
- Consider the material: Silicone molds are flexible and easy to use.
- Check the mold size: Ensure it fits your workspace and storage.
- Look for detailed designs: More detail means more realistic lures.
Cleaning And Oiling
Clean and oil your mold before use to prevent sticking and ensure smooth lure removal.
| Step | Action |
| 1 | Wash with warm, soapy water. |
| 2 | Rinse thoroughly to remove soap. |
| 3 | Dry completely with a soft cloth. |
| 4 | Apply a thin layer of oil to the mold surface. |
Melting The Plastic
Melting plastic is a key step in making soft plastic fishing lures. You need to heat the plastic until it becomes liquid. This lets you pour it into molds easily.
It is important to melt the plastic safely. Overheating can ruin the plastic or cause fumes. Using the right tools helps control the heat well.
Safe Heating Methods
Use safe tools to melt your plastic. A double boiler or a dedicated melting pot works best. These tools heat the plastic gently and evenly.
Avoid open flames or direct heat. These can burn the plastic and release harmful fumes. Always work in a well-ventilated area.
- Use a double boiler for slow, even heating
- Electric melting pots offer precise temperature control
- Wear heat-resistant gloves to protect your hands
- Keep a fire extinguisher nearby for safety
Temperature Tips
Keep the plastic temperature between 250°F and 300°F (120°C to 150°C). This range melts the plastic without burning it. Use a thermometer to check the heat.
Do not heat plastic too fast. Slow heating prevents bubbles and uneven melting. Stir the plastic gently to keep the temperature steady.
- Use a digital thermometer for accurate readings
- Heat plastic slowly to avoid bubbles
- Stir often with a heat-safe tool
- Stop heating if you see smoke or smell burning

Credit: www.youtube.com
Adding Color And Scent
Soft plastic fishing lures attract fish by looking and smelling real. Adding color and scent makes your lures more effective. You can mix colorants and scents into the plastic before molding.
Choosing the right color and scent helps match the lure to the fish’s environment and preferences. This guide explains how to add both color and scent to your lures.
Colorants And Dyes
Colorants and dyes give soft plastic lures their appearance. They come in powders, liquids, and pastes. Each type blends differently with the plastic mix.
- Powder pigments: Add directly to the melted plastic for solid colors.
- Liquid dyes: Mix well to spread color evenly.
- Flakes and glitter: Add sparkle and shine to the lure.
- Opaque vs. translucent: Choose opaque for bright colors, translucent for subtle effects.
| Colorant Type | Best Use | Effect |
| Powder Pigments | Strong solid colors | Matte finish |
| Liquid Dyes | Even color mixing | Glossy finish |
| Flakes and Glitter | Adding sparkle | Reflective shine |
| Opaque Colorants | Bright, bold lures | Blocks light |
| Translucent Colorants | Natural look | Light passes through |
Scent Options
Scent helps attract fish by mimicking real prey smells. You can add scent oils or powders to the soft plastic mix. Some scents work better for certain fish species.
- Oil-based scents: Mix easily and last long in water.
- Powder scents: Blend well and are less messy.
- Natural scents: Use fish oils or shrimp extracts for realism.
- Artificial scents: Use safe synthetic options for strong smells.
- Test scents in water to see how they release over time.
Pouring The Plastic
Pouring the plastic is a key step in making soft fishing lures. It requires care and attention to detail. The plastic must fill the mold evenly to get the right shape and texture.
Using the right technique helps avoid problems like air bubbles and incomplete fills. This guide covers how to pour plastic properly and how to avoid air bubbles.
Filling The Mold
Pour the melted plastic slowly into the mold’s opening. This helps the plastic flow smoothly and fill all parts. Avoid pouring too fast, or the plastic may spill or trap air.
- Hold the pouring container close to the mold to reduce splashing.
- Fill the mold just above the edges to ensure full coverage.
- Use a steady hand to keep the flow even.
- Let the plastic settle before moving the mold.
Avoiding Air Bubbles
Air bubbles make the lure weak and less attractive to fish. To avoid bubbles, keep the plastic warm and pour gently. Sometimes tapping or vibrating the mold can help bubbles rise.
| Method | Description | Benefit |
| Slow Pouring | Pour plastic slowly and steadily. | Reduces trapped air. |
| Tapping Mold | Gently tap mold after pouring. | Helps bubbles escape. |
| Warm Plastic | Keep plastic at proper temperature. | Keeps flow smooth and bubble-free. |
| Use Mold Release | Apply mold release before pouring. | Prevents sticking and helps bubble escape. |
Cooling And Removing Lures
After pouring hot plastic into molds, the lures need to cool down. Cooling makes the plastic hard and easy to handle.
Removing the lures carefully is important. Doing this right keeps the shape and details perfect.
Cooling Time
The cooling time depends on the plastic type and lure size. Usually, it takes about 20 to 30 minutes.
Let the mold sit undisturbed during cooling. This helps the lure keep its shape.
- Small lures cool faster than large ones
- Thicker plastic needs more time to harden
- Room temperature affects cooling speed
- Cooling in a fridge can speed up the process
Demolding Techniques
Remove the lure from the mold with gentle pressure. Avoid pulling too hard to prevent damage.
Use tools like plastic scrapers or soft tweezers if needed. These help loosen the lure from the mold edges.
- Press mold sides gently to release suction
- Twist the mold slightly to free the lure
- Do not use sharp tools that can scratch
- Clean molds after each use for easy removal
Finishing Touches
After crafting the soft plastic lure, you need to add the final details. These finishing touches improve the lure’s look and function. Proper finishing helps your lure perform better in water.
Two main tasks complete the lure: trimming excess plastic and adding hooks and accessories. Each step requires care to ensure the lure works well and lasts long.
Trimming Excess Plastic
After removing the lure from the mold, you may see extra plastic called flash. Trimming this excess plastic gives the lure a clean shape. Use sharp scissors or a craft knife for best results.
- Hold the lure firmly but gently
- Trim along the edges where plastic is uneven
- Cut slowly to avoid damaging the lure
- Remove any small pieces left after the first cut
- Smooth rough edges with fine sandpaper if needed
Adding Hooks And Accessories
Hooks and accessories make the lure ready for fishing. Attach the right size hook to keep the lure balanced and able to move naturally. You can add eyes, skirts, or weights to enhance attraction.
| Accessory | Purpose | Tips |
| Hooks | Catch fish | Choose size based on lure size |
| Eyes | Make lure look real | Glue firmly with waterproof adhesive |
| Weights | Control sinking speed | Attach inside or outside lure body |
| Skirts | Add movement and color | Use flexible materials for natural motion |
Tips For Better Lures
Making soft plastic fishing lures takes patience and care. Small changes can improve how fish react.
Using the right tools and materials helps you create lures that look and move like real bait.
Customizing Shapes
Shape affects how your lure moves in the water. Try different shapes to find what fish prefer.
Use simple molds or carve your own shapes before making the lure.
- Round shapes create smooth swimming action
- Flat shapes make the lure wobble
- Thin tails add more flutter
- Chunky bodies give more vibration
Storage And Maintenance
Keep your soft plastic lures in a cool, dry place to stop them from melting or sticking.
Separate different colors and types to avoid color bleeding and damage.
- Store lures in airtight containers
- Use plastic bags for single lures
- Check for damage before each use
- Clean lures with fresh water after fishing
Frequently Asked Questions
What Materials Do I Need For Soft Plastic Fishing Lures?
You need liquid plastic, pigments, molds, a heat source, and mixing tools. Quality materials ensure durable, effective lures.
How Do I Safely Melt Plastic For Lures?
Use a double boiler or dedicated melting pot. Avoid direct heat to prevent burning and fumes.
What Colors Work Best For Soft Plastic Fishing Lures?
Natural colors like green, brown, and white mimic real bait. Bright colors attract fish in murky water.
How Long Does It Take To Make One Lure?
It takes about 10-15 minutes to melt, pour, and cool one lure properly.
Conclusion
Making soft plastic fishing lures can be fun and rewarding. You control the shape, size, and color easily. These lures attract fish better because you customize them. Practice helps you improve your skills quickly. Use safe materials and follow instructions carefully.
Try different designs to see what works best. Enjoy the process and catch more fish with your own lures. It’s a great way to add fun to your fishing trips. Keep experimenting and learning for better results each time.