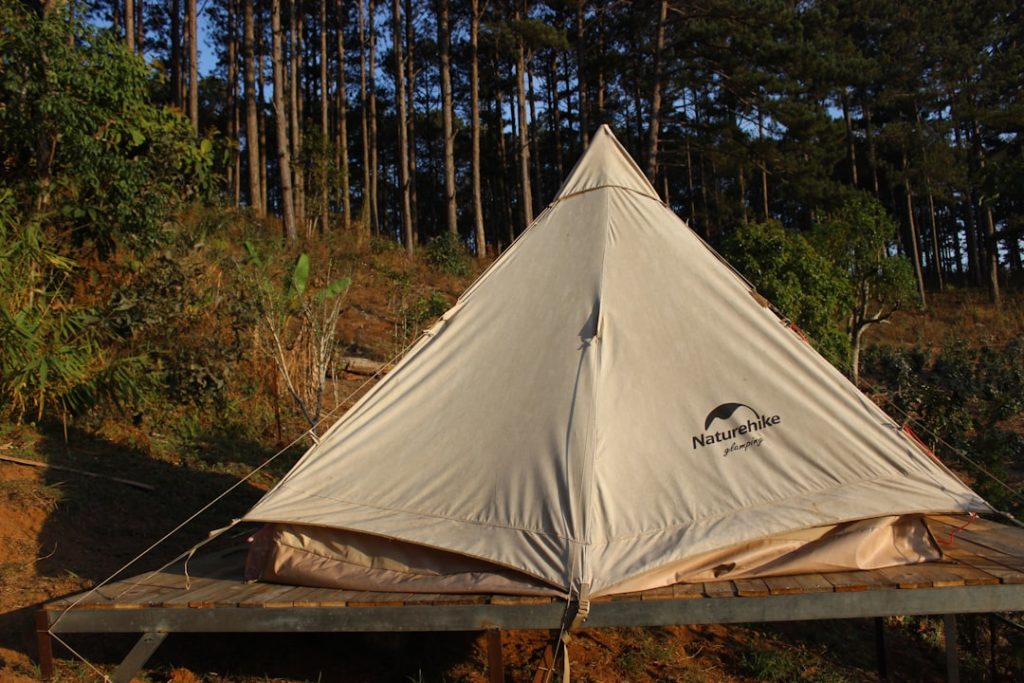
Have you ever dreamed of creating a cozy hideaway right in your living room or backyard? Imagine a space where you can unwind, read a book, or simply escape from the hustle and bustle of daily life.
Building your own teepee tent might be the perfect solution. Not only is it a fun and creative project, but it’s also a fantastic way to add a touch of adventure to your home. In this guide, you’ll discover step-by-step instructions on how to make a teepee tent that suits your style and space.
Whether you’re crafting it for your kids or for your personal retreat, you’re about to unlock the secrets to crafting a magical oasis that everyone will love. So, are you ready to dive into this exciting project and transform your space into something extraordinary? Let’s get started!
Materials Needed
Making a teepee tent is fun and easy. You need the right materials to build a strong tent.
This guide will help you pick fabrics, poles, and other supplies for your teepee.
Choosing The Right Fabric
Pick fabric that is strong and easy to clean. It should protect you from wind and rain.
Cotton canvas is a good choice. It is thick and lasts a long time. You can also use polyester or nylon for lighter tents.
- Cotton canvas – sturdy and breathable
- Polyester – water-resistant and light
- Nylon – strong and easy to carry
- Check fabric weight: 8 to 12 ounces per square yard
Selecting Poles And Supports
Poles hold up your teepee. Choose poles that are tall, strong, and easy to handle.
Wooden poles look natural and are sturdy. Aluminum poles are light and rust-free. Bamboo is another good option that is eco-friendly.
- Wooden poles: strong and classic
- Aluminum poles: light and durable
- Bamboo poles: natural and flexible
- Poles should be about 6 to 8 feet tall
Additional Supplies
You need some extra supplies to finish your teepee. These help with setup and stability.
Rope or strong twine will tie the poles together. Stakes keep the tent anchored to the ground. You might also want a groundsheet for comfort and protection.
- Rope or twine for tying poles
- Ground stakes to hold the tent down
- Hammer or mallet to drive stakes
- Groundsheet or tarp for the floor
- Scissors and sewing kit for fabric work
Preparing The Workspace
Before building a teepee tent, get your workspace ready. A clean area helps you work safely and easily.
Organizing your tools and space saves time and makes the process smooth.
Clearing The Area
Pick a flat spot with enough room for your teepee tent. Remove rocks, sticks, and trash from the ground.
Clear space around the tent area for easy movement and setting up the poles and fabric.
- Find a flat, open space
- Remove sharp objects and debris
- Keep the area free from obstacles
- Check for overhead branches or wires
Gathering Tools
Collect all tools and materials before you start. This keeps you focused and prevents interruptions.
Common tools for a teepee tent include poles, rope, fabric, and a mallet or hammer.
- Wooden or metal poles
- Strong rope or cord
- Large fabric or canvas
- Mallet or hammer
- Measuring tape
- Scissors or knife
Constructing The Frame
Building a teepee tent starts with making a strong frame. The frame holds the whole tent up. It must be sturdy and well balanced.
This guide will help you arrange the poles and secure the structure. These steps make your teepee safe and easy to use.
Arranging The Poles
Use long, straight poles for the teepee frame. Usually, three to five poles work well. They should be about the same length.
Stand the poles upright and lean them together at the top. Spread the bottom ends out in a circle. This forms the basic shape of the teepee.
- Choose poles that are strong and not cracked
- Place the poles so they touch at the top
- Make a wide base for stability
- Adjust the spacing to form a round shape
Securing The Structure
Tie the poles together at the top to keep them from moving. Use a strong rope or cord for this. Wrap the rope tightly around the poles.
Check that the frame stands firm. You can add extra ties lower down the poles if needed. This helps stop the frame from falling apart.
- Use a durable rope for tying the poles
- Wrap the rope several times around the top
- Create a knot that will not slip
- Add extra ties for more support
Making The Cover
The cover is the main part of your teepee tent. It keeps the inside safe and cozy. You need strong fabric to make a good cover.
This guide helps you measure, cut, and join fabric panels. These steps create a neat, sturdy cover for your teepee.
Measuring And Cutting Fabric
Start by measuring the height and base size of your teepee frame. These numbers help you cut the fabric correctly.
Mark the fabric with chalk or a fabric pen. Cut carefully along the lines to avoid mistakes.
- Measure the height of the poles plus extra for seams.
- Calculate the width of each panel based on the number of poles.
- Draw straight lines on the fabric for smooth edges.
- Cut slowly with sharp scissors or a rotary cutter.
Sewing Or Attaching Panels
After cutting, join the panels to form the teepee shape. You can sew or use strong fabric glue or tape.
Make sure seams are tight and even. This keeps the cover strong and weatherproof.
- Place two panels edges together, right sides facing.
- Sew a straight seam about half an inch from the edge.
- Use a backstitch or zigzag stitch for strength.
- Press seams flat with an iron to reduce bulk.
- If not sewing, use fabric glue or heavy-duty tape inside seams.
Assembling The Teepee
Assembling a teepee is a fun and simple project. It needs a strong frame and a fabric cover.
First, build the frame using long poles. Then, cover the frame with fabric to create the teepee shape.
Draping The Cover Over Frame
Start by lifting the fabric cover and placing it over the top of the frame. Make sure the cover is centered.
Let the fabric fall naturally around the poles. Smooth out wrinkles and adjust the cover so it fits evenly.
- Hold the cover at the top of the frame
- Gently pull the fabric down over the poles
- Adjust fabric so all sides hang evenly
- Smooth out any folds or wrinkles
Securing Fabric Edges
Once the cover is draped, secure the edges to keep the teepee stable. Use ties or clips to hold the fabric in place.
Make sure the fabric edges are tight against the ground. This helps protect the inside from wind and dirt.
- Use ropes or ties to fasten fabric edges to poles
- Clip or pin fabric edges to avoid movement
- Pull fabric tight to prevent sagging
- Check edges regularly for loose spots

Credit: www.fleecefun.com
Adding Comfort And Decor
A teepee tent feels cozy with soft cushions and warm rugs. Decorating it makes the space inviting and fun.
Adding lights can change the mood inside the tent. You can create a soft, glowing space to relax or read.
Choosing Cushions And Rugs
Select cushions and rugs that are soft and easy to clean. Bright colors or patterns add personality to your teepee.
- Use floor cushions for sitting comfort
- Choose rugs with non-slip backs for safety
- Mix different cushion sizes for a cozy look
- Pick washable fabrics to keep the tent fresh
- Layer rugs for extra warmth and texture
Incorporating Lighting
Lighting makes your teepee feel magical. Use soft lights that do not get too hot inside the small space.
| Light Type | Benefit | Tip |
| String Lights | Creates warm, soft glow | Wrap around tent poles |
| Battery Tea Lights | Safe and flicker like candles | Place inside lanterns |
| LED Fairy Lights | Energy efficient and bright | Use with a timer |
Maintaining Your Teepee
Taking care of your teepee helps it last longer and stay safe. Clean and store it well after use.
Follow simple steps to keep your teepee in great shape for many adventures.
Cleaning Tips
Remove dirt and dust from the fabric and poles before storing your teepee. Use gentle methods to avoid damage.
- Shake off loose dirt outside.
- Use a soft brush to clean fabric spots.
- Wipe poles with a damp cloth.
- Let the fabric dry completely before folding.
- Do not use harsh chemicals or bleach.
Storage Suggestions
Store your teepee in a dry and cool place. Keep it away from direct sunlight and moisture to avoid damage.
| Storage Tip | Reason |
| Fold fabric loosely | Prevents creases and weak spots |
| Store poles separately | Avoid bending or breaking |
| Use breathable bags | Keeps moisture out and allows air flow |
| Keep away from pests | Protects fabric and materials |
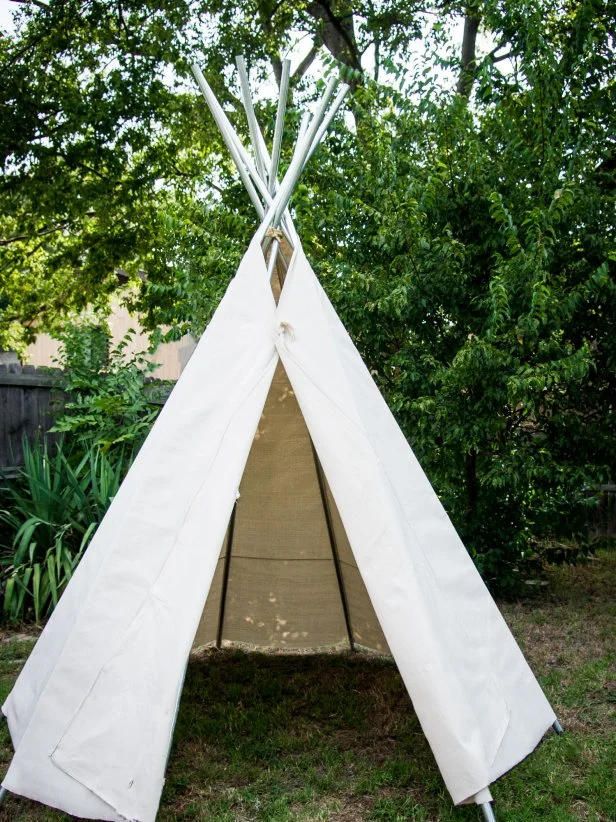
Credit: www.hgtv.com

Credit: www.creativegreenliving.com
Frequently Asked Questions
What Materials Are Needed To Make A Teepee Tent?
To make a teepee tent, you’ll need wooden poles, durable fabric or canvas, rope or twine, and basic tools like scissors. These materials ensure your teepee is sturdy, weather-resistant, and easy to assemble.
How Do You Assemble A Teepee Tent Step-by-step?
Start by arranging the wooden poles in a cone shape and tying them securely at the top. Next, drape the fabric around the poles, leaving an opening for the entrance. Finally, secure the fabric edges with rope or stakes for stability.
Can I Use A Teepee Tent Indoors?
Yes, teepee tents work well indoors as cozy play spaces or reading nooks. Use lightweight fabrics and ensure the frame fits your room size for safety and comfort.
How Long Does It Take To Make A Teepee Tent?
Making a teepee tent usually takes 1 to 2 hours. This depends on your experience and the size of the tent. Preparation and material quality also affect the time needed.
Conclusion
Building a teepee tent is simple and fun. You only need a few materials and some patience. This guide shows easy steps anyone can follow. Enjoy crafting your own cozy tent for play or rest. Try different fabrics or decorations to make it special.
Creating a teepee brings joy and a sense of pride. Start today and watch your tent take shape quickly. A homemade teepee makes great memories and endless fun.