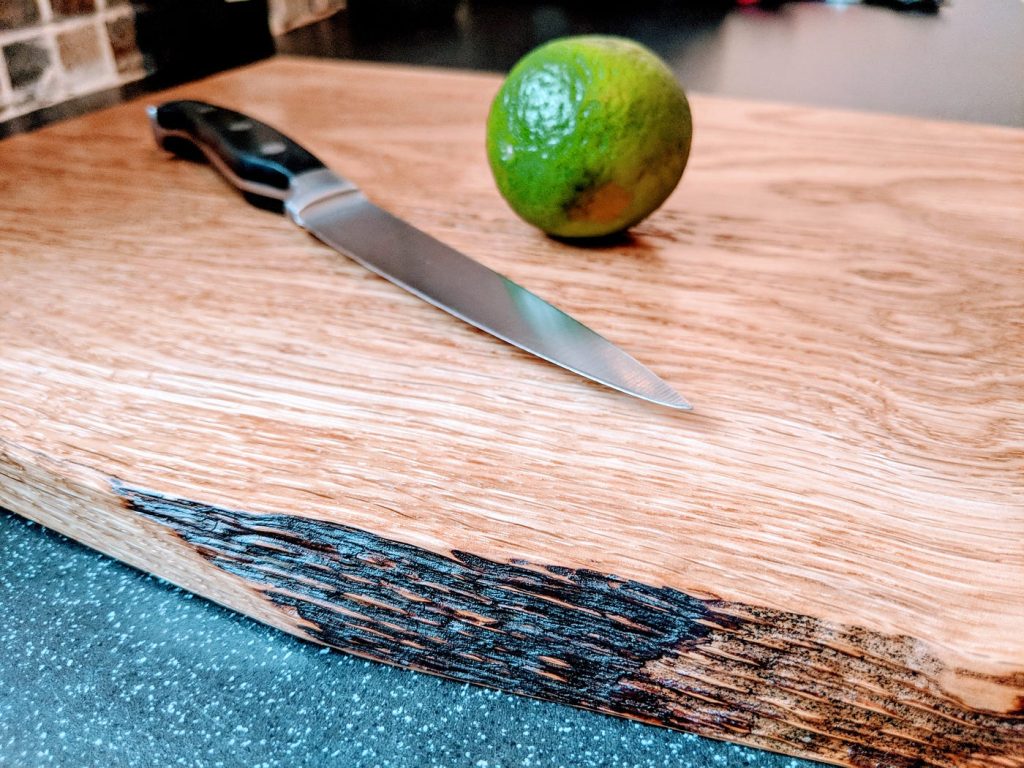
Are you ready to create a wooden cutting board that’s both beautiful and built to last? Making your own cutting board is easier than you might think, and it gives you a unique kitchen tool that reflects your style.
Imagine having a board that feels perfect in your hands, crafted by you with care. In this guide, you’ll discover simple steps and insider tips to turn raw wood into a smooth, sturdy cutting board. Keep reading, and you’ll soon have a project that’s rewarding and practical—something you’ll use every day with pride.
Choosing The Right Wood
Making a wooden cutting board starts with picking the right wood. The wood affects how strong and safe the board will be.
Some woods are better for cutting boards because they last longer and resist cuts. Choosing the right wood helps your board stay clean and safe.
Hardwood Vs Softwood
Hardwood comes from trees that lose leaves in winter. Softwood comes from trees that keep leaves all year.
Hardwood is better for cutting boards. It is harder and lasts longer. Softwood is softer and can get scratched easily.
- Hardwood is dense and resists cuts
- Softwood can get deep scratches
- Hardwood stays cleaner over time
- Softwood may hold bacteria in cuts
Popular Wood Types For Cutting Boards
Some hardwoods are popular for cutting boards. They are strong and safe for food use.
- Maple – very hard and light in color
- Walnut – dark and durable wood
- Cherry – medium hardness with a reddish tone
- Beech – pale and fine-grained wood
Avoid woods that are too soft or have open grains. Open grains hold moisture and germs.
Wood Safety Considerations
Not all woods are safe for cutting boards. Some woods can cause allergies or taste problems.
Use wood that is non-toxic and food safe. Avoid woods treated with chemicals or finishes.
- Choose wood free from toxins and chemicals
- Use smooth wood with tight grain
- Keep the board clean and dry
- Do not use wood that smells strong or bitter

Credit: www.youtube.com
Gathering Essential Tools
Making a wooden cutting board needs the right tools. These tools help you shape, smooth, and finish the wood safely and well.
This guide covers basic hand tools, power tools, and safety gear you will need for this project.
Basic Hand Tools Needed
Hand tools give you control when working on fine details and edges. You do not need many tools to start.
- Measuring tape or ruler for accurate cuts
- Pencil to mark cutting lines
- Hand saw for small cuts
- Chisels to shape edges
- Wood file or rasp to smooth rough spots
- Clamps to hold wood steady
Power Tools For Efficiency
Power tools save time and make cutting and sanding easier. They help you finish faster with good results.
| Tool | Purpose |
| Electric sander | Smooth the board surface quickly |
| Jigsaw or circular saw | Cut wood into the right shape |
| Drill | Make holes for handles or designs |
| Router | Create rounded edges or decorative cuts |
Safety Gear To Use
Safety gear protects you from injury and dust. Always wear the right equipment when using tools.
- Safety glasses to protect your eyes
- Dust mask to avoid breathing sawdust
- Ear protection to reduce noise from power tools
- Work gloves to guard your hands
- Apron to keep clothes clean
Preparing The Wood
Preparing the wood is the first key step in making a wooden cutting board. It ensures the wood is ready for shaping and finishing.
Good preparation helps the board last longer and look better. Let’s look at how to measure, cut, and sand the wood.
Measuring And Marking
Measure your wood carefully to get the right size for your cutting board. Use a ruler or tape measure and mark the wood with a pencil.
- Decide the length and width you want.
- Mark the edges clearly with a pencil.
- Double-check your measurements before cutting.
- Use a square tool to mark straight lines.
Cutting To Size
Cut the wood along your marks. Use a saw that fits the type of wood and your skill level.
| Tool | Best For | Tip |
| Hand Saw | Small cuts | Cut slowly to stay on line |
| Table Saw | Large boards | Use safety guards |
| Jigsaw | Curves and shapes | Use fine blades |
Sanding For Smoothness
Sanding makes the wood surface smooth and safe to use. Start with coarse sandpaper and finish with fine grit.
- Begin sanding with 80-grit sandpaper.
- Move to 120-grit for medium smoothing.
- Finish with 220-grit for a fine, smooth surface.
- Sand all sides and edges evenly.
- Wipe off dust with a clean cloth after sanding.
Assembling The Board
Assembling a wooden cutting board needs care and patience. This part joins all wood pieces into one solid board.
Good assembly helps the board last longer and stay safe for food use. Let’s look at the key steps.
Choosing A Board Design
Pick a design that fits your skill and style. Simple patterns use fewer cuts and less glue.
Decide if you want stripes, checkerboards, or a plain board. Each design needs different wood pieces.
- Striped boards use long, thin strips of wood
- Checkerboards need equal square pieces
- Plain boards can be one solid piece or glued strips
Gluing And Clamping Techniques
Apply wood glue evenly on all joint surfaces. Avoid using too much glue to prevent mess.
Use clamps to hold pieces tightly while glue dries. Clamps keep the board flat and the joints strong.
- Use waterproof wood glue for durability
- Place clamps every 6-8 inches along the board
- Check that boards stay flat and aligned under clamps
- Let glue dry for at least 24 hours before removing clamps
Ensuring Strong Joints
Strong joints keep the board from breaking or separating. Proper glue and clamping are key.
Sand the edges before gluing to help glue stick better. Clean off dust before applying glue.
- Use tight-fitting wood pieces without gaps
- Keep surfaces clean and dry before glue
- Clamp firmly but not too tight to avoid wood damage
- Allow full curing time before use
Finishing Touches
Adding the final touches to your wooden cutting board makes it safe and durable. These steps improve the board’s look and protect the wood from damage.
Follow these simple steps to finish your cutting board properly. This guide covers sanding, applying finishes, and caring for your board.
Final Sanding Steps
After shaping the board, sand it smoothly to remove rough spots. Start with medium-grit sandpaper and finish with fine grit for a soft surface.
- Use 120-grit sandpaper to smooth large rough areas.
- Switch to 220-grit sandpaper for a finer finish.
- Wipe the board clean with a damp cloth to remove dust.
- Check for any rough patches and sand again if needed.
Applying Food-safe Finishes
Choose a finish that is safe for food contact and protects the wood. Oils and waxes are common and easy to apply.
- Mineral oil is popular; it soaks into the wood and prevents drying.
- Beeswax adds a protective layer and a slight shine.
- Apply the finish evenly with a clean cloth or brush.
- Let the finish soak in for a few hours or overnight.
- Wipe off any excess finish before use.
Curing And Maintenance Tips
| Care Tip | Description |
|---|---|
| Let the finish cure | Allow the board to rest for 24 hours before first use. |
| Regular oiling | Apply mineral oil monthly to keep wood hydrated. |
| Cleaning | Wash with mild soap and warm water; avoid soaking. |
| Drying | Dry board standing up to prevent warping. |
| Re-sanding | Smooth the surface again if it feels rough after time. |

Credit: www.youtube.com
Tips For Longevity
Wooden cutting boards need good care to last long. Cleaning and handling them right keeps them safe from damage.
Knowing when to refinish or replace the board helps keep your kitchen tools fresh and safe.
Cleaning And Care
Clean your wooden cutting board after every use. Use mild soap and warm water. Avoid soaking it in water or putting it in the dishwasher.
- Wipe the board dry with a clean towel.
- Apply food-safe mineral oil once a month to keep wood from drying out.
- Use a mixture of vinegar and water to sanitize.
- Remove odors by rubbing the surface with coarse salt and lemon.
Avoiding Common Damages
Wood can crack, warp, or stain if not handled well. Avoid these common mistakes to keep your board strong.
| Damage Type | Cause | Prevention |
| Cracking | Drying out | Regular oiling |
| Warping | Excess water | No soaking or dishwasher |
| Staining | Strong juices | Clean promptly |
| Odors | Leftover food | Use salt and lemon scrub |
When To Refinish Or Replace
Refinish your cutting board if it looks dry or rough. Sand the surface and apply oil to restore it.
Replace the board if deep cracks appear or if it splits. These can harbor bacteria and are unsafe to use.
- Sand the surface with fine-grit sandpaper for a smooth finish.
- Apply food-grade mineral oil or beeswax after sanding.
- Check for deep cuts or cracks regularly.
- Replace the board if damage is too severe.

Credit: www.youtube.com
Frequently Asked Questions
What Type Of Wood Is Best For Cutting Boards?
Hardwoods like maple, walnut, and cherry are ideal for cutting boards. They are durable and resist knife marks well. These woods are also less porous, reducing the risk of bacterial growth. Opting for food-safe, sustainably sourced wood is crucial for a safe and environmentally friendly cutting board.
How Do I Maintain A Wooden Cutting Board?
Regularly oil your wooden cutting board with food-grade mineral oil. This helps prevent cracking and warping. Clean it with mild soap and water after use. Avoid soaking it in water to prevent damage. Occasionally, use a lemon and salt scrub to remove odors and stains.
Can I Use A Cutting Board Right After Making It?
It’s best to wait before using a freshly made cutting board. Apply food-grade mineral oil generously and allow it to soak overnight. This seals the wood, providing a protective barrier. Once the oil is fully absorbed, your cutting board is ready for use in the kitchen.
How Thick Should A Cutting Board Be?
A cutting board should ideally be 1. 5 to 2 inches thick. This thickness ensures durability and stability during use. Thicker boards resist warping and provide a solid surface for cutting. A well-proportioned board also enhances the aesthetic appeal and functionality in the kitchen.
Conclusion
Making a wooden cutting board is a simple and rewarding project. You only need a few tools and some patience. Choose good wood, cut it carefully, and finish it well. Take your time to sand and oil the board. A well-made board lasts long and looks great in your kitchen.
Try this craft to add a personal touch to your cooking space. Enjoy the process and the results!